manuals.online logo
Brands
  1. Home
  2. •
  3. Brands
  4. •
  5. HIK VISION
  6. •
  7. Intercom System
  8. •
  9. HIK VISION DS-KH6320-WTDE1 User manual

HIK VISION DS-KH6320-WTDE1 User manual

DS-KIS302-P
Video Intercom Kit UD28084B-A
Diagram References
1Appearance
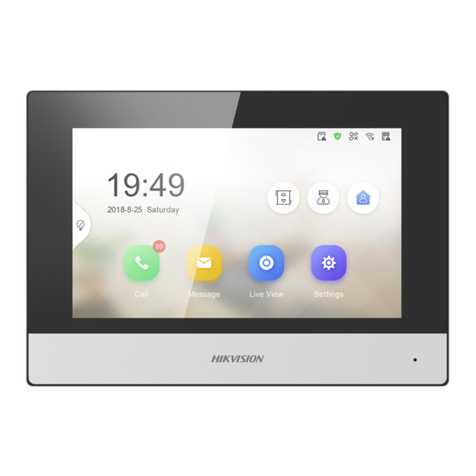
DS-KH6320-WTDE1
Network Indoor Sta�on
42
Network Interface 12 VDC Power Interface Alarm Input/Relay Output/
Rs-485 Interface
Four-Wire TerminalsMicrophone
5 6 7
There are 10 pins in the terminal on the rear panel of the indoor sta�on: 2 GND pin, 2
alarm input pins, 4 relay output pins and 2 RS-485 pins.
The are 2 Four-wire terminals on the rear panel of the indoor station to connect
doorphones.
3
It supports wall moun�ng. There are two installa�on modes.
Installa�on Accessory Descrip�on
The wall moun�ng plate and junc�on box are required to install the indoor sta�on onto
the wall.
The dimension of junc�on box should be 75 mm (width) ×75 mm (length) ×50 mm
(depth). The dimension of wall moun�ng plate is shown.
Wall Moun�ng with junc�on Box
Make sure the device in the package is in good condi�on and all the assembly parts
are included.
The power supply the indoor sta�on supports is 12 VDC. Please make sure your power
supply matches your indoor sta�on.
Make sure all related equipments are power-o during the installa�on.
Check the product specica�on for the installa�on environment.
Before You Start
1. Chisel a hole in the wall. The size of the hole should be 76 mm (width) × 76 mm
(length) × 50 mm (depth).
2. Insert the junc�on box to the hole chiseled on the wall.
3. Fix the wall moun�ng plate to the junc�on box with 2 screws.
4. Hook the indoor sta�on to the wall moun�ng plate �ghtly by inser�ng the plate
hooks into the slots on the rear panel of the indoor sta�on, during which the lock catch
will be locked automa�cally.
Wall Moun�ng without junc�on Box
1. Insert 2 expansion tubes into the wall.
2. Fix the wall moun�ng plate to the junc�on box with 2 screws.
3. Hook the indoor sta�on to the wall moun�ng plate �ghtly by inser�ng the plate
hooks into the slots on the rear panel of the indoor sta�on, during which the lock catch
will be locked automa�cally.
Getting Started
4
31
Installation
microSD Card SlotScreen
Note: The appearance of the device varies according to dierent models. Refers to the actual device for
detailed informa�on.
Terminal and Wiring
2
Serial Port (For Debugging Use Only)
8
11
3
3
Rear Panel (without Interface)
Lock Catch Lock Catch
Hook Hook
Hook Hook
Screw Wall Moun�ng Plate Junc�on Box Wall
Scan the QR code to get the
Opera�on Guide for detailed
informa�on.
Scan the QR code to get the
Congura�on Guide for detailed
informa�on.
2
122
Unit:mm
100
64.85
Rear Panel (without Interface)
Lock Catch Lock Catch
Hook
Hook
Hook Hook
Screw Wall Moun�ng Plate Wall
1 2 4
5
6
378
RS-485
GND
GND
AIN1
AIN2
NO2
COM2
NO1
COM1
485-
485+
B2+
B1+
V2
V1
A2
A1
G
G
Doorphone 2
Doorphone 1
Alarm Input
Relay Output
Activate Indoor Station
For the first-time use of the indoor station, you will need to finish a quick configuration
following the wizard.
1. Choose Language and tap Next.
2. Set password reset method and tap Next.
- Enter the Reserved Email address, and then you can reset the password by email.
Note: On the security questions setting page, you can tap Change to Reserved Email to modify the
password reset method.
- Tap Change to Security Question. Select 3 security questions from Deficiency List and
enter the answers of the questions, then you can reset the password by answering security
questions.
3. Set Network parameters and tap Next.
- Edit Local IP, Subnet Mask and Gateway parameters.
- Enable Auto Get IP Address, and the device will get network parameters automatically.
4. Congure the Indoor Station and tap Next.
a. Select Device Type and edit Floor and Room No.
b. Tap Advanced to set Community No., Building No. and Unit No.
c. Set the Registration Password.
5. Enable Wi-Fi function and tap Next.
-Select a Wi-Fi and enter the password to link.
6. Set Time parameters and tap Next.
7. Slide to enable the Mobile Client Service. Tap Next.
8. Link related devices and tap Next.
-If the device and the indoor station are in the
same LAN, the device will be displayed in the list. Tap the device or enter the serial No.
to link.
9. (Optional): Enable Indoor station and link related indoor extension devices. Tap Finish.
-If the indoor extension and the indoor station are in the same LAN, the device will be
displayed in the list. Tap the device or enter the serial No. to link.
10. Tap Finish to save the settings.
1. Power on the device via 12 VDC power supply or standard PoE. It will enter the
activation page automatically.
2. Create a password and conrm it.
3. Tap OK to activate the indoor station.
1. Tap Settings → → Configuration, and enter admin (activation) password.
2. Tap to enter the device management page.
3. Tap Main Door Station to pop up the device information dialog.
4. Tap the target main door station to link.
Up to 2 analog doorphones can be connected to the indoor station with four-wire
cables. Multiple functions, live view and remote door unlocking for example, can be
realized via operations on the indoor station or Hik-Connect App.
You are required to activate the device rst by setting a strong password before
you can use the device.
Quick Conguration
Connect to Analog Doorphone
Connect to Main Door Station
DS-KB2411T-IM
Doorphone
Microphone 2
IR Supplement Light
3Photoresistor
4
Call Button
5Loud speaker
6Four-Wire Interface
7Lock Interface
8
Terminal and Wiring
2
Installa�on
3
Diagram References
1Appearance
Steps:
1.
Fix the wall mounting shield to the wall with 3 screws.
2.
Hook the door station to the shield tightly by inserting the hooks of shield panel into
the slots on the rear panel of the door station.
3.
Secure the door station with the mounting shield with the set screw.
1
4
5
1
Local Operation
Typical Application
3
1Built-in Camera
Four-Wire Interface
G: Grounding Signal
A: Audio Input/Output
V: Video Output
B+: Power Supply (from Indoor Station)
Lock Interface
NC: Door Lock Relay Output/Normally Closed
COM: Door Lock Relay Output/Common
NO: Door Lock Relay Output/Normally Open
Wall Moun�ng Shield
Note:
To install the door station, the wall mounting shield is required.
ENGLISH 2
1
2
3
4
5
6
7
8
Indoor Station
Electric Bolt
G
A
V
B+
NC
COM
NO
48.83 mm
134.5 mm
29.08 mm
19.12 mm
7.6 mm
41.78 mm
26.25 mm
28.02 mm
12±0.05 mm
Power Supply
DoorphoneDoor Lock
Wi-Fi/UTP
Internet
APP Control
Indoor Station
Multicore Cable
4-wire
Power Supply
Optional
4 5
Call Button
Press the call button to call the resident.
Note: When press the call button to call the resident, the maximum ring duration of the
indoor station is 30s.
You can connect the door station to indoor station via the four-wire interface.
Screws
Wall Mounting Shield
Set Screw
123
Up to 2 analog doorphones can be connected to the indoor station with four-wire
cables. Multiple functions, live view and remote door unlocking for example, can be
realized via operations on the indoor station or Hik-Connect App.
Scan the QR code to view the user manual
for detailed informa�on of the kit.

Other manuals for DS-KH6320-WTDE1

3

This manual suits for next models

2

Other HIK VISION Intercom System manuals

HIK VISION DS-KH8520-WTE1 User manual

HIK VISION

HIK VISION DS-KH8520-WTE1 User manual

HIK VISION HYU-559 User manual

HIK VISION

HIK VISION HYU-559 User manual

HIK VISION DS-KD-M User manual

HIK VISION

HIK VISION DS-KD-M User manual

HIK VISION DS-KH6210(L) User manual

HIK VISION

HIK VISION DS-KH6210(L) User manual

HIK VISION DS-KIS603-P(B) User manual

HIK VISION

HIK VISION DS-KIS603-P(B) User manual

HIK VISION DS-KIS603-P User manual

HIK VISION

HIK VISION DS-KIS603-P User manual

HIK VISION DS-KIS702Y User manual

HIK VISION

HIK VISION DS-KIS702Y User manual

HIK VISION DS-KM8301 User manual

HIK VISION

HIK VISION DS-KM8301 User manual

HIK VISION DS-KD8003-IME1 User manual

HIK VISION

HIK VISION DS-KD8003-IME1 User manual

HIK VISION ADS-24S-12 1224GPCN User manual

HIK VISION

HIK VISION ADS-24S-12 1224GPCN User manual

HIK VISION DS-KABH6320-T User manual

HIK VISION

HIK VISION DS-KABH6320-T User manual

HIK VISION DS-KIS204T User manual

HIK VISION

HIK VISION DS-KIS204T User manual

HIK VISION DS-KH6350-TE1 User manual

HIK VISION

HIK VISION DS-KH6350-TE1 User manual

HIK VISION ADS-24S-12 1224GPCN User manual

HIK VISION

HIK VISION ADS-24S-12 1224GPCN User manual

HIK VISION DS-KD8002-VM User manual

HIK VISION

HIK VISION DS-KD8002-VM User manual

HIK VISION DS-KB8113-IME1(B) Series User manual

HIK VISION

HIK VISION DS-KB8113-IME1(B) Series User manual

HIK VISION DS-KH6320-WTE1 User manual

HIK VISION

HIK VISION DS-KH6320-WTE1 User manual

HIK VISION DS-KD9203-FE6 User manual

HIK VISION

HIK VISION DS-KD9203-FE6 User manual

HIK VISION DS-KD8003-IME2 User manual

HIK VISION

HIK VISION DS-KD8003-IME2 User manual

HIK VISION ADS-24S-12 1224GPCN User manual

HIK VISION

HIK VISION ADS-24S-12 1224GPCN User manual

HIK VISION DS-KH6100-E1 User manual

HIK VISION

HIK VISION DS-KH6100-E1 User manual

HIK VISION DS-KB2421-IM User manual

HIK VISION

HIK VISION DS-KB2421-IM User manual

HIK VISION DS-KV8213-WME1 User manual

HIK VISION

HIK VISION DS-KV8213-WME1 User manual

HIK VISION DS-KD9403-E6 User manual

HIK VISION

HIK VISION DS-KD9403-E6 User manual

Popular Intercom System manuals by other brands

Crystal 104 NEXA user guide

Crystal

Crystal 104 NEXA user guide

urmet domus IPercom VOG7 1761 User booklet

urmet domus

urmet domus IPercom VOG7 1761 User booklet

urmet domus NVR NEIUS Series quick guide

urmet domus

urmet domus NVR NEIUS Series quick guide

ViziT BVD-403 Series manual

ViziT

ViziT BVD-403 Series manual

Valcom VIP-581A-IC quick start guide

Valcom

Valcom VIP-581A-IC quick start guide

Fermax BUS 3 PALACE quick start guide

Fermax

Fermax BUS 3 PALACE quick start guide

Commax DRC-4CPNK user manual

Commax

Commax DRC-4CPNK user manual

Aiphone DA-1MD installation manual

Aiphone

Aiphone DA-1MD installation manual

Jupiter Avionics wiJAC2-T41 operating manual

Jupiter Avionics

Jupiter Avionics wiJAC2-T41 operating manual

Jabra PRO 9450 instruction manual

Jabra

Jabra PRO 9450 instruction manual

Comelit UT8010 Technical manual

Comelit

Comelit UT8010 Technical manual

Yale 7402 user manual

Yale

Yale 7402 user manual

ViziT BK-4MVE Operating	 instruction

ViziT

ViziT BK-4MVE Operating instruction

Naya AFDI-PT420 user manual

Naya

Naya AFDI-PT420 user manual

DTS Icom2 Operating instructions manual

DTS

DTS Icom2 Operating instructions manual

DKS 1812 Classic owner's manual

DKS

DKS 1812 Classic owner's manual

Opiz OP-D6A8M4 user manual

Opiz

Opiz OP-D6A8M4 user manual

ASL INTERCOM BS 216 user manual

ASL INTERCOM

ASL INTERCOM BS 216 user manual

manuals.online logo
manuals.online logoBrands
  • About & Mission
  • Contact us
  • Privacy Policy
  • Terms and Conditions

Copyright 2025 Manuals.Online. All Rights Reserved.