hilscher NXHX 52-JTAG User manual

Getting Started
NXHX 52-JTAG
Hilscher Gesellschaft für Systemautomation mbH
www.hilscher.com
DOC131004GS02EN | Revision 2 | English | 2013-11 | Released | Public

Table of Contents 2/89
NXHX 52-JTAG | Getting Started
DOC131004GS02EN | Revision 2 | English | 2013-11 | Released | Public © Hilscher 2013
Table of Contents
1INTRODUCTION.........................................................................................................4
1.1 About this Document ..................................................................................................4
1.1.1 Description of the Contents..................................................................................4
1.1.2 List of Revisions ...................................................................................................4
1.1.3 Conventions in this Manual..................................................................................4
1.2 Legal Notes.................................................................................................................5
1.2.1 Copyright..............................................................................................................5
1.2.2 Important Notes....................................................................................................5
1.2.3 Exclusion of Liability.............................................................................................6
1.2.4 Warranty...............................................................................................................6
1.2.5 Export Regulations...............................................................................................7
1.2.6 Registered Trademarks........................................................................................7
2DESCRIPTIONS OF THE USE CASES......................................................................8
2.1 Overview.....................................................................................................................8
2.2 Using the EtherCAT Slave Loadable Firmware..........................................................8
2.2.1 Loadable Firmware and Second Stage Bootloader .............................................9
2.2.2 Downloading SSBL and LFW to Serial Flash of NXHX 52-JTAG Board.............9
2.2.3 Using cifX Toolkit................................................................................................10
2.3 Using the Application Examples on the Product DVD..............................................10
2.3.1 Overview.............................................................................................................10
2.3.2 Using Waf to Build the Application Examples....................................................11
2.3.3 Using Eclipse to Build the Application Examples...............................................11
3DEVICE DRAWING AND POSITIONS OF THE NXHX 52-JTAG .............................12
4CONNECTING POWER SUPPLY.............................................................................14
5STEP BY STEP INSTRUCTIONS FOR TYPICAL USE CASES...............................15
5.1 Installing Code Sourcery Compiler on Your Development PC..................................15
5.1.1 Overview.............................................................................................................15
5.1.2 Prerequisites.......................................................................................................15
5.1.3 Step-by-Step Instructions...................................................................................15
5.2 Using Waf to Build ELF Files from All Application Examples ...................................16
5.2.1 Overview.............................................................................................................16
5.2.2 Prerequisites.......................................................................................................16
5.2.3 Step-by-Step Instructions...................................................................................16
5.3 Using Waf to Build an ELF File from a Single rcX Application Example...................18
5.3.1 Overview.............................................................................................................18
5.3.2 Prerequisites.......................................................................................................18
5.3.3 Step-by-Step Instructions...................................................................................18
5.4 Using Eclipse to Build ELF Files from All Application Examples ..............................24
5.4.1 Overview.............................................................................................................24

Table of Contents 3/89
NXHX 52-JTAG | Getting Started
DOC131004GS02EN | Revision 2 | English | 2013-11 | Released | Public © Hilscher 2013
5.4.2 Prerequisites.......................................................................................................24
5.4.3 Step-by-Step Instructions...................................................................................24
5.5 Using Bootwizard to Create an Executable Binary Firmware File from ELF File......29
5.5.1 Overview.............................................................................................................29
5.5.2 Prerequisites.......................................................................................................29
5.5.3 Step-by-Step Instructions...................................................................................29
5.6 Downloading Executable Binary Image to Serial Flash of the NXHX 52-JTAG via
USB ..........................................................................................................................33
5.6.1 Overview.............................................................................................................33
5.6.2 Prerequisites.......................................................................................................33
5.6.3 Step-by-Step Instructions...................................................................................34
5.7 Downloading NXF Firmware to Serial Flash of the NXHX 52-JTAG via USB...........44
5.7.1 Overview.............................................................................................................44
5.7.2 Prerequisites.......................................................................................................44
5.7.3 Step-by-Step Instructions...................................................................................45
5.8 Downloading NXF Firmware via PCI and Host Interface..........................................51
5.8.1 Overview.............................................................................................................51
5.8.2 Prerequisites.......................................................................................................51
5.8.3 Step-by-Step Instructions...................................................................................52
5.9 Configuration Example .............................................................................................62
5.9.1 Overview.............................................................................................................62
5.9.2 Prerequisites.......................................................................................................62
5.9.3 Step-by-Step Instructions...................................................................................63
5.10 Testing I/O Communication......................................................................................75
5.10.1 Overview.............................................................................................................75
5.10.2 Prerequisites.......................................................................................................75
5.10.3 Step-by-Step Instructions...................................................................................76
6APPENDIX................................................................................................................86
6.1 List of Figures...........................................................................................................86
6.2 List of Tables ............................................................................................................88
6.3 Contacts....................................................................................................................89

Introduction 4/89
NXHX 52-JTAG | Getting Started
DOC131004GS02EN | Revision 2 | English | 2013-11 | Released | Public © Hilscher 2013
1 Introduction
1.1 About this Document
1.1.1 Description of the Contents
This Getting Started Guide describes typical use cases for the Hilscher
NXHX 52-JTAG Development Board.
1.1.2 List of Revisions
Index Date Chapter Revisions
1 2013-10-25 All Created
2 2013-11-13 5.8
Settings for Parallel Dual-Port Memory 16 Bit
Mode at Switch S2 updated according to
hardware revision 3.
Table 1: List of Revisions
1.1.3 Conventions in this Manual
Notes, operation instructions and results of operation steps are marked as
follows:
Notes
Important: <important note>
Note: <note>
<note, where to find further information>
Operation Instructions
1. <instruction>
2. <instruction>
or
<instruction>
Results
<result>

Introduction 5/89
NXHX 52-JTAG | Getting Started
DOC131004GS02EN | Revision 2 | English | 2013-11 | Released | Public © Hilscher 2013
1.2 Legal Notes
1.2.1 Copyright
© Hilscher 2013, Hilscher Gesellschaft für Systemautomation mbH
All rights reserved.
The images, photographs and texts in the accompanying material (user
manual, accompanying texts, documentation, etc.) are protected by
German and international copyright law as well as international trade and
protection provisions. You are not authorized to duplicate these in whole or
in part using technical or mechanical methods (printing, photocopying or
other methods), to manipulate or transfer using electronic systems without
prior written consent. You are not permitted to make changes to copyright
notices, markings, trademarks or ownership declarations. The included
diagrams do not take the patent situation into account. The company
names and product descriptions included in this document may be
trademarks or brands of the respective owners and may be trademarked or
patented. Any form of further use requires the explicit consent of the
respective rights owner.
1.2.2 Important Notes
The user manual, accompanying texts and the documentation were created
for the use of the products by qualified experts, however, errors cannot be
ruled out. For this reason, no guarantee can be made and neither juristic
responsibility for erroneous information nor any liability can be assumed.
Descriptions, accompanying texts and documentation included in the user
manual do not present a guarantee nor any information about proper use
as stipulated in the contract or a warranted feature. It cannot be ruled out
that the user manual, the accompanying texts and the documentation do
not correspond exactly to the described features, standards or other data of
the delivered product. No warranty or guarantee regarding the correctness
or accuracy of the information is assumed.
We reserve the right to change our products and their specification as well
as related user manuals, accompanying texts and documentation at all
times and without advance notice, without obligation to report the change.
Changes will be included in future manuals and do not constitute any
obligations. There is no entitlement to revisions of delivered documents.
The manual delivered with the product applies.
Hilscher Gesellschaft für Systemautomation mbH is not liable under any
circumstances for direct, indirect, incidental or follow-on damage or loss of
earnings resulting from the use of the information contained in this
publication.

Introduction 6/89
NXHX 52-JTAG | Getting Started
DOC131004GS02EN | Revision 2 | English | 2013-11 | Released | Public © Hilscher 2013
1.2.3 Exclusion of Liability
The software was produced and tested with utmost care by Hilscher
Gesellschaft für Systemautomation mbH and is made available as is. No
warranty can be assumed for the performance and flawlessness of the
software for all usage conditions and cases and for the results produced
when utilized by the user. Liability for any damages that may result from the
use of the hardware or software or related documents, is limited to cases of
intent or grossly negligent violation of significant contractual obligations.
Indemnity claims for the violation of significant contractual obligations are
limited to damages that are foreseeable and typical for this type of contract.
It is strictly prohibited to use the software in the following areas:
for military purposes or in weapon systems;
for the design, construction, maintenance or operation of nuclear facili-
ties;
in air traffic control systems, air traffic or air traffic communication sys-
tems;
in life support systems;
in systems in which failures in the software could lead to personal injury
or injuries leading to death.
We inform you that the software was not developed for use in dangerous
environments requiring fail-proof control mechanisms. Use of the software
in such an environment occurs at your own risk. No liability is assumed for
damages or losses due to unauthorized use.
1.2.4 Warranty
Although the hardware and software was developed with utmost care and
tested intensively, Hilscher Gesellschaft für Systemautomation mbH does
not guarantee its suitability for any purpose not confirmed in writing. It
cannot be guaranteed that the hardware and software will meet your
requirements, that the use of the software operates without interruption and
that the software is free of errors. No guarantee is made regarding
infringements, violations of patents, rights of ownership or the freedom from
interference by third parties. No additional guarantees or assurances are
made regarding marketability, freedom of defect of title, integration or
usability for certain purposes unless they are required in accordance with
the law and cannot be limited. Warranty claims are limited to the right to
claim rectification.

Introduction 7/89
NXHX 52-JTAG | Getting Started
DOC131004GS02EN | Revision 2 | English | 2013-11 | Released | Public © Hilscher 2013
1.2.5 Export Regulations
The delivered product (including the technical data) is subject to export or
import laws as well as the associated regulations of different counters, in
particular those of Germany and the USA. The software may not be
exported to countries where this is prohibited by the United States Export
Administration Act and its additional provisions. You are obligated to
comply with the regulations at your personal responsibility. We wish to
inform you that you may require permission from state authorities to export,
re-export or import the product.
1.2.6 Registered Trademarks
Java is a registered trademark of Sun Microsystems, Inc.
Eclipse is a trademark of Eclipse Foundation, Inc.
EtherCAT®is a registered trademark and a patented technology of
Beckhoff Automation GmbH, Verl, Germany, formerly Elektro Beckhoff
GmbH.
Sourcery G++ is a trademark of CodeSourcery, Inc.
Windows ® XP, Windows ® 7 and Windows ® 8 are registered
trademarks of Microsoft Corporation.

Descriptions of the Use Cases 8/89
NXHX 52-JTAG | Getting Started
DOC131004GS02EN | Revision 2 | English | 2013-11 | Released | Public © Hilscher 2013
2 Descriptions of the Use Cases
2.1 Overview
The product DVD of the NXHX 52-JTAG board provides a loadable
EtherCAT slave (V4.2) firmware file with limited IO data exchange
(2 Bytes), which can be downloaded to the NXHX board. The NXHX board
can thus be operated as slave device in an EtherCAT network for testing
and evaluation purposes. This use case is described in full detail in this
document. The necessary tools for downloading software to the board and
for configuring the board as EtherCAT slave device are also provided on
the DVD.
On the DVD, you will also find precompiled libraries of the rcX operating
system, source code of software examples based on the rcX OS and
source code of embedded software programs running without the rcX OS,
specialized for the particular netX hardware.
You can use the Waf framework as meta build system or the Eclipse IDE
for creating ELF files from the provided application examples, which then
can be downloaded to the NXHX board for testing and debugging with a
debugger of your choice. Both build systems use Mentor Code Sourcery
GNU (GCC) as tool for compiling C source code. Detailed instructions on
how to build the application examples and also on how to turn an ELF into
an executable binary file, which can then be stored in the serial flash of the
NXHX board, are provided in this document.
2.2 Using the EtherCAT Slave Loadable Firmware
The EtherCAT slave (V4.2) firmware provided on the DVD is a Hilscher
Standard Loadable Firmware (LFW) with limited IO data exchange
(2 Bytes) for testing and evaluation purposes. You will find this
ECSV4_52.nxf firmware file in the Examples and
API\Targets\LFW\1. LFW netX Toolkit\Firmware\ETHERCAT
directory of the DVD.
In general, LFW contains a certain protocol stack (in this case EtherCAT
slave V4.2) and the rcX operating system for the netX controller. LFW files
are in the NXF format, and can thus be recognized by their .nxf file
extension. LFW is “ready-to-use”: after downloading the firmware and a
configuration file to the board, the device is immediately ready for
EtherCAT communication. It is thus the easiest way to operate the NXHX
52-JTAG board for testing and development purposes. Once downloaded
and stored in the non-volatile flash memory of the NXHX board, the
firmware is available on each netX boot process.

Descriptions of the Use Cases 9/89
NXHX 52-JTAG | Getting Started
DOC131004GS02EN | Revision 2 | English | 2013-11 | Released | Public © Hilscher 2013
2.2.1 Loadable Firmware and Second Stage Bootloader
Standard Loadable Firmware in NXF format can not be booted directly by
the ROM code (ROM Loader) residing in the netX controller. Firmware in
NXF format needs to be started by a software module called Second
Stage Bootloader (SSBL).
Therefore, operating your NXHX 52-JTAG with LFW requires the SSBL file
on the board. The SSBL must be downloaded and running on the NXHX
board before you can download or boot any LFW file.
An SSBL file, the NETX51-BSL.bin, is stored in the Tools\2nd Stage
Bootloader directory of the product DVD.
Important: Please note that this NETX51-BSL.bin SSBL stored in the
Tools\2nd Stage Bootloader directory needs to be patched before it
can be used on the NXHX 52-JTAG board. Instructions for this can be
found in the README file in the root directory of the DVD.
Note also that there is a special SSBL file needed for the EtherCAT LFW
example provided on the DVD. Thus, if you intend to use the
ECSV4_52.nxf EtherCAT firmware, you must download the
NXHX52JTAG_2ndStageLoader_V1.4.12.1.bin file stored in the
Examples and API\Targets\LFW\1.LFW netX Toolkit
\Firmware\ETHERCAT\2nd Stage Loader directory of the DVD
beforehand.
The SSBL can be downloaded and stored “non-volatile” in the serial flash of
the NXHX 52-JTAG board. After download to flash, the SSBL will be started
by the ROM loader after every power-on reset of the board (given that flash
boot mode is configured). The SSBL then in turn starts the firmware.
2.2.2 Downloading SSBL and LFW to Serial Flash of NXHX 52-JTAG
Board
There are several ways to download (“flash”) the Second Stage Bootloader
and the Loadable Firmware to the serial flash memory of the NXHX 52-
JTAG board from a Windows PC.
Hilscher recommends to use the netX Bootwizard tool and serial interface
(USB or COM Port). Instructions for this are provided in the Downloading
Executable Binary Image to Serial Flash of the NXHX 52-JTAG via USB
section on page 33 of this Getting Started Guide. An installation program
for the Bootwizard can be found on the product DVD in the
Tools\Bootwizard directory.
Like the SSBL, the LFW can also be flashed to the board from a Windows
PC via serial interface (USB or COM Port). Hilscher recommends to use the
netHOST Device Test Application for this. Instructions for this method are
provided in the Downloading NXF Firmware to Serial Flash of the NXHX
52-JTAG via USB section on page 44. The netHOST Device Test
Application can be found on the product DVD in the Tools\netX
Transport directory.
If you are using a Windows PC as host device for the NXHX board, you can
also download the firmware from the PC via PCI and host interface (i. e.
parallel Dual-Port Memory). You need an adapter board and a cable for
this, which can be purchased from Hilscher. This method is described in the
Downloading NXF Firmware via PCI and Host Interface section on page 51.
Descriptions of the Use Cases 10/89
NXHX 52-JTAG | Getting Started
DOC131004GS02EN | Revision 2 | English | 2013-11 | Released | Public © Hilscher 2013
2.2.3 Using cifX Toolkit
If you are using a customer-engineered host system not based on
Windows, you can, of course, also implement a customized download
function for firmware files via host interface in your own host application.
You can use the cifX Toolkit, which is provided on the product DVD in the
Driver and Toolkit\Driver Toolkit (NXDRV-
TKIT)\cifXToolkit directory, to develop application programs and
drivers enabling communication between your host system and the Dual-
Port Memory of the netX 52 (parallel or serial DPM).
An example of a host application program demonstrating Toolkit hardware
functions is stored in the Examples and API\Targets\LFW\1. LFW
netX Toolkit\cifXTKitHWFunctions directory of the DVD.
A Visual Studio project based on the cifX Toolkit featuring an application
program for configuring and initializing the NXHX board as EtherCAT slave
device is also provided in the above mentioned directory.
For more detailed information about the cifX Toolkit, please refer to the
Toolkit Manual cifX/netX Toolkit – DPM, DOC090203TKxxEN, which is
stored in the Driver and Toolkit\Driver Toolkit (NXDRV-
TKIT)\Documentation directory of the product DVD.
2.3 Using the Application Examples on the Product DVD
2.3.1 Overview
The Examples and API\Targets folder of the product DVD contains
the following sub-directories:
LFW: The 1. LFW netX Toolkit\Firmware\ETHERCAT directory
contains a ready-made Loadable Firmware file for EtherCAT slave with
limited IO data exchange (2 Bytes), a Second Stage Bootloader, a
SYCON.net configuration project for EtherCAT and a device description file
for the NXHX board serving as EtherCAT slave.
The 1. LFW netX Toolkit\cifXTKitHWFunctions directory
contains an example of a host application based on the cifX Toolkit for the
provided LFW file.
nonOS: Contains embedded software programs without OS (rcX), typically
specialized for the particular netX hardware.
rcX: Contains rcX based software examples with driver- and kernel
functionality for peripheral and interface support.
You can use the Waf framework or Eclipse for creating ELF files from the
nonOS and rcX application examples. Both build systems use Mentor
Code Sourcery GNU (GCC) as tool for compiling C source code.

Descriptions of the Use Cases 11/89
NXHX 52-JTAG | Getting Started
DOC131004GS02EN | Revision 2 | English | 2013-11 | Released | Public © Hilscher 2013
The produced ELF can then be downloaded by a JTAG hardware debugger
to the netX 52 controller for testing and debugging. The ELF runs only
“volatile” in the netX, i. e. it can not be stored in the serial flash of the NXHX
board in order to be automatically available for booting after each power-on
reset. Therefore, after successful testing and debugging, you might want to
create an executable binary firmware file, which can be downloaded and
stored “non-volatile” in the serial flash memory of the NXHX board. You can
use the netX Bootwizard to turn an ELF into an executable binary firmware
file. Instructions for this are provided in the Using Bootwizard to Create an
Executable Binary Firmware File from ELF File section on page 29.
After turning the ELF into an executable binary file, the Bootwizard can also
be used to download the file to the flash memory of the NXHX board via
serial interface (USB or COM Port). The procedure of downloading the
executable binary firmware is the same as for downloading a Second Stage
Bootloader file, because both files are in essence executable binary
images. Instructions for this are provided in the Downloading Executable
Binary Image to Serial Flash of the NXHX 52-JTAG via USB section on
page 33.
For more detailed information about the Bootwizard, please refer to the
Operating Instruction Manual netX Bootwizard, DOC070502OIxxEN,
which is stored in the Documentation\4. Tool
Manuals\Bootwizard directory of the NXHX 52-JTAG product DVD.
2.3.2 Using Waf to Build the Application Examples
If you use Waf, you can build all of the nonOS and rcX application
examples at once, simply by executing the Build.bat batch file located in
the Examples and API root directory from a command prompt. You only
have to specify whether you want to build the ELF files for debugging or
release purposes by entering a “debug” or “release” option. All produced
output will be stored in the Examples and API\build directory in the
debug\Targets or release\Targets folder according to the option you
have specified. Detailed instructions for this are provided in the Using Waf
to Build ELF Files from All Application Examples section on page 16.
If you want to build only one or certain examples, you can do so by
specifying a target in the command prompt or in the Build.bat batch file.
Detailed instructions for this are provided in the Using Waf to Build an ELF
File from a Single rcX Application Example section on page 18.
2.3.3 Using Eclipse to Build the Application Examples
With Eclipse, you can also build all of the nonOS and rcX application
examples at once by importing and using the Eclipse project file located in
the Examples and API root directory. In Eclipse, you can also specify
whether you want to build the ELF files for debugging or release purposes.
All produced output will be stored in the Examples and API\build
directory in the debug\Targets or release\Targets folder according
to the chosen option. Detailed instructions for this are provided in the Using
Eclipse to Build ELF Files from All Application Examples section on page
24.
Device Drawing and Positions of the NXHX 52-JTAG 12/89
NXHX 52-JTAG | Getting Started
DOC131004GS02EN | Revision 2 | English | 2013-11 | Released | Public © Hilscher 2013
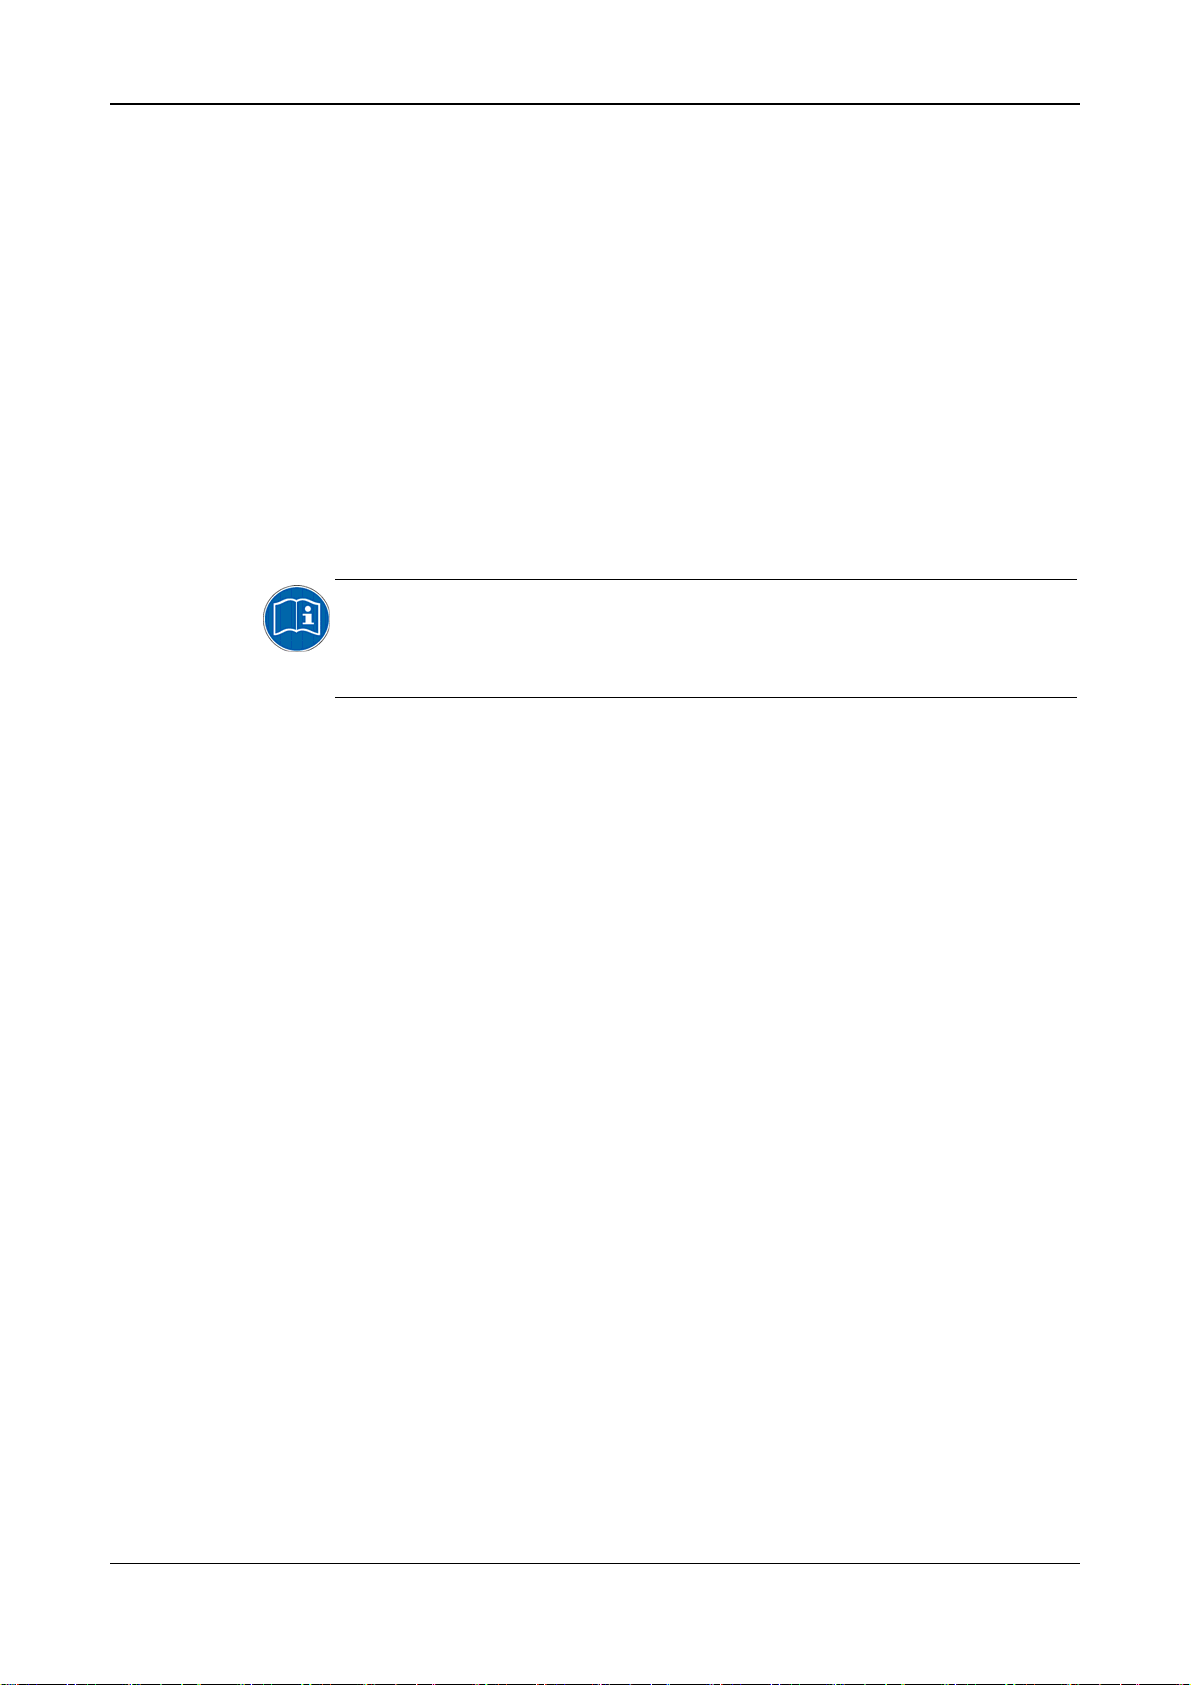
3 Device Drawing and Positions of the NXHX 52-JTAG
Figure 1: NXHX 52-JTAG Printed Circuit Board
No. in
figure Name Description
X1 Host interface
X30 RJ45 Connector Ethernet interface CH1
- Matrix-Label
X30 RJ45 Connector Ethernet interface CH0
V1 System status LED (yellow / green)
V30 Communication status LED COM 0 (green / red)
V31 Communication status LED COM 1 (green / red)
T2 GPIO input, MMIO08
V3 GPIO output LED (yellow), MMIO09
X6 MMIO, SPI, I2C, CAN
S3 RS-Mode
X7 9 pin D-Sub connector RS-232
- Device name
X5 micro SD Card connector
- micro SD Card (not part of delivery) formatting: FAT, max. 2 GByte
X100 Power supply socket

Device Drawing and Positions of the NXHX 52-JTAG 13/89
NXHX 52-JTAG | Getting Started
DOC131004GS02EN | Revision 2 | English | 2013-11 | Released | Public © Hilscher 2013
No. in
figure Name Description
- Drilling for attaching fieldbus interface to X6
S1 Boot strap options
T1 Power On Reset
X3 Mini-B USB connector
X4 JTAG Interface, plug connector 20 pin
S2 Host Interface Mode / Boot Mode
Table 2: List of Positions on Printed Circuit Board

Connecting Power Supply 14/89
NXHX 52-JTAG | Getting Started
DOC131004GS02EN | Revision 2 | English | 2013-11 | Released | Public © Hilscher 2013
4 Connecting Power Supply
The NXHX 52-JTAG Development Board is powered by an external DC
supply voltage of 24 V (±6V). Use the Hilscher NXAC Power adapter (part
number 7930.000).
Device Destruction!
Use only the permissible supply voltage of 24V DC (±6V) to operate the
NXHX 52-JTAG.
Operating the NXHX 52-JTAG with a supply voltage above the
specified range leads to device destruction.
Plug the barrel connector of the NXAC-POWER power supply into the
power supply connector socket on the NXHX board as shown in the
picture below.
Figure 2: Connect Power Supply

Step By Step Instructions for Typical Use Cases 15/89
NXHX 52-JTAG | Getting Started
DOC131004GS02EN | Revision 2 | English | 2013-11 | Released | Public © Hilscher 2013
5 Step By Step Instructions for Typical Use Cases
5.1 Installing Code Sourcery Compiler on Your Development
PC
5.1.1 Overview
This section describes how to install the Mentor Code Sourcery G++ Lite
for ARM EABI compiler on your development PC. Code Sourcery is used
by the Waf build framework and the Eclipse IDE as tool for compiling the
C source code provided on the product DVD.
5.1.2 Prerequisites
NXHX 52-JTAG Product DVD.
You have access to the internet (for downloading Code Sourcery).
5.1.3 Step-by-Step Instructions
Open Software\Mentor - Codesourcery directory on the product
DVD.
Double-click arm-none-eabi.exe.lnk to start downloading the Code
Sourcery installation program from the internet.
Your web browser opens and asks for permission to download the
Code Sourcery installation program.
After download, double-click the downloaded arm-2011.03-42-arm-
none-eabi.exe file to start the installation program on your PC.
Follow the instruction of the installation program. Accept all suggested
default settings.

Step By Step Instructions for Typical Use Cases 16/89
NXHX 52-JTAG | Getting Started
DOC131004GS02EN | Revision 2 | English | 2013-11 | Released | Public © Hilscher 2013
5.2 Using Waf to Build ELF Files from All Application
Examples
5.2.1 Overview
This section describes how to use Waf to build the nonOS and rcX
application examples provided in the Examples and API folder of the
product DVD at once.
5.2.2 Prerequisites
You have installed Code Sourcery G++ Lite for ARM EABI on your
development PC (see Installing Code Sourcery Compiler on Your
Development PC section on page 15).
You have copied the Examples and API folder from the product DVD
to a local path on your development PC.
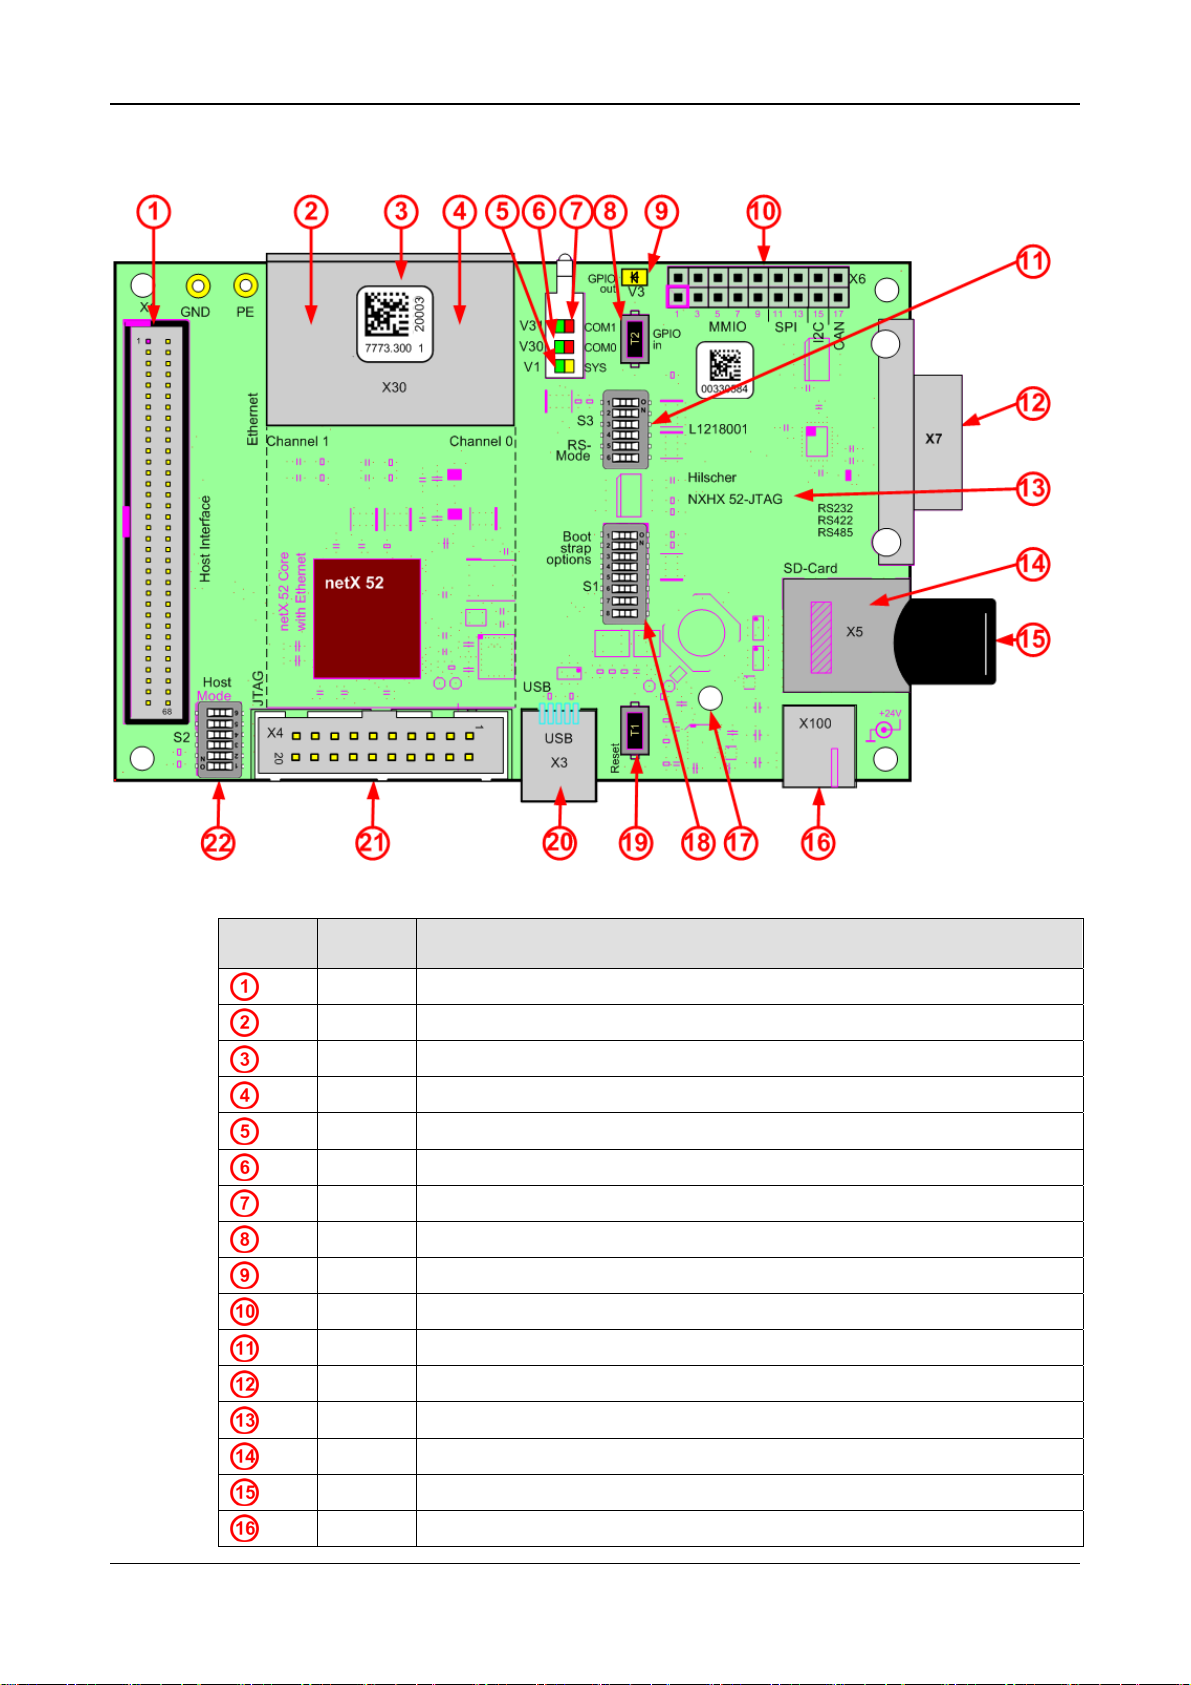
5.2.3 Step-by-Step Instructions
1. Open the command prompt on your development PC.
In the Windows Start menu, choose All Programs > Accessories >
Command Prompt.
The Command Prompt opens:
Figure 3: Command Prompt in Windows XP
2. Change to the directory where the Examples and API folder is stored.
If you have stored the Examples and API folder e. g. in the directory
E:\NXHX_52_JTAG on your PC, change to the E drive (if necessary)
and enter the following string:
cd “E:\NXHX_52_JTAG\Examples and API“

Step By Step Instructions for Typical Use Cases 17/89
NXHX 52-JTAG | Getting Started
DOC131004GS02EN | Revision 2 | English | 2013-11 | Released | Public © Hilscher 2013
The prompt shows the specified path:
Figure 4: Change Directory in Command Prompt
3. Execute Build.bat batch file to start the building process.
Enter Build.bat followed by the option debug or release.
Figure 5: Execute Build.bat
Note: If you later want to debug the produced ELF files with a debugger of
your choice, use the debug option. If you don’t want to debug them, use
the release option.
Waf starts to build all application examples provided in the Examples
and API folder (with the exception of the already built firmware file and
the host application stored in the LFW folder). It creates a build folder
and stores the ELF files and all produced output in the
debug\Targets or release\Targets subfolders of the build
folder according to the option you have specified.

Step By Step Instructions for Typical Use Cases 18/89
NXHX 52-JTAG | Getting Started
DOC131004GS02EN | Revision 2 | English | 2013-11 | Released | Public © Hilscher 2013
5.3 Using Waf to Build an ELF File from a Single rcX
Application Example
5.3.1 Overview
If you don’t want to build all application examples at once (as described in
the preceding section), you can use the Waf build option “--target=” to
specify a certain single example that you want to build. This section
describes how to use Waf to produce a single ELF file from the rcX Tasks
application example provided in the Examples and
API\Targets\rcX\1. rcX Tasks directory on the product DVD.
You can start the build process from a command prompt or from a
customized Build.bat batch file; both methods are described in this section.
If you want to produce ELF files from different examples and for different
purposes at different times (i. e. debugging or release), you can create
separate customized Build.bat batch files for each target and purpose.
Note, that you have to specify the exact name of the application example
that you want to build. How to find out the exact name of an application
example is described in step 1 of these step-by-step instructions.
5.3.2 Prerequisites
You have installed Code Sourcery G++ Lite for ARM EABI on your
development PC (see Installing Code Sourcery Compiler on Your
Development PC section on page 15).
You have copied the Examples and API folder from the product DVD
to a local path on your development PC.
5.3.3 Step-by-Step Instructions
1. Find out the name of the application example which you want to build.
Open the folder of the application example. In this case, it is the
Examples and API\Targets\rcX\1. rcX Tasks folder.
In the 1. rcX Tasks folder, open the wscript file with an editor, e. g.
Notepad.

Step By Step Instructions for Typical Use Cases 19/89
NXHX 52-JTAG | Getting Started
DOC131004GS02EN | Revision 2 | English | 2013-11 | Released | Public © Hilscher 2013
The application name is stated behind APPNAME.
Figure 6: Opened wscript File
Note or write down the application name on a sheet of paper.
Close the wscript file.
Using Command Prompt:
2. Open the command prompt on your development PC.
In the Windows Start menu, choose All Programs > Accessories >
Command Prompt.
The Command Prompt opens:
Figure 7: Command Prompt in Windows XP
3. Change to the directory where the Examples and API folder is stored.
If you have stored the Examples and API folder e. g. in the directory
E:\NXHX_52_JTAG on your PC, change to the E drive (if necessary)
and enter the following string:
cd “E:\NXHX_52_JTAG\Examples and API”
Step By Step Instructions for Typical Use Cases 20/89
NXHX 52-JTAG | Getting Started
DOC131004GS02EN | Revision 2 | English | 2013-11 | Released | Public © Hilscher 2013
The prompt shows the specified path:
Figure 8: Change Directory in Command Prompt
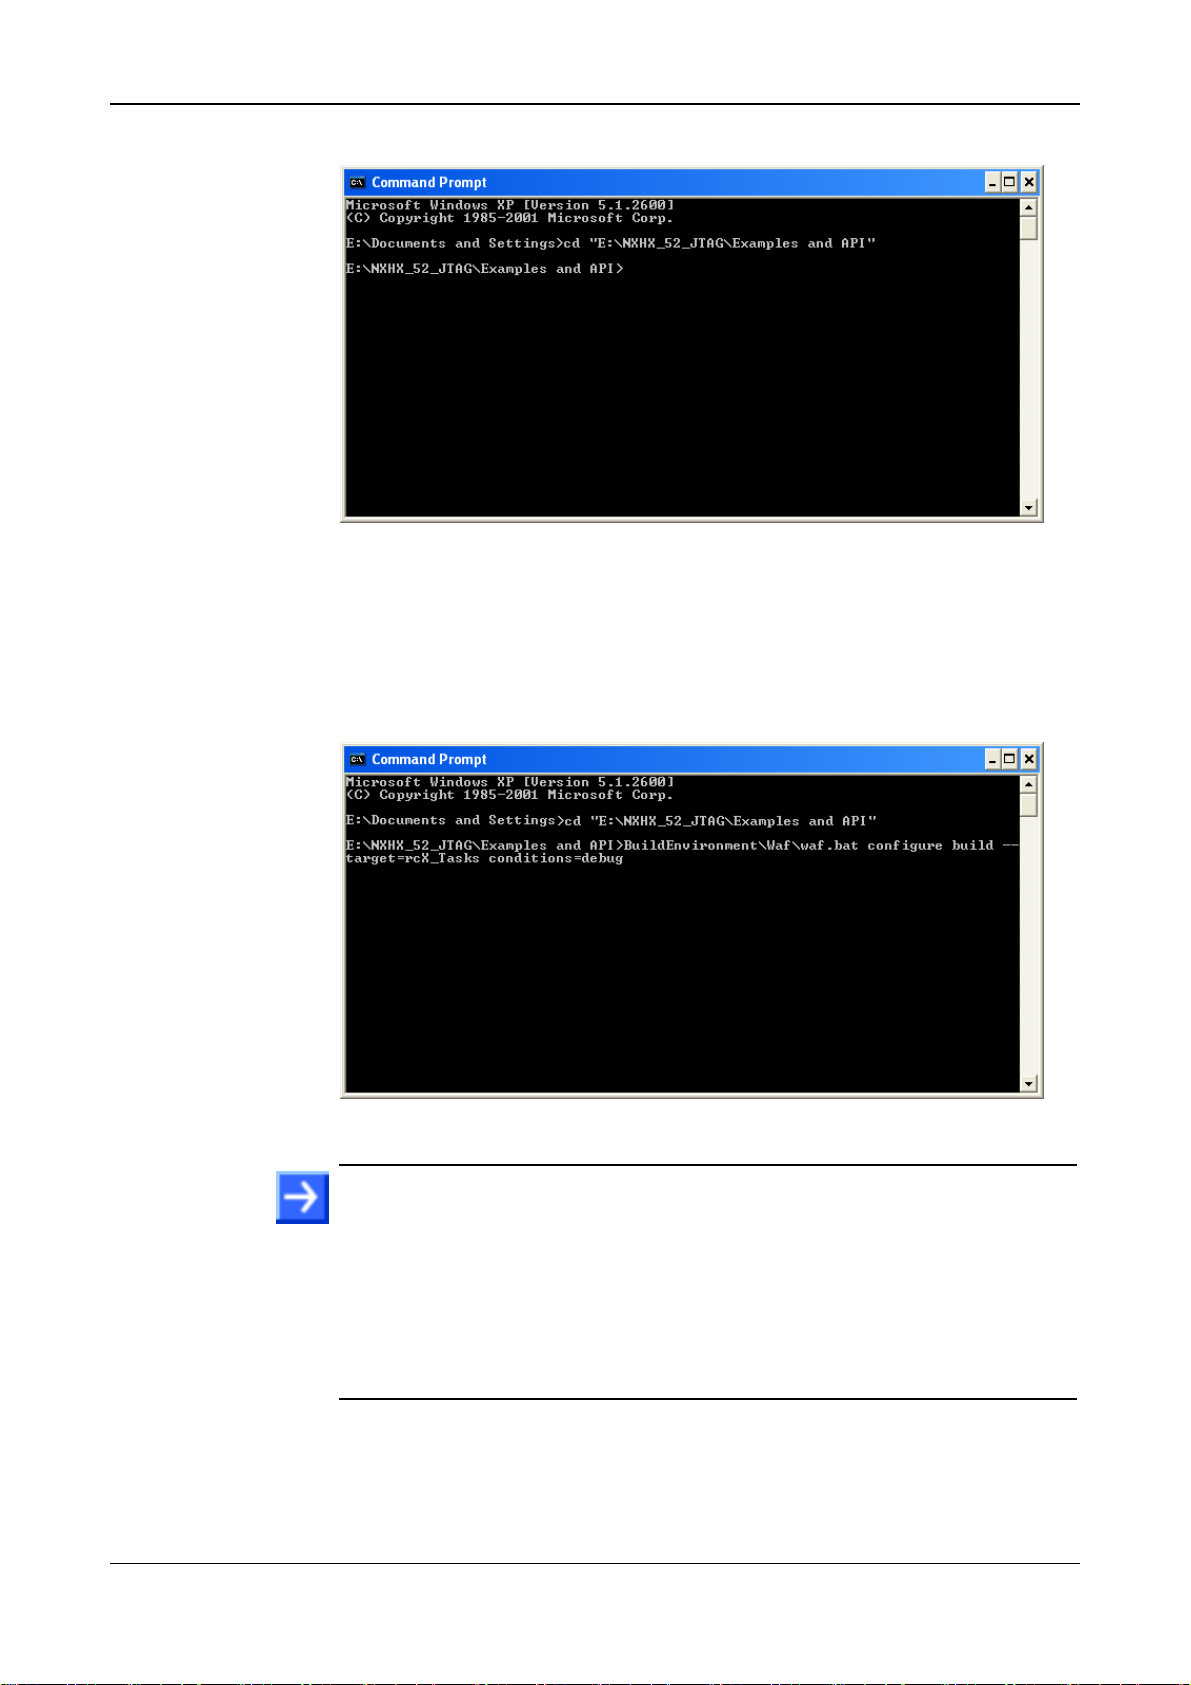
4. Specify build options and execute waf.bat batch file.
To build an ELF for debugging from the rcX_Tasks example, type in
the following string behind the prompt, then press Enter key on your
keyboard:
BuildEnvironment\Waf\waf.bat configure build --target=rcX_Tasks --conditions=debug
Figure 9: Execute waf.bat with Target and Build Options
Note: If you want to build a different application (not the rcX_Tasks
application), look up the APPNAME in the wscript file belonging to the
corresponding application example and enter it behind the target option:
--target=[APPNAME]. Note that the parameters are case sensitive.
If you want to use the ELF for debugging, don’t forget to add the debug
option: --conditions=debug. If you don’t use the
--conditions=debug option, the ELF will be built for release by
default.
Waf starts to build the application example specified by the target option
(i. e. the rcX_Tasks example). It creates a build\Targets\debug or
build\Targets\release directory and stores the produced ELF in
the corresponding application example folder (i. e. in the Examples
and API\build\debug\Targets\rcX\1. rcX Tasks directory).
Other manuals for NXHX 52-JTAG
1
Table of contents
Other hilscher Network Hardware manuals


Popular Network Hardware manuals by other brands


MikroTik
MikroTik FiberBox Plus quick start guide

Burg Wächter
Burg Wächter BWNVR-31632Pi quick guide

Idis
Idis DirectIP DR-1304P Operation manual

8e6 Technologies
8e6 Technologies Enterprise Filter Authentication R3000 user guide

Axis
Axis T8133 Midspan 30W installation guide

Anywave
Anywave ACT-9X user manual