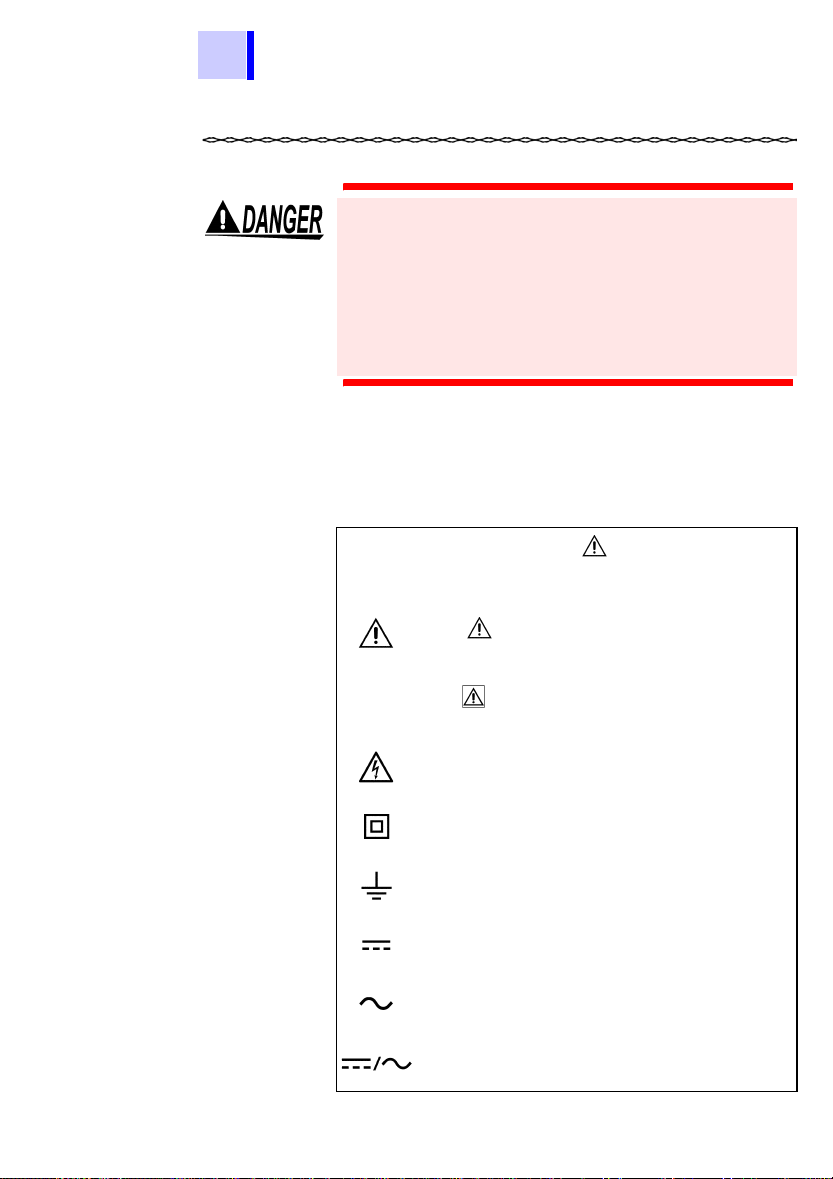
Hioki 3801-50 User manual


i
Contents
1
2
3
4
5
6
7
8
9
10
11
APPX
IDX
Contents
Introduction .........................................................................1
Verifying Package Contents ...............................................1
Safety Information ..............................................................2
Operating Precautions ........................................................5
1 Overview 7
1.1 Product Overview .....................................................7
1.2 Features ...................................................................8
1.3 Names and Functions of Parts .................................9
2 Measurement 15
2.1 Pre-Operation Inspection .......................................17
2.2 Voltage Measurement ............................................19
2.3 Current Measurement ............................................21
2.4 Resistance Measurement .......................................23
2.4.1 Resistance Measurement (Ω) ................................ 23
2.4.2 Conductance (1/Ω)Measurement (nS) ................... 24
2.5 Continuity Check ....................................................25
2.6 Diode Check ...........................................................26
2.7 Capacitance Measurement ....................................27
2.8 Frequency Measurement .......................................28
2.8.1 Frequency Measurement ........................................ 28
2.8.2 Frequency Counter Measurement .......................... 29
2.9 DUTY Ratio Measurement .....................................30
2.10 Pulse Width Measurement .....................................31
2.11 Temperature Measurement ....................................32
2.12 Pulse Output Function ............................................34
3 Additional Functions 37
3.1 Auto Range Function ..............................................37
3.2 Manual Range Function .........................................38
3.3 Hold Functions .......................................................39
3.3.1 Trigger Hold Function ............................................. 39
3.3.2 Refresh Hold Function ............................................ 40
3.3.3 Peak Hold Function ................................................. 42

ii
Contents
3.4 Recording Function ............................................... 43
3.5 Relative (REL) Display Function ............................ 45
3.6 Battery Indicator Function ...................................... 46
3.7 Communications Function ..................................... 47
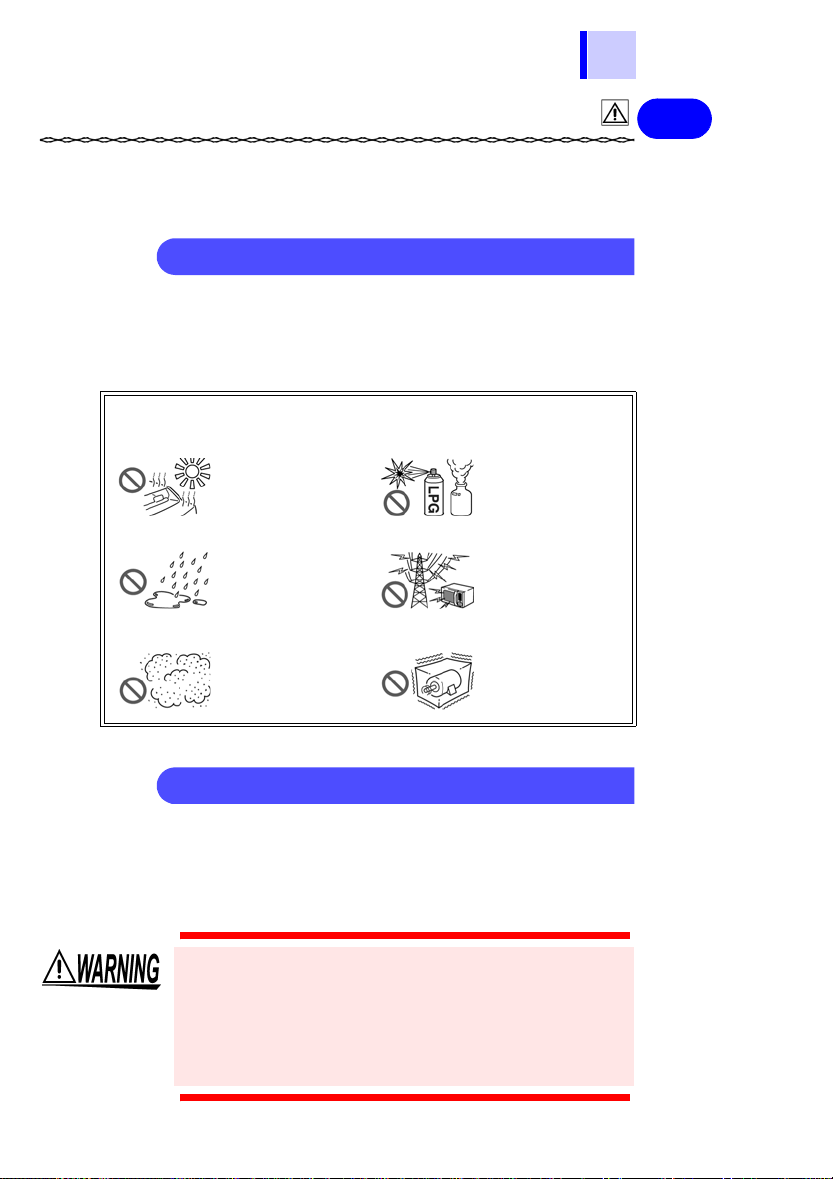
3.8 Warning Functions ................................................. 49
3.8.1 Terminal A Misconnection Warning .........................49
3.8.2 Overload Warning ....................................................50
4 Power On Options 51
4.1 Communications Settings ...................................... 53
4.1.1 Communications Speed Setting (Baud Rate) ..........53
4.1.2 Parity Check Setting ................................................53
4.1.3 Data Length Setting .................................................54
4.1.4 Response ON/OFF Setting ......................................54
4.1.5 Data Output ON/OFF Setting ...................................55
4.2 Toggling the Percentage Display
(4 - 20mA/0 - 20mA) .............................................. 56
4.3 Minimum Frequency Setting .................................. 57
4.4 Buzzer Sound setting ............................................ 58
4.5 Toggling the Decibel Display (dBm/ dBV) ............. 59
4.6 Thermocouple Type Setting .................................. 60
4.7 Temperature Display Setting ................................. 61
4.8 Refresh Hold Setting ............................................. 62
4.9 Auto Power Save Function .................................... 63
4.10 Display Backlight Setting ....................................... 64
4.11 Reference Impedance Setting ............................... 65
4.12 Reset ..................................................................... 66
5 Specifications 67
5.1 General Specifications ........................................... 67
5.2 Accuracy ................................................................ 71
6 Maintenance and Service 79
6.1 Troubleshooting ..................................................... 79
6.2 Cleaning ................................................................ 81
6.3 Replacing the Battery ............................................ 81
6.4 Replacing the Fuses .............................................. 83
6.5 Checking the Instrument Software Version ........... 85

1
1
2
3
4
5
6
7
8
9
10
11
Introduction
Thank you for purchasing the HIOKI “Model 3801-50
DIGITAL HiTESTER.” To obtain maximum performance
from the instrument, please read this manual first, and
keep it handy for future reference.
Verifying Package Contents
• When you receive the instrument, inspect it carefully to
ensure that no damage occurred during shipping. In
particular, check the accessories, panel switches, and
connectors. If damage is evident, or if it fails to operate
according to the specifications, contact your dealer or
Hioki representative.
• When transporting the instrument, use the original
packing materials in which it was shipped, and pack in
a double carton. Damage occurring during transporta-
tion is not covered by warranty.
Options ❏3853 CARRYING CASE
❏3856-01COMMUNICATION PACKAGE (RS-232C)
❏3856-02COMMUNICATION PACKAGE (USB)
❏9180 SHEATH TYPE TEMPERATURE PROBE
❏9181 SURFACE TEMPERATURE PROBE
❏9182 SHEATH TYPE TEMPERATURE PROBE
❏9183 SHEATH TYPE TEMPERATURE PROBE
❏9472 SHEATH TYPE TEMPERATURE PROBE
❏9473 SHEATH TYPE TEMPERATURE PROBE
❏9474 SHEATH TYPE TEMPERATURE PROBE
❏9475 SHEATH TYPE TEMPERATURE PROBE
❏9476 SURFACE TYPE TEMPERATURE PROBE
❏9617 CLIP ON BASE*
❏9618 CLIP-TYPE LEAD*
(* not complied with the CE marking)
❏6LR61 alkaline battery
(built into the instrument/ 1)
❏3851-10 TEST LEAD (1
)
❏3801-50 DIGITAL HiTESTER
(with protective holster/ 1) ❏Instruction
manual (1)
❏Strap (1)

2
Safety Information
Safety Symbols
This manual contains information and warnings essential
for safe operation of the instrument and for maintaining it
in safe operating condition. Before using it, be sure to
carefully read the following safety precautions.
This instrument is designed to comply with IEC
61010 Safety Standards, and has been thoroughly
tested for safety prior to shipment. However, mis-
handling during use could result in injury or death,
as well as damage to the instrument. Be certain that
you understand the instructions and precautions in
the manual before use. We disclaim any responsibil-
ity for accidents or injuries not resulting directly
from instrument defects.
In the manual, the symbol indicates par-
ticularly important information that the user
should read before using the instrument.
The symbol printed on the instrument
indicates that the user should refer to a corre-
sponding topic in the manual (marked with
the symbol) before using the relevant
function.
Indicates that dangerous voltage may be
present at this terminal.
Indicates a double-insulated device.
Indicates a grounding terminal.
Indicates DC (Direct Current).
Indicates AC (Alternating Current).
Indicates DC (Direct Current) or AC (Alternat-
ing Current).

3
1
2
3
4
5
6
7
8
9
10
11
The following symbols in this manual indicate the relative
importance of cautions and warnings.
Other Symbols
Accuracy We define measurement tolerances in terms of rdg.
(reading) and dgt. (digit) values, with the following mean-
ings:
rdg. (reading or displayed value)
The value currently being measured and indicated on the
measuring instrument.
dgt. (resolution)
The smallest displayable unit on a digital measuring
instrument, i.e., the input value that causes the digital dis-
play to show a "1" as the least-significant digit.
Indicates that incorrect operation presents
an extreme hazard that could result in seri-
ous injury or death to the user.
Indicates that incorrect operation presents
a significant hazard that could result in
serious injury or death to the user.
Indicates that incorrect operation presents
a possibility of injury to the user or damage
to the instrument.
Indicates advisory items related to perfor-
mance or correct operation of the instru-
ment.
Indicates the prohibited action.
❖Indicates the reference.

4
Measurement categories (Overvoltage categories)
This instrument complies with CAT III (1000 V) and CAT
IV (600 V) safety requirements.
To ensure safe operation of measurement instruments
IEC 61010 establishes safety standards for various elec-
trical environments, categorized as CAT I to CAT IV, and
called measurement categories. These are defined as fol-
lows.
Higher-numbered categories correspond to electrical
environments with greater momentary energy. So a mea-
surement device designed for CAT III environments can
endure greater momentary energy than a device
designed for CAT II.
Using a measurement instrument in an environment des-
ignated with a higher-numbered category than that for
which the instrument is rated could result in a severe
accident, and must be carefully avoided.
Never use a CAT I measuring instrument in CAT II, III, or
IV environments.
The measurement categories comply with the Overvolt-
age Categories of the IEC60664 Standards.
CAT I Secondary electrical circuits connected to an
AC electrical outlet through a transformer or
similar device.
CAT II Primary electrical circuits in equipment con-
nected to an AC electrical outlet by a power
cord (portable tools, household appliances,
etc.)
CAT III Primary electrical circuits of heavy equip-
ment (fixed installations) connected directly
to the distribution panel, and feeders from
the distribution panel to outlets.
CAT IV The circuit from the service drop to the ser-
vice entrance, and to the power meter and
primary overcurrent protection device (distri-
bution panel).

5
1
2
3
4
5
6
7
8
9
10
11
Operating Precautions
Follow these precautions to ensure safe operation and to
obtain the full benefits of the various functions.
Operating temperature and humidity:
0 to 50°C (32 ± 122°F), 80%RH or less (non-condensating)
Temperature and humidity range for guaranteed accuracy:
23 ± 5°C (73 ± 9°F), 80% RH or less (non-condensating)
Before using the instrument the first time, verify that it
operates normally to ensure that the no damage occurred
during storage or shipping. If you find any damage, con-
tact your dealer or Hioki representative.
Setting up the Instrument
Avoid the following locations that could cause an accident or damage
to the instrument.
Exposed to direct
sunlight
Exposed to high
temperature
In the presence of
corrosive or explo-
sive gases
Exposed to liquids
Exposed to high
humidity or con-
densation
Exposed to strong
electromagnetic
fields
Near electromag-
netic radiators
Exposed to high
levels of particu-
late dust
Subject to vibration
Preliminary Checks
Before using the instrument, make sure that the
insulation on the test leads is undamaged and that
no bare conductors are improperly exposed. Using
the instrument in such conditions could cause an
electric shock, so contact your dealer or Hioki rep-
resentative for replacements. (Model 3851-10 TEST
LEAD)

6
Observe the following precautions to avoid electric
shock.
• Always verify the appropriate setting of the func-
tion selector before connecting the test leads.
• Disconnect the test leads from the measurement
object and terminals before switching the function
selector.
The terminals are not sufficiently separated. To
avoid electrocution, do not touch the terminals.
For safety reasons, when taking measurements, only use the
test lead provided with the instrument.
To avoid damage to the instrument, protect it from physical
shock when transporting and handling. Be especially careful
to avoid physical shock from dropping.
• To avoid corrosion from battery leakage, remove the
batteries from the instrument if it is to be stored for a
long time.
• After use, always turn OFF the power.
• To avoid breaking the cables, do not bend or pull them.
• The ends of the leads are sharp. Be careful to avoid injury.
Fit the protective pin cap when the product is not in use.
• Keep the cables well away from heat sources, as bare
conductors could be exposed if the insulation melts.
Measurement Precautions
Handling this Instrument
Handling the Test Leads

1.1 Product Overview 7
1
2
3
4
5
6
7
8
9
10
11
Overview
The 3801-50 is a multifunction, high-performance digital
multimeter that can be used for voltage (DC/AC/AC+DC),
current (DC/AC/AC+DC), resistance, continuity, diodes,
electrostatic capacity, frequency, frequency counter, duty
ratio, pulse width, and temperature measurement. In
addition, this instrument is equipped with a pulse output
function that can be used to check a variety of pulse sig-
nal instruments. Furthermore, this instrument can be
controlled by computer and transfer measurement data to
the computer when the optional 3856-01/02 is used.
Measurement Capabilities
* DUTY ratio
The duty ratio is the ratio between the pulse width and
the pulse cycle. This instrument displays this ratio in
terms of 100 (%).
Overview 1
1.1 Product Overview
Voltage Measurement (19 page)
Current Measurement (21 page)
Resistance Measurement (23 page)
Continuity Check (25 page)
Diode Check (26 page)
Capacitance Measurement (27 page)
Frequency Measurement (28 page)
DUTY Ratio*Measurement (30 page)
Pulse Width Measurement (31 page)
Temperature Measurement (32 page)
T
t
Plus slope pulse width Minus slope pulse width
Pulse cycle (=tw++ tw-)
0 V tw-
tw+

81.2 Features
High-performance Handheld DMM
The 3801-50 can display a maximum count of 51,000. It
can even measure distorted waveforms with high-preci-
sion using true RMS measurement. The basic accuracy
for DC voltage measurement is ±0.025% rdg. ±5 dgt.
Safe Design Compliant with CE Marking Stan-
dards
The 3801-50 is compliant with international safety stan-
dards (IEC61010-1 measurement categories CAT III
(1000 V) and CAT IV (600 V)) and EMC related stan-
dards.
Comprehensive Additional Functions
The 3801-50 is also equipped with a wealth of additional
functions ranging from simple support for measurement
to easy analysis.
❖See Chapter 3 Additional Functions (page 37)
1.2 Features
Refresh Hold
Function The measured value is locked automati-
cally and then stored, even if you let go
of the test leads.
Trigger Hold
Function The measured value is stored each time
that a key is pressed.
Peak Hold Function Captures transient voltage or current
spikes caused by surges, etc.
Recording Function Switches the display to maximum mea-
sured value, minimum value, average
value, or current value.
Relative Display
Function Displays the deviation from the refer-
ence value.
Back Light Function Brightens the display in dark conditions
(EL type).
Communications
Function Permits connection to a computer for
data analysis. (Requires RS-232C/USB
and the optional 3856-01/02.)
Pulse Output
Function Outputs a pulse signal for checking var-
ious types of pulse-controlled equip-
ment.

10 1.3 Names and Functions of Parts
Lights when under remote control.
Lights when the pulse output function is being used.
Lights when the DCV measurement or DCA measurement func-
tion is being used.
Lights when the ACV measurement or ACA measurement func-
tion is being used.
Lights when the AC+DCV measurement or AC+DCA measure-
ment function is being used.
AUTO Lights when the auto range function is being used.
/ / Indicates the thermocouple type for temperature measurement.
The type that is selected lights.
Lights when the diode check function is being used.
Lights when the continuity check function is being used.
REL Lights when the relative value display function is ON.
TRIG Lights when the trigger hold function is ON.
MAX Lights when the maximum value is being displayed.
(Peak hold, recording function)
MIN Lights when the minimum value is being displayed.
(Peak hold, recording function)
AVG Lights when the average value is being displayed.
(Recording function)
Lights when the percentage conversion display is 0 to 20mA
Lights when the percentage conversion display is 4 to 20mA
Lights when the DUTY ratio measurement or pulse width mea-
surement function is being used.
Low battery indicator. This lights when the battery needs to be
replaced.
APS Lights when the auto power save function is ON.
Display Sub display and units
Main display and units
Bar graph
Remote
K
J
0°
C
HOLD
0-2
0
4-2
0

1.3 Names and Functions of Parts 11
1
2
3
4
5
6
7
8
9
10
11
Overview
Operation Keys
SHIFT key
Locks the current measured value. (Hold
function)
Holding this key down toggles the recording
function ON/OFF.
Displays the relative value. (Relative value
display function)
Holding this key down toggles the peak hold
function ON/OFF.
Changes the measurement range. (Manual
range)
Holding this key down sets the auto range
function.
Displays different measured values in the
main display and the sub display in combi-
nation.
In peak hold mode and recording mode,
pressing this key restarts the instrument.
Selects the frequency, duty ratio and pulse
width in the main display.
Holding this key terminates the selection.
Toggles the backlight ON/OFF.
Holding this key down displays the battery
level.
SHIFT
HOLD
REL
RANGE
DUAL
Hz

12 1.3 Names and Functions of Parts
Function Selector
OFF Pressing this key turns the instrument off.
VAC voltage measurement function
VVoltage measurement function
Use the SHIFT key to select DC, AC, or AC+DC.
mV Voltage measurement function up to 1000 mV.
Use the SHIFT key to select DC, AC, or AC+DC.
ΩResistance measurement function
Use the SHIFT key to select either continuity check or the
nS measurement function.
Diode check function
Use the SHIFT key to select the frequency counter func-
tion.
Capacitance measurement function
Use the SHIFT key to select the temperature measurement
function.
μACurrent measurement function up to 5100 μA.
Use the SHIFT key to select DC, AC, or AC+DC.
mA.A Current measurement function
Use the SHIFT key to select DC, AC, or AC+DC.
Pulse output function

1.3 Names and Functions of Parts 13
1
2
3
4
5
6
7
8
9
10
11
Overview
Terminals
A Terminal Terminal used for current measurement. (A function)
Connect the read test lead.
μA.mA Terminal
Terminal used for current measurement and for pulse
output. (μA, mA, pulse output function)
Connect the read test lead.
COM Terminal Common terminal used for all measurements.
Connect the black test lead.
V Terminal Terminal used for voltage measurement, resistance
measurement, diode check, capacitance measure-
ment, and temperature measurement.
Connect the read test lead.
Rear Panel
Screw
Battery Cover
Communications
Port

14 1.3 Names and Functions of Parts
This instrument includes the holster as standard equipment.
Because the holster is made of a soft material, it will absorb external
shocks and protect the instrument.
Remove the instrument from the holster before attempting to change the
battery or the fuse. After replacing the battery or fuse, be sure to return the
instrument to the holster before starting to use the instrument again.
Test Lead
Holder
Connector
Strap Attachment
Hole
Holster
Stand
Strap
Attachment
Hole
Pass the strap provided through the hole in the holster to
secure the 3801-50 for portable use. The strap can be
used to suspend the instrument from a belt or hook when
there is no place to set it down.
Connector This connector is for the optional communications cable. If
you remove instrument from the holster, this connector will
also be detached. Be careful not to lose the connector.
Test Lead
Holder These lock the test leads in place. You can lock one test
lead in place and then carry the instrument around while
taking measurements.
Stand Pull out the stand in order to set the instrument down in a
standing position.
Do not apply heavy downward pressure with the stand
extended. The stand could be damaged.

15
1
2
3
4
5
6
7
8
9
10
11
Measurement
Measurement 2
Observe the following precautions to avoid electric
shock.
• Always verify the appropriate setting of the func-
tion selector before connecting the test leads.
• Disconnect the test leads from the measurement
object before switching the function selector.
• The maximum input voltage is 1000 VDC,
1000 Vrms (sin) or 107VHz. Attempting to measure
voltage in excess of the maximum input could
destroy the instrument and result in personal
injury or death.
• The maximum input current is as follows;
A terminal: Continuous up to 10 A AC/DC, no more
than 30 seconds up to 20 A AC/DC.
mA.mA terminal: 510 mA AC/DC
Never exceed this limit, as doing so could result in
destruction of the instrument and personal injury
or death.
• The maximum rated voltage between input termi-
nals and the ground is as follows;
CAT III: DC1000 V, AC1000 Vrms (sin) or 107 VHz
CAT IV: DC600 V, AC600 Vrms (sin) or 107 VHz
Attempting to measure voltages exceeding this
level with respect to ground could damage the
instrument and result in personal injury.
• To avoid electrical shock, be careful to avoid
shorting live lines with the test leads.
• For safety, test lead connections must always be
made at the secondary side of a circuit breaker.

16
The terminals do not have sufficient spatial isola-
tion. To avoid electrocution, do not touch the termi-
nals.
For safety reasons, when taking measurements, only use the
test lead provided with the instrument.
In order to protect the tips of the
test leads, the test leads are
capped when the unit is shipped
from the factory. Be sure to
remove the caps before using the
test leads.
Other manuals for 3801-50
1
Table of contents
Other Hioki Multimeter manuals

Hioki
Hioki 3256-50 User manual

Hioki
Hioki DT4281 User manual

Hioki
Hioki 3801-50 User manual

Hioki
Hioki DT4221 User manual

Hioki
Hioki dt4212 User manual

Hioki
Hioki DT4261 User manual

Hioki
Hioki DT4221 User manual

Hioki
Hioki DT4252 User manual

Hioki
Hioki 3255-50 HiTESTER User manual

Hioki
Hioki DT4280 Series User manual