manuals.online logo
Brands
  1. Home
  2. •
  3. Brands
  4. •
  5. HiTi Digital
  6. •
  7. Printer
  8. •
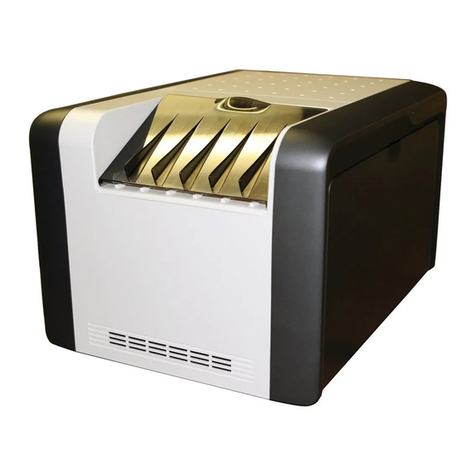
  9. HiTi Digital P320W User manual

HiTi Digital P320W User manual

HiTi P320W Quick Guide
Table of Contents / Tabla de contenido / Table des matières / 開箱和確認附件
HiTi P320W Photo Printer
Impresora fotográfica HiTi P320W
Imprimante photo HiTi P320W
HiTi P320W 印相機
Power Adapter
Adaptador de alimentación
Adaptateur secteur Cordon
變壓器
Power cord
Cable de alimentación
Cordon d'alimentation
電源線
Paper Cassette
Casete de papel
Bac à papier
紙匣
Warranty Information
Información de garantía
Informations sur la garantie
Adaptateur de
保固卡
Cleaning Kit
Kit de limpieza
Kit de nettoyage
清潔紙組
Quick Guide
Guía rápida
Guide rapide
簡易說明
USB Cable
Cable de USB
Cable USB
USB線
English /Español/ Français /
繁體中文
Name of the parts / Nombre de las partes / Nom des pièces / 部件名稱
1. Paper Cassette Door
1. Tapa del casete de papel
1. Volet du bac à papier
1. 紙匣門
2. Power Switch
2. Interruptor de encendido/apagado
2. Interrupteur d'alimentation
2. 電源開關鈕
3. Heat Ventilation
3. Ventilación de calor
3. Ventilation de la chaleur
3. 散熱孔
4. Ribbon Door Switch / Interruptor de la tapa de la cinta /
Commutateur du volet du ruban / 色帶門開關鈕
5. USB Port / Puerto USB / Port USB / Micro-B USB 孔
6. Power Connector / Conector de alimentación /
Connecteur d'alimentation / 電源線插孔
7. USB Slot
7. Ranura USB
7. Fente USB
7. USB 插槽
8. Paper Cassette
8. Casete de papel
8. Bac à papier
8. 紙匣
1
2
3
45
6
8
7
HiTi P320W Quick Guide English /Español/ Français /
繁體中文
Power On the Printer / Conexión del cable de alimentación /
Raccordement du cordon d'alimentation / 連接電源線
★ Please Ensure Your Printer is Plugged in and Turned on Prior to Connect to Your
Computer or Mobile Device.
★ Asegúrese de que su impresora esté enchufada y encendida antes de conectarla a su
computadora o dispositivo móvil.
★ Assurez-vous que votre imprimante est branchée et allumée avant de vous
connecter à votre ordinateur ou à votre périphérique mobile.
★ 在連接到電腦或無線設備之前,請確保印相機已打開電源。
Connect the power cord with the power adapter.
Conecte el cable de alimentación con el adaptador de corriente.
Connectez le cordon d’alimentation à l’adaptateur secteur.
將電源線與電源變壓器連接。
Plug the power adapter to the printer and plug the power cord into
a power outlet.
Branchez l'adaptateur secteur sur l'imprimante et branchez le
cordon d'alimentation sur une prise secteur.
Conecte el adaptador de alimentación a la impresora y el cable de
alimentación a una toma de corriente.
將電源變壓器插入印相機,然後將電源線插入電源插座。
Press the power switch for a few seconds to turn on the printer. It is
ready once you see the green light on.
Presione el botón de encendido durante unos segundos para
encender la impresora. Estará lista una vez que la luz verde se
encienda.
Appuyez sur le bouton d'alimentation pendant quelques secondes
pour allumer l'imprimante. Il est prêt une fois que vous voyez le
feu vert.
按電源開關幾秒鐘以打開印相機, 直到綠燈亮時即準備好了。
HiTi P320W Quick Guide English /Español/ Français /
繁體中文
How to Insert Ink Ribbon / Carga de la cinta / Chargement du ruban / 色帶的安裝方法
Follow the arrow direction marked on the Ink Ribbon and inside the
printer, and then slide the Ink Ribbon into the empty compartment.
Siga la dirección de la flecha marcada en la cinta de tinta y dentro
de la impresora, y luego deslice la cinta de tinta en el
compartimiento vacío.
Suivez les flèches indiquées sur le ruban encreur et à l'intérieur de
l'imprimante, puis faites-le glisser dans le compartiment vide.
按照色帶匣上和印相機內部標記的箭頭方向將色帶匣滑入。
Once the Ink Ribbon lies flat, press it down gently until you feel a
slight click.
Una vez que la cinta de tinta esté horizontal, presiónela hacia abajo
suavemente hasta que escuche un ligero click.
Une fois que le ruban encreur est à plat, appuyez doucement
jusqu'à ce que vous sentiez un léger déclic.
色帶匣平放後,輕輕按下,直至感覺到輕微咔噠一聲。
Press on the Ribbon Door Switch to lift open Ribbon Door.
Abra la tapa de la cinta presionando el interruptor de la tapa de la
cinta.
Ouvrez le volet du ruban en enfonçant le commutateur du
volet à ruban.
按下色帶門按鈕, 將色帶門打開。
★ Please do not touch the print head as shown on the warning sign.
★ NO TOQUE EL CABEZAL DE IMPRESIÓN DURANTE O INMEDIATAMENTE
ANTES O DESPUÉS DEL PROCESO DE IMPRESIÓN!
★ NE TOUCHEZ PAS LA TÊTE D'IMPRESSION PENDANT OU JUSTE
AVANT OU APRÈS LE PROCESSUS D'IMPRESSION !
★ 請勿觸碰列印頭 !
Close the Ribbon Door.
Cierre la tapa de la cinta.
Refermez le volet du ruban.
關起色帶門。
HiTi P320W Quick Guide English /Español/ Français /
繁體中文
How to Insert Photo Paper and Paper Cassette / Carga de papel y cassette de papel /
Chargement du papier et cassette papier / 相紙及紙匣的安裝方法
Flip open the Paper Cassette and place the Photo Paper with the
glossy side up, and the logo side facing down. We suggest to place
less than 15pcs paper at once to avoid error.
Abra el casete de papel e inserte el papel en el casete de papel. Sugerimos
colocar menos de 15 hojas de papel a la vez para evitar errores. ASEGÚRESE
DE COLOCAR EL PAPEL CON LA SUPERFICIE CORRECTA ( LA SUPERFICIE
BRILLOSA HACIA ARRIBA Y EL LOGOTIPO DE HITI HACIA ABAJO ).
Ouvrez le bac à papier et insérez-y le papier. Nous vous invitons à placer
moins de 15 feuilles de papier en même temps pour éviter des erreurs.
VÉRIFIEZ QUE LE PAPIER EST INSÉRÉ DANS LE BON SENS ( LA SURFACE
BRILLANTE VERS LE HAUT ET LE LOGO HITI VERS LE BAS ) .
打開紙匣將相紙放入紙匣內,建議一次放紙最多15張以避免卡紙。
注意相紙擺放方向! 相紙光滑面朝上,HiTi logo朝下。
To attach the Paper Cassette to the printer,
open the Paper Cassette Door by pushing down
the bottom and flip it open.
Abra la tapa del casete de papel. En primer
lugar, presione hacia abajo la tapa y luego
ábrala.
Ouvrez le volet du bac à papier. Veuillez
d'abord abaisser le volet puis l'ouvrir.
打開紙匣門。 注意: 先將門往下推再打開。
Slide the Paper Cassette in tightly until you hear a click.
Coloque aquí el casete de papel.
Placez-y le bac à papier.
將紙匣放進紙匣門。
HiTi P320W Quick Guide English /Español/ Français /
繁體中文
Retrieve Photo Paper from its package by holding onto the paper edge to
avoid finger prints on the print area of the Photo Paper.
Extraiga cuidadosamente el papel. SUJETE EL BORDE DEL PAPEL
FOTOGRÁFICO Y EVITE TOCAR LA SUPERFICIE AL EXTRAERLO DEL EMBALAJE.
Sortez le papier avec précaution. VEUILLEZ TENIR LE BORD DU PAPIER
PHOTO ET ÉVITER DE TOUCHER SA SURFACE EN LE SORTANT DE
L'EMBALLAGE.
小心將紙拿出。 拿相紙時請注意,請拿相紙邊緣處,切勿碰到相紙列印面以
避免污染相紙。
Connect and Print from Your Mobile Device/Conéctese e imprima desde su dispositivo móvil
Connecter et imprimer depuis votre appareil mobile /從行動裝置連接和列印
To Connect / Para conectar / Se connecter / 連接
Prinpiz APP Prinhome APP
Search for “ Prinbiz / Prinhome ” App in Apple Store or Google Play. Download the app and complete the
installation process.
Busque la aplicación “ Prinbiz / Prinhome ” en el Apple Store o Google Play. Descargue la aplicación y
continúe el proceso de instalación.
Recherchez l'application “ Prinbiz / Prinhome ” sur Apple Store ou Google Play. Téléchargez l'application
et terminez le processus d'installation.
在Apple Store或Google Play中搜索“ Prinbiz / Prinhome ”應用程式。 下載應用程式並完成安裝。
Turn on the printer and go to the WiFi Setting page on
your mobile device to find “P320W-xxxx.” Tap on the
device name to connect to the printer.
Encienda la impresora y vaya a la página
Configuración de WiFi en su dispositivo móvil para
encontrar "P320W-xxxx". Seleccione el nombre del
dispositivo para conectarse a la impresora.
Allumez l'imprimante et allez à la page «Paramètres
WiFi» de votre appareil mobile pour trouver
«P320W-xxxx». Appuyez sur le nom de l'appareil pour
vous connecter à l'imprimante.
打開印相機並到無線設備上的WiFi設置頁面查
“P320W-xxxx”,點擊設備名稱以連接到印相機。
HiTi P320W Quick Guide English /Español/ Français /
繁體中文
HiTi P320W Quick Guide English /Español/ Français /
繁體中文
To Print / Imprimir / Imprimer / 列印
Prinpiz APP
Prinhome APP
Open Prinbiz or Prinhome app to print. Select between Rapid Printing and General Printing, the
General Printing mode enables you to edit and resize your photos prior to printing, while the Rapid
Printing mode prints instantly as you finish selecting your desired photos.
Abra la aplicación Prinbiz / Prinhome para imprimir. Seleccione entre Impresión rápida e Impresión
general, el modo Impresión general le permite editar y cambiar el tamaño de sus fotos antes de
imprimirlas, mientras que el modo Impresión rápida imprime instantáneamente cuando termina de
seleccionar las fotos que desea.
Ouvrez l'application Prinbiz / Prinhome pour imprimer. Choisissez entre Impression rapide et
Impression générale, le mode Impression générale vous permet de modifier et de redimensionner
vos photos avant l'impression, tandis que le mode Impression rapide imprime instantanément à la
fin de la sélection des photos souhaitées.
打開Prinbiz / Prinhome 應用程式進行列印。 在快速列印和一般列印之間進行選擇,一般列印模式
可讓您在列印前編輯照片並調整照片大小,而快速列印模式則在您選擇照片後立即列印。
HiTi P320W Quick Guide English /Español/ Français /
繁體中文
You can select photos and print directly from your mobile device.
Alternatively, you can also print from your camera, memory cards, and USB storage device. Please
ensure your devices are plugged into the associated slots on the printer if you choose to do so.
Puede seleccionar fotos e imprimir directamente desde su dispositivo móvil.
Alternativamente, también puede imprimir desde su cámara, tarjeta de memoria y dispositivo de
almacenamiento USB. Si decide hacerlo, por favor asegúrese de que sus dispositivos estén
conectados a las ranuras correspondientes de la impresora.
Prinpiz APP Prinhome APP
Vous pouvez sélectionner des photos et imprimer directement à partir de votre appareil mobile.
Vous pouvez également imprimer à partir de votre appareil photo, de vos cartes mémoire et de votre
périphérique de stockage USB. Assurez-vous que vos périphériques sont bien branchés dans les
emplacements correspondants de l'imprimante si vous le souhaitez.
您可以直接從無線設備中選擇照片列印。或者您也可以使用相機,存儲卡和USB存儲設備進行列印。
如果您選擇這樣做,請確保您的設備已插入印相機上的相關插槽。
HiTi P320W Quick Guide English /Español/ Français /
繁體中文
Driver Installation / Instalación del controlador / Installation du pilote / 安裝驅動程式
You can download the driver from our website
www.hiti.com in the Download & Support
section.
Puede descargar el controlador desde nuestro
sitio web www.hiti.com en la sección de
Descarga y soporte.
Vous pouvez télécharger le pilote sur notre site
Web www.hiti.com dans la section
Téléchargement et assistance.
您可以從我們的網站www.hiti.com的支援網頁
下載驅動程式。
Connect and Print from Your PC and Mac / Conecte e imprima desde su PC y Mac
Connectez-vous et imprimez à partir de votre PC et de votre Mac /
PC和Mac的連接和列印
Select the associated computer system, printer
model, location and click on Next.
Seleccione el sistema informático asociado, el
modelo de la impresora, la ubicación y haga
click en Siguiente.
Une fois le téléchargement terminé, vous
Sélectionnez le système informatique associé,
le modèle d'imprimante, l'emplacement et
cliquez sur Suivant.
選擇電腦系統、印相機型號、區域,然後點擊下
一 步。
Once download is completed, you need to
extract the files and click to run the
AUTORUN.exe program to complete
installation.
Una vez que se completa la descarga, debe
extraer los archivos y hacer click para
ejecutar el programa AUTORUN.exe y
completar la instalación.
Une fois le téléchargement terminé, vous
devez extraire les fichiers et cliquer pour
exécuter le programme AUTORUN.exe pour
terminer.
下載完成後,您需要解壓縮文件檔並點擊
AUTORUN.exe 來運行安裝程序。
HiTi P320W Quick Guide English /Español/ Français /
繁體中文
Connect the printer to your PC with the USB cable / Conecte la impresora a su PC con el cable USB
Connectez l’imprimante à votre PC avec le câble USB / 使用USB線將印相機連接到PC
Driver download MAC
1. Click on link to start download
《 NOTE 》 Some OS versions security settings will not allow program to open if this occurs hold down
your control key and right click open
2. Press continue to be guideed through driver install; follow steps
《 NOTE 》 May ask for password to complete installation
Descargar driver MAC
1. Haga clic en el enlace para iniciar la descarga
[NOTA]: la configuración de seguridad de algunas versiones del sistema operativo no permitirá que
se abra el programa si esto ocurre, mantenga presionada la tecla de control y haga clic derecho para abrir
2. Presione continuar para ser guiado a través de la instalación del controlador; sigue los pasos
[NOTA]: puede solicitar una contraseña para completar la instalación
Driver télécharger MAC
1. Cliquez sur le lien pour lancer le téléchargement.
  [REMARQUE]: Les paramètres de sécurité de certaines versions de système d'exploitation ne
permettront pas au programme de s'ouvrir si cela se produit, maintenez votre touche de contrôle
enfoncée et cliquez avec le bouton droit de la souris sur open.
2. Appuyez sur Continuer pour être guidé à travers l’installation du pilote; suivez les étapes
[NOTE]: Peut demander un mot de passe pour terminer l'installation
驅動程序下載MAC
1. 單擊鏈接開始下載
[注意]:某些操作系統版本的安全設置將不允許程序打開,如果發生這種情況按住您的控制鍵並右鍵
點擊打開。
2. 按繼續引導驅動程序安裝; 按照步驟操作
[注意]:可能要求輸入密碼才能完成安裝
HiTi P320W Quick Guide English /Español/ Français /
繁體中文
To Print / Imprimir / Imprimer / 列印
Select photos and click on the Print
function.
Seleccione las fotos y haga click en la
función Imprimir.
Sélectionnez des photos et cliquez sur la
fonction Imprimer.
選擇照片並點擊“列印”功能。
Please ensure you set your P320W printer
as your desired output connection and
follow the instructions to print.
Asegúrese de configurar su impresora
P320W como su dispositivo de impresión
deseado y siga las instrucciones para
imprimir.
Assurez-vous de configurer votre
imprimante P320W en tant que connexion
de sortie souhaitée et suivez les
instructions pour imprimer.
請確保將P320W印相機設置為預設印相機
然後按照步驟進行列印。
HiTi P320W Quick Guide English /Español/ Français /
繁體中文
How to use cleaning kit
/ Conexión con la impresora /
Mode d’emploi pour le paquet de nettoyage / 如何使用清潔組工具
PC link Mode / Modo de enlace de PC / Avec l’ordinateur / 連接電腦使用模式
Step 1: Connect the printer to the PC
Step 2: Remove the ribbon cassette from the printer and photo paper from the paper cassette.
Put the separator into the paper cassette first and then the cleaning paper afterwards.
Step 3: Before putting the cleaning paper, please remove the yellow protective covers on both sides
and make sure the “Front side” of the cleaning paper faces up.
Step 4: PC: Go “Start-Settings-Printers and Faxes” and select the Hiti Photo Printer model.
Click the right key on mouse and choose “Printing Preferences”Choose “Tool” on the top and
click the icon of cleaning tool to begin the cleaning process.
Paso 1: Conectar la impresora al PC
Paso 2: Retire el cartucho de cinta de la impresora y el papel fotográfico de la bandeja de papel .
Poner el separador en el depósito de papel primero y luego el papel de limpieza después.
Paso 3: Antes de poner el papel de limpieza , por favor retire las cubiertas protectoras de color amarillo
en ambos lados y asegúrese de que el "lado frontal" del papel de limpieza enfrenta hasta.
Paso 4: PC : Ve a " Inicio-Configuración - Impresoras y faxes" y seleccione el modelo de impresora
de fotos Hiti . Haga clic en el botón derecho del ratón y selecciona en " Preferencias de
impresión "Seleccione la opción " herramienta" en la parte superior y haga clic en el icono
de la herramienta de limpieza para comenzar el proceso de limpieza .
Étape 1 : Connecter l'imprimante à l'ordinateur.
Étape 2 : Retirer le ruban d’encre et les papiers photo. Mettre le séparateur dans la cassette papier.
Étape 3 : Retirer la couverture jeune du papier nettoyage, et mettre le papier nettoyage dans la
cassette papier. Faire assurer que la face avant est d’orientée vers le haut.
Étape 4 : Sur l’ordinateur: Cliquer “Paramètre de imprimante et fax” et choissir votre imprimante
HiTi. Cliquer la droite du souris d’ordinateur et choisir “Préférence”.
Choisir “L’Outil” et cliquer l’outil nettoyage pour commencer.
1. 連接印相機和電腦
2. 取出印相機內的色帶匣及紙匣內的相紙或貼紙,接著放入分紙器及清潔紙。
3. 放入清潔紙前 , 先將其正反面的黃色保護膜撕去 ; 請確定清潔紙正面朝上 , 依照箭頭方向清潔紙
放入紙匣內。
4. 「開始」 > 「設定」 > 「印相機與傳真」 選擇印相機並按下滑鼠右鍵選擇 「列印喜好設定」 , 接著選擇
「工具」按下工具清潔工具圖示開始清潔動作。
App link Mode / App vínculo Modo / Avec l’app / App應用程式連結模式
Step 1: Go "Setting" and choose "Cleaning Mode".
Step 2: Follow the instructions to clean the printer.
Paso 1: Vaya "Configuración" y seleccione "Modo de limpieza" .
Paso 2: Siga las instrucciones para limpiar la impresora .
Étape 1 : Choissir "Paramètre" puis "Nettoyage".
Étape 2 : Suivre l’instruction pour nettoyer l’imprimante.
1. 到 "設定" , 然後選擇 "清潔模式" 。
2. 按照步驟清潔印相機。
Prinbiz App Prinhome App
HiTi P320W Quick Guide English /Español/ Français /
繁體中文
HiTi P320W Quick Guide English /Español/ Français /
繁體中文
In order to use this consumable on the printer, below procedures are needed.
Para poder utilizar nuestros nuevos consumibles en la impresora, es necesario realizar los siguientes
ajustes de configuración.
Afin d'utiliser nos nouveaux consommables sur l'imprimante, les paramètres ci-dessous sont requis.
在印相機上使用此耗材,必須操作以下步驟
HiTi Consumables Instructions/HiTi Instrucciones de consumibles/
HiTi Consommables Instructions/耗材使用說明
1. Please update App., Driver and printer’s firmware to the latest versions. UPDATE IS A MUST! Driver &
FW can be downloaded from HiTi Website: http://download.hiti.com/index.asp?MLang=English
1. Por favor actualice la App., el controlador y el firmware de la impresora a la versión más reciente.
La actualización es imprescindible y Driver & FW se puede descargar desde el sitio web de HiTi:
http://download.hiti.com/index.asp?MLang=English
1. Veuillez mettre à jour l’application, le pilote et le micrologiciel de l’imprimante sur la dernière version.
La mise à jour est nécessaire, les pilotes de l'ordinateur et le micrologiciel de l'imprimante peuvent
être téléchargés à partir du site Web officiel de HiTi :
http://download.hiti.com/index.asp?MLang=English
1. 列印前請確認App或電腦驅動程式與印相機韌體都已更新至最新版本。更新是必要的!
電腦驅動程式與印相機韌體可以到HiTi官網下載:
http://download.hiti.com/index.asp?MLang=TChinese
2. Please select the correct consumable version in App or Driver before printing.
The consumable version no. is showing on the ribbon cassette.
2. Por favor seleccione la versión correcta del consumible en la App o controlador antes de imprimir.
El número de versión del consumible se muestra en la carcasa del ribbon.
2. Veuillez sélectionner la version correcte des consommables dans App ou Driver avant d’imprimer.
La version consommable no. s'affiche sur la cassette à ruban.
2. 請在App或電腦驅動程式的設定頁面 , 選擇正確的耗材版本編號。
版本編號標示於盒式色帶上
Please update App, PC Driver and Printer’s FirmWare to the latest
version.
Select the correct consumables number “0x” in App or Driver before
printing.
Actualice la aplicación, el controlador de PC y el firmware de la
impresora a la última versión.
Seleccione el número correcto de consumibles "0x" en la aplicación o
controlador antes de imprimir.
Veuillez mettre à jour l'application, le pilote du PC et le micrologiciel
de l'imprimante vers la dernière version.
Sélectionnez le numéro de consommable correct «0x» dans
l'application ou le pilote avant d'imprimer.
請確認App, 印相機驅動程式與印相機韌體都已更新至最新版本。
列印前請在App或Driver的設定頁面選擇正確的耗材版本編號”0x”
HiTi P320W Quick Guide English /Español/ Français /
繁體中文
* App: At the Printing page, choose the correct version no. before printing.
* App: En la Página de Impresión, seleccione el número de versión correcta
antes de imprimir.
Consumables Ver. 0x
Consumibles Ver. 0x
Consommables Ver.
0x
* App: À la page Impression, choisissez la version correcte no.
avant impression.
耗材版本編號 0x
* App: 在App 列印畫面,選擇正確的耗材版本編號。
* PC Driver:
Go “Printing Preference”, choose “Set Up” and
then choose the correct consumable version
printing.
* Controlador para PC:
Ingrese en “Preferencias de Impresión”, seleccione
“Configuración” y seleccione la versión correcta de
consumible.
* Pilote PC:
sélectionnez «Préférences d'impression»,
choisissez «Configurer», puis choisissez la version
de consommable appropriée.
* 電腦驅動程式:
到列印“喜好設定” 的設定頁,選擇正確的耗材版
本編號。
4. If there is no label on the ribbon cassette, then please select “00” as the consumable number.
FOR THIS CONSUMABLE, RIBBON AND PHOTO PAPER MUST BE USED TOGETHER, DON’T MIX UP
WITHE THE EXISTING CONSUMABLES!
4. Si no se encuentra la etiqueta en la carcasa del ribbon, entonces seleccione “00” como número de consumible.
4. S'il n'y a pas d'étiquette sur la cassette à ruban, veuillez sélectionner «00» comme numéro de consommable.
4. 若盒式色帶上無貼標籤, 則請選擇耗材版本編號 “00” 。
此耗材的色帶相紙必須一起使用,請勿與原耗材混合使用!

Other manuals for P320W

1

Other HiTi Digital Printer manuals

HiTi Digital 640 DL User manual

HiTi Digital

HiTi Digital 640 DL User manual

HiTi Digital P530D User manual

HiTi Digital

HiTi Digital P530D User manual

HiTi Digital P3X User manual

HiTi Digital

HiTi Digital P3X User manual

HiTi Digital P461 User manual

HiTi Digital

HiTi Digital P461 User manual

HiTi Digital S420 User manual

HiTi Digital

HiTi Digital S420 User manual

HiTi Digital P310W User manual

HiTi Digital

HiTi Digital P310W User manual

HiTi Digital CS-310 User manual

HiTi Digital

HiTi Digital CS-310 User manual

HiTi Digital P750L User manual

HiTi Digital

HiTi Digital P750L User manual

HiTi Digital CS-200e Installation instructions

HiTi Digital

HiTi Digital CS-200e Installation instructions

HiTi Digital P910L User manual

HiTi Digital

HiTi Digital P910L User manual

HiTi Digital P510k User manual

HiTi Digital

HiTi Digital P510k User manual

HiTi Digital P525L User manual

HiTi Digital

HiTi Digital P525L User manual

HiTi Digital CS-200e User manual

HiTi Digital

HiTi Digital CS-200e User manual

HiTi Digital Photo Printer 640PS User manual

HiTi Digital

HiTi Digital Photo Printer 640PS User manual

HiTi Digital 640Amphi User manual

HiTi Digital

HiTi Digital 640Amphi User manual

HiTi Digital CS-222e User manual

HiTi Digital

HiTi Digital CS-222e User manual

HiTi Digital M610 User manual

HiTi Digital

HiTi Digital M610 User manual

HiTi Digital P710L User manual

HiTi Digital

HiTi Digital P710L User manual

HiTi Digital P110S User manual

HiTi Digital

HiTi Digital P110S User manual

HiTi Digital P520L User manual

HiTi Digital

HiTi Digital P520L User manual

HiTi Digital L300 User manual

HiTi Digital

HiTi Digital L300 User manual

HiTi Digital BS-G400 User manual

HiTi Digital

HiTi Digital BS-G400 User manual

HiTi Digital P510L User manual

HiTi Digital

HiTi Digital P510L User manual

HiTi Digital P510L User manual

HiTi Digital

HiTi Digital P510L User manual

Popular Printer manuals by other brands

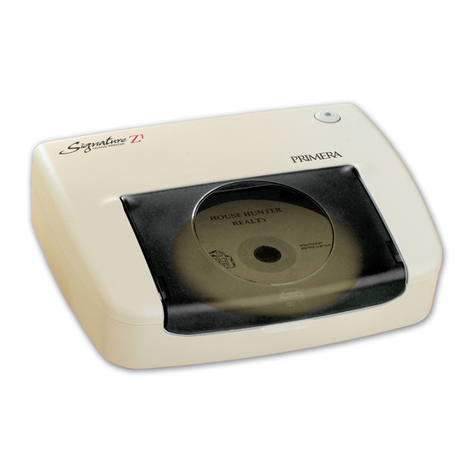
Primera Primera Signature Z1 user guide

Primera

Primera Primera Signature Z1 user guide

Ricoh AP410i - Aficio B/W Laser Printer manual

Ricoh

Ricoh AP410i - Aficio B/W Laser Printer manual

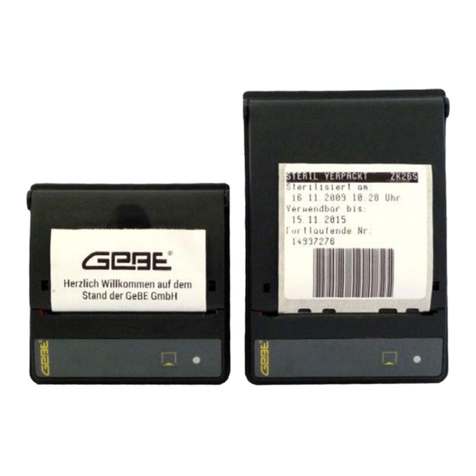
GeBe GeBE-MULDE Mini operating manual

GeBe

GeBe GeBE-MULDE Mini operating manual

Canon imagePROGRAF iPF9400S Basic guide

Canon

Canon imagePROGRAF iPF9400S Basic guide

Epson Stylus Pro 4900 Setup guide

Epson

Epson Stylus Pro 4900 Setup guide

Epson SC-F10000 Series Startup guide

Epson

Epson SC-F10000 Series Startup guide

REMEHA SCU-S03 Assembly instructions

REMEHA

REMEHA SCU-S03 Assembly instructions

Epson EPL-2020 Setup

Epson

Epson EPL-2020 Setup

Epson Stylus Pro 9500 Engine Service manual

Epson

Epson Stylus Pro 9500 Engine Service manual

Canon MG6600 Series Online manual

Canon

Canon MG6600 Series Online manual

Kodak EasyShare G600 user guide

Kodak

Kodak EasyShare G600 user guide

ISHIDA BC-4000TEC user manual

ISHIDA

ISHIDA BC-4000TEC user manual

Canon TS3440 Online manual

Canon

Canon TS3440 Online manual

Canon BJC-S200 user guide

Canon

Canon BJC-S200 user guide

Dell B2375dfw user guide

Dell

Dell B2375dfw user guide

PSI PP 4050XP user manual

PSI

PSI PP 4050XP user manual

Canon SELPHY CP770 Service manual

Canon

Canon SELPHY CP770 Service manual

Datamax Apex 4 user guide

Datamax

Datamax Apex 4 user guide

manuals.online logo
manuals.online logoBrands
  • About & Mission
  • Contact us
  • Privacy Policy
  • Terms and Conditions

Copyright 2025 Manuals.Online. All Rights Reserved.