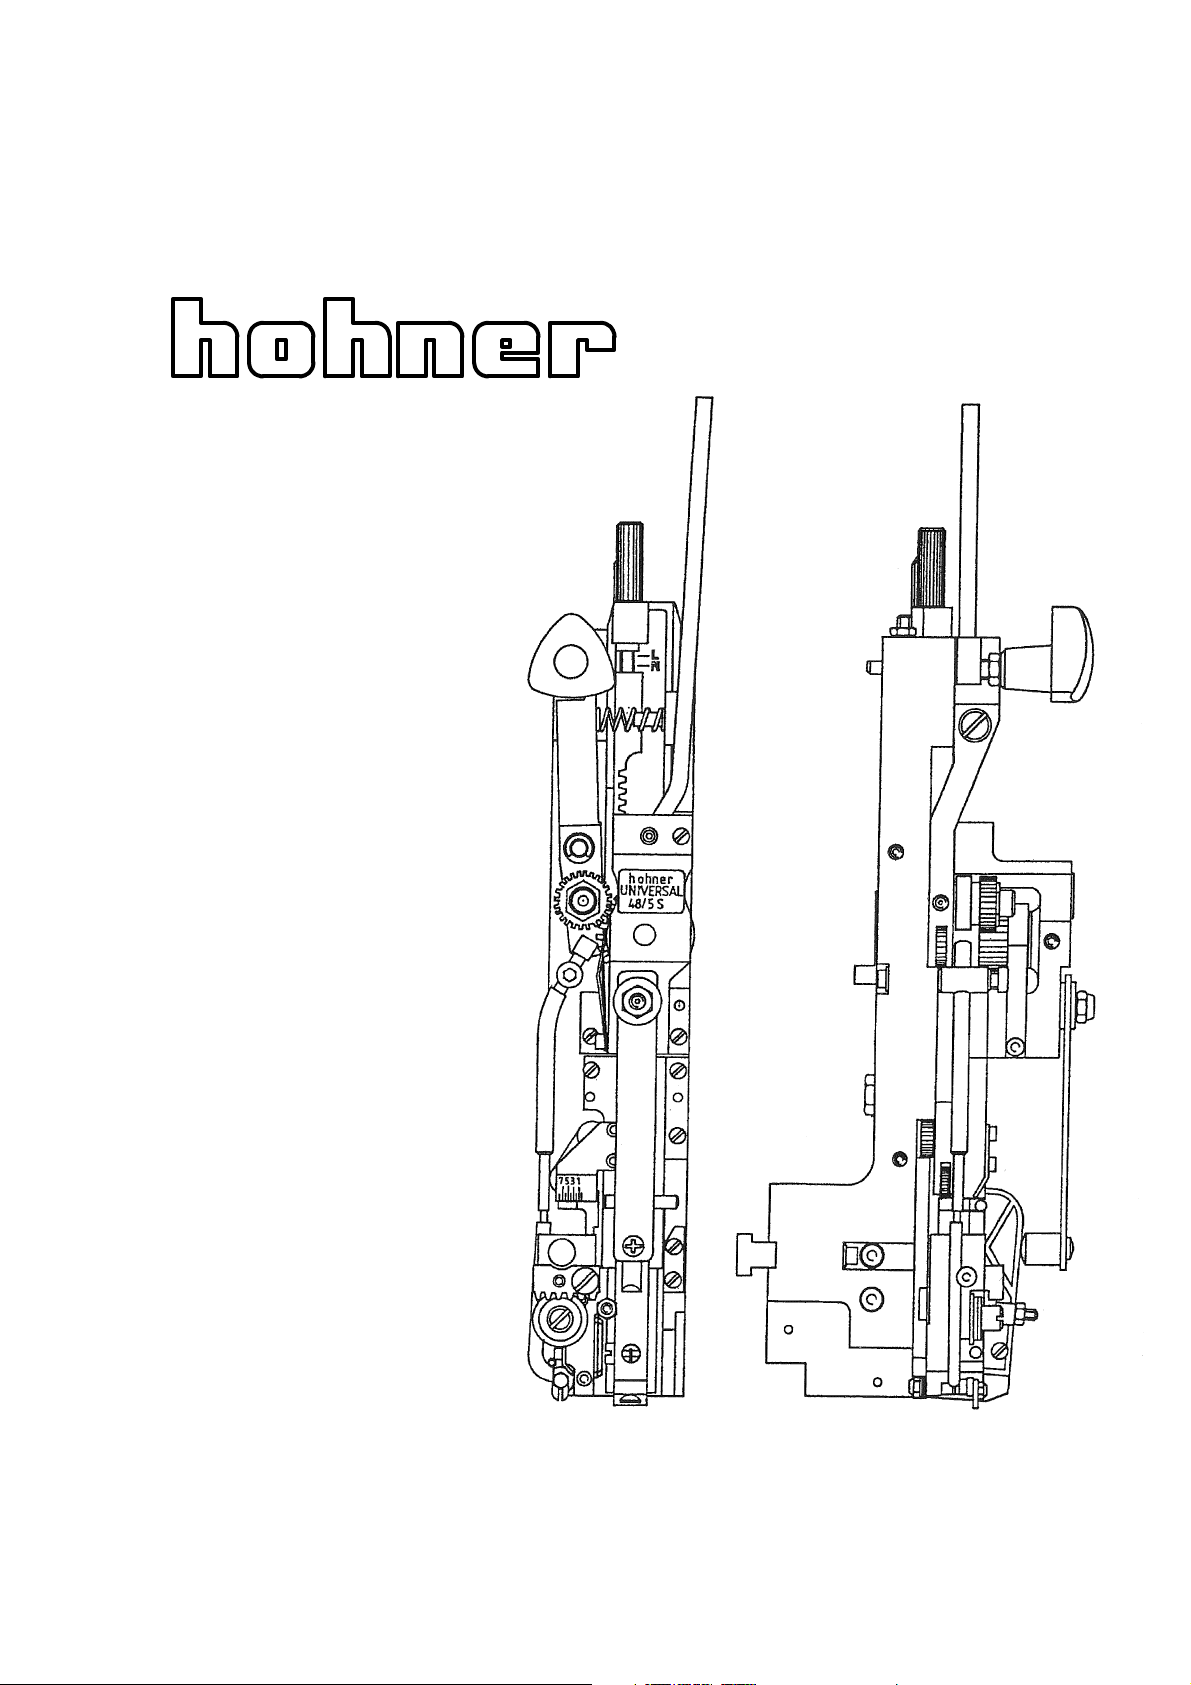
hohner Maschinenbau GmbH - 48/5 S
Contents
Chapter Page:
I. General and Services ..................................................................................................4
1. Safety notices ..............................................................................................................4
2. Technical data .............................................................................................................5
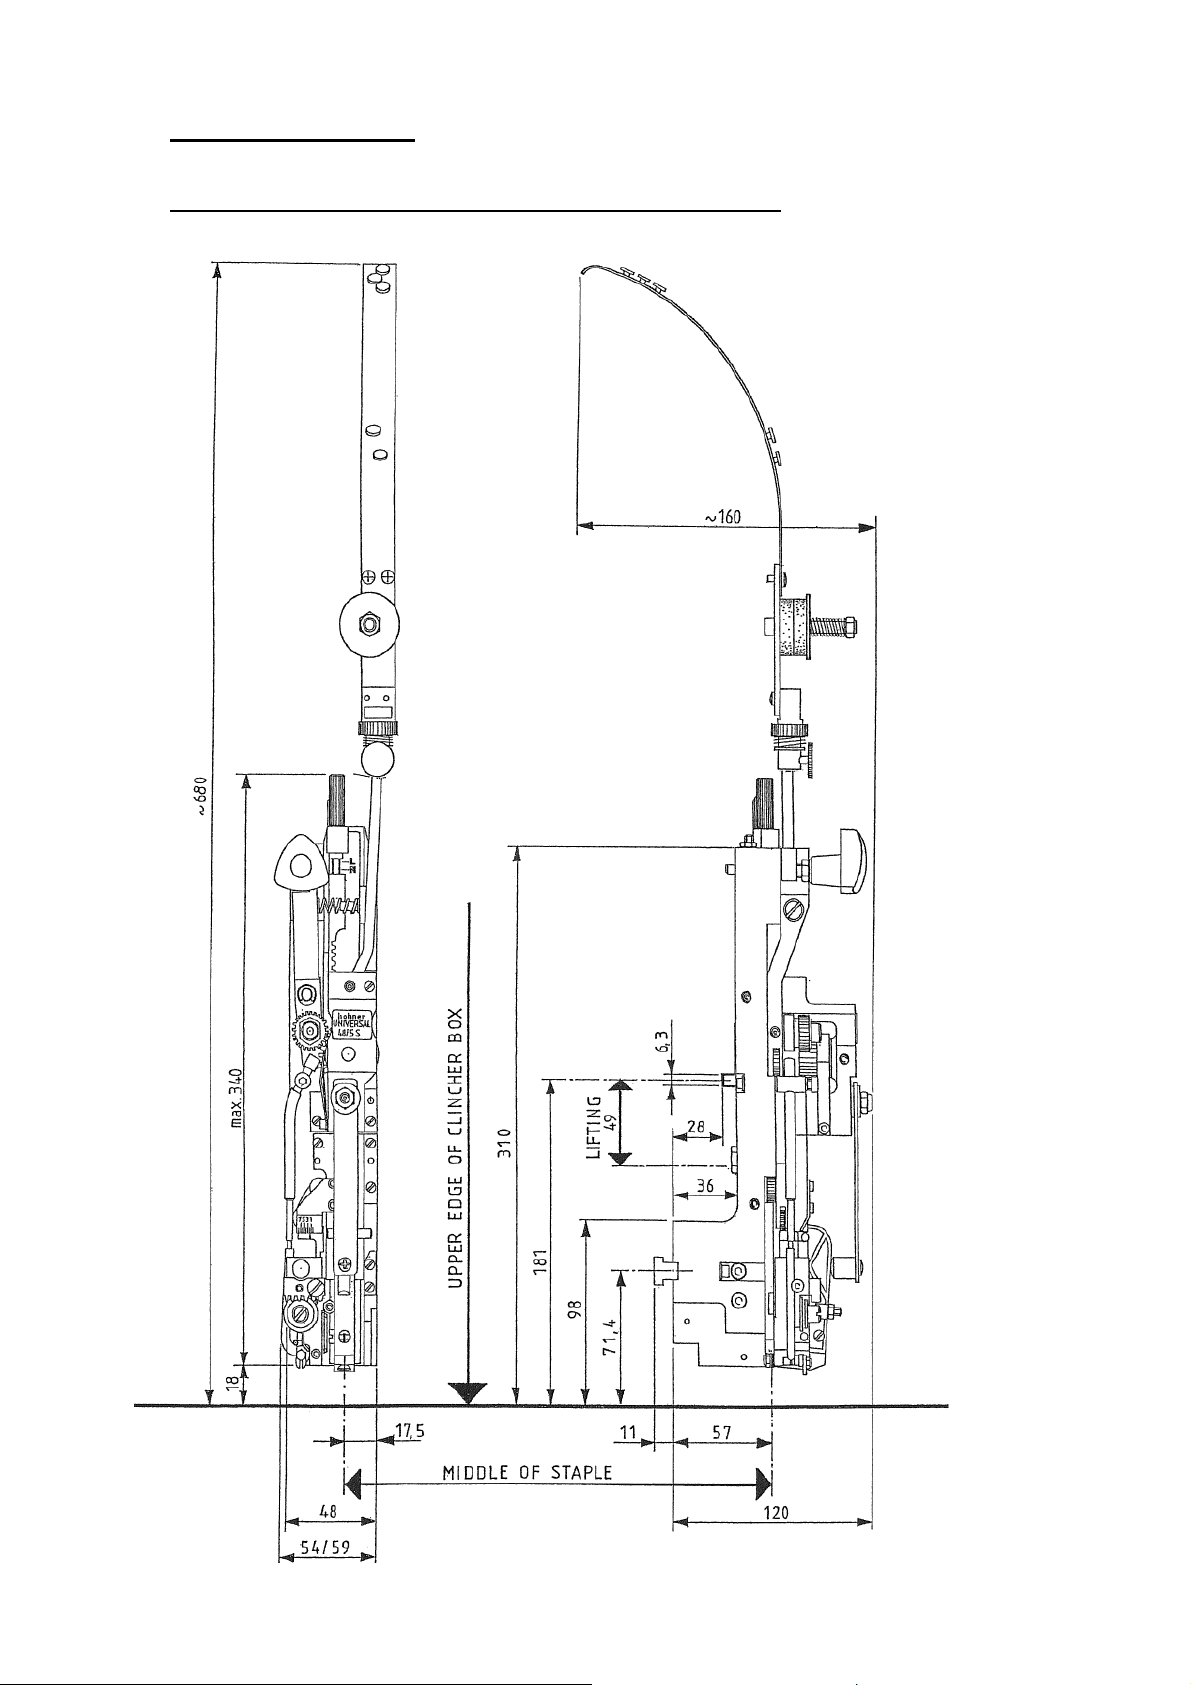
3a Foundation plan of the stitching head UNIVERSAL 48/5 s...........................................7
3b Foundation plan of the stitching head and clincher box mounting................................8
4. Accessories .................................................................................................................9
4.1 Equipment: ..................................................................................................................9
4.2 Tools:...........................................................................................................................9
5. Lube specification......................................................................................................10
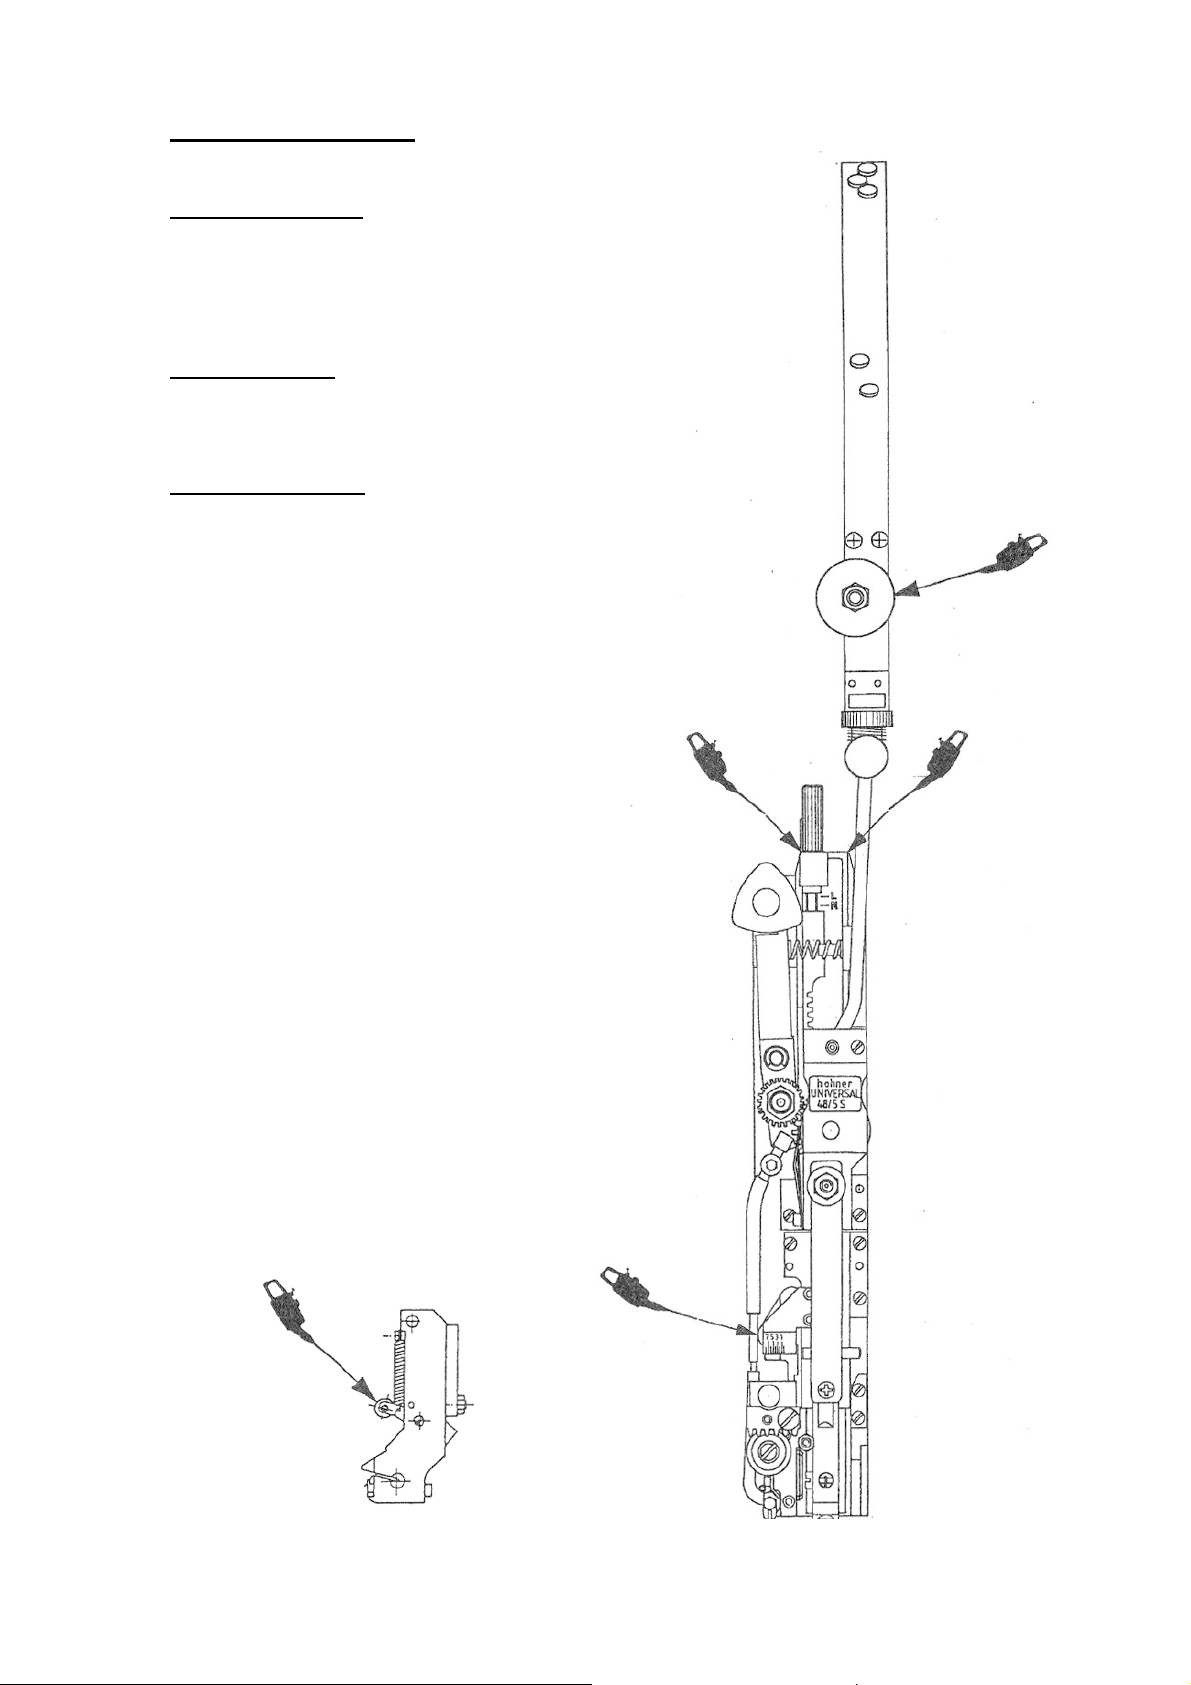
6. Installation and adjustment of the Universal 48/5 s....................................................11
7. Fine adjustment of the clincher box ...........................................................................13
8. Inserting the wire .......................................................................................................14
9. Straightening of the wire ............................................................................................15
10. Basic setting of wire length ........................................................................................16
11. Setting of leg length...................................................................................................17
12. Alignment of former ...................................................................................................19
13. Alignment of bender...................................................................................................20
14. Exchange of knives....................................................................................................21
15. Exchange of bender...................................................................................................22
16. Exchange of driver.....................................................................................................23
17. Exchange of clincher .................................................................................................24
18. Fitting the holding down device..................................................................................25
II. Conversion of the universal 48/5 s from standard-stitching to loop-stitching..............28
III. Troubleshooting.........................................................................................................30