manuals.online logo
Brands
  1. Home
  2. •
  3. Brands
  4. •
  5. ELNA
  6. •
  7. Sewing Machine Accessories
  8. •
  9. ELNA 202-248-004 User manual

ELNA 202-248-004 User manual

Elna International Corp. SA / 02.02.2022
1.
2.
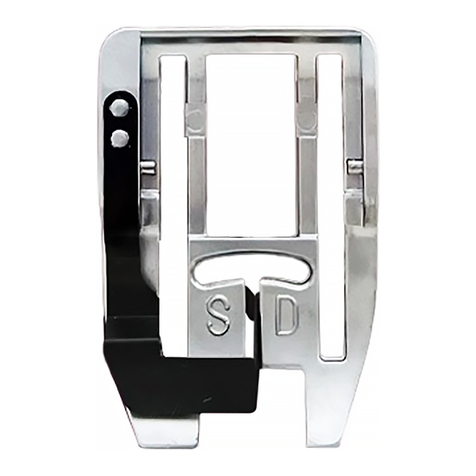
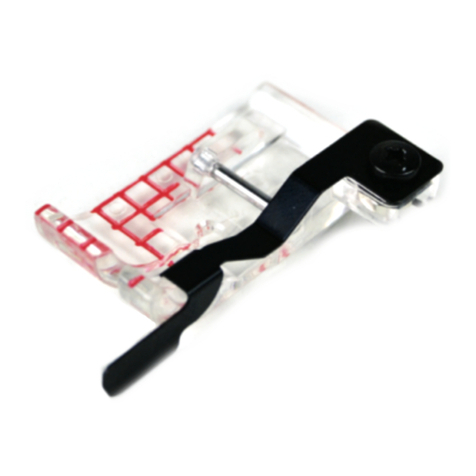
MULTI-PURPOSE FOOT WITH THREE
ELASTIC GATHERERS
Compatibles models: 845 - 745
Ref.: 202-248-004
Adding elastic gatherse:
Evenly apply 7.5, 10 or 13 mm (1/4", 3/8"or 1/2")
elastic with the elastic gatherer. The overlocker /
serger quickly sews elastic onto fabric with either
four-thread stitch.
The elastic gathering foot not only takes the hard
work out of attaching elastic, it is also great for
making your own custom soutache. The three
attachments allow you to sew 7.5 mm, 10 mm,
or 13 mm (1/4", 3/8" or 1/2") flat elastic directly
onto fabric.
• 7.5 mm 200-805-102
• 10 mm 200-805-205
• 13 mm 200-805-30
1.
2.
3.
Select sewing program No. 1 or 2:
4-Thread Stitch or 3-Thread Stitch Wide
Thread and set up machine as indicated
on the machine or in your instruction
manual. Set stitch width dial on widest
width. Attach elastic gathering foot (C).
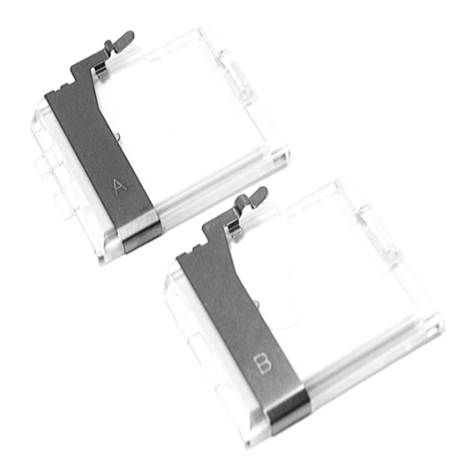
Snap elastic gatherer «A» onto elastic
gatheringfoot.Seegure1.
Loosen adjustment screw «B» and insert
elastic into gatherer slot. Pull elastic
under foot and extend it behind foot.
Tighten screw «B» to set amount of
gathering.Seegure2.
Caution
Make sure to press the Lockout key when
replacing the foot or attaching a binder.
For models without the Lockout key, turn the
powerswitchowhenattachinganddetaching
the foot and binder.
Please refer to your machine’s instruction
manual for accessory attachment and removal
information.
KIT CONTENANT PIED MULTI-USAGES
ET 3 GUIDES FRONCEUR POUR
ÉLASTIQUES
Machines compatibles: 845 - 745
Réf.: 202-248-004
Attention
Appuyez sur le bouton de verrouillage lorsque vous
remplacezlepiedouxezundispositif.
Pour les modèles de machines sans bouton de
verrouillage, coupez le contact lorsque vous retirez
ouxezunaccessoire.
Référez-vous au manuel d’instruction de votre
machine à coudre pour toutes les informations
concernantlaxationetlechangementd’un
accessoire.
Fixation du fronceur élastique:
Le pied applique de manière manière uniforme
l’élastique grâce aux fronceurs de 7.5, 10 ou
13 mm. Le fronceur élastique étire l’élastique
uniformément tout en le cousant sur le tissu avec
unpointde3ou4ls.
Le pied multi-usages c’est un outil pratique pour
la réalisation d’ouvrages intégrant des élastiques.
Les trois guides vous permettront de coudre
directement sur votre tissu des élastiques de 7.5,
10 ou 13 mm de largeur.
• 7.5 mm 200-805-102
• 10 mm 200-805-205
• 13 mm 200-805-30
1.
2.
3.
Sélectionnez le programme de couture
N.1ou2:4-lsou3-lspointlarge,et
réglez la machine selon les indications
sur votre machine ou dans votre manuel
d’instructions réglez le sélecteur de largeur
dupointsurlaplushautelargeuretxezle
pied multi-usages c.
Installez le fronceur élastique (A) sur le pied
multi-usages. Voir image 1.
Desserrez la vis de réglage (B) et insérez
l’élastique dans la fente du fronceur. Placez
l’élastique sous le pied et tirez le vers
l’arrière. Resserrez la vis (B) pour régler
l’intensité des fronces. Voir image 2.
Elna International Corp. SA / 02.02.2022
3.
4.
5.
6.
Position guide «C»; the elastic should be on
the needle plate edge and next to cutting
blades. Place fabric with right side up under
elastic infront of cutting blades.
Lower needle(s) into fabric. Lower the
presser foot.
Sewrsttwostitchesbyhandturninghand
wheel. Test sew adjusting elastic gatherer
for fullness and checking that only fabric
not the elastic is being cut. Sew at medium
speed.Seegure3.
Note: If you are using elastic lace, insert lace
scallop to left side of elastic gatherer.
4.
5.
6.
Position du guide (C); l’élastique doit se
trouver au bord de la plaque aiguille, à côté
de la lame du couteau. Placez le tissu à
l’endroit sous l’élastique en face des lames.
Abaissez l’aiguille(s) et le pied-de-biche.
Cousez quelques points à la main en
utilisant le volant. Testez sur quelque la
densité des fronces et veillez que le coupe
soit fait uniquement sur le tissu et non pas
sur l’élastique. Cousez à vitesse moyenne.
Voir image 3.
Remarque: Si vous utilisez de la dentelle
élastique, positionnez-la à gauche du fronceur
élastique.
Elna International Corp. SA / 02.02.2022
1.
MEHRZWECKFUSS MIT DREI
GUMMIBANDKRÄUSLERN
Kompatible Modelle: 845 - 745
Art.-Nr.: 202-248-004
Vorsicht
Achten Sie darauf, die Sperrtaste zu drücken, wenn
Sie den Fuß anbringen/abnehmen.
Schalten Sie bei Modellen ohne Sperrtaste den
Netzschalter aus, wenn Sie den Fuß anbringen/
abnehmen.
Informationen zum Anbringen und Abnehmen des
ZubehörteilsndenSieinderBedienungsanleitung
Ihrer Maschine.
Der Mehrzweckfuß mit drei Gummibandkräuslern
erleichtert nicht nur das Anbringen von
elastischem Gummiband, sondern eignet sich
auch hervorragend zum Anfertigen Ihrer eigenen
Soutache-Bänder. Mit den drei Aufsätzen können
Sie 7,5 mm, 10 mm oder 13 mm (1/4, 3/8 oder
1/2Zoll)breite,ache,elastischeBänderdirekt
aufdenStonähen.
• 7.5 mm 200-805-102
• 10 mm 200-805-205
• 13 mm 200-805-30
Anbringen eines
Gummibandkräuslers:
Nähen Sie das 7,5 mm, 10 mm oder 13 mm
(1/4, 3/8 oder 1/2 Zoll) breite, elastische Band
gleichmäßig gedehnt auf. Die Overlockmaschine
näht das elastische Band mit einem drei- oder
vierfädigenStichschnellaufdenSto.
1.
2.
Wählen Sie das Nähprogramm Nr. 1 oder
2 aus. Fädeln Sie den vierfädigen oder
dreifädigen Overlockstich ein. Richten Sie
die Maschine ein, wie auf der Maschine
oder in Ihrer Bedienungsanleitung
angegeben. Stellen Sie das
Stichbreitenwählrad auf die höchste Breite
ein. Bringen Sie den Mehrzweckfuß mit
Gummibandkräusler an.
Lassen Sie den Gummibandkräusler „A“
in den Mehrzweckfuß einrasten. Siehe
Abbildung 1.
PRENSATELAS MULTIUSOS CON
TRES FRUNCIDORES ELÁSTICOS
Modelos compatibles: 845 - 745
Ref.: 202-248-004
Precaución
Asegúrese de pulsar la tecla Bloqueo al montar/
desmontar el prensatelas.
Para los modelos sin tecla Bloqueo, apague
el interruptor de alimentación al montarlo/
desmontarlo.
Consulte el manual de instrucciones de su
máquina para obtener información sobre el
montaje y desmontaje de accesorios.
Añadir fruncidores elásticos:
Aplique uniformemente elástico de 7,5, 10 o 13
mm (1/4”, 3/8” o 1/2”) con el fruncidor elástico.
El sobrehilador/rematador cose rápidamente el
elástico en la tela con puntadas de tres o cuatro
hilos.
El prensatelas multiuso es una herramienta
práctica para proyectos de costura con elásticos.
Las tres guías permiten coser elásticos de 7,5, 10
o 13 mm de ancho directamente en la tela.
• 7.5 mm 200-805-102
• 10 mm 200-805-205
• 13 mm 200-805-30
1.
2.
Seleccione el programa de costura número
1 o 2, hilo ancho para puntada de 4 hilos o
puntadade3hilos,ycongurelamáquina
tal y como se indica en la misma o en el
manual de instrucciones. Ajuste el dial
de anchura de puntada en la anchura
más ancha y coloque el prensatelas para
fruncido elástico (C).
Coloque un fruncidor elástico “A” en el
prensatelas de fruncido para elásticos.
Consulte la imagen 1.
Elna International Corp. SA / 02.02.2022
2.
3.
3.
4.
5.
6.
Lösen Sie die Einstellschraube „B“ und
legen Sie das elastische Band in den
Schlitz des Gummibandkräuslers ein.
Ziehen Sie das elastische Band unter den
Fuß und ziehen Sie es hinter den Fuß.
Ziehen Sie die Schraube „B“ fest, um die
Stärke der Kräuselung einzustellen. Siehe
Abbildung 2.
Position für die Führung „C“: das elastische
Band sollte an der Stichplattenkante und
neben den Schneidklingen anliegen. Legen
SiedenStonebendieSchneidklingen
unter das elastische Band.
SenkenSiedieNadel(n)indenStoab.
Senken Sie den Nähfuß ab.
Nähen Sie die ersten beiden Stiche von
Hand, indem Sie das Handrad drehen.
Nähen Sie eine Probe, um die Funktion
des Gummibandkräuslers vollständig
einzustellen. Kontrollieren Sie, dass nur
derStoundnichtdaselastischeBand
abgeschnitten wird. Nähen Sie mit mittlerer
Geschwindigkeit. Siehe Abbildung 3.
Hinweis: Wenn Sie elastische Spitze
verwenden, legen Sie die Spitzenkante an der
linken Seite des Gummibandkräuslers ein.
3.
4.
5.
6.
Aojeeltornillodeajuste“B”einserteel
elástico en la ranura del fruncidor. Tire del
elástico debajo del prensatelas y extiéndalo
por detrás del prensatelas. Apriete el
tornillo “B” para ajustar la cantidad de
fruncido. Consulte la imagen 2.
Coloque la guía “C”; el elástico debe
encontrarse en el extremo de la placa de
la aguja y junto a las cuchillas de corte.
Coloque la tela con el lado derecho hacia
arriba debajo del elástico delante de las
cuchillas de corte.
Baje la(s) aguja(s) sobre la tela y baje el
prensatelas.
Cosa las primeras dos puntadas con la
mano utilizando el volante. Realice una
costura de prueba para determinar si es
necesario un ajuste adicional del fruncidor
elástico. Asegúrese de que solo se corta
la tela y no el elástico. Cosa a velocidad
media. Consulte la imagen 3.
Nota: Si está utilizando encaje elástico,
introduzca el festón del encaje en el lado
izquierdo del fruncidor elástico.

Other ELNA Sewing Machine Accessories manuals

ELNA 202-142-007 User manual

ELNA

ELNA 202-142-007 User manual

ELNA 202-080-202 User manual

ELNA

ELNA 202-080-202 User manual

ELNA 202-084-206 User manual

ELNA

ELNA 202-084-206 User manual

ELNA 202-082-204 User manual

ELNA

ELNA 202-082-204 User manual

ELNA 202-490-003 User manual

ELNA

ELNA 202-490-003 User manual

ELNA 202-238-001 User manual

ELNA

ELNA 202-238-001 User manual

ELNA 202-099-204 User manual

ELNA

ELNA 202-099-204 User manual

ELNA 202-156-004 User manual

ELNA

ELNA 202-156-004 User manual

ELNA 202-420-002 User manual

ELNA

ELNA 202-420-002 User manual

ELNA 202-255-004 User manual

ELNA

ELNA 202-255-004 User manual

ELNA 795-816-116 User manual

ELNA

ELNA 795-816-116 User manual

ELNA 611-511-001 User manual

ELNA

ELNA 611-511-001 User manual

ELNA W1 User manual

ELNA

ELNA W1 User manual

ELNA 202-488-008 User manual

ELNA

ELNA 202-488-008 User manual

ELNA 202-096-201 User manual

ELNA

ELNA 202-096-201 User manual

ELNA 202-098-203 User manual

ELNA

ELNA 202-098-203 User manual

ELNA 202-091-206 User manual

ELNA

ELNA 202-091-206 User manual

ELNA 434 User manual

ELNA

ELNA 434 User manual

ELNA 200-050-104 User manual

ELNA

ELNA 200-050-104 User manual

ELNA 202-239-002 User manual

ELNA

ELNA 202-239-002 User manual

ELNA 200-314-028 User manual

ELNA

ELNA 200-314-028 User manual

ELNA 202-249-005 User manual

ELNA

ELNA 202-249-005 User manual

ELNA 202-237-000 User manual

ELNA

ELNA 202-237-000 User manual

ELNA 495-526-20 User manual

ELNA

ELNA 495-526-20 User manual

Popular Sewing Machine Accessories manuals by other brands

Bernina 87 user manual

Bernina

Bernina 87 user manual

Brother 4234DT instruction manual

Brother

Brother 4234DT instruction manual

handi quilter HQ Pro-Stitcher Premium Getting started guide

handi quilter

handi quilter HQ Pro-Stitcher Premium Getting started guide

MYERS AWL manual

MYERS

MYERS AWL manual

Brother MD-600 Series product manual

Brother

Brother MD-600 Series product manual

Pfaff 333-712/02 Adjustment manual

Pfaff

Pfaff 333-712/02 Adjustment manual

Brother PRSCLPM1 installation manual

Brother

Brother PRSCLPM1 installation manual

TEX ALL IN 1 Sleeve Board Pro user manual

TEX

TEX ALL IN 1 Sleeve Board Pro user manual

TEX ALL IN 1 Sleeve Board Pro user manual

TEX

TEX ALL IN 1 Sleeve Board Pro user manual

Pfaff EcoDrive P40 ED instruction manual

Pfaff

Pfaff EcoDrive P40 ED instruction manual

DURKOPP ADLER 806 Instructions for operating

DURKOPP ADLER

DURKOPP ADLER 806 Instructions for operating

Grace SMP-03-12171 Installation

Grace

Grace SMP-03-12171 Installation

Pegasus MD440 instructions

Pegasus

Pegasus MD440 instructions

Baby Lock BLRG20ST Instruction and reference guide

Baby Lock

Baby Lock BLRG20ST Instruction and reference guide

manuals.online logo
manuals.online logoBrands
  • About & Mission
  • Contact us
  • Privacy Policy
  • Terms and Conditions

Copyright 2025 Manuals.Online. All Rights Reserved.