manuals.online logo
Brands
  1. Home
  2. •
  3. Brands
  4. •
  5. ELNA
  6. •
  7. Sewing Machine Accessories
  8. •
  9. ELNA 495-526-20 User manual

ELNA 495-526-20 User manual

Elna International Corp. SA / 02.02.2022
Caution
Make sure to press the Lockout key when
replacing the foot or attaching a binder.
For models without the Lockout key, turn the
power switch o when attaching and detaching
the foot and binder.
Please refer to your machine’s instruction
manual for accessory attachment and removal
information.
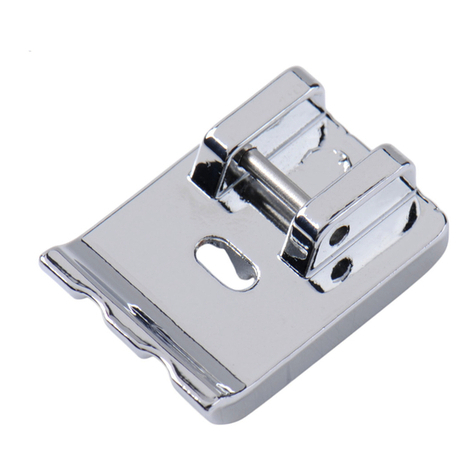
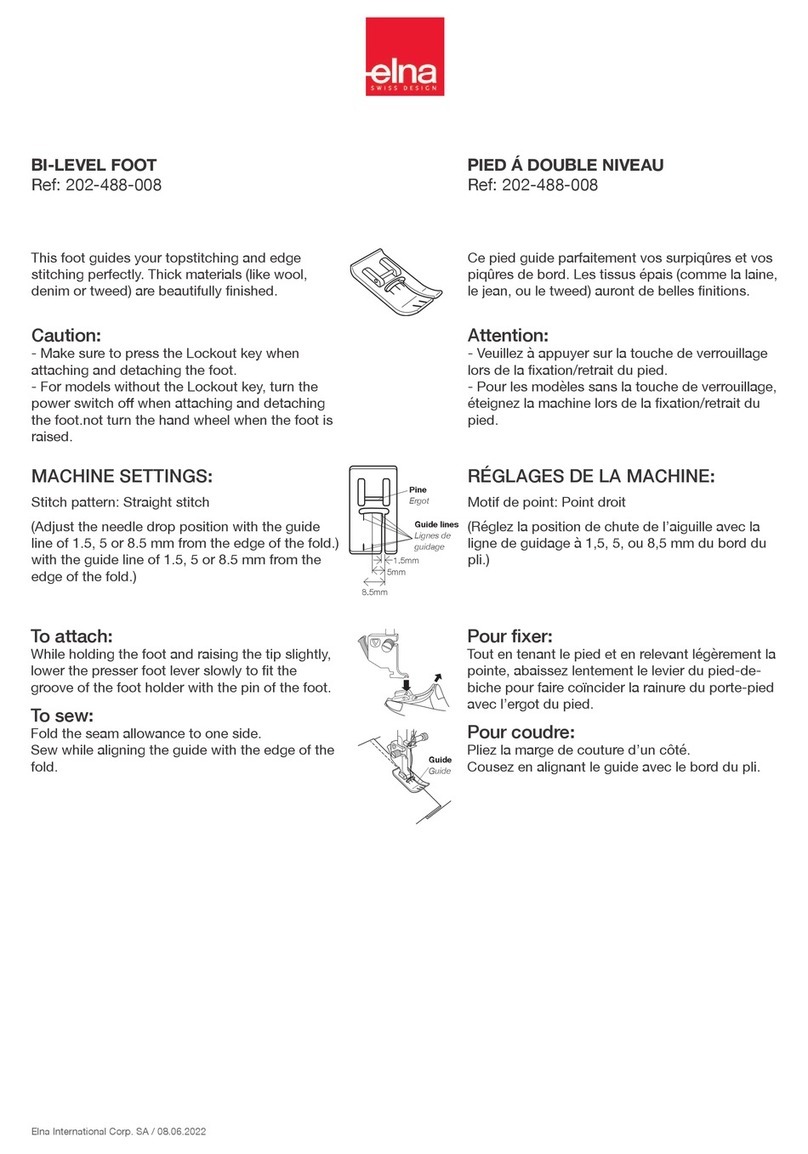
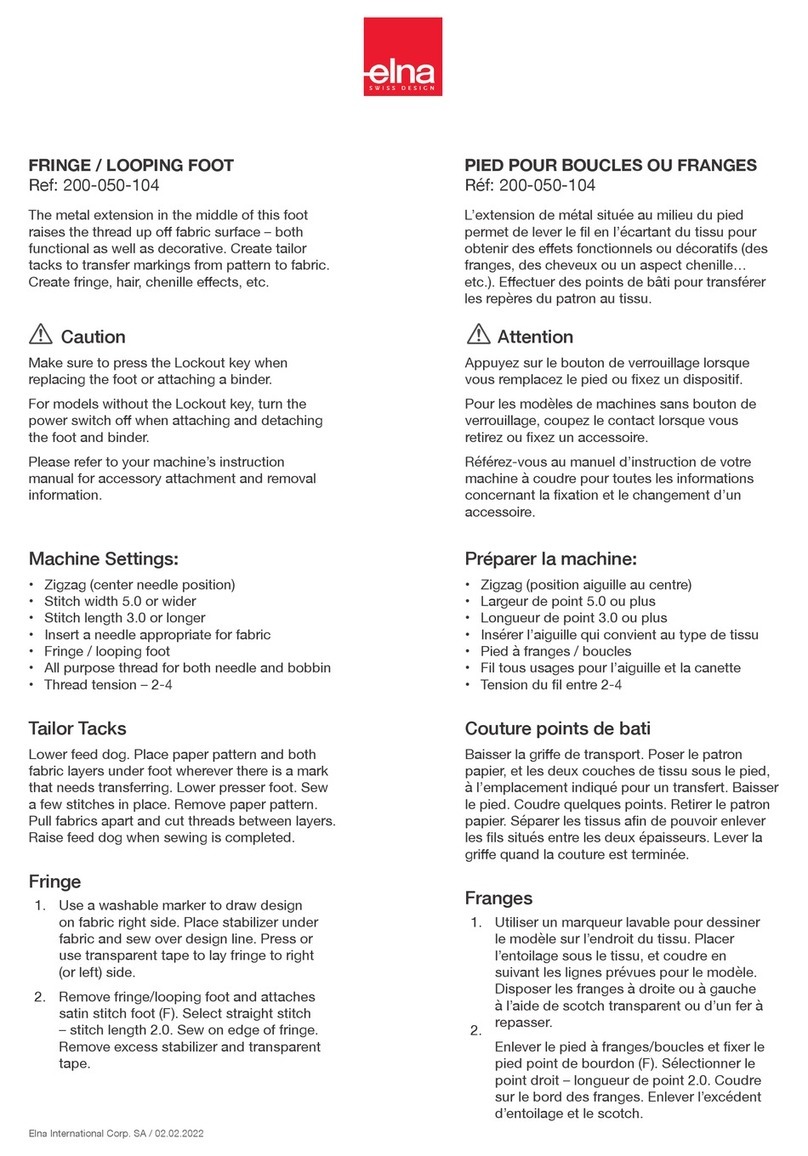
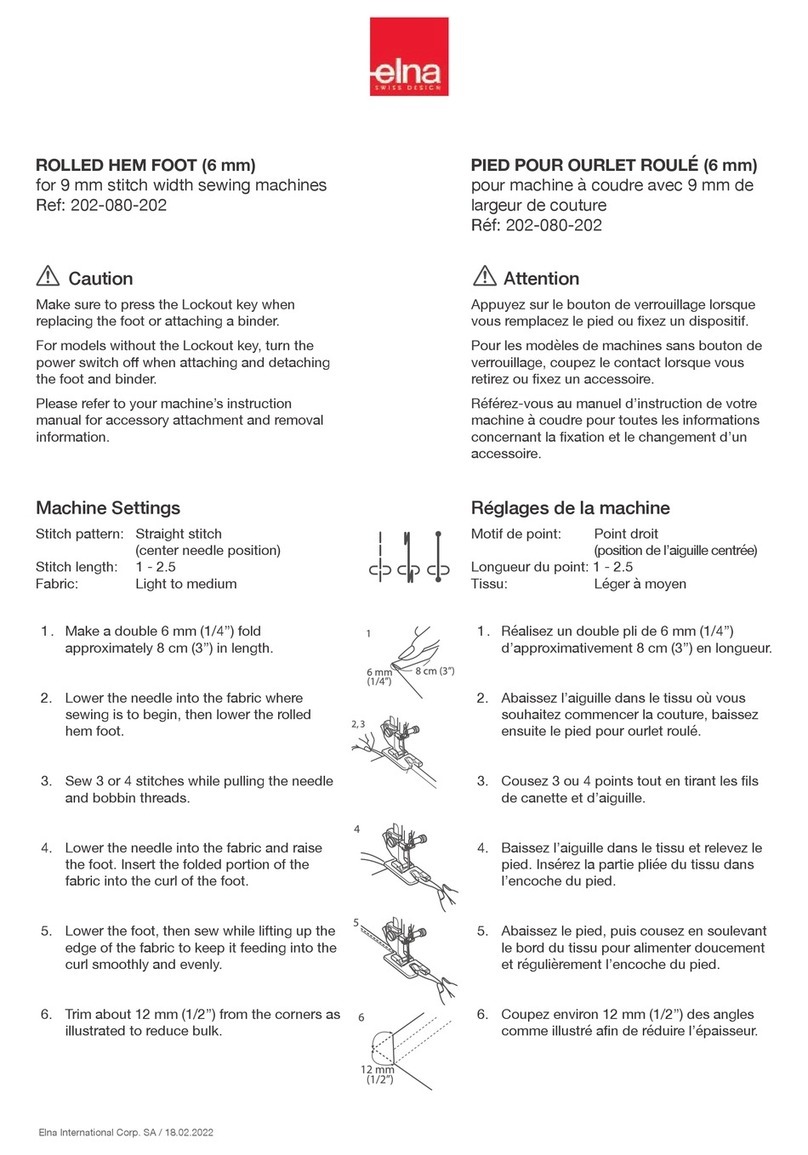
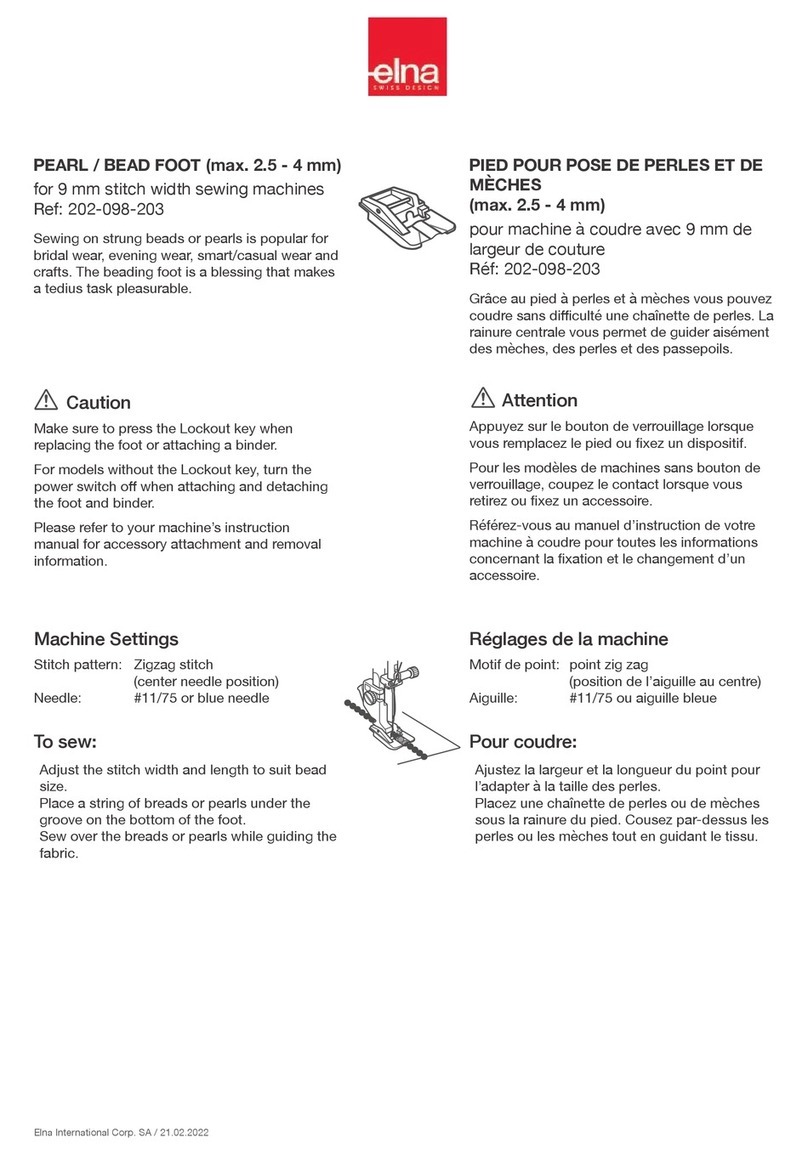
ELASTIC GATHERER - 10 MM
Ref: 495-526-20
The elastic gatherer stretches the elastic as it is
sewn to the fabric, a quick and easy method.
Available in 3 sizes
– 8 mm, 10 mm or 13 mm (1/4”, 3/8” or 1/2”).
Machine Settings:
• 3 Step zigzag
• Stitch width 5.0 or 7.0, stitch length 2.5 or 3.0
• Insert a needle appropriate for fabric
• Elastic gatherer
• All purpose thread for both needle and bobbin
• Thread tension – Auto or 4-5
Sewing:
Loosen the adjusting screw on the elastic
gatherer A. Angle cut elastic end and insert
elastic into slot. Pull elastic through slot Buntil
4 cm-5 cm (1 1/2”- 2”) extends out the back.
Tighten adjusting screw.
According to your model:
• Attach elastic gatherer by inserting prongs on
elastic gatherer into holes on front of needle
plate.
• Or, remove bobbin cover plate and attach
elastic gatherer plate. Place scrap fabric under
foot on top of elastic. Test sew. Tighten or
loosen adjusting screw as desired.
FRONCEUR-ÉLASTIQUE - 10 MM
Réf: 495-526-20
Le fronceur-élastique est rapide et pratique: il
tend uniformément l’élastique pendant la couture.
Il existe en trois dimensions :
- 8 mm, 10 mm, et 13 mm.
Attention
Appuyez sur le bouton de verrouillage lorsque
vous remplacez le pied ou xez un dispositif.
Pour les modèles de machines sans bouton de
verrouillage, coupez le contact lorsque vous
retirez ou xez un accessoire.
Référez-vous au manuel d’instruction de votre
machine à coudre pour toutes les informations
concernant la xation et le changement d’un
accessoire.
Réglages de la machine:
• Zigzag spécial
• Largeur de point 5,0 à 7,0, longueur de point
2,5 à 3,0.
• Insérer l’aiguille qui convient au type de tissu
• Semelle bourdon (F)
• Fil tous usages pour l’aiguille et la canette
• Tension du  l – Auto ou entre 4 – 5
Pour coudre:
Desserrer la vis de serrage sur le fronceur-
élastique A. Couper l’élastique en diagonale et
l’insérer le dans la fente. Tirer l’élastique dans
la fente B jusqu’à ce qu’il y en ait 4 à 5 cm de
l’autre côté. Resserrer la vis de réglage.
Selon votre modèle :
• Retirer le couvercle crochet et xer le fronceur-
élastique.
• Ou, clipper le fronceur – élastique dans les
trous positionnés à l’avant du pied. Placer une
chute de tissu sous le pied et sur l’élastique.
Faire une couture d’essai. Serrer ou desserrer
la vis de réglage si besoin est.
Elna International Corp. SA / 02.02.2022
GUMMIBANDKRÄUSLER - 10 MM
Art.-Nr.: 495-526-20
Der Gummibandkräusler ist schnell und praktisch: er
dehnt das Gummiband gleichmässig während des
Nähens.
Er ist in drei Grössen erhältlich:
- 8 mm, 10 mm und 13 mm.
Maschineneinstellungen:
• Spezial-Zickzack
• Stichbreite 5,0 bis 7,0, Stichlänge 2,5 bis 3,0.
• Die der Stoart entsprechende Nadel einsetzen
• Kordonsohle (F)
• Multizweck-Faden für die Nadel und die
Spulenkapsel
• Fadenspannung – Auto oder zwischen 4 - 5
Nähen:
Die Einstellschraube am Gummibandkräusler lösen
A. Das Gummiband schräglaufend schneiden und
in den Schlitz einführen. Das Gummiband durch den
Schlitz B ziehen bis es auf der anderen Seite um 4 -
5 cm vorsteht. Die Einstellschraube wieder anziehen.
Vorsicht
Achten Sie darauf, die Sperrtaste zu drücken, wenn
Sie den Fuß austauschen.
Schalten Sie bei Modellen ohne Sperrtaste den
Netzschalter aus, wenn Sie den Fuß anbringen und
abnehmen.
Informationen zum Anbringen und Abnehmen des
Zubehörteils nden Sie in der Bedienungsanleitung
Ihrer Maschine.
Entsprechend Ihrem Nähmaschinenmodel:
• Spülchendeckel entfernen und den
Gummibandkräusler einsetzen.
• Oder den Gummibandkräusler in die dafür
vorgesehenen Löcher vor dem Fuss einrasten.
Einen Storesten unter den Nähfuss und auf das
Gummiband legen. Eine Versuchsnaht vollziehen.
Die Einstellschraube wenn nötig anziehen oder
lösen.
Precaución
Asegúrese de pulsar la tecla Bloqueo cuando
reemplace el prensatelas.
Para los modelos sin tecla Bloqueo, apague el
interruptor de alimentación al montar y desmontar el
prensatelas.
Consulte el manual de instrucciones de su máquina
para obtener información sobre el montaje y
desmontaje de accesorios.
FRUNCIDOR ELÁSTICO - 10 MM
Ref: 495-526-20
El fruncidor elástico estira el elástico a medida que
se cose a la tela, un método rápido y sencillo.
Disponible en 3 tamaños
– 8 mm, 10 mm o 13 mm (1/4”, 3/8” o 1/2”).
Ajustes de la máquina:
• Zigzag de 3 pasos
• Anchura de la puntada de 5,0 o 7,0, longitud de la
puntada de 2,5 o 3,0
• Introduzca una aguja adecuada para la tela
• Fruncidor elástico
• Hilo multipropósito para la aguja y la canilla
• Tensión del hilo: Automático o 4-5
Costura:
Aoje el tornillo de ajuste del fruncidor elástico A.
Corte el extremo del elástico en ángulo e inserte el
elástico en la ranura. Tire del elástico a través de la
ranura Bhasta que se extiendan 4 cm-5 cm (1 1/2”-
2”) hacia atrás. Apriete el tornillo de ajuste.
Según su modelo:
• Coloque el fruncidor elástico insertando los
dientes del fruncidor elástico en los agujeros de la
parte delantera de la placa de la aguja.
• O bien, retire la placa de la cubierta de la canilla
y coloque la placa de fruncidor elástico. Coloque
el retal debajo del prensatelas sobre el elástico.
Realice una costura de prueba. Apriete o aoje el
tornillo de ajuste según desee.
Other ELNA Sewing Machine Accessories manuals

ELNA 202-098-203 User manual

ELNA

ELNA 202-098-203 User manual

ELNA 202-084-206 User manual

ELNA

ELNA 202-084-206 User manual

ELNA 202-156-004 User manual

ELNA

ELNA 202-156-004 User manual

ELNA 202-488-008 User manual

ELNA

ELNA 202-488-008 User manual

ELNA 611-511-001 User manual

ELNA

ELNA 611-511-001 User manual

ELNA 202-080-202 User manual

ELNA

ELNA 202-080-202 User manual

ELNA 795-816-116 User manual

ELNA

ELNA 795-816-116 User manual

ELNA 434 User manual

ELNA

ELNA 434 User manual

ELNA 202-249-005 User manual

ELNA

ELNA 202-249-005 User manual

ELNA 200-050-104 User manual

ELNA

ELNA 200-050-104 User manual

ELNA 202-490-003 User manual

ELNA

ELNA 202-490-003 User manual

ELNA 202-420-002 User manual

ELNA

ELNA 202-420-002 User manual

ELNA 202-238-001 User manual

ELNA

ELNA 202-238-001 User manual

ELNA 202-255-004 User manual

ELNA

ELNA 202-255-004 User manual

ELNA 202-082-204 User manual

ELNA

ELNA 202-082-204 User manual

ELNA W1 User manual

ELNA

ELNA W1 User manual

ELNA 202-239-002 User manual

ELNA

ELNA 202-239-002 User manual

ELNA 580+ User manual

ELNA

ELNA 580+ User manual

ELNA 202-099-204 User manual

ELNA

ELNA 202-099-204 User manual

ELNA 202-235-008 User manual

ELNA

ELNA 202-235-008 User manual

ELNA 202-237-000 User manual

ELNA

ELNA 202-237-000 User manual

ELNA 202-142-007 User manual

ELNA

ELNA 202-142-007 User manual

ELNA 200-314-028 User manual

ELNA

ELNA 200-314-028 User manual

ELNA 202-091-206 User manual

ELNA

ELNA 202-091-206 User manual

Popular Sewing Machine Accessories manuals by other brands

JUKI SC-510 Safety information

JUKI

JUKI SC-510 Safety information

Brother S-6200A manual

Brother

Brother S-6200A manual

Brother ScanNCut DX Embossing Starter Kit Operation manual

Brother

Brother ScanNCut DX Embossing Starter Kit Operation manual

DURKOPP ADLER 806 Instructions for operating

DURKOPP ADLER

DURKOPP ADLER 806 Instructions for operating

Singer YC-485EC manual

Singer

Singer YC-485EC manual

Grace Continuum II ASSEMBLY & USE

Grace

Grace Continuum II ASSEMBLY & USE

Baby Lock BLES8-CST instructions

Baby Lock

Baby Lock BLES8-CST instructions

Grace Cutie ASSEMBLY & USE

Grace

Grace Cutie ASSEMBLY & USE

DURKOPP ADLER 867 instructions

DURKOPP ADLER

DURKOPP ADLER 867 instructions

IntelliQuilter HQ-AVANTE 03.25.16 Installation

IntelliQuilter

IntelliQuilter HQ-AVANTE 03.25.16 Installation

Kenmore 272.98201.490 owner's manual

Kenmore

Kenmore 272.98201.490 owner's manual

Baby Lock BLQ2-OT instructions

Baby Lock

Baby Lock BLQ2-OT instructions

Grace Company Sure Stitch user manual

Grace Company

Grace Company Sure Stitch user manual

Racing MCA 18K-38/TR Installation Guide book

Racing

Racing MCA 18K-38/TR Installation Guide book

manuals.online logo
manuals.online logoBrands
  • About & Mission
  • Contact us
  • Privacy Policy
  • Terms and Conditions

Copyright 2025 Manuals.Online. All Rights Reserved.