manuals.online logo
Brands
  1. Home
  2. •
  3. Brands
  4. •
  5. HOKLARTHERM
  6. •
  7. Greenhouse Kit
  8. •
  9. HOKLARTHERM Riga User manual

HOKLARTHERM Riga User manual

Other manuals for Riga

1

Other HOKLARTHERM Greenhouse Kit manuals

HOKLARTHERM Livingten User manual

HOKLARTHERM

HOKLARTHERM Livingten User manual

HOKLARTHERM Riga III Series User manual

HOKLARTHERM

HOKLARTHERM Riga III Series User manual

HOKLARTHERM Riga S User manual

HOKLARTHERM

HOKLARTHERM Riga S User manual

HOKLARTHERM Riga User guide

HOKLARTHERM

HOKLARTHERM Riga User guide

Popular Greenhouse Kit manuals by other brands

Dancover TITAN Arch 196 manual

Dancover

Dancover TITAN Arch 196 manual

ACD PRESTIGE MR3 H manual

ACD PRESTIGE

ACD PRESTIGE MR3 H manual

Vitavia VA0040-TRP Assembly instructions

Vitavia

Vitavia VA0040-TRP Assembly instructions

VegTrug Nursery manual

VegTrug

VegTrug Nursery manual

Riverstone Networks Monticello 041315V Assembly instructions

Riverstone Networks

Riverstone Networks Monticello 041315V Assembly instructions

CLIMA POD Spirit V7 Series Assembly instructions

CLIMA POD

CLIMA POD Spirit V7 Series Assembly instructions

Vitavia GAIA JUMBO Assembly instructions

Vitavia

Vitavia GAIA JUMBO Assembly instructions

Palram Harmony 6'x4' Assembly instructions

Palram

Palram Harmony 6'x4' Assembly instructions

ClearSpan Storage Master 104598 instruction manual

ClearSpan

ClearSpan Storage Master 104598 instruction manual

Sproutwell GRANGE - 5 Assembly instructions

Sproutwell

Sproutwell GRANGE - 5 Assembly instructions

STC Easy Grow 6x12 Greenhouse Assembly instructions

STC

STC Easy Grow 6x12 Greenhouse Assembly instructions

Growhouse Lean To 6 x 8 Erection and Glazing Instructions

Growhouse

Growhouse Lean To 6 x 8 Erection and Glazing Instructions

Riverstone Networks Grower's 181010V Assembly instructions

Riverstone Networks

Riverstone Networks Grower's 181010V Assembly instructions

GrowSpan 500 Series manual

GrowSpan

GrowSpan 500 Series manual

Stocker 9641/2 manual

Stocker

Stocker 9641/2 manual

Outsunny 845-421V02 manual

Outsunny

Outsunny 845-421V02 manual

ACD Piccolo 03 manual

ACD

ACD Piccolo 03 manual

Riverstone Networks MONT-8 Assembly instructions

Riverstone Networks

Riverstone Networks MONT-8 Assembly instructions

manuals.online logo
manuals.online logoBrands
  • About & Mission
  • Contact us
  • Privacy Policy
  • Terms and Conditions

Copyright 2025 Manuals.Online. All Rights Reserved.

1
ALUMINIUM
GREENHOUSE
Riga S/Riga
Basic kit
assembly instructions
Subject to technical changes! Current as of 09/2013
model Riga S
system width 2,32 m
system width 2,96 m
model Riga
2
Dear garden friend,
congratulations on the purchase of an aluminium greenhouse made by
The construction is simple. First read the assembly instructions and follow them step by step.
Parts and parts list
Please complete all boxes stored dry and protected from direct sunlight!
number of cartons
basic construction
(gable/eaves)
curved center
proles
windows/
doors
glazing
Riga S/II/III/IV 1 1 1 1
Riga III/IV/V 1 1 1 1
Start with the basic kit. Please do not open all the boxes at the same time. Let's not get confused
by the variety of items.
Before you begin assembly, check on the parts lists, if all parts are present. Each box goes
through a quality check before it is closed, thus missing parts are almost excluded. Should any
parts are missing, please give us the wrong position.
Customer Service: 877-760-8500 or 512-407-8500 [email protected]
Exaco Trading
10203 Metropolitan Dr.
Austin, TX 78758
Location
Choose, if possible, a sunny place for your greenhouse. Avoid the shadow of buildings and trees.
For vegeteables, like tomatoes, cucumbers and melons, make your greenhouse as possible in
north-south-direction. For owers and potted plants in east-west-direction.
Warning:
The greenhouse should preferably be placed in a sheltered spot and not in
stormy weather. It is dangerous to leave a partly assembled house!
With the correct assembly resists this greenhouse and strong winds. The manufacturer assumes
no responsibility for any damage by improper installation or acts of God.
The constructions of the greenhouse must be conducted by at least two people.
Work with secure, craft-oriented tools. Be careful when assembling on a secure stand of the ladder
(risk of accident!).
In principle, only with gloves on (risk of injury, average risk!).
3 - 5 mm 3 - 5 mm 6 - 8 mm
length
model 712 mm 768 mm 1030 mm
Riga S II 4 1 7
Riga S III 4 1 11
Riga S IV 4 1 14
3 - 5 mm 3 - 5 mm 6 - 8 mm
length
model 768 mm 1030 mm 1030 mm
Riga III 1 4 11
Riga IV 1 4 14
Riga V 1 4 16
3
For the conguration you need the following tools:
1 pc. Phillips screwdriver size 2
1 pc. foot-end wrench10 mm
1 pc. screwdriver
1 pc. allen key 3 mm (in the accessoires bag of the roof window)
1 pc. level
1 pc. stepladder
1 pc. le to remove any burrs on the proles
1 pc. rubber hammer
1 pc. tape measure
You should be careful:
Wedge seals (V23) pull
apart the center!
Push the seal 3 - 5 mm between the soil prole and the glazing.
Both within the greenhouse!
Important: This compress the seals because they contract in cold weather!
Hexagonal screws can also be inser-
ted later in the plastic slider!
Plastic slider in the bottom door
frame, side and roof bars
numbers of wedge seals
pos.4-2
pos.4-1
pos.3-3
pos.1-5-6
pos.2-1
pos.2-3.1
pos.2-3.1
pos.1-1
pos.1-9
pos.1-9
pos.1-5-4
pos.1-5-4
pos.1-5-6
pos.1-7
pos.1-6
pos.1-8
pos.3-2
4
The ISO-Cellular sheets, speak glazing, always install the UV coated side out. The plates have
on the protective lm has a hint.
The protective lm, rst loosen the edges and only after the complete assembly pull it off
immediately. After several days of sunlight can burn the lm rmly on the plates and can be
solved only with difculty.
Do not pull the box right after the lm, otherwise you could not tell which side has the UV
protection!
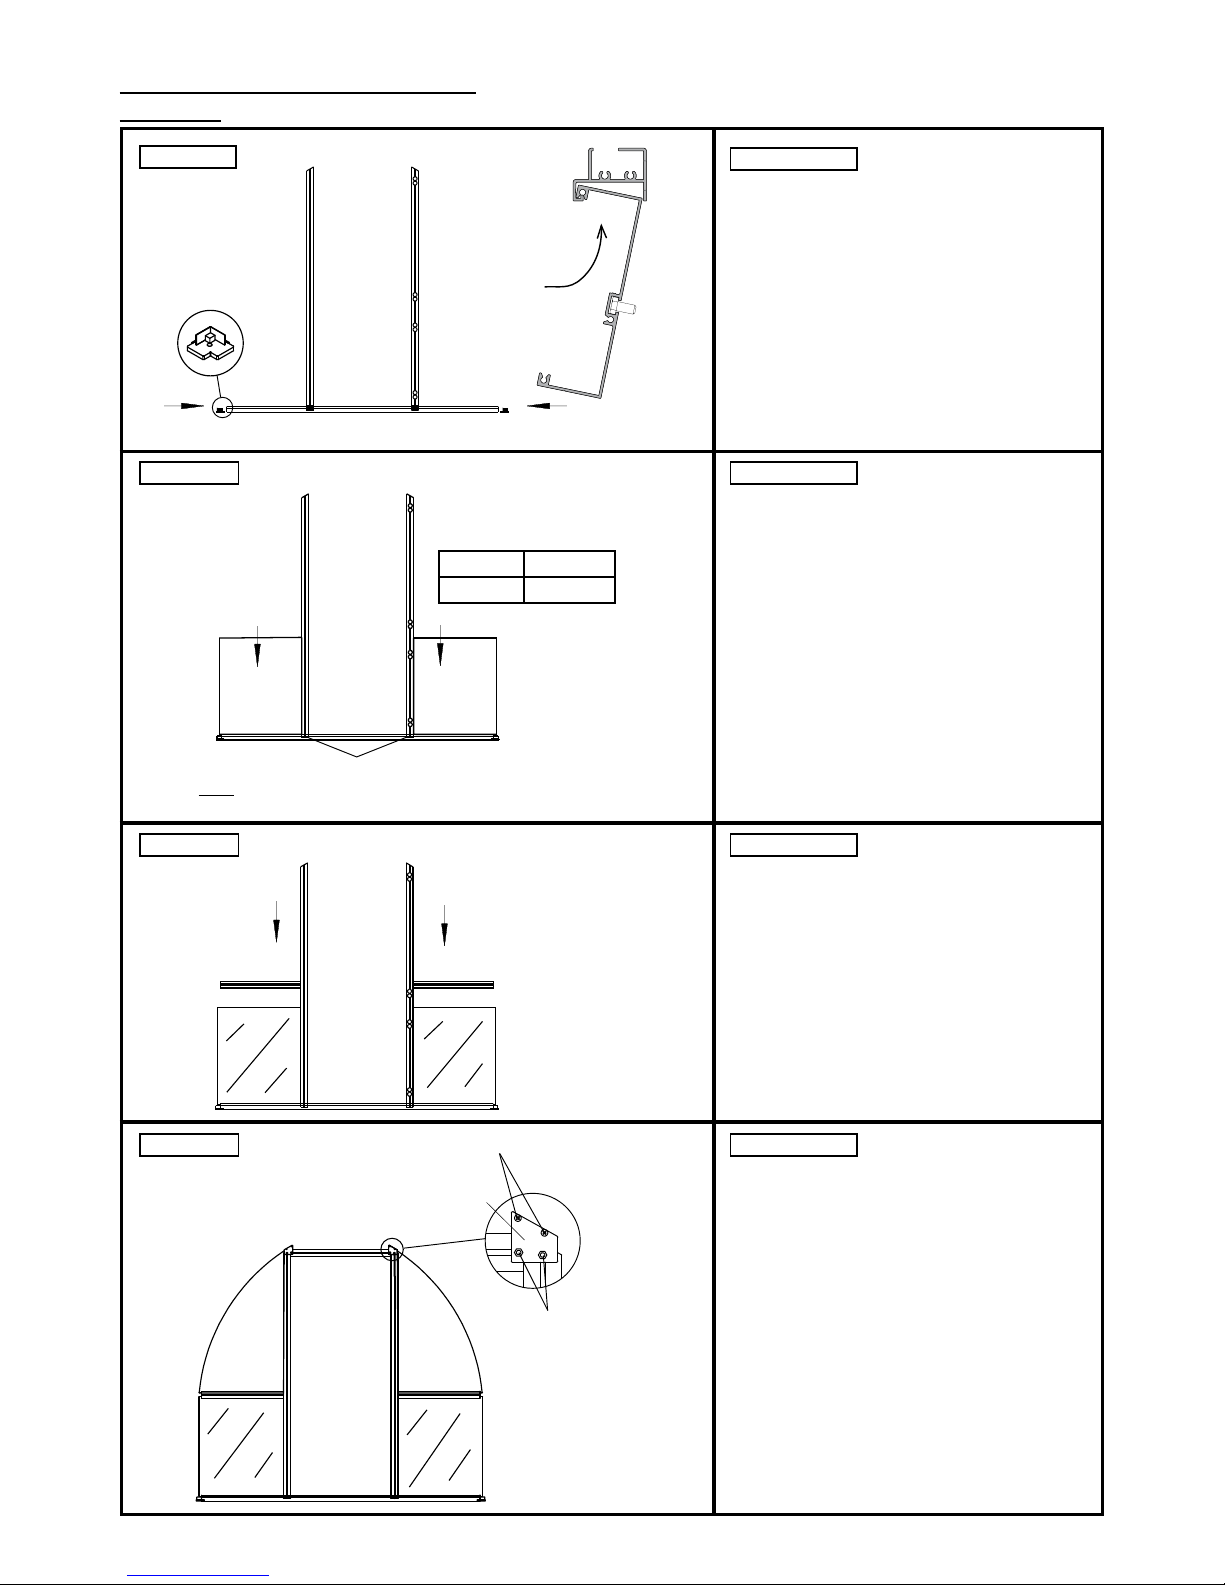
Question: Do I have a greenhouse and the greenhouse glazing and "seal"?
In principle: No.
But we recommend the horizontal transitions of the glazing to the prole (see sketch -->
dashed line ----) sealed with neutral cure, silicone transparent, so that as little water and can
therefore get a little dirt in the glas shots.
Advantage: The greenhouse looks to length of optically better. The tendency to formation of
algae just takes considerably in these areas.
Moisture/water can also occur
within the glass/hollow cham-
bers depending on the whea-
ther, since the plastic plates are
not "water-vapor-permeable
solid", ie moisture occurs in the
form of water vapor into the
plate. This is possible a purely
optical disadvantage, however,
can not be avoided.
The plates can thus take no
damage, even at freezing tem-
peratures.
Warning: Use only neutral cure silicone, otherwise it may lead to stress cracks in plastic de-
glazing. This is the most common silicone sealant.
It is in any hardware store or at HOKLAR-Therm for about 4 - 6 € available/
cartridge.
Cleaning and care:
The greenhouse with plenty of water such as car washing brush. In addition, using a little
detergent.
!!!Note: Important information for glazing!!!
overview pos. description number/length in mm
type II type III type IV
6.1 foundation frame prole/
gable
2
2199
2
2199
2
2199
6.2 foundation frame prole/
eaves
2
2033
2
3091
2
4149
V26 foundation frame corner bracket
40/40/2 x 105
4
105
4
105
4
105
V27 mounting bracket
(rung/foundation frame) 10
135
10
135
10
135
S12
S1
hexagonal screw M6 x 12 +
nut M6 20 20 20
overview pos. description number/length in mm
type III type IV type V
6.1 foundation frame prole/
gable
2
2835
2
2835
2
2835
6.2 oundation frame prole/
eaves
2
3091
2
4149
2
5207
5
Foundation frame for digging (optional)
Proles and accessoires for foundation frame
Riga S
:
Proles and accessoires for foundation frame
Riga
:(V26/V27/S12/S1 as above)
!!!Warning: Use only according to instructions under foundation. See below!!!
This is the easiest, safest and also foundation of a greenhouse.
The foundation frame is hooked force-t into the soil prole of the green-
house screwed into the corners with a corner angle (V26). (See page 6).
The foundation frame is assemble to coincide with the greenhouse
together.
Setting up the foundation frame
A small ditch, sod (about 10 - 12 cm deep), dug into the dimensions of the
foundation frame. Use in the corners as a paving stone according to the
other horizontally.
These are then the safe circulation and avoid "bagging" a possibly of the
greenhouse. The greenhouse and the foundation frame in this "gab" and set them
with earth ll.
Expedient is also the creation of garden slaps or stone pavement, so the
greenhouse at eg heavy rain is not covered by mud splashes is.
In addition, the work made easier around the greenhouse, such as mowing the
lawn.
item no 9999 0078
item no 9999 0267
item no 9999 0124 + 9999 0128
6
Note: The founda-
tion frame proles
are shorter than
soil proles!
Foundation of the greenhouse
We recommend that you use for the bolt in place anchor bolts. These are not included!
side rung/
door frame
mounting bracket
- offset - (V15)
bolt M6 x 12 (S12)
+ nut M6 (S1)
soil prole
The foundation frame proles separately in the soil
proles rotate and center align.
Note: The foundation frame proles are shorter than
soil proles!
To stabilisize the house,
the mounting bracket
(V27) using bolts M6 x 12
(S12) retracted bolted to
the foundation frame and
the side rungs or door
frames.
In the foundation frame proles in the corner of
one bolt M6 x 12 (S12) to move, corner brackets
(V26) and fasten with nut M6 (S1).
Assembly foundation frame
model foundation greenhouse
B1 L1 B2 L2
Riga S II 249 232 233 216
Riga S III 249 338 233 322
Riga S IV 249 443 233 427
Riga III 312 338 296 322
Riga IV 312 443 296 427
Riga V 312 533 296 533
7
Foundation plan Riga S/Riga
all dimensions in [cm]
Foundation of your greenhouse with a strip foundation
If you have not bought a foundation frame, the secure foundation by means fo strip
foundation. Then please create such a foundation in accordance with the specied
dimensions below.
You have set up your possibility to the greenhouse on low cur stones such as,
50 x 25 x 8 cm or better 50 x 30 x 10 cm.
Please note that the foundation is made evenly horizontally.
The greenhouse then please anchoring with the included mounting brackets (V15)
with the dowels (minimum)
Screws and ancors are not included.
exterior edge of the foundation
exterior edge of the greenhouse
upper edge of ground
frost-free ground
overview pos. description
number/length in mm
Riga S Riga
II III IV III IV V
2.1 soil prole/eaves 2
2072
2
3130
2
4188
2
3130
2
4188
2
5246
2.3 side rung - curved 2 4 6 4 6 8
3.2 cross bar/roof window 1
1020
1
1020
2
1020
1
1020
2
1020
4
1020
3.3 ridge prole 1
2137
1
3195
1
4253
1
3195
1
4253
1
5311
3.4 angle stabilization 4
2104
4
3162
4
4220
4
3162
4
4220
4
5278
overview pos. description
number/length in mm
Riga S Riga
II III IV III IV V
1.1 soil prole/gable 2
2238
2
2238
2
2238
2
2874
2
2874
2
2874
1.5.4 rand rung left - curved 2 2 2 2 2 2
1.5.6 rand rung right - curved 2 2 2 2 2 2
1.6 door frame left
with slant
2
1876
2
1876
2
1876
2
2059
2
2059
2
2059
1.7 door frame right
with slant and drilling
2
1876
2
1876
2
1876
2
2059
2
2059
2
2059
1.8 door frame above 2
758
2
758
2
758
2
758
2
758
2
758
1.8 cross bar
in the side door without
1
758
1
758
1
758
1
758
1
758
1
758
1.9 cross bar left and right 4
702
4
702
4
702
4
1020
4
1020
4
1020
8
Content main box - basic kit Riga S/Riga
Please check in the tables list the completeness of the components.
Proles for both gables:
Proles for eaves:
overview pos. description/
item number
num-
ber
RigaS
num-
ber
Riga
V9 corner soil prole 4 4
V5 connecting plate Ortgangprol/Türzarge 4 4
V10
connecting plate 90 x 35 mm
mounting
cross bar/rear 2 2
V11 endplate ridge/gutter 2 2
V4 connecting plate for cross bar/roof window
II = 2
III = 2
IV= 4
III = 2
IV = 4
V = 8
V12 corner
30/30/2/15 mm
soil prole
screw the corner from inside
4 4
S21 blind plug Ø10 mm rand rung -drilling cross bar 4 4
V14 hose section 760 mm lg. door threshold seal 1 1
V23 wedge seal 3 - 5 mm sealing the soil prole inside
See
table
below !
See
table
below!
S9 self-tapping screw pan head
4,2x13
door frame-soil prole/
cover plate/corner (V12) 38* 38*
S13 self-tapping screw pan head
4,8 x 45 gable 6 6
S5/
S1
hexagnal screw M6 x 16
+ nut screws for pulling
II = 40*
III =40*
IV=44*
III =40*
IV=44*
V=48*
V15 mounting bracket - offset
74 x 30 x 33 mm
for the attachement of the
greenhouse on foundation by
customer (not with foundation
frame)
10 10
S32 washer A6,4 door frames, roof and side
rungs 20 20
V = 24
V1 mounting corner bracket
inside
je
2x lks.
2x rts.
je
2x lks.
2x rts.
9
Accessories bag basic kit Riga S/Riga
item no 9999 0003
item no 9999 0028
item no 9999 0030
item no 9999 0075
item no 9999 0031
item no 9999 0072
item no 9999 0097
item no 9999 0181
item no 9999 0119
item no 9999 0144
item no 9999 0207
item no 9999 0183 + 9999 0128
item no 9999 0150
item no 9999 0173
item no 9999 00074
Riga S Riga
730 x 728 1048 x 728
10
ATTENTION! When using a foundation frame assemble in advance on this soil prole (see page S. 5, 6)
soil prole (pos.1.1)
door frame right (pos.1.7)
door frame left (pos.1.6)
corner soil prole (V9)
step 1
glazing
glazing
self-tapping screw pan head 4,2 x 13 (S9)
Note: Only after the screw mounting of the door -->
ability to align.
cross bar (pos.1.9) cross bar (pos.1.9)
view from inside
self-tapping screw pan head 4,2 x 13 (S9)
connecting plate (V5)
screw M6 x 16 (S5)
with nut M6 (S1)
glazing
door frame
above
(pos.1.8)
glazing
to step 1:
First, please slide the door frame
left (pos.1.6) and the door frame
(pos.1.7)
(prole with 8 drill holes, a 30° chamfer and
a black plastic glide)
up to the small holes in the middle
of the soil prole. The chamfer must
show this to the outside. Then at-
tach the corner bracket (V9) on the
soil prole.
step 2
Assembly procedure gable
to step 2:
Even now you need the small side
windows.
Dimensions are listed in the table.
With bar direction - vertical - in the
soil prole and sideways while in the
door frame.
step 3 to step 3:
Now the cross bar (pos. 1.9) is in-
serted from the top of the glazing.
step 4 to step 4:
Before the connecting plate (V5)
with the door frame above (pos.1.8)
screwed, slide in the vertical door
frames (pos.1.6/1.7) two hex screws
M6 x 16 (S5) and in the horizontal
door frame in M6 x 16 (S5) one.
view from inside