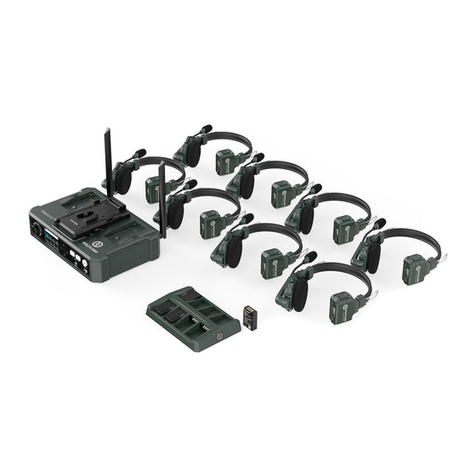
Hollyland Solidcom C1 Pro User manual

Hollyland Solidcom C1 Pro - Hub4S
User Manual
V1.0.0


EN-1
Thank you for purchasing Hollyland Solidcom C1 Pro full-duplex wireless noise-
cancelling intercom system.
The Solidcom C1 Pro - Hub4S is a full-duplex wireless noise-cancelling intercom
system engineered to provide clear audio and all-day wearing comfort in a truly
wireless design with no beltpack required. The system operates in the 1.9GHz band,
providing a reliable LOS range of up to 1,100ft (350m).
This User Manual will help you through the installation and use of the equipment.
Introduction

EN-2
Packing List
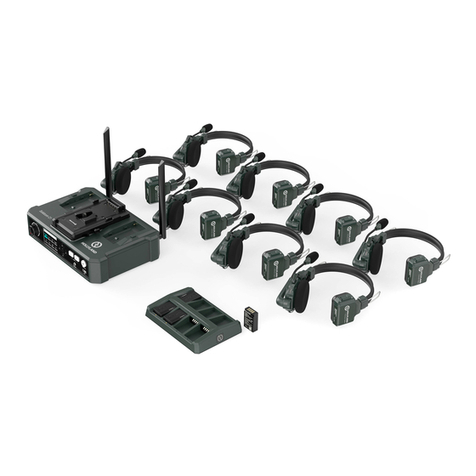
Solidcom C1 Pro - Hub4S Intercom Headset Package
Hub x 1
Remote Headset (With Blue Nameplate) x 4
0B10 Wired Headset (With Red Nameplate) x 1
8-Slot Charging Case x 1
Headset Batte x 8
Microphone Cushion x 5
12V/2A DC Adapter x 2
Over-ear Leather Cushion x 5
On-ear Foam Cushion x 5
High-Gain Antenna x 4
USB-A to USB-C Cable x 1
3-Pin XLR Male to 3-Pin XLR Female Cable x 1
Storage Case x 1
User Manual x 5
Warranty Card x 1
Note: The quantity of the items depends on the product conguration.
①
②
③
④
⑤
⑥
⑦
⑧
⑨
⑩
⑪
⑫
⑬
⑭
⑮

EN-3
Powering on the Hub
Installing the Hub Antennas
Quick Guide
• Connect the 12V/2A DC adapter to
the hub.
Note: The hub can also be powered on by NP-F batteries, V-mount batteries, or
G-mount batteries.
• Switch on the Hub.

EN-4
Pairing
The hub and remote headsets that come from the same system will pair with each
other automatically right out of the box. Manual pairing is only required when a new
headset needs to be added or when a headset or the hub needs to be replaced.
Connecting a Headset to the Hub Using a USB-C Cable
A USB-C cable is required for pairing. Connect the headset to the hub via the USB
interface on the hub and the USB-C interface on the headset. Then, the number
selection interface will automatically be displayed on the hub. Simply press the
arrow buttons to select a number and press the round Menu/Conrmation button to
complete number settings and pairing.
Setting Headset Numbers on the Hub
When repairing and numbering a headset, be sure to turn on all the headsets to
avoid selecting duplicate numbers. Otherwise, the other headsets may not be
connected.
In case of wrong numbering for the headset, simply connect it to the hub using a
USB cable and peorm pairing and numbering again.
Quick Guide

EN-5
Conguring the Hub on the Web Seer
Turn on the hub, connect it to a computer using a network cable via the RJ45
interface on the hub and the network port on the computer, configure the same
network segment for the computer and hub, open a browser on the computer, and
then enter the following addresses (Check the corresponding addresses through the
network menu on the hub):
Default IP address of a master hub: 192.168.218.10
Default IP address of a remote hub: 192.168.218.11
You can log in to the web seer (default password: 12345678) to upgrade the hub,
peorm headset grouping, and set headset states.
Quick Guide

EN-6
Parameters
Hub Wired Headset
Inteace
RJ45 inteace
Power inteace (DC inteace)
4-wire audio inteace (RJ45
socket)
USB inteace
2-wire audio inteace
PGM audio inteace
USB-C inteace
0B10 headset inteace
RF antenna inteace
USB-C inteace
Antenna External Built-in
Power Supply
DC power, NP-F batte,
V-mount batte, G-mount
batte
700mAh lithium polymer batte
Operation Time / About 10 hours
Charging Time / About 2.5 hours
Volume Adjustment Adjustment knob Adjustable in 7 gears
Power Consumption <4.5W <0.3W
Dimensions
(LxWxH):
259.9mmx180.5mmx65.5mm
(10.2”x7.1”x2.6”)
(LxWxH):
186.9mmx75.6mmx188.6mm
(7.4”x3”x7.4”)
Net Weight About 1300g (45.9oz) with the
antennas excluded
About 170g (6oz) with the batte
included
Transmission Range 1,100ft (350m) LOS
Frequency Band 1.9 GHz (DECT)
Wireless
Technology Adaptive Frequency Hopping
Modulation Mode GFSK
Wireless Power ≤ 21dBm (125.9mW)
Bandwidth 1.728MHz
RX Sensitivity <–90dBm

EN-7
Frequency
Response 150Hz–7kHz
Signal-to-Noise
Ratio >55dB
Distoion <1%
Input SPL >115dBSPL
Temperature Range
0℃ to 45℃ (working condition)
–10℃ to 60℃ (storage condition)
Note: The highest working temperature is 40℃ when the
adapter is used for the power supply.

EN-8
Do not place the product near or inside heating devices (including but not limited
to microwave ovens, induction cookers, electric ovens, electric heaters, pressure
cookers, water heaters, and gas stoves) to prevent the batte from overheating and
exploding.
Do not use non-original charging cases, cables, and batteries with the product. The
use of non-original accessories may cause electric shock, re, explosion, or other
dangers.
Safety Precautions

EN-9
If you encounter any problems in using the product or need any help, please contact
Hollyland Suppo Team via the following ways:
Statement
All copyrights belong to Shenzhen Hollyland Technology Co., Ltd. Without the
written approval of Shenzhen Hollyland Technology Co., Ltd., no organization or
individual may copy or reproduce pa or all of any written or illustrative content and
disseminate it in any form.
Trademark Statement
All the trademarks are owned by Shenzhen Hollyland Technology Co., Ltd.
Note:
Due to product version upgrades or other reasons, this User Manual will be updated
from time to time. Unless otherwise agreed, this document is provided as a guide for
use only. All representations, information, and recommendations in this document do
not constitute warranties of any kind, express, or implied.
Suppo

EN-10
Any changes or modifications not expressly approved by the party responsible
for compliance could void the user's authority to operate the device. This device
complies with Pa 15 of the FCC Rules.
Operations are subject to the following two conditions:
(1) This device may not cause harmful inteerence.
(2) This device must accept any interference received, including interference that
may cause undesired operations.
FCC Radiation Exposure Statement:
The device has been tested and complies with FCC SAR limits.
Note:
This device has been tested and found to comply with the limits for a Class B
digital device, pursuant to Part 15 of the FCC Rules. These limits are designed
to provide reasonable protection against harmful interference in a residential
installation. This device generates, uses, and can radiate radio frequency energy,
and if it is not installed and used in accordance with the instrustions, it may cause
harmful interference to radio communications. However, there is no guarantee
that inteerence will not occur in a paicular installation. If this device does cause
harmful interference to radio or television reception, which can be determined
by turning the device off and on, the user is encouraged to try to correct the
inteerence by one or more of the following measures:
- Reorient or relocate the receiving antenna.
- Increase the distance between the device and the receiver.
- Connect the device to an outlet on a circuit dierent from that to which the
receiver is connected.
- Consult the dealer or an experienced radio/TV technician for help.
FCC Requirement

FR-1
Nous vous remercions d’avoir acheté le système d’interphone sans l Solidcom C1
Pro full-duplex à annulation de bruit de Hollyland.
Le Solidcom C1 Pro - Hub4S est un système d’interphone sans fil full-duplex à
annulation de bruit conçu pour fournir un son clair et un confort de port tout au
long de la journée dans une conception véritablement sans l, ne nécessitant pas
de sac de ceinture. Le système fonctionne sur la bande de 1.9GHz, offrant une
portée able de 1,100 pieds (350 m).
Ce manuel d’utilisation vous aidera à installer et à utiliser l’équipement.
Introduction

FR-2
Contenu de l'emballage
Solidcom C1 Pro - Hub4S Ensemble de casques d’interphone
Hub x 1
Casque d’écoute à distance (avec plaque signalétique bleue) x 4
0B10 Casque laire (avec plaque signalétique rouge) x 1
Boîtier de charge à 8 emplacements x 1
Batterie du casque x 8
Coussinet pour microphone x 5
Adaptateur CC 12 V/2 A x 2
Coussinet en cuir pour casque x 5
Coussinet en mousse supra-auriculaire x 5
Antenne à gain élevé x 4
Câble USB-A vers USB-C x 1
Câble XLR mâle 3 broches vers XLR femelle 3 broches x 1
Étui de rangement x 1
Manuel d’utilisation x 5
Carte de garantie x 1
Remarque : la quantité d’articles dépend de la conguration du produit.
①
②
③
④
⑤
⑥
⑦
⑧
⑨
⑩
⑪
⑫
⑬
⑭
⑮

FR-3
Alimentation du hub
Installation des antennes du hub
Guide rapide
• Connectez l’adaptateur CC 12 V/2 A
au hub.
Remarque : Le hub peut également être alimenté par des batteries NP-F, des
batteries V-mount ou des batteries G-mount.
• Mettez le hub en marche.

FR-4
Jumelage
Le hub et les casques d’écoute à distance provenant du même système se
jumèleront automatiquement dès leur sortie de l’emballage. Le jumelage manuel
n’est nécessaire que lors du jumelage d’un nouveau casque, du remplacement d’un
casque ou du hub.
La connexion d’un casque au hub à l’aide d’un câble USB-C
Un câble USB-C est nécessaire pour le jumelage. Connectez le casque au hub à
l’aide de l’interface USB du hub et de l’interface USB-C du casque. Ensuite, l’interface
de sélection des numéros sera automatiquement affichée sur le hub. Il suffit
d’appuyer sur les boutons échés pour sélectionner un numéro et d’appuyer sur le
bouton rond de Menu/Conrmation pour terminer le paramétrage du numéro et le
jumelage.
Paramétrage des numéros de casque sur le hub
Lorsque vous réparez et numérotez un casque, veillez à allumer tous les casques
an d’éviter de sélectionner des numéros en double. Autrement, les autres casques
risquent de ne pas être connectés.
En cas de numérotation erronée du casque, il sut de le connecter au hub à l’aide
d’un câble USB et de procéder de nouveau au jumelage et à la numérotation.
Guide rapide

FR-5
Paramétrage du hub sur le serveur web
Mettez le hub en marche, connectez-le à un ordinateur en utilisant un câble
réseau à l’aide de l’interface RJ45 du hub et du port réseau de l’ordinateur,
paramétrez le même segment de réseau pour l’ordinateur et le hub, ouvrez un
navigateur sur l’ordinateur, puis entrez les adresses suivantes (vériez les adresses
correspondantes dans le menu réseau du hub) :
L’adresse IP par défaut d’un hub maître est : 192.168.218.10
L’adresse IP par défaut d’un hub esclave est : 192.168.218.11
Vous pouvez vous connecter au serveur web (mot de passe par défaut) : 12345678)
an de mettre à niveau le hub, eectuer le regroupement des casques et dénir les
états de ceux-ci
Guide rapide

FR-6
Paramètres
Hub Casque laire
Interface
Interface RJ45
Interface d’alimentation
(interface CC)
Interface audio à 4 ls
(prise RJ45)
Interface USB
Interface audio à 2 ls
Interface audio PGM
Interface USB-C
Interface pour casque 0B10
Interface d’antenne RF
Interface USB-C
Antenne Externe Intégré
Alimentation
électrique
Alimentation CC, batterie
NP-F, batterie V-mount,
batterie G-mount
Batterie lithium-polymère de
700mAh
Autonomie / Environ 10 heures
Temps de charge / Environ 2,5 heures
Réglage du volume Molette de réglage Réglable en 7 vitesses
Consommation
électrique <4,5 W <0,3 W
Dimensions
(L x L x H) :
259,9 mm x 180,5 mm x
65,5mm
(10,2 po x 7,1 po x 2,6 po)
(L x L x H) :
186,9 mm x 75,6 mm x 188,6 mm
(7,4 po x 3 po x 7,4 po)
Poids net Environ 1300 g (45,9 oz) sans
les antennes.
Environ 170 g (6 oz) avec la
batterie incluse
Plage de
transmission 1,100 pieds (350m) LOS
Bande de
fréquences 1,9 GHz (DECT)
Technologie sans l Saut de fréquence adaptatif
Mode de
modulation GFSK

FR-7
Alimentation sans
l ≤21 dBm (125,9 mW)
Bande passante 1,728MHz
Sensibilité RX <–90 dBm
Réponse en
fréquence 150 Hz–7k Hz
Rapport signal-
bruit >55dB
Distorsion <1%
Entrée SPL >115dBSPL
Plage de
température
De 0 ℃ à 45 ℃ ( en état de fonctionnement)
De -10 ℃ à 60 ℃ (dans des conditions de rangement)
Remarque : la température maximale de fonctionnement est
de 40℃ lorsque l’adaptateur est utilisé pour l’alimentation
électrique.

FR-8
Ne placez pas le produit à proximité ou à l’intérieur d’appareils chauffants (y
compris, mais sans s’y limiter, les fours à micro-ondes, les cuisinières à induction,
les fours électriques, les chauages électriques, les cocottes-minute, les chaue-
eau et les cuisinières à gaz) pour éviter que la batterie ne surchaue et n’explose.
N’utilisez pas de boîtiers de charge, de câbles et de batteries non originaux avec
le produit. L’utilisation d’accessoires non originaux peut entraîner des décharges
électriques, des incendies, des explosions ou d’autres dangers.
Mesures de sécurité
Other manuals for Solidcom C1 Pro
5
Table of contents
Languages:
Other Hollyland Intercom System manuals

Hollyland
Hollyland Solidcom C1 HUB8S User manual

Hollyland
Hollyland 0108B User manual

Hollyland
Hollyland SOLIDCOM C1 User manual

Hollyland
Hollyland Solidcom C1 Pro User manual
Hollyland
Hollyland MARS T1000 Quick start guide

Hollyland
Hollyland MARS T1000 User manual

Hollyland
Hollyland SOLIDCOM C1 User manual

Hollyland
Hollyland SOLIDCOM M1 User manual
Hollyland
Hollyland MARS T1000 Installation guide

Hollyland
Hollyland MARS T1000 User manual