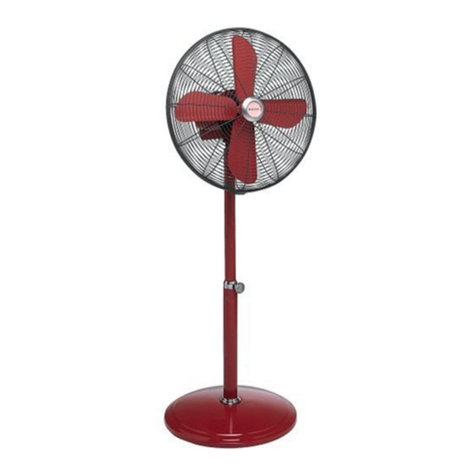
OPERATINGINSTRUCTIONS:
Step1. Setfanbaseonadry,levelsurface.
Step2. Plugcordintoanystandard120voltACoutlet.Pleasemakesure
theSpeedControlKnobisintheOffposition.Thisknobislocated
onthetopoftheFanMotorHousing.
Step3. Thespeedisadjustedbyturningthecontrolknobtothedesired
setting,Off-High-Med-Low.
Step4. TheOscillationControlBarislocatedonthetopoftheFanMotor
Housing.ToStartOscillation,PushBarDown.ToStopOscillation,
PullBarUp.
SpecialNote: Thisfancanbeusedina“straight-up”(Total-Flex) position,
asawholeroomaircirculator(SeeAdjustmentInstructions).
ADJUSTMENTINSTRUCTIONS:
Height Adjustment:
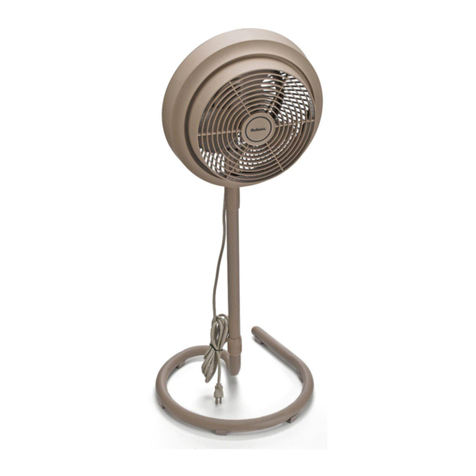
Thisfanisequippedwithtwopoleswhichallowyoutoadjusttheheightof
thefanforthreeheightsettings.
•SmallPoleOnly30”
•LargerPoleOnly35”
•BothPolesfor50”
Fan Head Tilt Adjustment:
Thisfanisequippedwithamulti-anglefanheadwhichincludesTotal-
Flex™forWhole-Roomaircirculation.Followthestepsbelowtoproperly
adjusttheTiltangleofyourfan.Note:TheOscillationfeaturemaybeused
inallpositions,includingTotalFlex.
Step1. Tochangethetiltingangleofthefanhead,simplyloosentheTilt
AdjustmentKnob(seefigure#3)
Step2. Movethefanheadtothedesiredangle,andfirmlytightenthe
knobtolockinplace.
Step3. Thisfancanbetiltedtoastraight-upposition,offeringTotal-Flex™
Oscillation.
Note:Whenevertiltingthefanhead,besuretosecurelytighteninplace.
CLEANING/MAINTENANCEINSTRUCTIONS:
FollowtheseinstructionstocorrectlyandsafelycareforyourHolmes
Productsstandfan.Pleaseremember:
•Alwaysunplugthefanbeforecleaningordisassembling.
•Donotallowwatertodriporenterthefanhousing.
•Besuretouseasoftclothmoistenedwithmildsoapsolution.
• Do notuse anyof thefollowing asa cleaner:gasoline, thinner,benzine.
Fan Blade Cleaning:
(Seeinstructionsforfanheadassemblyonpage2,figure#3)
STEP1:Toaccessthefanblade,removethefrontgrillandbladecap.
STEP2:Cleanthefanblade, frontandreargrillswithasoft,moistcloth.
STEP 3: Replace blade, tightenblade cap,and securelyfasten thefront grill.
Fan Head, Base, and Pole Cleaning:
Usingasoft,moistcloth,withorwithoutamild,soapsolution,carefully
cleanthefanbase,pole,andhead.Pleaseusecautionaroundthemotor
housingarea.Donotallowthemotororotherelectricalcomponentstobe
exposedtowater.
FANSTORAGE:
Yourfancanbestoredintheoff-seasoneitherpartiallydisassembledor
assembled.Itisimportanttokeepitinasafe,drylocation.
•Ifstoreddisassembled,werecommendusingtheoriginal(orappropri-
atelysized)box.
•Ifstoredassembledorpartiallyassembled,remembertoprotectthe
fanheadfromdust.
TheexclusiveHolmesProductsFanBonnetisavailabletoprotectyourfan.
(Seeattachedmailorderformforspecialofferorcall1-800-5-HOLMES)
FANSERVICEINSTRUCTIONS:
1.DoNOTattempttorepairoradjustanyelectricalormechanicalfunc-
tionsonthisunit.Doingsowillvoidthewarranty.
2.Ifyouhaveanyquestionsregardingthisunit’soperationorbelieveany
repairisnecessary,pleasecall1-800-5HOLMEStospeakwithaCustomer
ServiceRepresentative.
3.Ifyouneedtoexchangetheunit,pleasereturnitinitsoriginalcarton,
withasalesreceipt,tothestorewhereyoupurchasedit.Ifyouarereturn-
ingtheunitmorethan30daysafterthedateofpurchase,pleaseseethe
enclosedwarranty.
4.Ifyouhaveanyotherquestionsorcomments,feelfreetowriteusat:
The Holmes Group
P.O. Box 769
Milford, MA 01757-0769
ASSEMBLYINSTRUCTIONS:
Carefullyunpackcontentsofcarton.
Base Assembly:
Youwillneedthebasecover,weightedinsert,1pole(eithercanbeused,
theyareinterchangeable)andbasenut.
STEP1. Insert1polethroughthebasecoverandtwistpoleclockwiseto
lockinposition.
Becarefulto
alignthe
cutaway/
groovesonthe
threadedjoint
(maleend),
(seefigure#1)
withthetwo
protruding
raisedpieces
insidethehol-
lowendofthe
basecover,
(seefigure #1).
STEP2. Nowturnthebasecoverupsidedown(polefacingfloor)and
placetheweightedinsertintothebasecover.Thepolethreadswill
beexposedastheyprotrudethroughthebaseinsert.
Note:Holdthepole,basecoverandweightedinsertinonehandwhile
tighteningthebasenutwiththeotherhand.
STEP3. Now,placethebasenutonthethreadedsectionandhandtighten
basenuttosecurelyfastenthepoletothebase.
Note:Donotuseatooltotightenthebasenut.
Pole Assembly:
Youwillneedthesecondpole.
Note:Thepolesareinterchangeable.
Insertthepolewiththethreaded
joint(maleend),(seefigure#2)
intothehollowendofthesecond
pole(femaleend),(seefigure#2)
untilbothpolesmeet.Becarefulto
alignthecutaway/groovesonthe
threadedjoint(maleend)withthe
twoprotrudingpiecesinsidethehol-
lowendofthesecondpole(female
end).
Now,slowlyturnthepolewiththe
threadedjointclockwisetolockit
securelyinplace(seefigure#2).
Fan Head Assembly:
Youarenowreadytoassemblethefanhead(SeeFigure#3)
STEP1. Positionthereargrilloverthemotorshaft,makingcertainthe2
notchesatthetopandbottomofthereargrillfitoverthe2
prongsonthemotorhousing.Pleasemakesurethereargrillfits
securelyagainstthemotorhousing.
STEP2. Fastenthereargrillinplaceusingthereargrillmountingnut.
Turnthenutclockwiseandtightenfirmly.
STEP3. Slidethefanblade,withthehollowedinteriorofthebladefacing
towardsthereargrillfirmlyontothemotorshaft.Makesurethe
motorshaftpinlinesupwiththerecessedgrooveinthebackof
thefanblade. Also,besuretheshaftprotrudesfromthefrontof
theblade.
STEP4. Securefanbladeontothemotorshaftbyturningthebladecap
counter-clockwise(makesurethebladeisfirmlyinposition.)
STEP5. Installthefrontgrillbysnappingthecircularfrontgrillcenter
logoplateinplace.
STEP6. Centerthefrontgrill,aligningtheHolmeslogosoitishorizontal
andparalleltothefloor,placeontothereargrill,andsnapin
place.Securebytighteningthegrillscrewatthebottomofthe
reargrill.
Final Assembly: Insertthefanheadneckjoint(seefigure#3)into
thehollowendofthetoppoleandslowlyturntheneckjointtolockin
place.Becarefultoalignthecutaway/groovesontheneckjointwiththe
twoprotrudingraisedpiecesinsidethehollowendofthepole.Lastly,
insertthetiltadjustmentknobintotheneckjointandtightenuntilitis
securelyinplace.
DETACH FROM INSTRUCTIONS AND MAIL IN THIS FORM
Fill out form on reverse side or call
1-800-5-HOLMES
to place your order today.
EXTEND THE LIFE OF
YOUR FAN
For short term or seasonal
storage of your Holmes fan
FAN
BONNET
$9.99
PLUS SHIPPING
AND HANDLING
Page2 Page3
A. LOGOPLATE(SNAP ON)
B. FRONTGRILL
C. BLADECAP
D. FANBLADE
E. REARGRILLMOUNTING
NUT
F. PLASTIC BAND
G. GRILLSCREW
H. REARGRILL
I. MOTORSHAFT
J. GRILLMOUNT
K. SPEEDCONTROLKNOB
L. OSCILLATIONBAR
M.MOTOR HOUSING
N. TILTJOINT
O. TILTADJUSTMENTKNOB
P. NECKJOINT
Q. HOLLOWEND(FEMALE)
R. THREADEDJOINT(MALE)
S. EXTENSIONPOLES
T. BASECOVER
U. WEIGHTEDINSERT
V. BASENUT
A
N
BDE
O
P
Q
RS
T
FG
H
IM
JKL
(fig3)
U
V
(fig1) POLE
THREADEDJOINT
(maleend)
HOLLOWENDOF
BASECOVER
ONTOP
BASECOVER
WEIGHTEDINSERT
BASENUT
CUTAWAY/
GROOVES ▼
CUTAWAY/GROOVES
HOLLOWEND
(femaleend)
THREADEDJOINT
(maleend)
(fig2)
C
