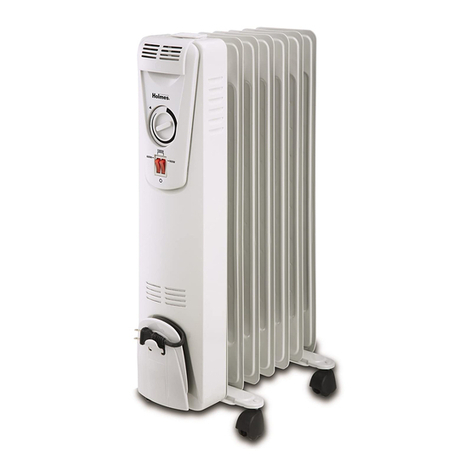
WALLMOUNTINGINSTRUCTIONS:
CAUTION:PLEASEMAKESURETHEHEATERISUNPLUGGEDANDCOOLED
DOWNTOROOMTEMPERATUREBEFOREWALLMOUNTINGTHISUNIT.
Thisunithastheuniquefeatureofusingthebaseasthewallmount
bracket.(Wallmountinghardwareisnotsupplied.)RefertoFigure2.To
installtheheateronthewall,followtheseeasysteps:
Note:Ifyourunithascastersattached,you’llneedtoremovethem.Ifthe
baseisstillattachedtothebottomoftheheater,you’llneedtoremoveit
(followstep5inassemblyinstructions).
1. Selectalocationonthewallwhereyouwouldliketohavethe
heatermounted.
2. Usethebaseasatemplateforholelocations
3. Useappropriatehardwarefordifferentmountingsurfaces(seebelow).
Selectedhardwaremustbeabletosupportaminimumof
twenty-poundweight.
4. Whensecuringthebase/wallmounttothewall,keepthelocktab
toyourleft.
5. Oncethebase/wallmountisinplace,alignthemountingtabsonthe
backoftheheater withtheholesinthebase/wallmountandslidethe
heatertotherightuntilitstopsandissecure.
6. Toremovetheheater,simplyslideittotheleft.
NOTE:ThisunitisnottobemountedinwaysotherthanshowninFigure2.
Therearemanywaystoattachyourheatertoverticalwallsifdesired.
Please,usetheapplicablesectionofthismanualtosafelyinstall
yourheater.
Forwoodwalls
You’llneeda1/8"drillbitandtwo#10-12x11⁄2"screws
1. Usethebaseoftheheaterasatemplatetooutlinetheholelocation
2. Using1/8"drillbit,drill11⁄4"deeppilotholes
3. Protrudethescrewsthroughthetwoouterholesinthebaseandsecure
thebasetothewall
4. Slidetheheaterontothebase
Fordrywallswithstuds
Werecommendthatyouusewoodenstudsbehindthedrywallforbetter
supportandperformanceofyourheater.Rememberthatinmost
Americanhomes,studsbehindthewallarespaced16"apartandthe
drywallis1⁄2"-5/8"thick.Notethatthedistancebetweenthetwofarthest
holesofthebaseis16"aswell.
1. Findstudsbehindthedrywall.
2. Usethebaseoftheheaterasatemplatetocentertheholesonstuds
3. Using1/8"drillbit,drill13⁄4"deeppilotholes
4. Protrude#10-12x2"screwsthroughthetwoouterholesinthebase
andscrewthemintopre-drilledholes
5. Slidetheheaterontothebase
Fordrywallswithoutstudsandothersolidwalls
1. Usethebaseoftheheaterasatemplatetooutlinetheholelocation
2. Using1⁄4"drillbit,drillpilotholesthroughthewall
3. Insert1⁄4"plasticanchorsintotheholes
4. Protrude#10-12x11/2'’screwsthroughthetwoouterholesinthe
baseandscrewthemintotheanchors
Slidetheheaterontothebase
OPERATINGINSTRUCTIONS:
1. Unlesswallmounted,placeheateronafirmlevelfloorsurface.
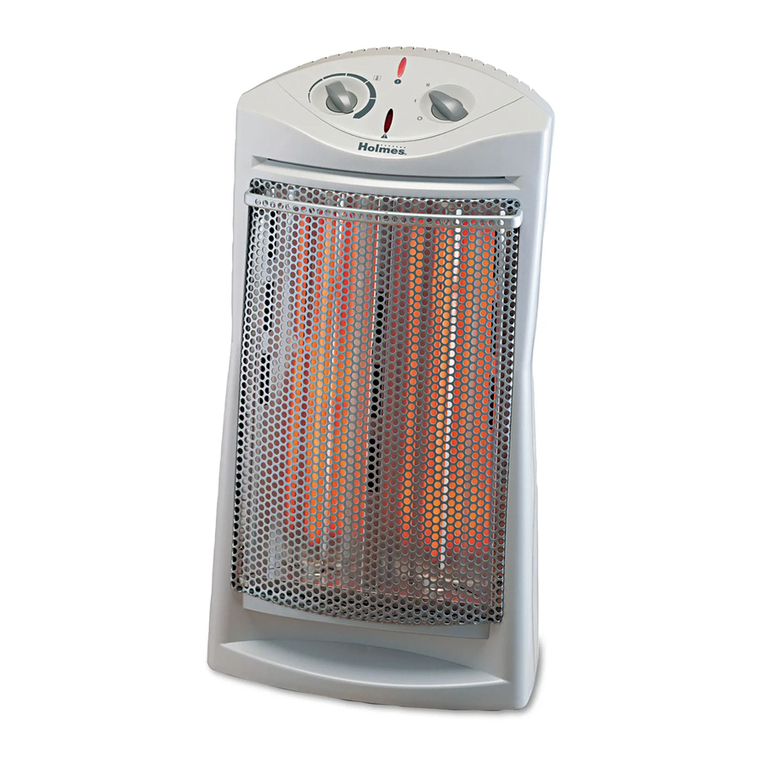
2. Forheateroperation,pleasesettheThermostatallthewaytoHI.
(SeeFigure1)
3. TurntheSelectorControltodesiredheatsetting
(LOfor750WorHIfor1500W).
4. ThePowerLightwillremainlitduringoperation
Note:Thisunitdoesnothaveafan.Itwarmstheairbynatural
convection.
THERMOSTATINSTRUCTIONS:
1. YouneedtosetthermostatonHItostartheater(SeeFigure1).
Allowheatertooperateandwarmuptheroom.
2. Whenthedesiredtemperature/comfortlevelisreached,lowerthe
thermostatsettinguntiltheheaterstopsoperating.
3. Thecontrolwillnowautomaticallymaintainthepre-settemperature
levelbyturningtheheaterONandOFF. TheTemperatureRange
Displaycanbeusedasguidance,butwillnotprovideexact
measurement.
Note: ItisnormalfortheheatertocycleONandOFFasitmaintainsthe
presettemperature. Topreventtheunitfromcycling,youneedtoraise
thethermostatsetting.
Note: TheLEDDisplayshowsapproximatetemperaturesettings.
ILLUSTRATIONS
PLEASEREADANDSAVE THESE
IMPORTANT SAFEGUARDS
Whenusingelectricalappliances,basicprecautionsshould
alwaysbetakentoreducetheriskoffire,electricshock,
andinjury topersons,includingthefollowing:
1) Readallinstructionsbeforeusingtheappliance.
2) Toavoidfireorshockhazard,plugtheappliancedirectlyintoa
120VACelectricaloutlet.
3) Theheaterishotwheninuse.Toavoidburns,DONOTletbareskin
touchhotsurfaces. Ifprovided,usehandleswhenmovingthis
heater. Keepcombustiblematerials,suchasfurniture,pillows,bed-
ding,papers,clothes,andcurtainsatleast3ft(0.9m)fromthe
frontoftheheaterandkeepthemawayfromthesidesandrear.
4) DONOTruncordundercarpeting.DONOTcovercordwiththrow
rugs,runners,orthelike. Arrangecordawayfromtrafficareaand
whereitwillnotbetrippedover.
5) Thisheaterisnotintendedforuseinbathrooms,laundryareasand
similarindoorlocations. NEVERlocateheaterwhereitmayfallinto
abathtuborotherwatercontainer.
6) Thisunitiswallmountable,butDONOTmountheateronceilings.
7) Extremecautionisnecessarywhenanyheaterisusedby,ornear
childrenorinvalids,andwhenevertheheaterisleftoperating
andunattended.
8) Alwaysunplugtheheaterwhennotinuse.
9) Whenunplugging,besuretopullbytheplugandnotthecord.
10) DONOTinsertorallowforeignobjectstoenteranyventilationor
exhaustopeningasthismaycauseanelectricshockorfire,or
damagetheheater.
11) DONOToperateheaterwithadamagedcordorplug,orafterthe
heatermalfunctions,hasbeendamagedinanymanner. Return
appliancetomanufacturerforexamination,electricalormechanical
adjustment,orrepair.
12) Aheaterhashotandarcingorsparkingpartsinside.DONOTuse
itinareaswheregasoline,paint,orflammableliquidsareused
orstored.
13) Useapplianceonlyforintendedhouseholduseasdescribedinthis
manual. Anyotherusenotrecommendedbythemanufacturer
maycausefire,electricshock,orinjurytopersons. Theuseof
attachmentsnotrecommendedorsoldbyTheHolmesGroupmay
causehazards.
14) DONOTuseoutdoors.
15) Topreventapossiblefire,DONOTblockairintakesorexhaustin
anymanner.DONOTuseonsoftsurfaces,likeabed,where
openingsmaybecomeblocked.
16) Todisconnectheater,turncontrolstoOFF,thenremoveplug
fromoutlet.
17) Avoidtheuseofanextensioncordbecausetheextensioncordmay
overheatandcauseariskoffire. However,ifyouhavetousean
extensioncord,thecordshallbeNo.14AWGminimumsizeand
ratednotlessthan1875watts.
18) Iftheheaterwillnotoperate,seespecificinstructionsonAutoSafety
Shut-off.
19) DONOTattempttorepairoradjustanyelectricalormechanicalfunc-
tionsonthisunit. Doingsowillvoidyourwarranty. Theinsideof
theunitcontainsnouserserviceableparts. Allservicingshouldbe
performedbyqualifiedpersonnelonly.
ThankyouforchoosingaHolmesheater.Toensurethebest
performancefromyourheater,pleasereadandsavethe
followinginstructions.
PLEASEREADANDSAVE THESE
IMPORTANT INSTRUCTIONS
AUTOSAFETYSHUT-OFFWITHINSTANTTIP-OVERPROTECTION
:
Thisheaterisequipped withapatented, technologically-advancedsafetysys-
temthatrequiresthe usertoreset theheaterif thereisapotentialoverheat
situation. Whenapotentialoverheat temperatureisreached, thesystem
willautomaticallyshutthe heateroff. Itcan onlyresumeoperation when
theuserresetsthe unit.
ToResettheHeater:
1.TurntheSelector Controltothe OFFpositionand thermostattoHI
2.Unplugtheheater andwait10 minutesforthe unittocooldown
3.Afterthe10 minutes,plugthe unitinagain andoperatenormally.
Tip-OverShutOff:
Whentheunitis accidentallyknockedover, itwillinstantly shutoff. To
reset,simplyplacethe heaterinan uprightposition.
PRE-OPERATINGINSTRUCTIONS:
1. Carefullyremoveyourheaterfromthebox.(pleasesavethecarton
foroff-seasonstorage).
2. MakesuretheunitisintheOFFpositionbeforepluggingtheheater
intotheoutlet.
3. Placeheateronfirmlevelsurfaceafterattachingbase(seebelowfor
assembly)
4. Avoidoverloadingyourcircuitbynotusingotherhighwattage
appliancesinthesameoutlet. At1500Watts,thisunitdraws
12.5Amps.
FORFLOORORWALLMOUNTUSEONLY
ASSEMBLYINSTRUCTIONS:
Thereare4castersand1baseprovidedwithinthepackagingthatyouwill
needtoassembletheheater.
Note: Castersarenotnecessaryfortheunittorunproperly.Ifyouwishto
installthebasewithoutcastersskiptostep3.
1. Carefullyremovethebaseand4castersfromthebox.
2. Turnthebaseupsidedownandpushcastershaftsintothe4
correspondingholesonendsofthebase.
3. Carefullyremovetheheaterfromtheboxandturnitupsidedown
withgrillfacingyou.Thecontrolpanelwillbeonyourleft.
4. Placethebase(withthetabontheleft)onwhatnowisthetopofthe
heaterdirectlyontothecorrespondinglocatorsandslidethebaseto
theleft.Thiswillsecuretheunitandthebasetogether.
5. Toremovetheheaterfromthebase,turntheheaterupsidedown
(withthegrillfacingyou),andslidethebasetotherightandliftitup.
Page2 Page3
FIGURE 1
FIGURE 2
SELECTOR CONTROL
0=OFF
II =HI(1500Watts)
I=LO(750Watts)
THERMOSTAT
