HOLMS Dustbuster User manual

Original language: Swedish © HOLMS INDUSTRI AB, ALL RIGHTS RESERVED 160429. English
Operating instructions
Box 924 SE-591 29 Motala Sweden +46 141 22 41 00 ¬+46 141 22 41 90
Applicable from machine no.: 20916
Pick-up sweeper
Holms Dustbuster


Holms Dustbuster
© HOLMS INDUSTRI AB, ALL RIGHTS RESERVED 160429. 3
Warning labels..............................................................4
Safety...........................................................................7
Product data.................................................................9
Transport and storage................................................10
Transporting the tool.........................................10
Storage .............................................................10
Product Description....................................................11
Operating instructions ................................................12
Adjusting the height and tilt of the machine,
sweeper with one support wheel.......................13
Emptying the refuse collector............................13
Disconnection from carrier................................13
Sprinkler............................................................13
Side brush (accessory) .....................................14
Maintenance...............................................................15
After operation ..................................................15
Replacing the brush..........................................15
Other service.....................................................18
Index...........................................................................19
Contents

Holms Dustbuster
4© HOLMS INDUSTRI AB, ALL RIGHTS RESERVED 160429.
Warning labels
There are several specific warning labels on this product; see the descriptions below. Make sure that
you understand the implications of these labels before using the product.
Clean/replace warning labels if they are illegible or are missing. Contact you Holms dealer if you
require new labels.
Risk of crushing - mind your hands and do not come too close to the machine (warning label
1530052)
Do not enter this area whilst the machine is in
operation. Mind your hands and keep them away
from this area whilst the tool is in use.
Keep a safe distance away from the machine
whilst it is in operation. Not following this rule
may lead to serious personal injury or, in a worst
case scenario, death.
Risk of crushing - do not come too close to the machine (warning label 1530053)
Keep a safe distance away from the machine
whilst it is in operation. Not following this rule
may lead to serious personal injury or, in a worst
case scenario, death.

Holms Dustbuster
© HOLMS INDUSTRI AB, ALL RIGHTS RESERVED 160429. 5
Always read instructions and safety regulations before use (warning label 1530054)
Do not use the tool before you have thoroughly
studied all instructions and safety regulations,
and are sure you have understood them. If there
is something you do not understand, contact your
Holms dealer. Misinterpretations may result in
serious personal injury or, in a worst case
scenario, death.
Risk of crushing, beware of flying objects - mind your hands and do not come too close to the
machine (warning label 1530055)
Keep a safe distance from the tool whilst it is
being used and beware of flying objects. Not
following this rule may lead to serious personal
injury or, in a worst case scenario, death.
Use the marked loops when transporting the tool (warning label 1530056)
When transporting the tool, use the marked loops
to secure the tool during transit.

Holms Dustbuster
6© HOLMS INDUSTRI AB, ALL RIGHTS RESERVED 160429.
Attach lifting devices at the marked locations when lifing the tool (warning label 1530057)
This label shows where the lifting devices are to
be attached. Make sure that the lifting devices are
attached so that the tool is lifted horizontally (in
horizontal position, no inclination). Use
approved lifting devices only.
Risk of crushing - mind your hands (warning label 1530060)
Mind your hands and keep them away from this
area whilst the tool is in use.

Holms Dustbuster
© HOLMS INDUSTRI AB, ALL RIGHTS RESERVED 160429. 7
NB
READ THIS DOCUMENT CAREFULLY BEFORE USING THE EQUIPMENT.
Important safety aspects to take into consideration
• Make sure that the tractor/loader can carry the equivalent tool type and weight.
• Make sure that for this sweeper the carrier has a suitable hydraulic oil flow.
• Make sure that no unauthorised persons are loitering in the machine’s working area when working
with the machine or carrying out servicing.
• Always use the dust covers for the quick-couplings when the machine is disconnected, to prevent
dirt getting into the hydraulic system.
Safety
This instruction manual is intended to be used as a guide for the correct use and maintenance of the
machine. Study the manual carefully before starting and operating the machine and before any
preventive maintenance is carried out. A lot of time has been spent on designing and manufacturing
the machine so that it will be as efficient and safe as possible, all of which will be of little use if you
do not read, understand and follow the instructions. Familiarise yourself with the product and all the
instructions, and keep the instruction manual safe so that it is always readily at hand when using the
machine.
NB
THIS MANUAL HAS BEEN PREPARED FOR ALL OUR MARKETS AND MAY THEREFORE INCLUDE DIFFERENT
EQUIPMENT FOR SPECIFIC MARKETS. PLEASE IGNORE THE SECTIONS THAT DO NOT APPLY TO YOUR
MACHINE.
We continuously strive to improve our products and therefore reserve the right to change design
specifications and implement improvements whenever we consider this necessary; however, such
improvements will not be made to products that have already been delivered or put to work. We also
reserve the right to change data and equipment without prior notice, as well as instructions for
maintenance and other service procedures.
The operator is responsible for ensuring that:
Please pay special attention to the warning symbols.
Make sure you tighten the screw joint reinforcement.
The machine is not used or handled incorrectly.
That any warning labels on the machine are legible.
Unauthorised persons do not use the machine or remain within the machine’s
working area during its operation or maintenance.

Holms Dustbuster
8© HOLMS INDUSTRI AB, ALL RIGHTS RESERVED 160429.
NB
WESTRONGLY ADVISE AGAINST ANY MODIFICATIONS, CHANGES OR CONVERSIONS THAT HAVE NOT BEEN
APPROVED BY HOLMS. WEALSO WARN AGAINST USING SPARE PARTS THAT HAVE NOT BEEN APPROVED
BY HOLMS. DAMAGE OR FAULTS THAT COULD HAVE BEEN CAUSED BY NON-APPROVED SPARE PARTS OR
NON-APPROVED MODIFICATIONS ARE NOT COVERED BY HOLMS’ LIMITED WARRANTY – SEE APPLICABLE
WARRANTY CONDITIONS. HOLMS WILL NOT PROVIDE COMPENSATION FOR ANY PERSONAL INJURY OR
MATERIAL DAMAGE RESULTING FROM THE USE OF NON-APPROVED SPARE PARTS OR MODIFICATIONS.
When ordering spare parts, or otherwise contacting Holms or your local dealer, always specify the
machine type and its serial number. (Specified on the product’s machine plate.)
The carrier is suitable for use with the machine (hydraulic oil flow, stability,
etc.).

Holms Dustbuster
© HOLMS INDUSTRI AB, ALL RIGHTS RESERVED 160429. 9
Product data
Working width (m) 2.5
Max. width (m) 2.82
Max. height without hook (m) 0.8
Length (m) 1.45
Water tank volume (litres) 270
Effective sweeping volume (approx. litres) 290
Weight without side brush (kg) 345
Additional weight with side brush (kg) 55
Max. oil flow (litres/min) 80
Centre of gravity, dimension A (without side brush) (mm) 620
Centre of gravity, dimension B (without side brush) (mm) 245
Additional weight with dust kit 30
1.Centre of gravity

Holms Dustbuster
10 © HOLMS INDUSTRI AB, ALL RIGHTS RESERVED 160429.
Transport and storage
Transporting the tool
When loading and unloading, lift the tool at all three
marked loops.
Storage
When storing, remember to drain the spray system.
Make sure that the machine is lubricated; there are five
lubrication points. See figure 16 and figure 17 on
page 19.
Use approved lifting devices only.
When transporting the tool, use the marked loops
to secure the tool during transit.

Holms Dustbuster
© HOLMS INDUSTRI AB, ALL RIGHTS RESERVED 160429. 11
Product description
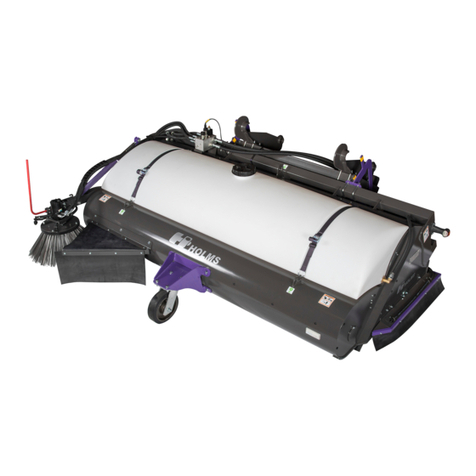
Holms Dustbuster is a front mounted pick-up sweeper,
designed to tackle dust. The roller is driven by a direct-
acting hydraulic motor, which is intended for a flow of
hydraulic oil of between 40-80 litres/min.
The suspension of the roller brush ensures a constant and
uniformly distributed contact pressure to the surface.
This minimises brush wear and contact against inclines
and uneven surfaces.
In the standard version, Holms Dustbuster is fitted with a
water tank and an electric water pump. The machine’s
attachment hooks are secured with screws, whichenables
lateral displacement and simplifies switching between
different hook types.
2.Holms Dustbuster

Holms Dustbuster
12 © HOLMS INDUSTRI AB, ALL RIGHTS RESERVED 160429.

Holms Dustbuster
© HOLMS INDUSTRI AB, ALL RIGHTS RESERVED 160429. 13
Operating instructions
Connection to carrier
1. Connect the sweeper to the carrier by tilting the
machine attachment forwards, coupling the hook
section, lifting and tilting back. The machine must
then be locked. See Instruction Manual for the carrier
in question.
2. Connect the power hoses' quick couplings to the third
function's hydraulic terminal or to the hydraulic
motor circuit on the carrier.
3. Connect the electric cable on the water pump to the
carrier. The socket must be rated for at least 10
Ampere.
4. Start the roller brush by moving the lever for the third
hydraulic function to its locked position, or activate
the hydraulic motor circuit.
5. Check that the sweeper roller is rotating in the right
direction, see figure 3 If the roller brush rotates in the
wrong direction when in the locked position, change
the locked position for the lever or change the quick
coupling for the third hydraulic function.
Adjusting the height and tilt of the machine, sweeper with
three support wheels
1. Lift the sweeper.
2. Tilt until the sweeper is horizontal.
3. Lower the sweeper gently until the yellow markings
on the set of support wheels, see figure 4, are in line.
4. Readjust the tilt where appropriate as per item 2.
Check that the machine is secured.
It is extremely important that the hydraulic
couplings are clean. Allowing dirt into the
hydraulic system would severely impair sweeper
functionality.
Operate carefully in transport position on uneven
surfaces, to avoid exposing the sweeper to undue
strain.
3.Direction of rotation
4.
4.Yellow markings on support
wheel set
Markings

Holms Dustbuster
14 © HOLMS INDUSTRI AB, ALL RIGHTS RESERVED 160429.
Emptying the refuse collector
Liftup the machineandtilt itbackwards sothatthe refuse
can dropout, see figure5. Carefully rotate theroller a few
turns to free it from rubbish. If the sweeper is equipped
with side brushes, see “Operation” on page 15.
Disconnection from carrier
1. Release the hydraulic quick-couplings and electric
cable.
2. Release the machine attachment lock pins, and
carefully lower the machine to the ground. This is
important, otherwise the sweeper may be damaged.
3. When the machine reaches the ground, tilt forward
and then back to release the hooks.
Sprinkler
The pump must not be run when dry, i.e. once the water
has been used up the pump must be switched off.
Themachineis equippedwith twowaterfilterstoprevent
dirt getting into the system. One filter sits in the tank
fillinghole,whilst theother filteris locatedon thesuction
side of the pump. The filters can be flushed clean and
reused. NB! The filters must be in position when the tank
is filled, otherwise there is a danger that the pump and
water system will be damaged.
If there is a risk of freezing, empty the water from the
water tank, water pump and attendant hoses. The easiest
thing is to empty the tank first and then run the pump dry
for 20-30 seconds. When emptying the tank, the hose on
the tank can be disconnected using a quick-coupling.
Keep your distance. Look out for thrown objects.
Never leave the machine in the unfolded position.
Risk of crushing!
5.Sweeper in emptying
position

Holms Dustbuster
© HOLMS INDUSTRI AB, ALL RIGHTS RESERVED 160429. 15
Side brush
Holms Dustbuster can be fitted with aside brush for more
efficient sweeping up against kerbs, etc. It can be fitted
on the right or left side. The brush is automatically
extended/retracted when started/stopped.
Connection of side brush
See “Connection" in the Driver instruction Radio control.
Setting the side brush
The basic brushing pattern setting on the side brush is
made using the round holes on the bracket
The side brush is possible to adjust laterally and
longitudinally (accessory), see figure 6.
If a brushing pattern other than the preset pattern is
required, see figure 8, this can be adjusted by moving the
screws to the oval holes, angling the brush and tightening
the screws, see figure 6
The brush’s contact pressure against the ground can be
adjusted by loosening the lower knob, see figure 7, turn
the upper knob clockwise to increase the ground pressure
or anticlockwise to reduce the ground pressure. After
adjusting, lock the lower knob again
By allowing the side brush to rotate for a while against
the ground and then raising it, the brushing pattern can be
studied. Only the forward, outer part should touch the
ground, see figure 8.
Operation
See "Pick-up sweeper" in the Driver instruction Radio
control.
Always turn the side brush and sweeper roller off
before making any adjustments.
6. Adjusting laterally and
longitudinally
7. Adjusting the contact
pressure
-
+
8.Brushing pattern

Holms Dustbuster
16 © HOLMS INDUSTRI AB, ALL RIGHTS RESERVED 160429.
Maintenance
After operation
• Wash the sweeper. This will increase its service life
and make it easier to detect any leakage or other
faults.
• Inspect the machine and make sure that the hoses,
rubber housings and the machine body are not
damaged. Also check for any oil leakage.
Replacing the brush
Tools
• hex key
• socket wrench
• ring spanner
• screwdriver
• rubber mallet
Carefully lower down the container to the ground.
Removing the brush roller
1. Drain the water tank by disconnecting the quick
coupling at the tank, see figure 9. Then disconnect the
straps (A figure 10) and lift the water tank out.
2. Remove the lifting stops on both the right and left
side. See C figure 10.
3. Release the front attachments on the slewing brackets
on both sides. See D figure 10.
Note that only the screws are released from the
outside,andthat theslewingbracketsthemselvesmay
be left in position in their clamp plates, see figure 10.
4. Carefully lift up the machine to allow the motor to be
pulled out from the side. See figure 11.
5. Lift up the machine and remove the roller.
Make sure that the brush has stopped moving
before maintenance.
If the machine is lifted up too high before the
motor unit has been pulled out, the roller can be
left hanging from the hydraulic hoses and there is
a risk of damaging them.
9.Quick couplings
10.Removing the water tank, lifting
stops and slewing brackets
A
C
D
CD
11.
11.Removing the motor
Clamp plate for slewing brackets

Holms Dustbuster
© HOLMS INDUSTRI AB, ALL RIGHTS RESERVED 160429. 17
Replacing the brush
1. Loosen the two split pins and remove the roller
brush’s end ring, see figure 12.
2. Pull off the brush and spacer rings. This is most easily
done by hanging up the roller vertically in an
overhead crane or suchlike.
3. Check the core for damage.
4. Lift up the brush core with the bearing shaft facing
downwards on a pair of wooden blocks or suchlike.
This is to prevent damaging the shaft and slewing
brackets.
5. Fit a brush ring so that the “pins” are supported by the
flange on the brush core.
6. Fit a spacer ring.
7. Fit alternating brush rings and spacer rings. Note that
the “carrier pins” on the brush rings must be placed
on opposite sides of the two stops. This is to ensure
the load is distributed evenly over the brush core.
8. To “cover” the entire core it may be necessary to use
double brushes without spacer ring on the end so that
the right length will be obtained.
9. Refit the end ring using the two split pins. See figure
12.
12.Split pins

Holms Dustbuster
18 © HOLMS INDUSTRI AB, ALL RIGHTS RESERVED 160429.
Fitting the brush roller
1. Lift the machine and roll in the brush. Lower the
machine. See figure 13.
2. Push in the motor unit and place the motor end
slewing brackets up in the container.
3. Carefully lower down the machine to the ground.
4. Fit the motor end slewing brackets to the chassis.
5. Place the single slewing bracket in position (on the
opposite side to the motor end) and fit it in the chassis.
6. Refit the slewing bracket stops, water tank, straps and
hose to the water tank.
7. Fill the 5 lucubration points.
Replacing the side brush
Unscrew the four nuts and lower the brush. Reassemble
in the reverse order, see figure 14.
Replacing the bearing pins
The protective cap should first be pried loose when
removing the bearing pins. The bearing pins are then
driven out in the direction of the arrows, see figure 15.
This is due to the holes for the pins being rifled to prevent
the pins from rotating.
Make sure that the slewing brackets and hydraulic
hoses are not jammed when the machine is put on
the ground.
Always use Loctite on the screws.
13.Refitting the motor
Clamp plate for slewing brackets
14.Replacing the brush
15.Fitting/removing the bearing
pins

Holms Dustbuster
© HOLMS INDUSTRI AB, ALL RIGHTS RESERVED 160429. 19
Other service
Lubrication points
Lubricate the machine's five lubrication points when
changing brush, see figure 16 and figure 17. Also
lubricate the lubrication points prior to long-term storage.
Fitting the hydraulic hoses
If the hydraulic hoses have been disconnected, it is
essential that they are refitted correctly.
• The hoses are fitted at an angle of 45° to the ground
• The hoses must then follow the inside of the chassis.
See figure 18.
Fitting the bearings
The machine’s bearings are made of maintenance-free
material. They must, however, be greased before being
refitted.
Inspect the hydraulic hoses. Damaged hoses can
cause leaks.
Exercise care when working where hydraulic oil
may be present. Contact with the skin may cause
an allergic reaction.
16.Lubrication points
17.Lubrication point
18.Refitting of hoses

Holms Dustbuster
20 © HOLMS INDUSTRI AB, ALL RIGHTS RESERVED 160429.
Table of contents
Other HOLMS Blower manuals
Popular Blower manuals by other brands

Kärcher
Kärcher KMR 1250 LPG User instructions

Powr-Flite
Powr-Flite WONDER WAND Operator and parts manual

GreenWorks Pro
GreenWorks Pro BL80B00 Operator's manual

HSS Hire
HSS Hire 568 Operating & safety guide

Masport
Masport Aerocore Turbo Blower CBV60H1.9 owner's manual

EINHELL
EINHELL GE-EL 3000 E Original operating instructions

Craftsman
Craftsman INCREDI-PULL 316.794831 Operator's manual

FRADAN
FRADAN MSPB-18VG Operator's manual

NSS
NSS Sidewinder BP 30 Instruction and maintenance handbook

Weed Eater
Weed Eater 530164008 instruction manual

MTD
MTD BV3100 Operator's manual

Utile
Utile LW401 Installation, operation & maintenance instructions