3
MATERIAL CONTENTS
1
TABLE OF CONTENTS
MATERIAL CONTENTS
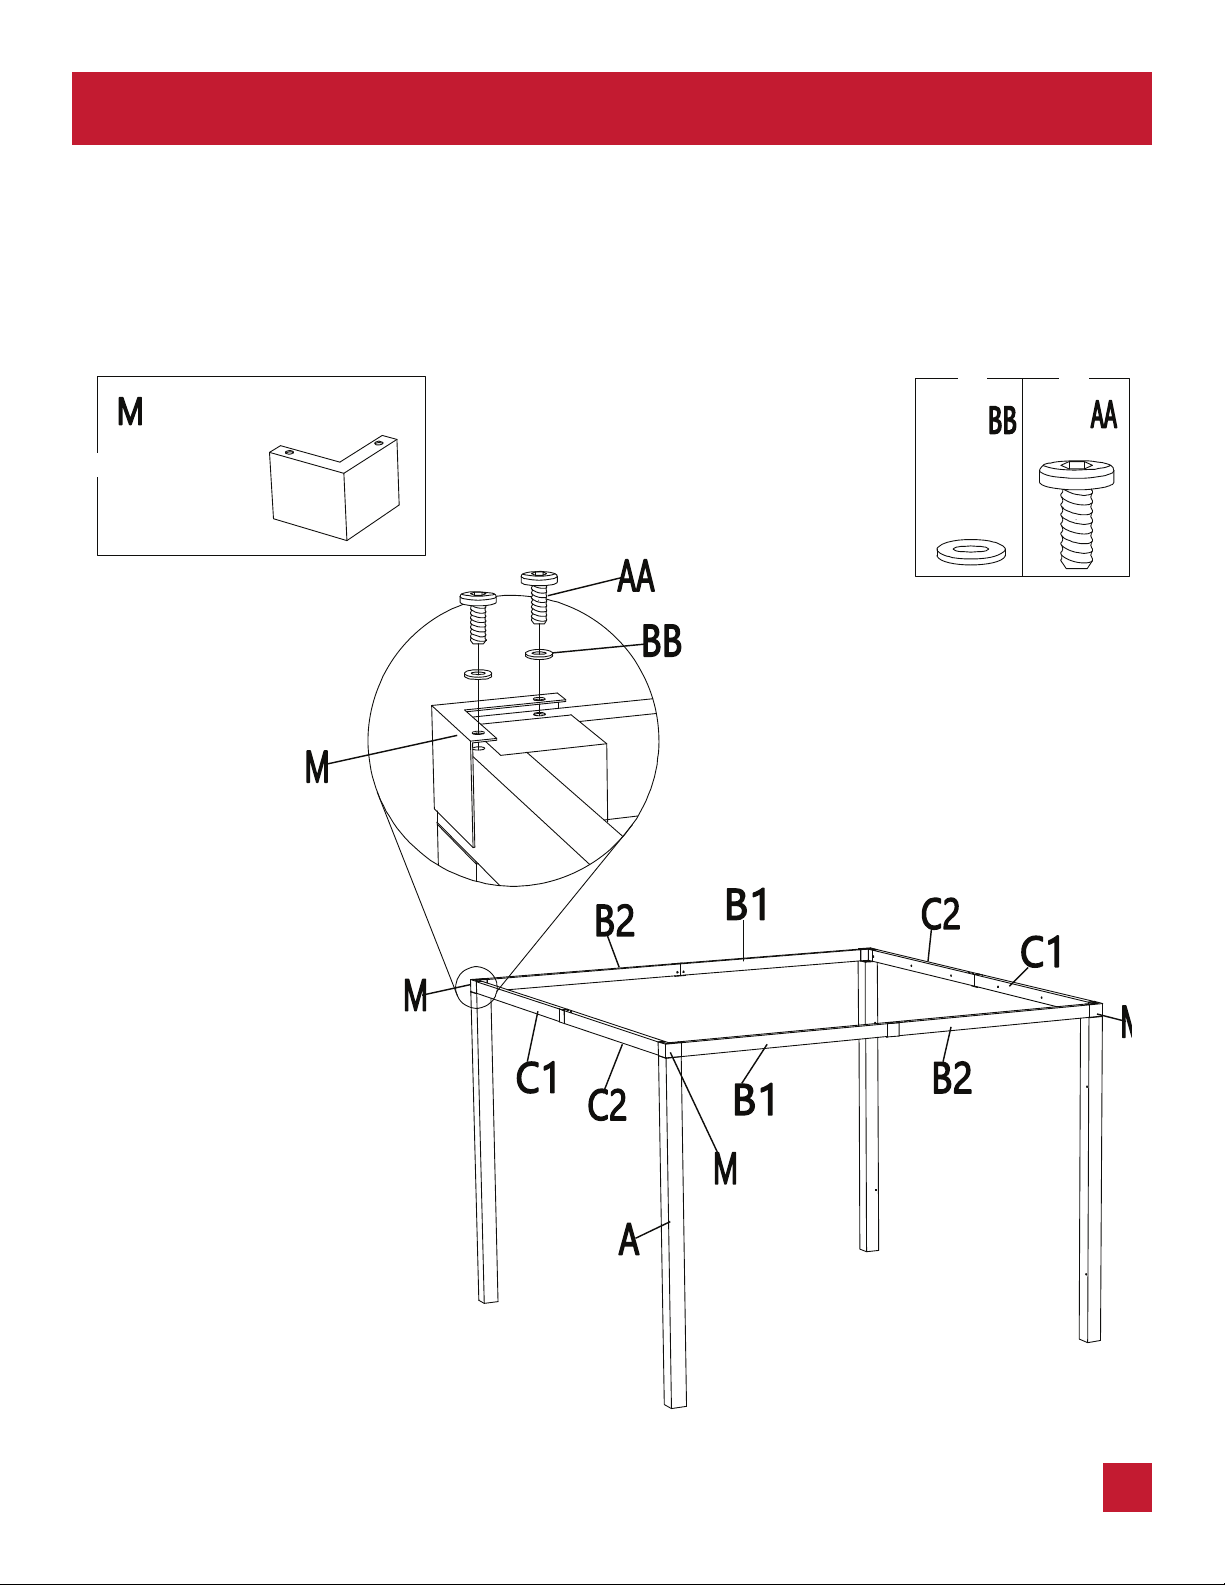
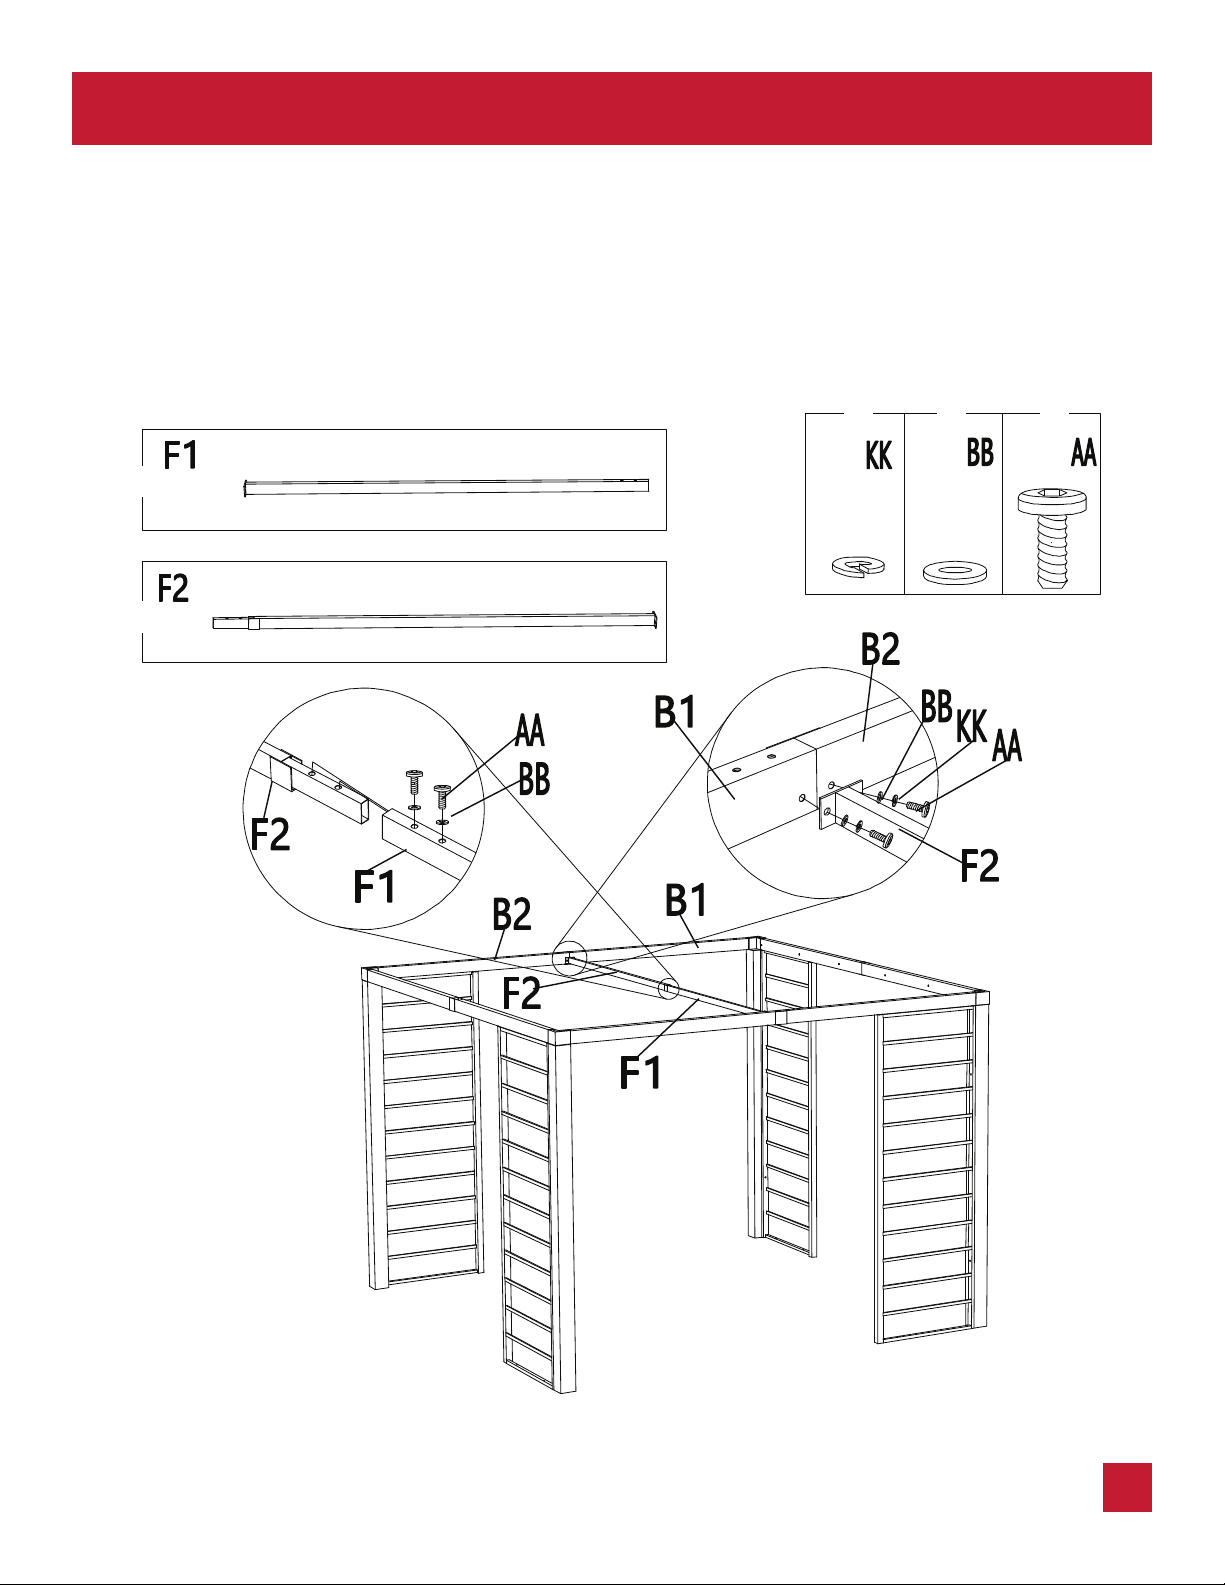
ASSEMBLY INSTRUCTIONS
CARE AND MAINTENANCE
SAFETY WARNINGS
WARRANTY
1–3
4–15
16
16
16
IMPORTANT INSTRUCTIONS
1. Read installation and maintenance instructions thoroughly. Be sure to use proper tools, and always wear personal
protection equipment for your safety.
2. Before assembly, inspect the product for damage and ensure all parts are accounted for.
3. Multiple people required for assembly. Do not attempt to assemble alone. Make sure there is sufficient manpower
when assembling or moving the pergola.
CAUTION: Proper placement of the pergola
is essential. Do not place the pergola
underneath electrical lines.
Pre-Assembly
PLANNING ASSEMBLY
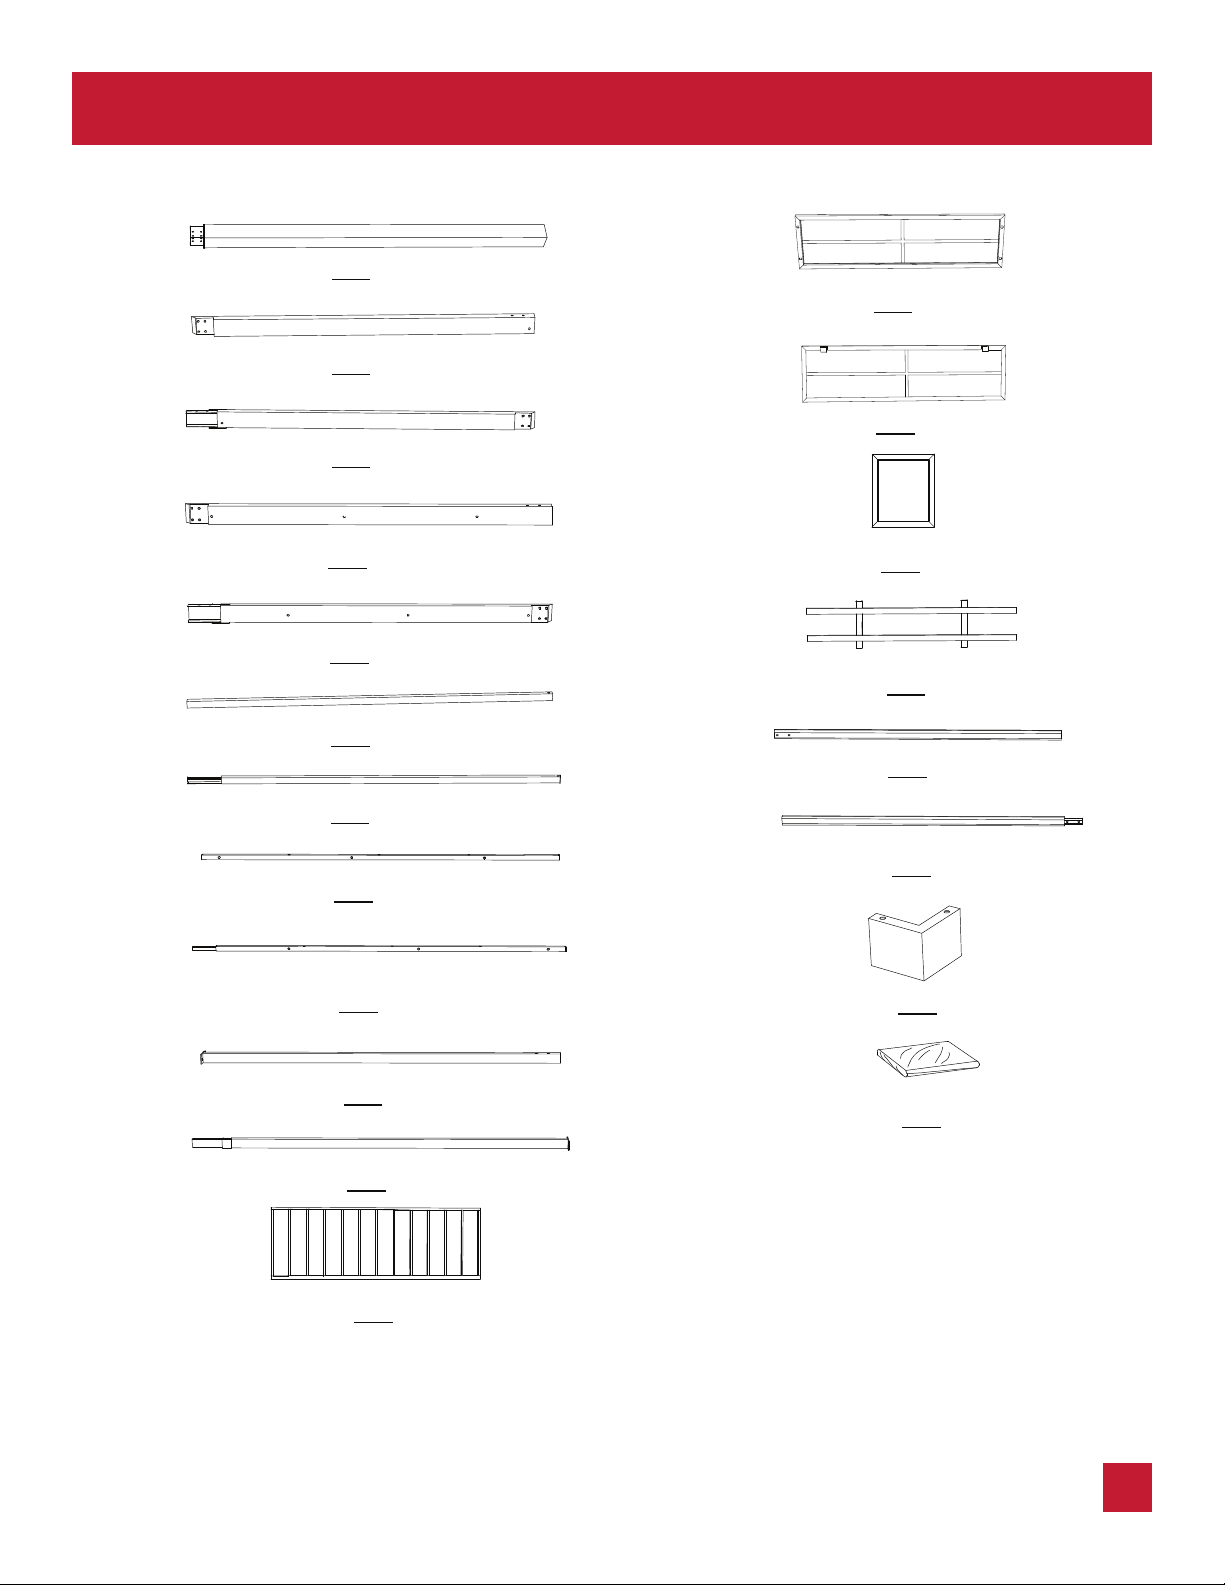
Before beginning assembly of this product, make sure all parts are present. Compare parts with the Hardware Included
and Package Contents lists. If any part is missing or damaged, do not attempt to assemble the product.
Contact customer service for replacement parts.
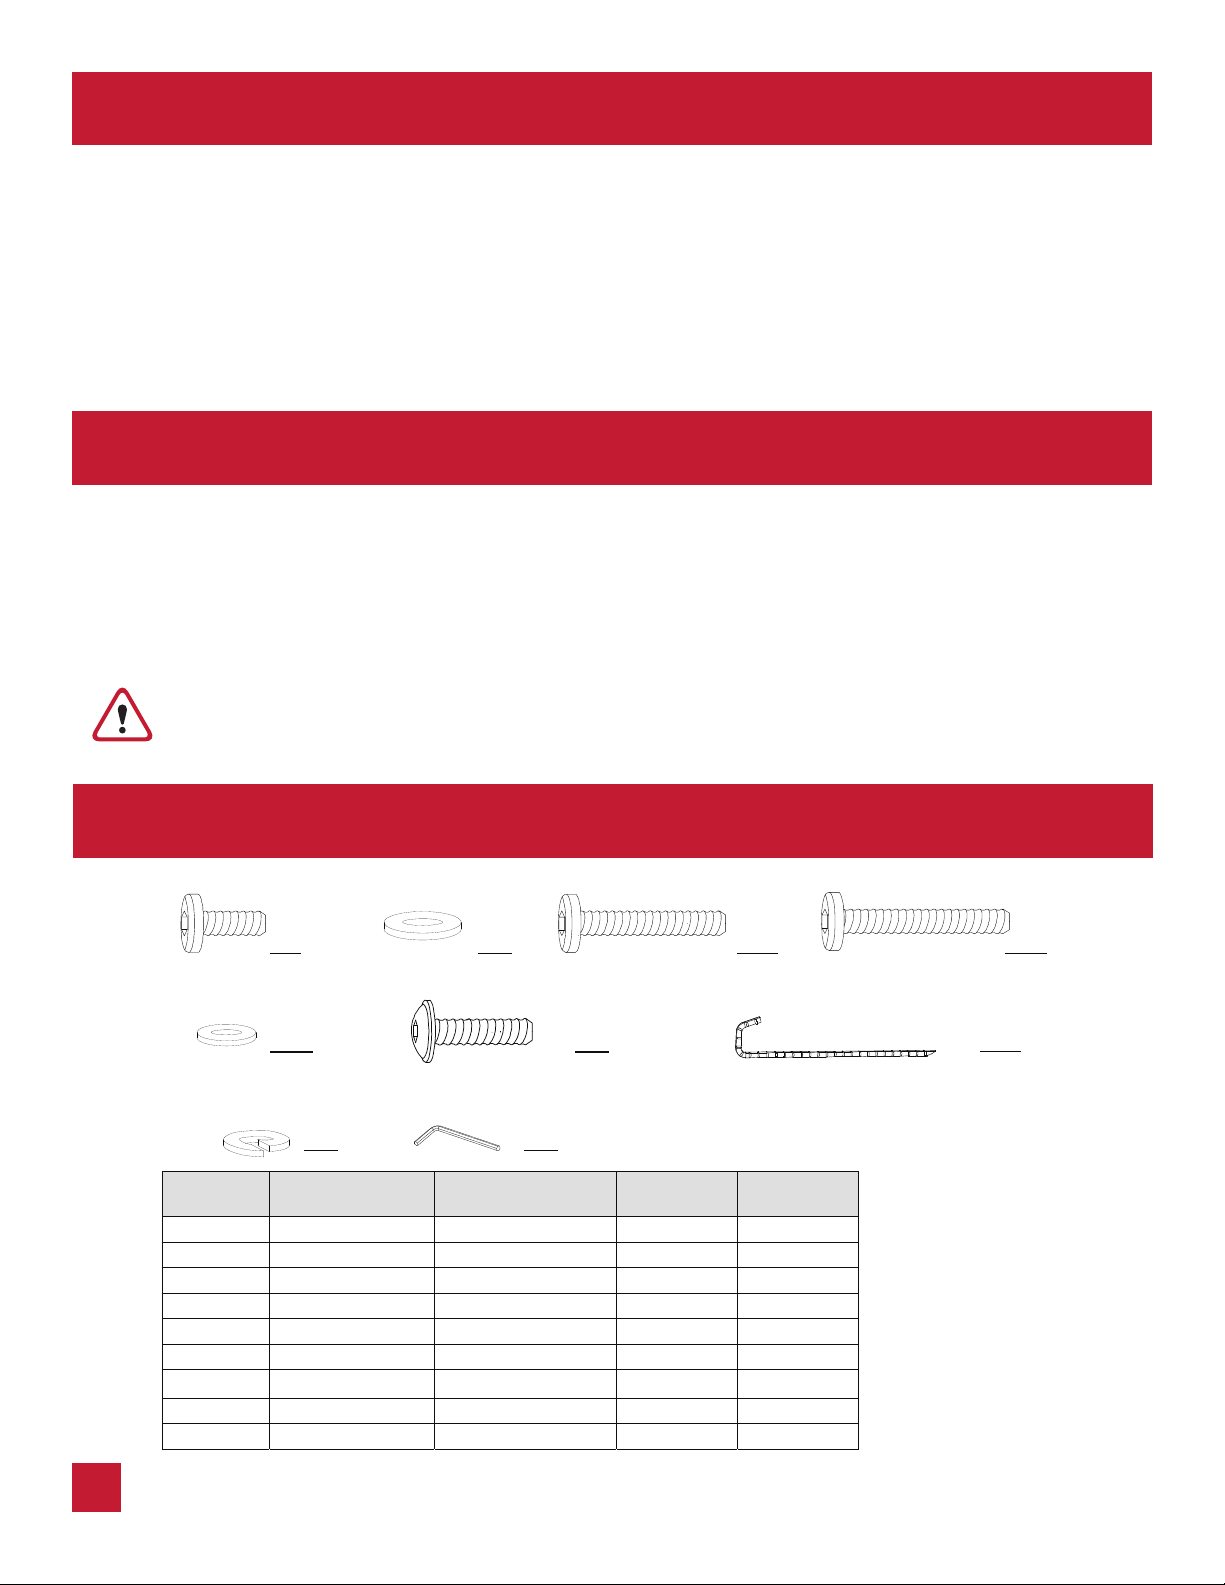
HARDWARE INCLUDED
NOTE: Hardware not shown to actual size.
AA BB DD EE
FF
GG
KK
Z
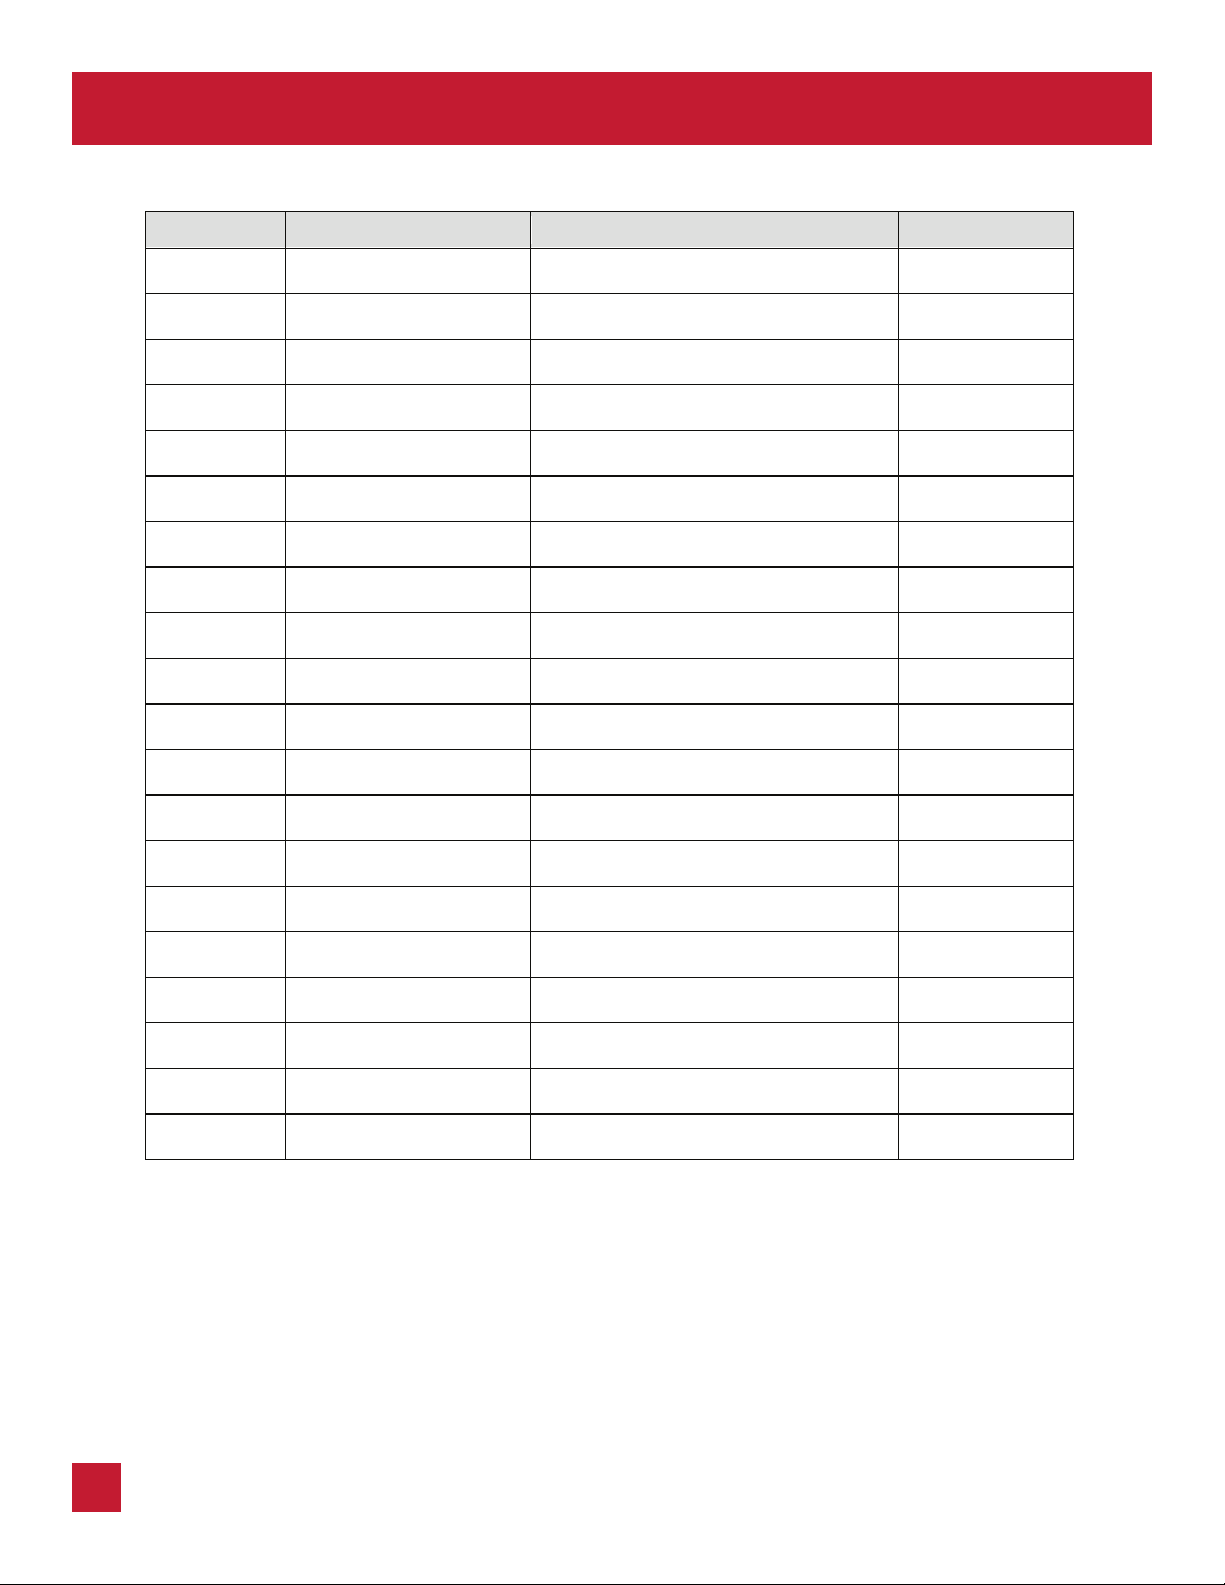
Part Part Number Description Quantity Additional
Hardware
AA H010030030 M6 X 15 Bolt 72 4
BB H050030001 M6 Flat washer 86 6
DD H010030023 M6 X 35 Bolt 32 2
EE H010030036 M6 X 45 Bolt 14 1
FF H050010025 M6 Washer 32 6
GG H010060016 M6 X 25 Bolt 32 2
HH Φ6X230“7” Stake 8 0
KK H050020017 Spring washer 28 2
Z H090030002 M6 Allen key 1 0
H070010005