Honeywell DR4500A Manual

Form 44-45-33-52A Auxiliary Output Kit Instruction Page 1 of 8
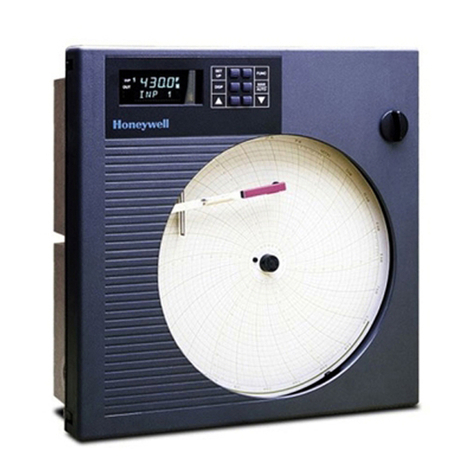
DR 4500A Circular Chart Recorder
Kit Instruction
Auxiliary Output Printed Circuit Board Kit
(Part Number 51404561-501 or 51404561-503)
Form: 44-45-33-52A
Effective: 1/15
Supercedes: 5/98
Summary
Enclosed with this instruction is a new Auxiliary Output printed circuit
board for your DR4500A Recorder (Classic or Truline models).
Use the procedures listed in the tables to install, configure, and calibrate
the Auxiliary Output Printed Circuit board. These procedures assume
that
you are familiar with the DR4500A recorder. We suggest that you have a
copy of the recorder's product manual on hand for reference.
ATTENTION
Kit Part Number 51404561-503 contains a printed circuit
board that has both Auxiliary output and RS485 Modbus RTU functions.
Refer to Instruction Sheet 44-45-33-58 for information on the RS485
Modbus RTU function.
WARNING
Never access components inside the case with the power
applied.
CAUTION
When handling electronic assemblies, care should be taken to
avoid damage by electrostatic discharge. Use a wrist strap connected to an
earth ground before withdrawing the printed circuit board from its
container and installing it into the recorder.
Kit Contents
This kit contains parts to add Auxiliary Output to your DR4500A recorder.
You kit you have received contains the following parts:
Part Number Description
51404561-001
or
51404561-003
Auxiliary Output PCB
or
Auxiliary Output/Modbus RTU Communications PCB
30756005-001 Card Guide (2)
30755139-002 Terminal Block - 2 Position
30366609-004 Tie Wraps (2)
NOTE: You may wish to change or add Table III in your recorder’s model
number to equal 1XX to show that the recorder is equipped with the
Auxiliary Output function, or 4XX to show that the recorder is equipped
with the Auxiliary Output and Modbus RTU Communication function.
Continued on next page

Form 44-45-33-52A Auxiliary Output Kit Instruction Page 2 of 8
Auxiliary Output Installation
Installation Procedure
Follow the steps listed in Table 1 to add the 4-20mA Auxiliary Output
printed circuit board. The procedure assumes that the chart door is open,
the chart plate is swung out, and the power is removed.
Table 1 Adding a 4-20mA Auxiliary Output PCB
Step Action
1 Install the new card guides supplied with the kit into proper location
on the motherboard located in the left hand side of the case.
(See Figure 1 for Auxiliary Output card location)
CAUTION Install the guides with a steady pressure. Excessive
rocking will destroy its latch.
2 Slide the new Auxiliary Output board into the card guides and press in
firmly to seat the connector onto the motherboard.
3 Connect the 2-wire violet colored connector lead from the transformer
on the motherboard to the Auxiliary Output board at J4. (See Figure 1
for location)
If required, redress the leads from the Motherboard with the tie wraps
provided in the kit.
4 Locate connector J2 near the bottom of the Auxiliary Output printed
circuit board (See Figure 1 for location).
5 Run the output wires through the desired knockout.
6 Strip 1/4-inch maximum of insulation from the end of each wire.
7 Loosen the screws in terminals on the plug connector supplied in the
kit and position the plug as you would to plug it into J2 on the
Auxiliary Output board.
8 Observing the polarity, insert the wires into the appropriate screw
clamps as shown in Figure 1. Tighten the screws to secure the wires.
9 Install the wired plug into J2
10 Configure the recorder for Auxiliary Output. Refer to Tables 2 and 3.
11 Make sure that the Auxiliary Output is calibrated.
Refer to Tables 4 and 5.
Continued on next page

Form 44-45-33-52A Auxiliary Output Kit Instruction Page 3 of 8
Auxiliary Output Installation,
Continued
Installation Procedure,
continued
Figure 1 shows the location of the Auxiliary Output components.
Figure 1 Auxiliary Output Components
22849C
Plug J2
Auxiliary Output
Connector
Auxiliary Output
Modbus
PCB
J4
Transformer
Connector
Motherboard
Controller Load
0 - 1000 Ohms
–
+
J3
Modbus
Connector
Continued on next page

Form 44-45-33-52A Auxiliary Output Kit Instruction Page 4 of 8
Auxiliary Output Configuration
Enable auxiliary output
The procedure to enable Auxiliary Output is listed in Table 2.
Table 2 Procedure for Enabling Auxiliary Output
Step Operation Press Action/Result
1 Access the
Options Set
Up group
SET
UP
Until you see:
OPTIONS
Lower Display
SET UP
Upper Display
2 Access the
Aux Out
Prompt
FUNC
Until you see:
Lower Display
AUX OUT
Upper Display
OPTIONS
3 Select a
Parameter
or
To select what the Auxiliary Output will
represent. It can represent any of twelve
control parameters.
See Table 3 for available parameter
selections and definitions.
4 Return to
normal
operation
LOWR
DISP
to return to normal operation.
Continued on next page

Form 44-45-33-52A Auxiliary Output Kit Instruction Page 5 of 8
Auxiliary Output Configuration,
Continued
Parameter selections
Table 3 lists the available Auxiliary Output Selections and their
definitions.
Table 3 Auxiliary Output Selection and Definitions
Lower Display
Prompt
Upper Display
Range of Setting
or Selection
Parameter
Definition
AUX OUT AUXILIARY OUTPUT SELECTION provides an mA output
representing any of twelve control parameters. The display
for auxiliary Output viewing will be in engineering units for
all but output. Output will be designated in percent (%).
Other prompts affected by these selections: “4 mA VAL”
and “20mA VAL”.
DISABL NO AUXILIARY OUTPUT
IN 1 INPUT 1—This represents the configured range of input 1.
FOR EXAMPLE:
Type “J” Thermocouple (0 to 1600°F)
0°F display = 0% output
1600°F display = 100% output
IN 2 INPUT 2 represents the value of the configured range of
input 2.
PV 1 PROCESS VARIABLE 1—Represents the value of the
Process Variable for Loop 1. PV = Input 1 + Bias
DEV 1 DEVIATION 1 (PROCESS VARIABLE MINUS
SETPOINT)—Represents –100 to +100% of the selected
PV span in engineering units for Loop 1. FOR EXAMPLE:
Type “T” Thermocouple
PV range = –300 to +700°F
PV span = 1000°F
Deviation range = –1000 to +1000°F
If PV = 500°F
and SP = 650°F
then Deviation Display = –150°F
Auxiliary Output = 42.5%
NOTE: A deviation of 0°F yields an auxiliary output of
50%.
OUT 1 OUTPUT 1—Represents the displayed controller output in
percent (%) for Loop 1.
SP 1 SETPOINT 1—Represents the value of the setpoint in
units of PV for Loop 1.
PV 2 PROCESS VARIABLE 2—Represents the value of the
process variable for Loop 2.
DEV 2 DEVIATION 2 (PROCESS VARIABLE MINUS
SETPOINT)—Represents –100 to +100% of the selected
PV span for Loop 2.
See Example at DEV 1.
Table 3 is continued on next page
Form 44-45-33-52A Auxiliary Output Kit Instruction Page 6 of 8
Auxiliary Output Configuration,
Continued
Parameter selections,
continued
Table 3 Auxiliary Output Selection and Definitionscontinued
Lower Display
Prompt
Upper Display
Range of Setting
or Selection
Parameter
Definition
AUX OUT
(continued)
OUT 2 OUTPUT 2—Represents the displayed controller output in
percent (%) for Loop 2.
SP 2 SETPOINT 2—Represents the value of the setpoint in
units of PV for Loop 2.
IN 3 INPUT 3—Represents the value of the configured range of
Input 3.
IN 4 INPUT 4—Represents the value of the configured range of
Input 4.
4 mA VAL Low Scale Value
within the range of the
selected variable to
represent 4 mA
AUXILIARY OUTPUT LOW SCALING FACTOR—Use a
value in engineering units for all selections above except
Output.
Use value in percent (%) for Output. (Output can be
between –5 and +105%.)
20mA VAL High Scale Value
within the range of the
selected variable to
represent 20 mA
AUXILIARY OUTPUT HIGH SCALING FACTOR—Use a
value in engineering units for: Input 1, Input 2, Process
Variable, Deviation,* and Setpoint.
Use a value in percent (%) for Output. (Output can be
between –5 and +105%.)
*When Deviation is selected, only one operating
parameter will be entered. This value represents the
deviation level that will produce 20 mA output. Zero
deviation will produce a center scale (12 mA) output. A
negative deviation equal in magnitude to the Auxiliary
Output High Value will produce a low end (4 mA) output.

Form 44-45-33-52A Auxiliary Output Kit Instruction Page 7 of 8
Auxiliary Output Calibration
Introduction
Calibrate the recorder so that the auxiliary output provides the proper
amount of current over the desired range.
• The recorder can provide an auxiliary output current range of from
0 to 21 milliamperes and can be calibrated at 4 mA for 0% of output
and 20 mA for 100% of output or any other values between 0 and 21
mA.
Equipment needed
You will need a standard shop type milliammeter, with whatever accuracy
is required, capable of measuring 0 to 20 milliamps.
Calibrator connections
Refer to Figure 2 and wire the recorder according to the procedure given
in Table 4.
Table 4 Set Up Wiring Procedure for Auxiliary Output
Step Action
1 With the power off, door open, and the chart plate swung out; tag and disconnect field wiring
from the plug in connector J2 on the auxiliary output PCB (see Figure 2).
2 Observing polarity, connect a milliammeter’s leads to the plug for connector J2.
3 Close the chart plate; apply power and allow the recorder to warm up 15 minutes before you
calibrate.
Figure 2 Test Equipment Connections for Calibrating Auxiliary Output
Milliammeter
Plug J2
(auxiliary output)
+
-
Auxiliary Output
Modbus
PCB
J4
Transformer
Connector
Motherboard
Continued on next page

Form 44-45-33-52A Auxiliary Output Kit Instruction Page 8 of 8
Auxiliary Output Calibration,
Continued
Procedure
The procedure for calibrating the Auxiliary Output is listed in Table 5.
Make sure “LOCKOUT” in the Set Up group is set to “NONE.” Also,
“AUX. OUT” must NOT be disabled in the “Options” Set Up group.11
Table 5 Auxiliary Output Calibration Procedure
Step Description Press Action/Result
1 Enter Calibration Mode
SET
UP
until you see
AUX OUT
Lower Display
CALIB
Upper Display
2 Calibrate 0%
FUNC
You will see:
Lower Display
Upper Display
ZERO VAL
a value
or
Until the desired 0% (4 mA) output is read on the
milliammeter.
3 Calibrate 100%
FUNC
Stores the 0% value and, you will see:
Lower Display
Upper Display
SPAN VAL
a value
or
Until the desired 100% (20 mA) output is read on the
milliammeter.
4 Exit the Calibration
Mode
FUNC
The recorder stores the span value.
LOWR
DISP
or
SET
UP
To exit the calibration mode.
Other manuals for DR4500A
3
This manual suits for next models
2
Table of contents
Other Honeywell Voice Recorder manuals

Honeywell
Honeywell DPR180 User manual

Honeywell
Honeywell ERX 350 User manual

Honeywell
Honeywell X Series User manual

Honeywell
Honeywell DR4500A Manual

Honeywell
Honeywell X Series User manual

Honeywell
Honeywell DR4300 Series Guide

Honeywell
Honeywell X Series User manual

Honeywell
Honeywell DR4300 Series User manual

Honeywell
Honeywell DR4500A User manual

Honeywell
Honeywell DR4300 Series Guide