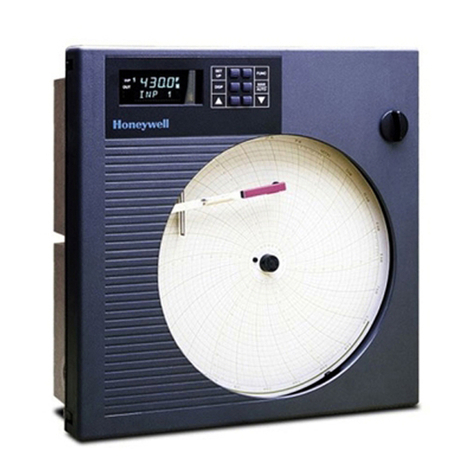
Honeywell DPR180 User manual

DPR180
PRODUCT MANUAL
Issue 13 March 2010
US1I-6171


DPR 180
DIGITAL STRIP CHART RECORDER
PRODUCT MANUAL
Ref. : US1I-6171
Issue : 13 March 2010


Copyright, Notices, and Trademarks
© Copyright 2009-10 by Honeywell Inc.
While this information is presented in good faith and believed to be accurate,
Honeywell disclaims the implied warranties of merchantability and fitness for a
particular purpose and makes no express warranties except as may be stated
in its written agreement with and for its customer.
In no event is Honeywell liable to anyone for any indirect, special or
consequential damages. The information and specifications in this document
are subject to change without notice.
This document was prepared using Information Mapping methodologies and
formatting principles.
Information Mapping is a trademark of Information Mapping Inc.
Windows is a registered trademark of Microsoft Inc.
Modbus is a registered trademark of MODICON, Inc.
The omission of a name from this list is not to be interpreted that the name is
not a trademark.

About This Document
Abstract
This manual describes the installation, configuration, operation, and maintenance of the Recorder.
Warranty
WARRANTY. THE FOLLOWING IS IN LIEU OF ALL OTHER WARRANTIES, EXPRESS OR IMPLIED, INCLUDING THOSE OF MERCHANTABILITY
AND FITNESS FOR PARTICULAR PURPOSE.
a) Goods/Hardware
Except as otherwise hereinafter provided, Honeywell warrants goods of its manufacture to be free of defective materials
and faulty workmanship and as conforming to applicable specifications and/or drawings. Commencing with date of
shipment, Honeywell's warranty shall run for the period specified on the face hereof or, if none be mentioned, 18
months. If warranted goods are returned to Honeywell during this period of coverage, Honeywell will repair or replace
without charge those items it finds defective.
Experimental devices (designated by the letter "X" or "E" within their part-number identification) are prototype, pre-
production items that have yet to complete all phases of product-release testing; these items are sold "AS IS" WITH NO
WARRANTY.
b) Software
Software, if listed on the face hereof and used within hardware and/or a system warranted by Honeywell, will be
furnished on a medium that’s free of defect in materials or workmanship under normal use for so long as the hardware
and/or system is under warranty. During this period, Honeywell will replace without charge any such medium it finds
defective. As for the quality or performance of any software or data, they are supplied “AS IS” WITH NO WARRANTY.
c) Services
Where hardware and/or a system is installed by Honeywell, such services are warranted against faulty workmanship for
the same period (if any) as applies to the installed items. During this concurrently running period, Honeywell will correct
without charge any workmanship it finds to be faulty.
Contacts
If you encounter any problem with your recorder, please contact your nearest Sales Office. (See the
address list at the end of this manual).
An engineer will discuss your problem with you. Please have your complete model
number and serial number available. Model number and serial number are located on the
chassis nameplate.
If it is determined that a hardware problem exists, a replacement instrument or part will be shipped
with instructions for returning the defective unit. Do not return your instrument without authorization
from your Sales Office or until the replacement has been received.
World Wide Web: http://www.honeywell.com
Corporate Industrial Measurement and Control: http://www.honeywell.com/imc/
Telephone: USA & Canada Honeywell: Tech nical Support: 1800-423-9883
TAC FACS: 1888-423-9883
Service: 1800 -525-7439

Symbol Meanings
Symbol What it means
Protective ground terminal. Provided for connection of the protective earth green (green
or green/yellow) supply system conductor.
Functional ground terminal. Used for non-safety purposes such as noise immunity
improvement.
WARNING. Risk of electric shock. This symbol warns the user of a potential shock
hazard where voltages greater than 30 Vrms, 42.4 Vpeak, or 60 Vdc may be accessible.
CAUTION. When this symbol appears on the product, see the user manual for more
information. This symbol appears next to the required information in the manual.
CE conformity
This product conforms with the protection requirements of the following European Council
Directives: 89/336/EEC, the EMC directive, and 73/23/EEC, the low voltage directive. Do
not assume this product conforms to any other “CE Mark” Directive(s).
Attention
The emission limits of EN61326-1 are designed to provide reasonable protection against harmful interference
when this equipment is operated in an industrial environment. Operation of this equipment in a residential
area may cause harmful interference. This equipment generates and can radiate radio frequency energy and
may cause interference to radio and television reception when the equipment is used closer than 30 meters to
the antenna (e). In special cases, when highly susceptible apparatus is used in close proximity, the user may
have to employ additional mitigating measures to further reduce the electromagnetic emissions of this
equipment.
Product model number:
Serial number:
Date code:
Service department telephone
number:


TABLE OF CONTENTS
i
TABLE OF CONTENTS
1. OVERVIEW...............................................................................................................................................1-1
1.1 RECORDER OVERVIEW..............................................................................................................1-2
1.2 MODEL SELECTION GUIDE .......................................................................................................1-4
2. INSTALLATION.......................................................................................................................................2-1
2.1 WARNING ........................................................................................................................................2-2
2.2 UNPACKING....................................................................................................................................2-3
2.3 PANEL MOUNTING THE RECORDER......................................................................................2-4
2.4 WIRING THE RECORDER............................................................................................................2-7
2.5 TERMINAL CONNECTIONS........................................................................................................2-8
2.6 FITTING THE CHART.................................................................................................................2-15
2.7 INSTALLING THE PRINTING SYSTEM..................................................................................2-22
2.8 CHECK LIST..................................................................................................................................2-24
3. OPERATION .............................................................................................................................................3-1
3.1 OPERATOR INTERFACE EXPLANATIONS.............................................................................3-2
3.2 OPERATOR INTERFACE..............................................................................................................3-2
3.3 POWER UP.......................................................................................................................................3-3
3.4 SELECTING AND INTERPRETING RUN MODE DISPLAY...................................................3-4
3.5 OPERATOR INITIATED ACTIONS.............................................................................................3-9
3.6 GLOSSARY OF OPERATING TERMS......................................................................................3-12
4. CONFICURATION...................................................................................................................................4-1
4.1 INTRODUCTION.............................................................................................................................4-2
4.2 PARAMETERS LIST.......................................................................................................................4-3
4.3 PRINCIPLES OF CONFIGURATION..........................................................................................4-4
4.4 COPY CONFIGURATION..........................................................................................................4-104
4.5 PRINT CONFIGURATION.........................................................................................................4-108
4.6 CONFIGURABLE AND PRINTABLE CHARACTERS..........................................................4-114
INDEX............................................................................................................................................4-115
5. PC CONFIGURATION.............................................................................................................................5-2
5.1 OVERVIEW......................................................................................................................................5-2
5.2 INSTALLING THE SOFTWARE ON YOUR SYSTEM..............................................................5-2
5.3 INSTALLING THE FIRMWARE ON THE RECORDER FOR COMMS................................5-3
5.4 PC - RECORDER INTERFACE.....................................................................................................5-3
5.5 CONFIGURATION UPLOAD/DOWNLOAD...............................................................................5-4
5.6 RECORDER FIRMWARE UPGRADE.........................................................................................5-8
5.7 COMMUNICATION FIRMWARE UPGRADE...........................................................................5-8
5.8 RELAY STATE AND CONTROL..................................................................................................5-8
5.9 COPY LINE OPERATION..............................................................................................................5-9
5.10 USER ACTUATION.........................................................................................................................5-9

TABLE OF CONTENTS
ii
6. KITS LIST..................................................................................................................................................6-1
7. TROUBLESHOOTING ............................................................................................................................7-1
7.1 PARTS LOCATION.........................................................................................................................7-2
7.2 SYMPTOMS:....................................................................................................................................7-4
to 7.24........................................................................................................................................................7-10
8. SERVICE....................................................................................................................................................8-1
8.1 OPERATOR INTERFACE..............................................................................................................8-2
8.2 LIST OF SERVICES........................................................................................................................8-5
9. PRODUCT SPECIFICATION .................................................................................................................9-1
10. PROMPTS TRANSLATION .................................................................................................................10-1
10.1 MATRICES.....................................................................................................................................10-2
11. CONFIGURATION WORKSHEETS ..................................................................................................11-1
11.1 to 11.13.....................................................................................................................................................11.16
SAFETY TRANSLATIONS
SALES AND SERVICE

1-1
1. OVERVIEW
TABLE OF CONTENTS
Section Page
1.1 RECORDER OVERVIEW . . . . . . . . . . . . . . . . . . . . . . . . . . . . . . . . . . . . . . . . . . . 1-2
1.1.1 INTRODUCTION . . . . . . . . . . . . . . . . . . . . . . . . . . . . . . . . . . . . . . . . . . . 1-2
1.1.2 MODEL SELECTION GUIDE . . . . . . . . . . . . . . . . . . . . . . . . . . . . . . . . . . . 1-4

1-2
1. OVERVIEW
1.1 RECORDER OVERVIEW
1.1.1 INTRODUCTION
This recorder is a precision measuring instrument that offers many features.
• Up to 24 analog input channels,
• Compact size: 320 mm (12.60 '') depth, 310 mm front face height x 317 mm width (12.21 '' x 12.48 ''),
278 mm x 278 mm (10.95 '' x 10.95 '') cutout,
• 180 mm chart in either roll or fanfold presentation,
• Universal power supply: 100 to 240 V ac/dc,
• IP55 front panel protection,
• Universal input with a wide choice of actuation/range,
• Option linear input,
• High accuracy: 0.05 % via field calibration,
• Easy interactive product configuration,
• Large, clear operator display,
• Fast scanning rate:
2 channels = 105 ms
4 channels = 210 ms
8 channels = 420 ms
12 channels = 630 ms
16 channels = 840 ms
20 channels = 1050 ms
24 channels = 1260 ms
• Configurable alphanumeric chart documentation,
• Up to 48 alarm setpoints with a wide choice of alarm types,
• Event alarm: End of chart paper, sensor burnout, clock battery low, etc.,
• Up to 48 customer messages of 50 characters each,
• Standard chart illumination,

1-3
1. OVERVIEW
• Product configuration, service diagnostic, software upgrading via PC interface,
• Chart zoning configurable,
• Complies with IEC348 and EN61010-1 safety requirements,
• EC mark: Conformity with 73/23/EEC low voltage directive and 89/336 EEC, EMC directives,
• CSA approval (certified) LR57938
OPTIONS
• Up to 36 alarm relay outputs, • Communication board
• Up to 36 digital inputs, • Up to 8 4/20 mA current outputs,
• Keylock, • PCMCIA board driver.
• Maths functions,

1-4
1. OVERVIEW
1.2 MODEL SELECTION GUIDE
This table helps you to identify correctly the unit in front of you. Please refer to the product label and verify
that you have the right unit.
Instructions
Refer to Supplementary Ordering Data before order entry.
Select the desired Key Number. The arrow to the right marks the selection available.
Make selections from Tables I through VII using the column below the proper arrow. A
dot ( ) denotes unrestricted availability. A letter denotes restricted availability.
A complete Model Number must have the designated number of digits in each table.
Ke
y
Number I II III IV
D18 - _ _ _ _ _ _ - _ _ _ _ _ _ - _ _ _ _ - _ -
V
V
I
V
II
_
_
_
_
-
_
_
-
_
KEY NUMBER Selection Availability
Description
DPR 180 Stri
p
Chart Recorder D18
TABLE I - Analo
g
In
p
uts
(
Note 1
)
Input Card 1 None 0 _ _ _ _ _
(Slot A) 4 Linear Inputs (Channel 1 to 4) L _ _ _ _ _
4 Universal Inputs (Channel 1 to 4) U _ _ _ _ _
Input Card 2 None _ 0 _ _ _ _
(Slot B) 4 Linear Inputs (Channel 5 to 8) _ L _ _ _ _
4 Universal Inputs (Channel 5 to 8) _ U _ _ _ _
Input Card 3 None _ _ 0 _ _ _
(Slot C) 4 Linear Inputs (Channel 9 to 12) _ _ L _ _ _
4 Universal In
p
uts
(
Channel 9 to 12
)
_ _ U _ _ _
Input Card 4 None _ _ _ 0 _ _
(Slot D) 4 Linear Inputs (Channel 13 to 16) _ _ _ L _ _
4 Universal Inputs (Channel 13 to 16) _ _ _ U _ _
Input Card 5 None _ _ _ _ 0 _
(Slot E) 4 Linear Inputs (Channel 17 to 20) _ _ _ _ L _
4 Universal Inputs (Channel 17 to 20) _ _ _ _ U _
Input Card 6 None _ _ _ _ _ 0
(Slot F) 4 Linear Inputs (Channel 21 to 24) _ _ _ _ _ L
4 Universal Inputs (Channel 21 to 24) _ _ _ _ _ U

1-5
1. OVERVIEW

1-6
1. OVERVIEW

2-1
2. INSTALLATION
TABLE OF CONTENTS
Section Page
2.1 WARNING . . . . . . . . . . . . . . . . . . . . . . . . . . . . . . . . . . . . . . . . . . . . . . . . . . . . . . . . 2-2
2.2 UNPACKING . . . . . . . . . . . . . . . . . . . . . . . . . . . . . . . . . . . . . . . . . . . . . . . . . . . . . . 2-3
2.3 PANEL MOUNTING THE RECORDER . . . . . . . . . . . . . . . . . . . . . . . . . . . . . . . . . . . 2-4
2.3.1 Recommendations . . . . . . . . . . . . . . . . . . . . . . . . . . . . . . . . . . . . . . . . . . . . . . 2-4
2.3.2 External dimensions and cut-out . . . . . . . . . . . . . . . . . . . . . . . . . . . . . . . . . . . . 2-4
2.3.3 Installing the recorder . . . . . . . . . . . . . . . . . . . . . . . . . . . . . . . . . . . . . . . . . . . . 2-5
2.4 WIRING THE RECORDER . . . . . . . . . . . . . . . . . . . . . . . . . . . . . . . . . . . . . . . . . . . . 2-7
2.4.1 Recommendations . . . . . . . . . . . . . . . . . . . . . . . . . . . . . . . . . . . . . . . . . . . . . . 2-7
2.5 TERMINAL CONNECTIONS . . . . . . . . . . . . . . . . . . . . . . . . . . . . . . . . . . . . . . . . . . . 2-8
2.5.1 Digital input signals. (DI). . . . . . . . . . . . . . . . . . . . . . . . . . . . . . . . . . . . . . . . . . 2-10
2.5.2 Relay outputs. (DO). . . . . . . . . . . . . . . . . . . . . . . . . . . . . . .. . . . . . . . . . . . . . . 2-11
2.5.2.1 Removing the alarm card to change NC to NO contacts . . . . . . . . . . . . . . 2-12
2.6 FITTING THE CHART . . . . . . . . . . . . . . . . . . . . . . . . . . . . . . . . . . . . . . . . . . . . . . . 2-15
2.6.1 Chart cassette . . . . . . . . . . . . . . . . . . . . . . . . . . . . . . . . . . . . . . . . . . . . . . . . 2-16
2.6.2 Cleaning the rod and lubricating the carriage bushings . . . . . . . . . . . . . . . . . . . 2-21
2.7 INSTALLING THE PRINTING SYSTEM . . . . . . . . . . . . . . . . . . . . . . . . . . . . . . . . . . 2-22
2.8 CHECK LIST . . . . . . . . . . . . . . . . . . . . . . . . . . . . . . . . . . . . . . . . . . . . . . . . . . . . . . 2-24

2-2
2. INSTALLATION
2.1 WARNING
WARNING
IMPROPER INSTALLATION
!
To avoid the risk of electrical shock that could cause personal injury, follow all safety notices in
this documentation.
Protective earth terminal. Provided for connection of the protective earth supply system
conductor.
Failure to comply with these instructions could result in death or serious injury
; POWER SUPPLY
Ensure the source voltage matches the voltage of the power supply before turning on the power. (In the
rear of the recorder, near to the connector of the power supply)
; PROTECTIVE GROUNDING
Make sure to connect the protective grounding to prevent an electric shock before turning on the power.
; NECESSITY OF PROTECTIVE GROUNDING
To avoid a potential shock hazard, never cut off the internal or external protective grounding wire or
disconnect the wiring of protective grounding terminal.
; DEFECT OF PROTECTIVE GROUNDING AND FUSE
Do not operate the instrument when protective grounding or fuse might be defective.
; FUSE
To prevent a fire, make sure to use the fuse with specified standard (current voltage, type). Before
replacing the fuse, turn off the power and disconnect the power source. Do not use a different fuse or
short-circuit the fuse holder.
; DO NOT OPERATE IN AN EXPLOSIVE ATMOSPHERE
Do not operate the instrument in the presence of flammable liquids or vapours. Operation of any
electrical instrument in such an environment constitutes a safety hazard.
; NEVER TOUCH THE INTERIOR OF THE INSTRUMENT
Inside this instrument there are areas of high voltage; therefore, never touch the interior if the power
supply is connected. This instrument has an internal changeable system; however, internal inspection
and adjustments should be performed by qualified personnel only.
; EXTERNAL CONNECTION
To ground securely, connect the protective grounding before connecting to measurement or control unit.
; If the equipment is used in a manner not specified by the manufacturer, the protection provided by the
equipment may be impaired.
; Do not replace any component (or part) not explicitly specified as replaceable by your supplier.
; INSTALL INDOOR ONLY

2-3
2. INSTALLATION
2.2 UNPACKING
Remove the accessories and check them against the figure below.
1. Ribbon cartridge
4. Mounting brackets with nuts
2. Fuse (Spare) (Use only 3.15 A T. fuses for
Europe or 3.2 A T. fuses for U.S.)
5. Product manual or CD
3. Roll (R) and fanfold (Z) chart
6. Front label
7. Recorder
NOTE: In the event that any items are missing, please contact your nearest sales office.

2-4
2. INSTALLATION
2.3 PANEL MOUNTING THE RECORDER
2.3.1 Recommendations
This recorder is designed to operate under specific conditions. If you need more information, refer to the
product specification sheet.
2.3.2 External dimensions and cut-out
Prepare panel cut-out as detailed below:
Note: Maximum panel thickness 40 mm (1.5 '')
! CAUTION
The maximum temperature inside the cabinet should not exceed the ambient conditions specific for the
recorders. The recorder must be mounted into a panel to limit operator access to the rear terminals.
Failure to comply with these instructions may result in product damage
Other manuals for DPR180
1
Table of contents
Other Honeywell Voice Recorder manuals

Honeywell
Honeywell X Series User manual

Honeywell
Honeywell X Series User manual

Honeywell
Honeywell DR4300 Series User manual

Honeywell
Honeywell DR4300 Series User manual

Honeywell
Honeywell DR4500A User manual

Honeywell
Honeywell X Series User manual

Honeywell
Honeywell DR4300 Series Guide

Honeywell
Honeywell DR4500A Manual

Honeywell
Honeywell DR Graphic User manual

Honeywell
Honeywell ERX 350 User manual