manuals.online logo
Brands
  1. Home
  2. •
  3. Brands
  4. •
  5. Honeywell
  6. •
  7. Voice Recorder
  8. •
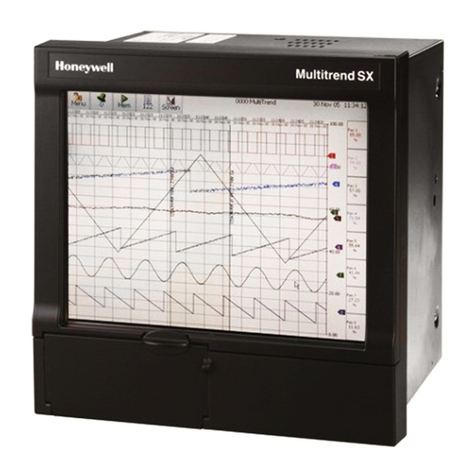
  9. Honeywell DR4500A Manual

Honeywell DR4500A Manual

06/26/13 Kit Instruction 44-45-33-33B 1 of 4
Honeywell
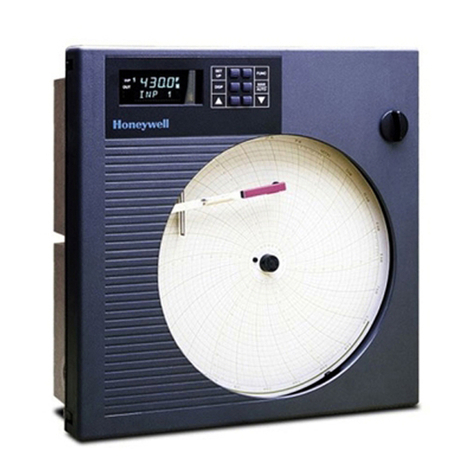
DR 4200, DR4300, DR 4500 & DR 4500A
Circular Chart Recorders
Latch Assembly Kit 30756584-001
Lock Assembly Kit 30756584-002
KIT INSTRUCTION 44-45-33-33B
Summary
The assembly kit contains all the components you need to replace the latch assembly on the door of a
DR 4200, DR4300, DR 4500 or DR 4500A recorder. Table 1 lists contents of the kit. Note that three
housing retainers are supplied - one is for use with DR 4200 recorders; one is for older DR 4500 &
DR 4500A recorders and one is for newer DR4500A & DR4300 Recorders. Use the appropriate procedure
to install the kit. The procedures assume that the chart door is opened, the chart plate is swung out, and the
power is removed.
Table 1 - Kit Contents
LATCH
30756584-001 LOCK
30756584-002
Component Part Number Qty Qty
Latch 30756100-001 1 0
Barrel 30756208-001 1 0
O-ring 30756216-001 1 0
Retaining Nut 30756209-001 1 0
Washer - Delrin 30756218-001 1 1
Latch Retainer 30756102-001 1 1
Housing Retainer – Older
(DR 4500 & DR 4500A) 30756204-001 1 1
Housing Retainer – Newer
(DR4500A & DR4300) 51205576-001 1 1
Housing Retainer (DR 4200) 30756101-001 1 1
Screw (10-32) 30674113-012 1 1
Cam 30756207-001 1 0
Screw (#10) 30000005-004 1 0
Washer 30004950-000 1 0
Lock Cylinder Assembly 30756047-001 0 1
Washer - S. Steel 30756218-002 1 1
Removal Procedure
door
Latch Assembly
1. Push down on side clip, and push latch pin
out through hole in outer edge of door. Use
needle-nose pliers to remove pin, and
discard latch assembly.
Removing Latch Assembly
(Old Design)
2 of 4 Kit Instruction 44-45-33-33B 06/26/13
Installation - Latch Assembly
Installation Procedure - Latch Assembly
3. For DR 4200, push housing retainer
(30756101-001) with tab facing
down over barrel.
For DR 4500 & DR 4500A, push
housing retainer (30756204-001)
with rectangular cut edge facing down
over barrel.
Installing Latch Assembly Kit
1. Put round washer (30756218-002)
on barrel (30756208-001).
NOTE: If steel door use
30756218-001.
2. Insert barrel through hole from
front of door.
6. Push latch
(30756100-001)
into barrel with pawl
pointing down.
5. Lubricate O-ring (30756216-001)
with silicon grease and slip it on outside
of barrel.
NOTE: If you are installing the latch
on a steel door, skip Step 3.
4. Install retaining nut
(30756209-001) to
secure barrel.
7. Put "D" shaped hole of cam
(30756207-001) on latch with
large edge of cam facing down.
Secure cam to end of lock cylinder
with washer (30004950-000)
and #10 screw (3000005-004).
8. For proper installation, latch must
turn counterclockwise to open as
viewed from front of door.
1. Remove rubber O-ring from back of
captive screw in chart plate.
2. Position retaining latch (30756102-001)
in rectangular cutout of chart plate. Insert
10-32 screw (30674113-012) through
retaining latch and slip rubber O-ring over
screw from back of chart plate.
3. Close chart plate and secure with captive screw.
NOTE: Always secure chart plate to case
before engaging latch.
4. Close and latch door.
door
Installing Latch on Chart Plate
06/26/13 Kit Instruction 44-45-33-33B 3 of 4
Installation - Lock Assembly
Installation Procedure - Latch Assembly
3. Push large square washer
30756204-001 for DR4500 & DR4500A;
30756101-001 for DR4200 over lock cylinder, or
51205576-001for DR4300& Newer DR4500A.
Be sure key slot in cylinder faces right edge of door.
Installing Lock Assembly Kit
1. Put round washer (30756218-002)
on lock cylinder (30756047-001).
NOTE: If steel door usewasher
30756218-001.
2. Insert lock cylinder through hole
fromfront of door.
* Component supplied as part of the
lock assembly.
NOTE: If you are installing the lock
on a steel door, skip Step 3.
4. Install retainingnut*
to secure lock cylinder.
5. Put "D" shaped hole of cam*
on lock cylinder with large edge of
camfacing outer edge of door..
Secure camto end of lock cylinder
with the screw (& washer) included
inassembly.
6. For proper installation, key
should turn downward to lock door.
door
1. Remove rubber O-ring from back of
captive screw in chart plate.
2. Position retaining latch (30756102-001)
in rectangular cutout of chart plate. Insert
10-32 screw (30674113-012) through
retaining latch and slip rubber O-ring over
screwfromback of chart plate.
3. Close chart plate and secure with captive screw.
NOTE:
A
lways secure chart plate to cas
e
beforeengaginglock.
4. Close and lock door.
Installing Latch on Chart Plate
NOTE: Lock assembly supplied may
require some disassembly
prior toperforming
installationprocedure.
4 of 4 Kit Instruction 44-45-33-33B 06/26/13
Honeywell
Industrial Automation and Control Helping You Control Your World
Honeywell, Inc.
1100 Virginia Drive
Fort Washington, Pennsylvania 19034
06/26/13 Kit Instruction 44-45-33-33B 5 of 4

Other manuals for DR4500A

3

This manual suits for next models

3

Other Honeywell Voice Recorder manuals

Honeywell DR4300 Series User manual

Honeywell

Honeywell DR4300 Series User manual

Honeywell DR4500A Manual

Honeywell

Honeywell DR4500A Manual

Honeywell DR4300 Series Guide

Honeywell

Honeywell DR4300 Series Guide

Honeywell DR Graphic User manual

Honeywell

Honeywell DR Graphic User manual

Honeywell X Series User manual

Honeywell

Honeywell X Series User manual

Honeywell DR4500A User manual

Honeywell

Honeywell DR4500A User manual

Honeywell X Series User manual

Honeywell

Honeywell X Series User manual

Honeywell DPR180 User manual

Honeywell

Honeywell DPR180 User manual

Honeywell X Series User manual

Honeywell

Honeywell X Series User manual

Honeywell DR4300 Series Guide

Honeywell

Honeywell DR4300 Series Guide

Honeywell ERX 350 User manual

Honeywell

Honeywell ERX 350 User manual

Honeywell DR4300 Series User manual

Honeywell

Honeywell DR4300 Series User manual

Popular Voice Recorder manuals by other brands

Olympus 141932 instructions

Olympus

Olympus 141932 instructions

RCA VR5340 quick start guide

RCA

RCA VR5340 quick start guide

Goodmans GDB20USB3 instruction manual

Goodmans

Goodmans GDB20USB3 instruction manual

Philips Pocket Memo DPM8200 manual

Philips

Philips Pocket Memo DPM8200 manual

Crown Boiler CSC-950F Service manual

Crown Boiler

Crown Boiler CSC-950F Service manual

Dictaphone Walkabout operating instructions

Dictaphone

Dictaphone Walkabout operating instructions

Olympus DS-3500 instructions

Olympus

Olympus DS-3500 instructions

Olympus VOICE & MUSIC DM-10 Mode d'emploi

Olympus

Olympus VOICE & MUSIC DM-10 Mode d'emploi

Diasonic DDR-3032 user manual

Diasonic

Diasonic DDR-3032 user manual

Laboratory2 SOROKA-16E Operational manual

Laboratory2

Laboratory2 SOROKA-16E Operational manual

Panasonic POVCAM AG-MDR25E Basic operating instructions

Panasonic

Panasonic POVCAM AG-MDR25E Basic operating instructions

Sanyo TRC-7600 Brochure & specs

Sanyo

Sanyo TRC-7600 Brochure & specs

Olympus DP-201 instructions

Olympus

Olympus DP-201 instructions

Fisher ICR-B150 instruction manual

Fisher

Fisher ICR-B150 instruction manual

Edic 1120 operating manual

Edic

Edic 1120 operating manual

Exacom Ears-104 Installation and operation manual

Exacom

Exacom Ears-104 Installation and operation manual

Philips CDC 752 Instructions for use

Philips

Philips CDC 752 Instructions for use

EDIC-mini Tiny16+ Series Operation manual

EDIC-mini

EDIC-mini Tiny16+ Series Operation manual

manuals.online logo
manuals.online logoBrands
  • About & Mission
  • Contact us
  • Privacy Policy
  • Terms and Conditions

Copyright 2025 Manuals.Online. All Rights Reserved.