GENERAL SAFETY INFORMATION
FOR HOUSEHOLD USE ONLY.
When using the carpet washer, basic safety precautions should always be observed,
including the following:
1. This Pressure washer is for outdoor use only.
2. It is your responsibility to check the suitability of the surface to be cleaned. Hoover cannot be held
responsible for damage caused.
3. Keep fingers, hair and loose clothing from moving parts and openings whilst using the pressure washer.
4. When using your pressure washer the recommended working distance between the nozzle and surface area
or object to be cleaned is 30cm.
5. This appliance can only be used by children aged from 8 years and above and persons with reduced
physical, sensory or mental capabilities or lack of experience and knowledge if they have been given
supervision or instruction concerning use of the appliance in a safe way and understand the hazards involved.
Children should not play with the appliance. Cleaning and user maintenance shall not be made by children
without supervision.
6. Hoover only recommend the use of Hoover genuine accessories and solution to be used with
this pressure washer.
7. Don’t leave the pressure washer unattended or running when not in use for more than 5 minutes without
depressing the trigger.
8. Don’t use this pressure washer if it has been dropped, damaged or immersed in water.
9. Don’t use pressure washer if the power cord or plug is damaged.
10. Don’t handle the plug of the pressure washer with wet hands.
11. Don’t use the pressure washer without supply hose (minimum length 7.5m) in place and unwind the hose
fully from reel.
12. Don’t use the pressure washer without the water filter in place.
13. Don’t pull or carry this pressure washer by the power cord. Don’t use the power cord as a handle, pull the
power cord around corners or sharp edges or close a door over the power cord. Don’t unplug pressure washer
by pulling on the power cord.
14. Don’t aim the pressure washer at people, animals, plants, electrical components, wires, or the pressure
washer itself.
15. Don’t use the pressure washer on electrical components, damaged/delicate paint surfaces, tyres,
engines/motors.
16. Don’t use the pressure washer with incorrect voltage as this may result in damage or injury to the user.
The correct voltage is listed on the rating label.
17. Always wear suitable clothing footwear and eye protection whilst using the pressure washer.
18. Always connect the water supply, remove the lance and squeeze the trigger to run water through
the machine before switching the power on.
19. Always use a suitable hose connector to match the coupling on the pressure washer with a non-return valve
at tap end of the supply hose.
20. Always unplug the pressure washer before cleaning or carrying out any maintenance.
21. Always turn off and unplug the pressure washer before disconnecting or connecting the hose, after use
always wrap the pressure hose and power cord around the storage clips provided.
22. Always release any built up pressure in the handle prior to disconnecting the hose and ensure water inlet
filter is clean prior to storage in a cool dry place.
23. Use only CE approved 13amp extension cords with RCD, non-approved extension cords may overheat.
Care should be taken to arrange the extension cord as it could be a trip hazard.
24. Always make sure the power/extension cord is fully unwound and prevent the power/extension cord from
getting wet during use.
25. Always replace the fuse in the plug with a 13amp fuse. Always protect the power cable from heated
surfaces or near open flames.
26. Always carry the pressure washer by the handle.
27. Always check water hose and accessories are not damaged, broken or worn before use.
PLEASE KEEP INSTRUCTIONS FOR FURTHER USE.
4
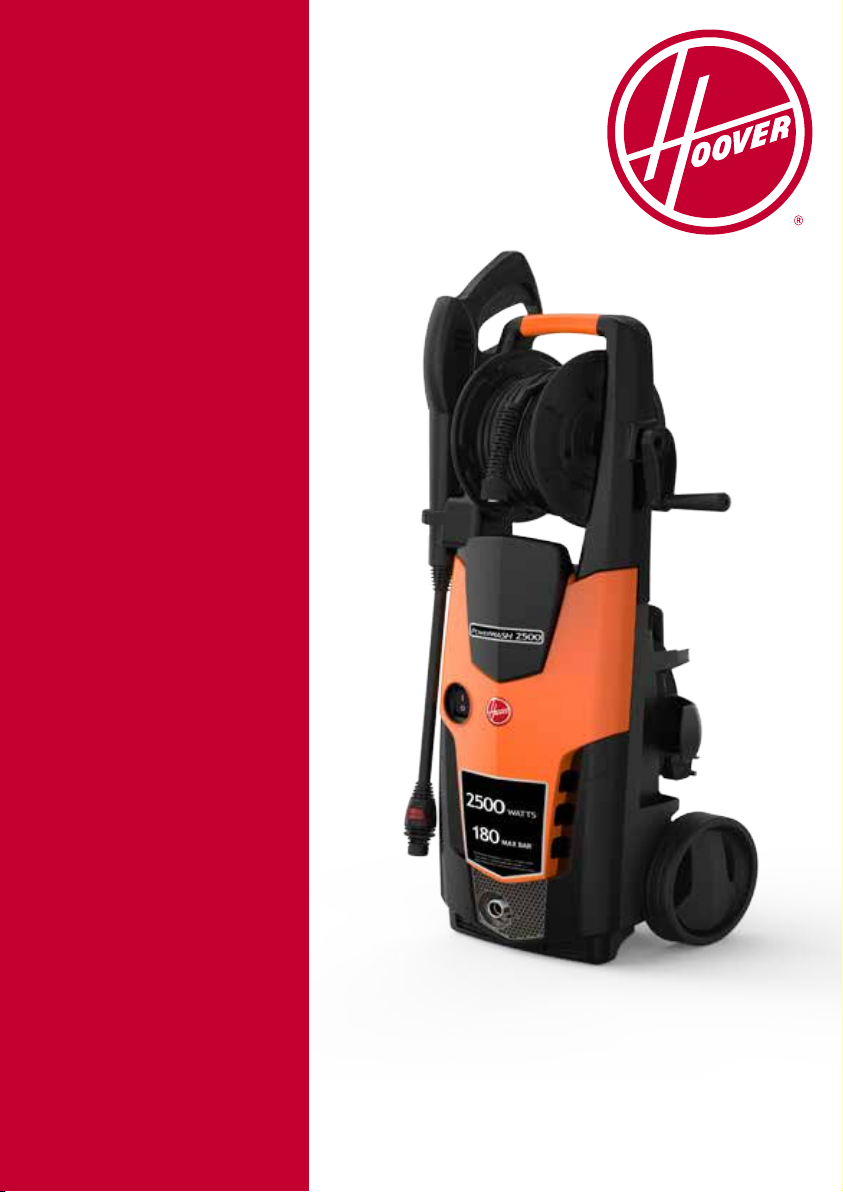
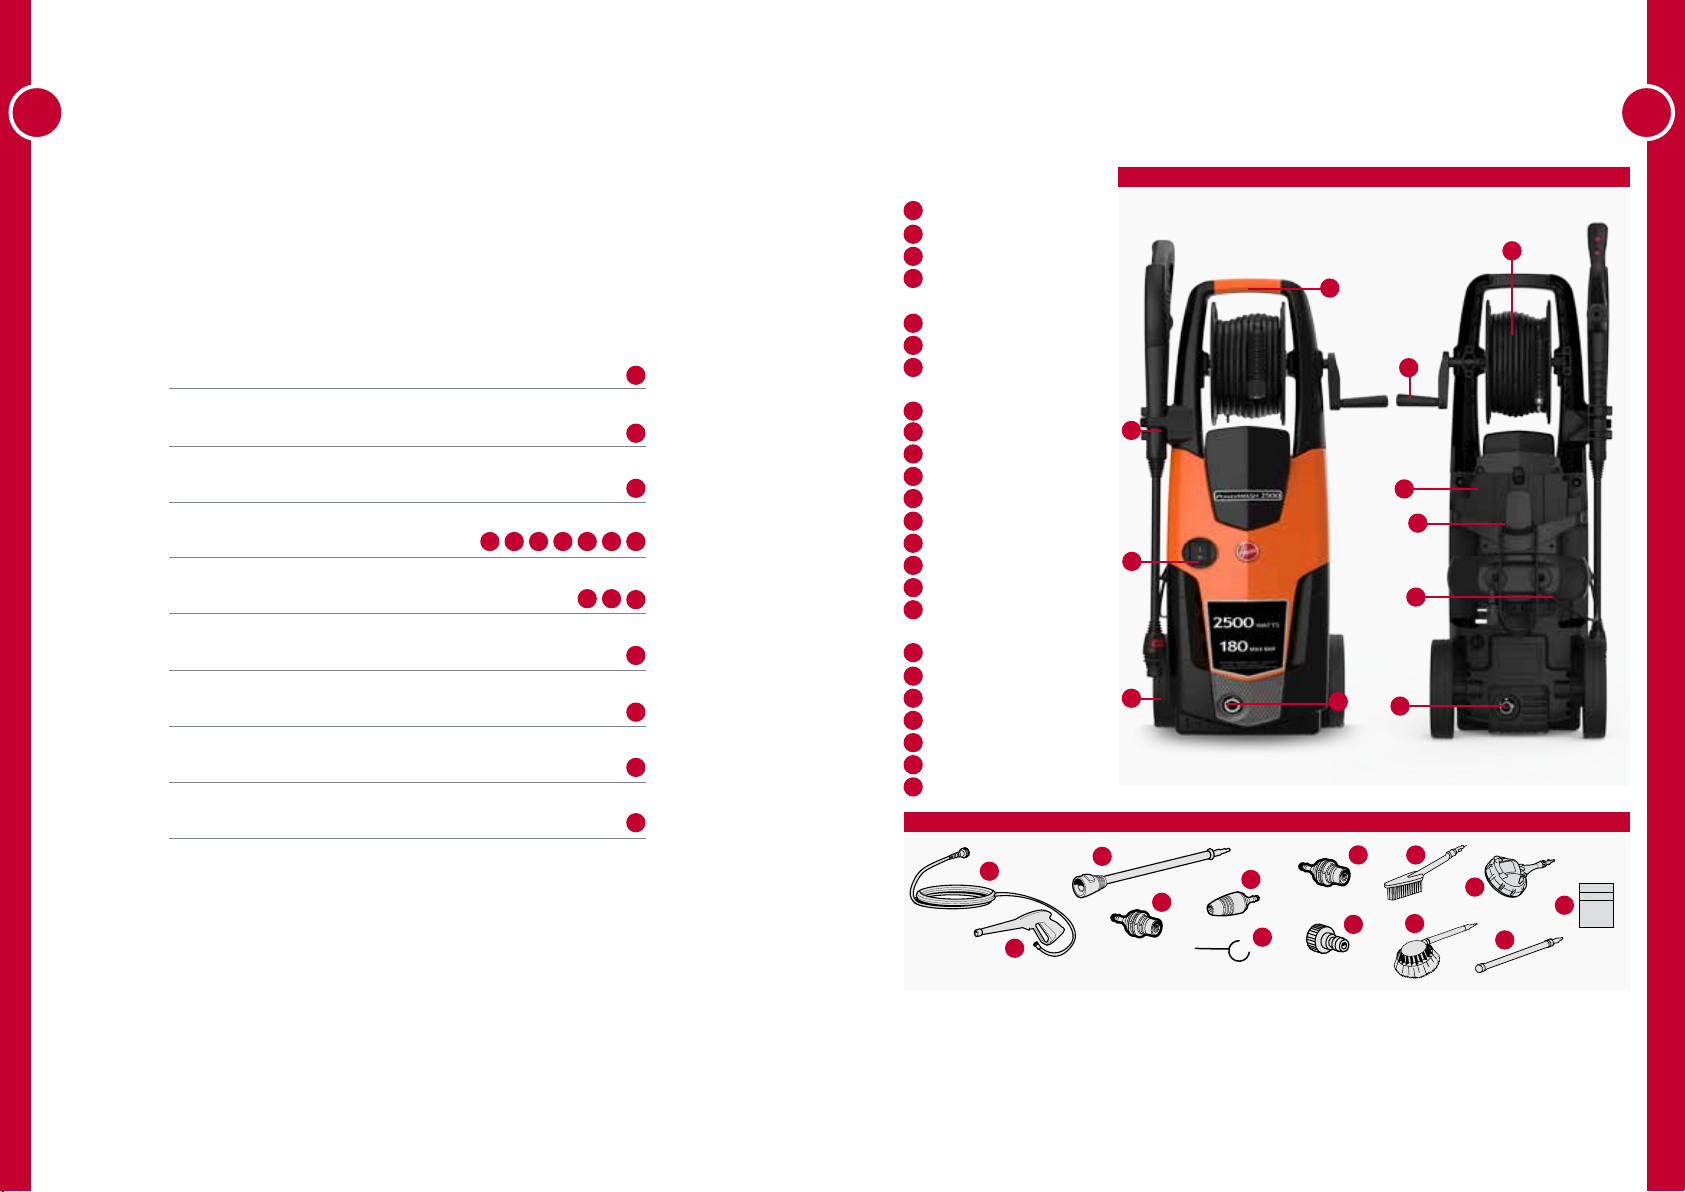
Assembling your Pressure Washer
OPERATION
Please read General Safety Information at the beginning before use.
Attach both wheels
and push until they
click into place.
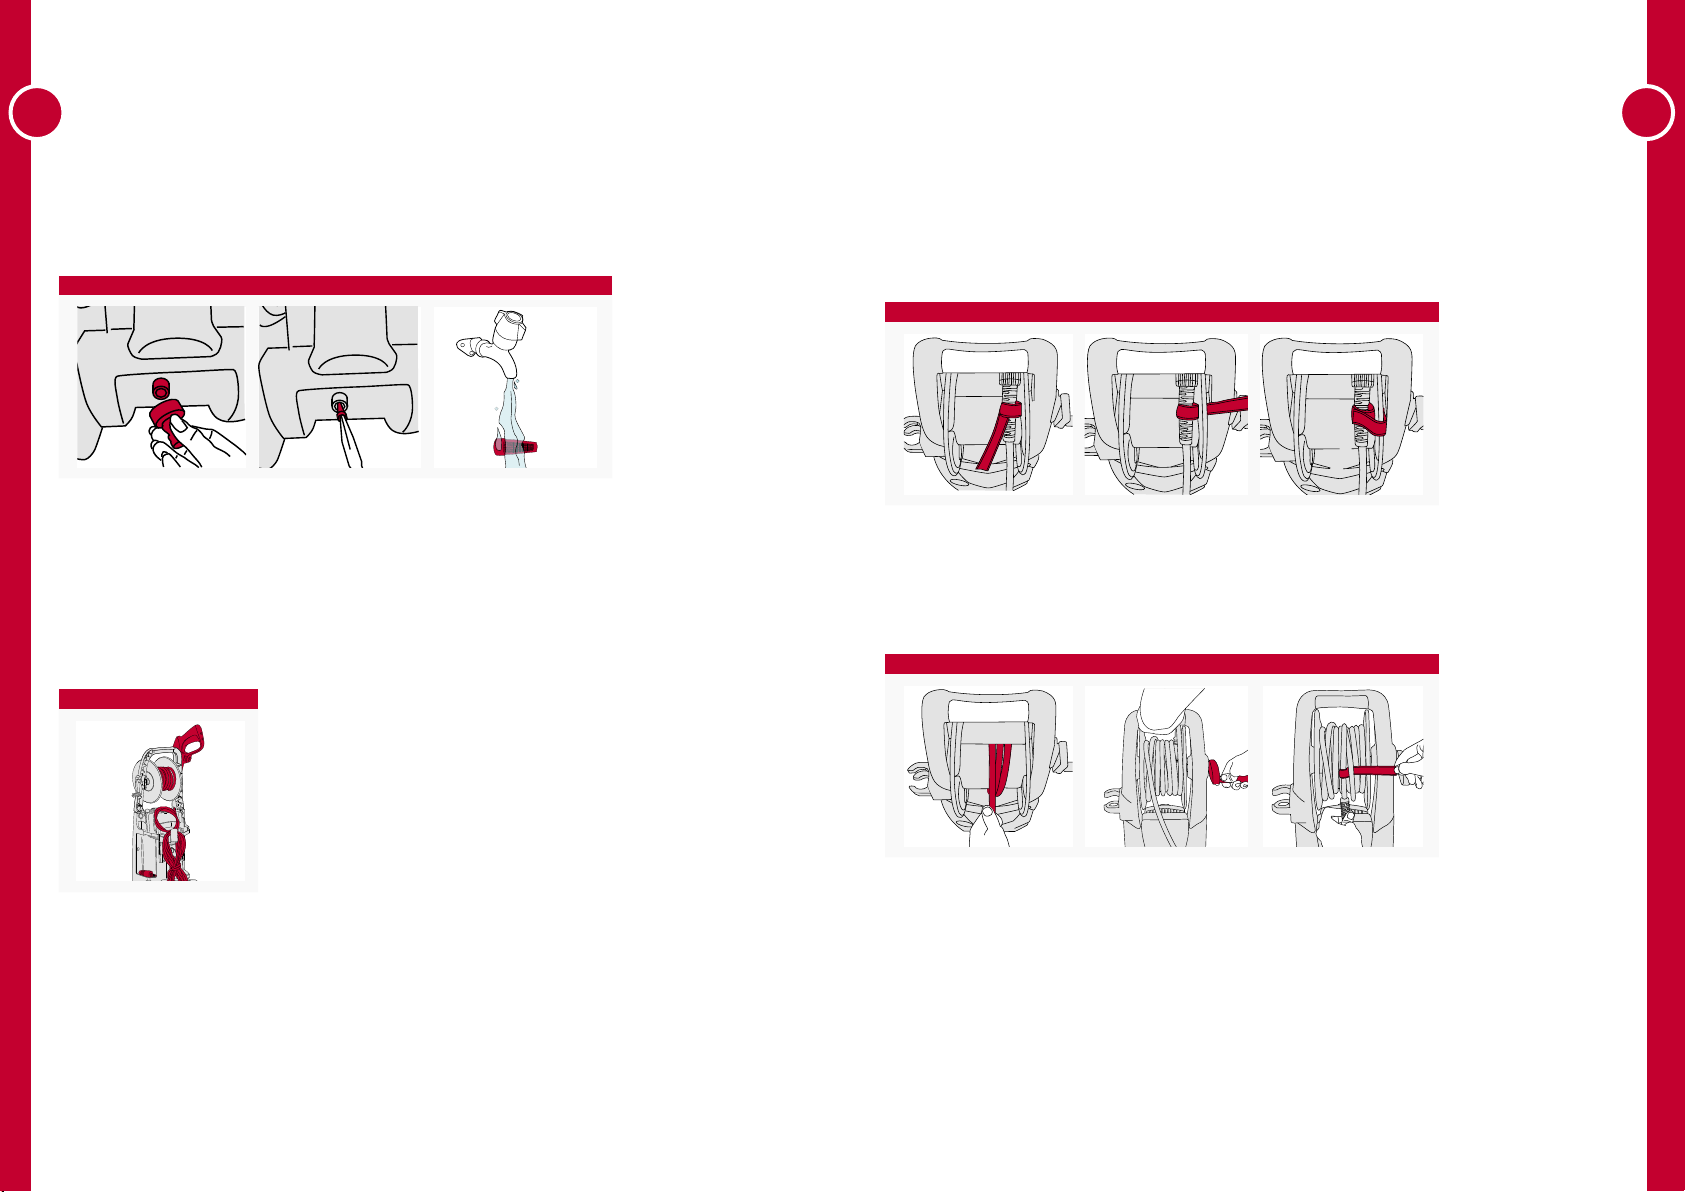
Attach the hose
connector to water inlet
by turning clockwise
until tight.
To attach the handle into the top of the pressure
washer, align the handle with the screw holes
making sure not to trap the solution tube. Slide
together and insert 2 screws and turn clockwise
to tighten.
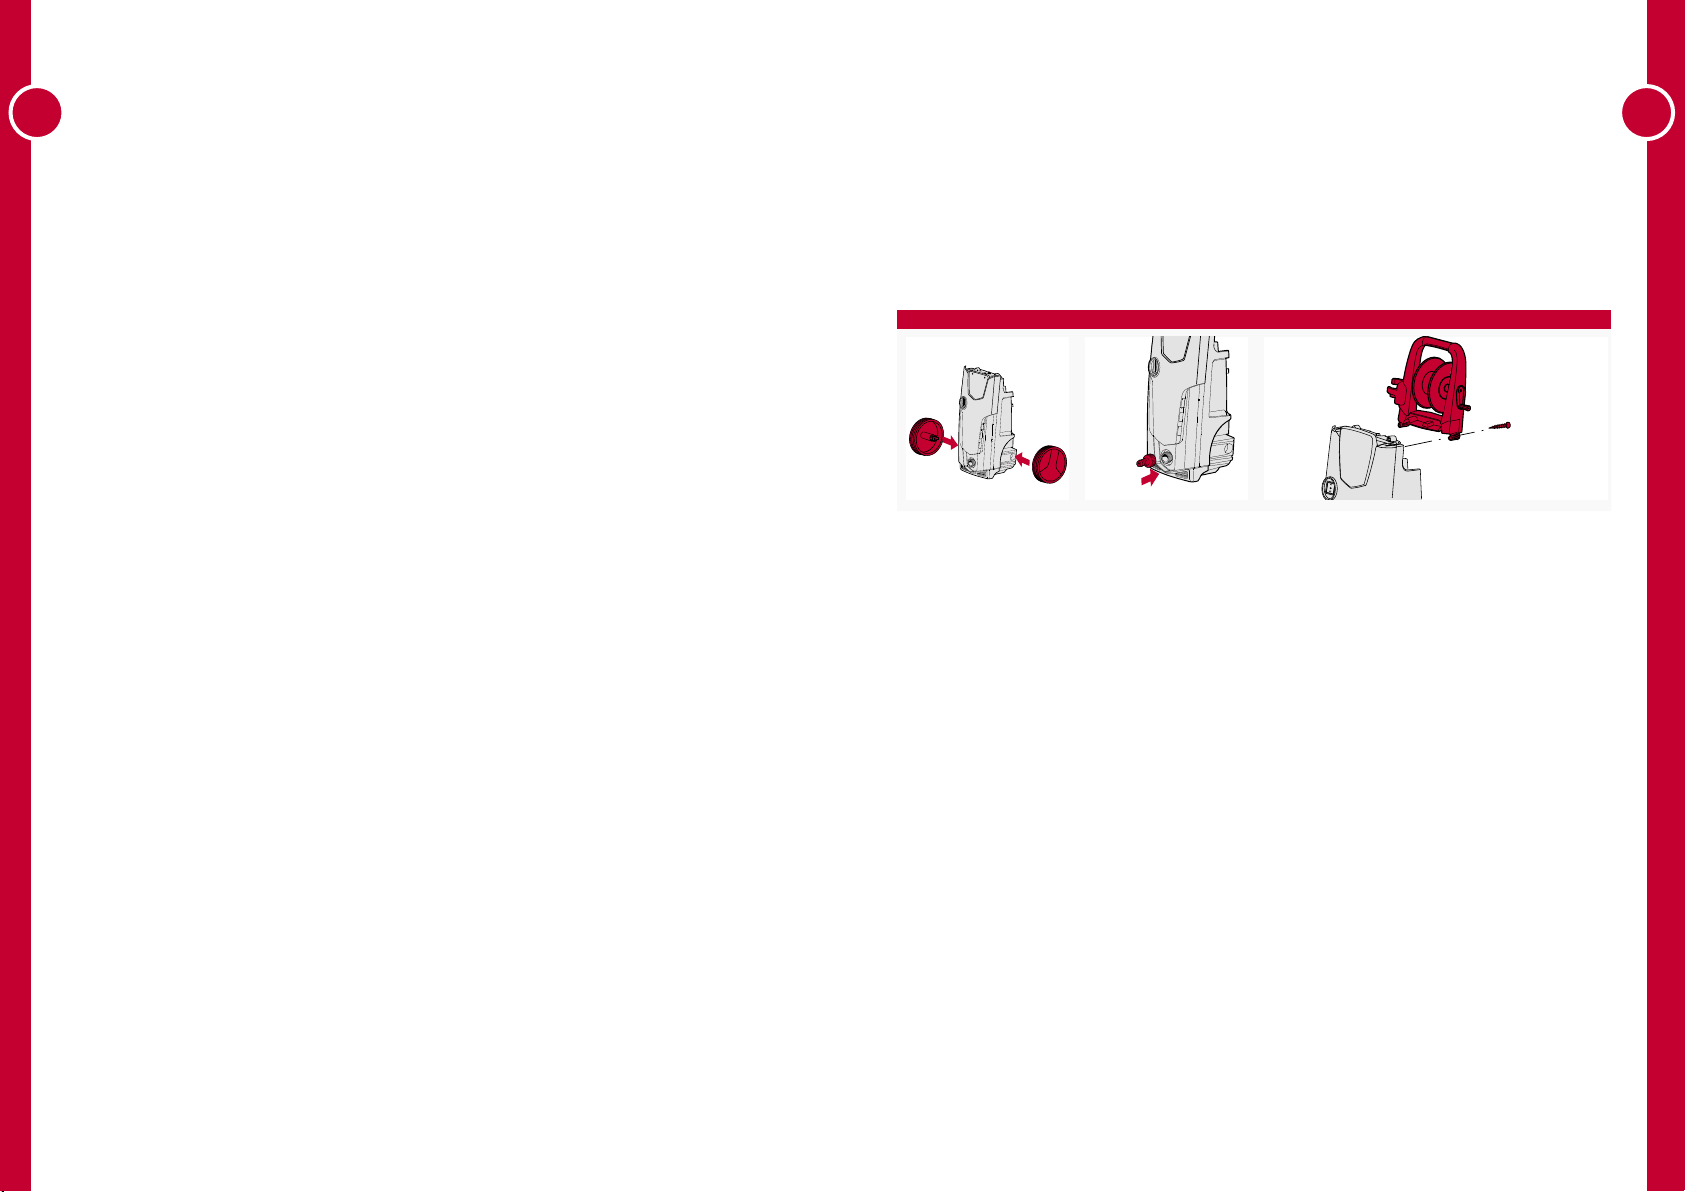
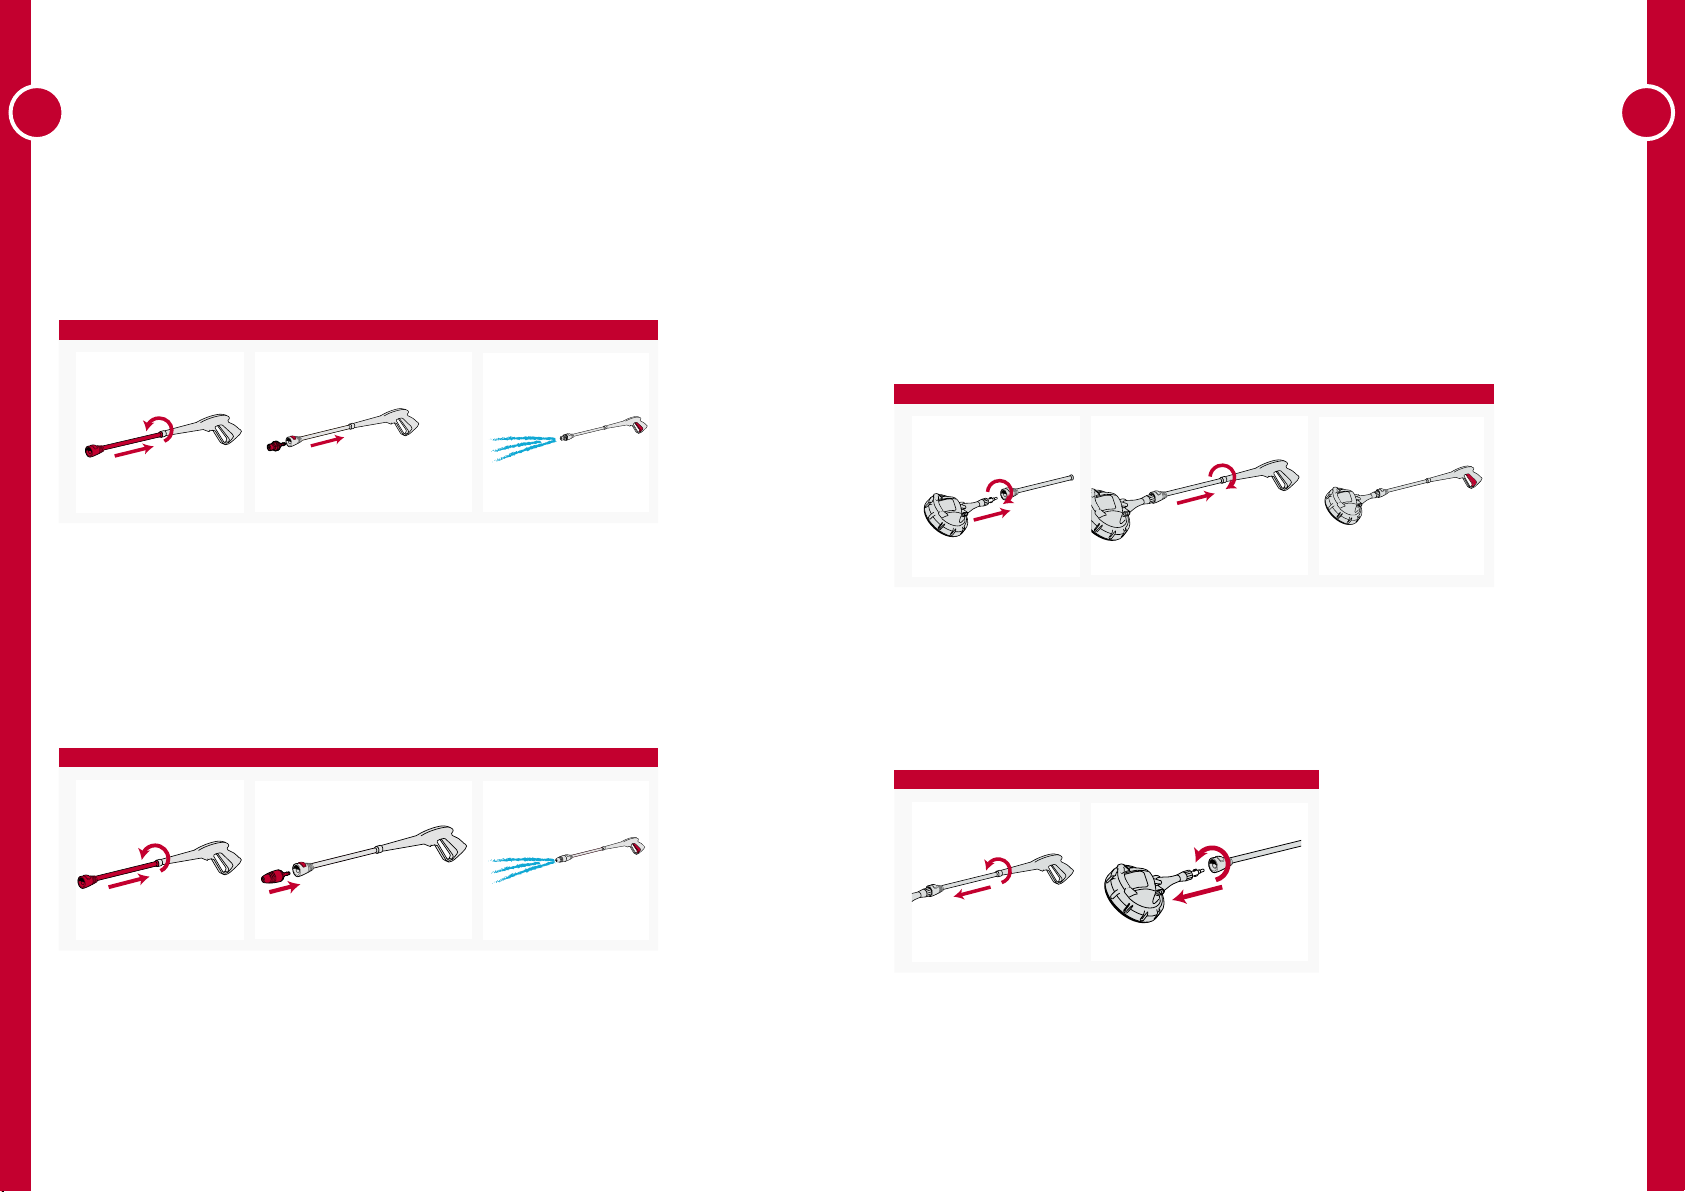
Always make sure the pressure washer and water supply are off before connecting or disconnecting
the hose and accessories.
5