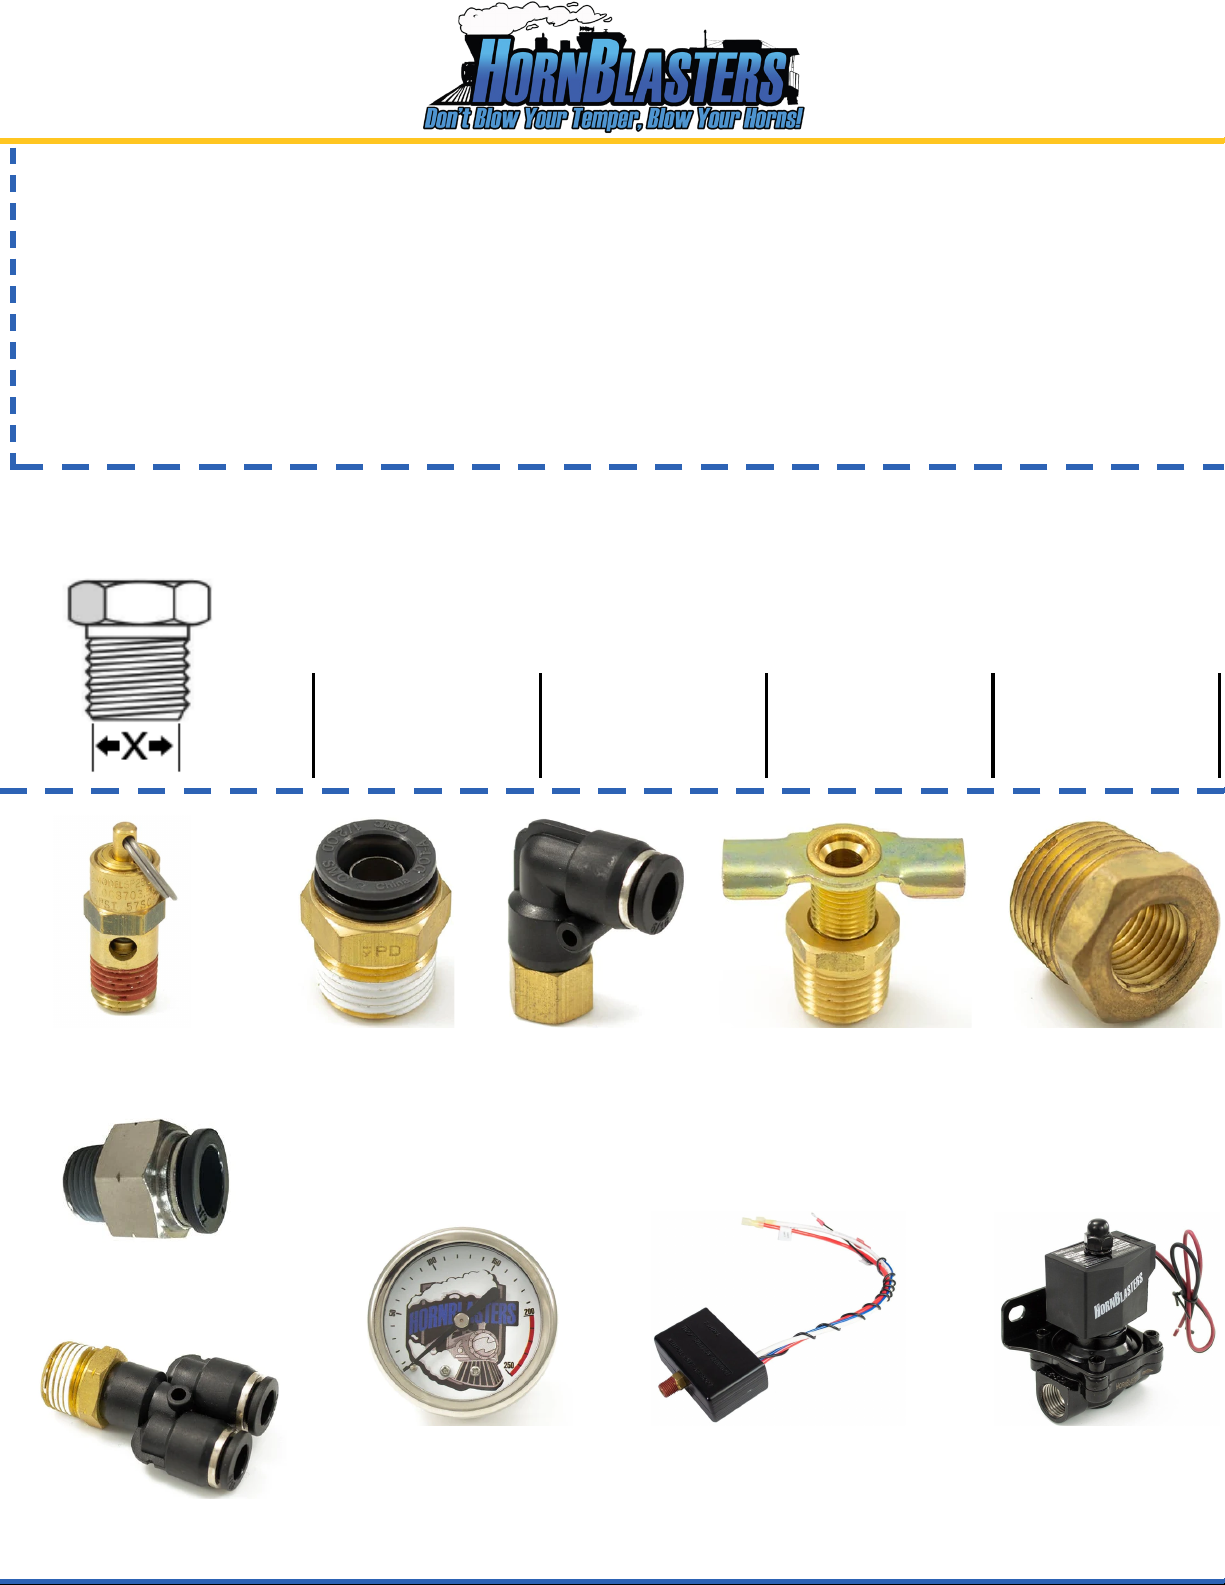
Plumbing the Valve to the Tank (Continued)
•
•
•
Plumbing the Horns to the Valve
Locate the roll of 5/16" air line that was packaged with your kit. This line will be used to connect each horn bell to
the 4-way splitter on the solenoid valve. You will also need the 4x shocker elbow fittings that came with your kit.
Plumb each elbow fitting onto the brass stud of each horn as shown to the left. Do not use
Teflon tape here! Little pieces of the tape will find it's way into the horn and prevent it from
honking. Get each fitting hand tight and give them another 1/8" turn with a wrench if possible.
Be careful not to use too much force or the stud will break loose. These fittings DO NOT need
to be torqued down that much. They are not under constant pressure.
Make sure that:
•Both 5/16" lines are equal length
•Make sure each horn is mounted
properly before you drive the
vehicle.
•Ensure each line is properly
connected into each elbow fitting
and each side of the splitter.
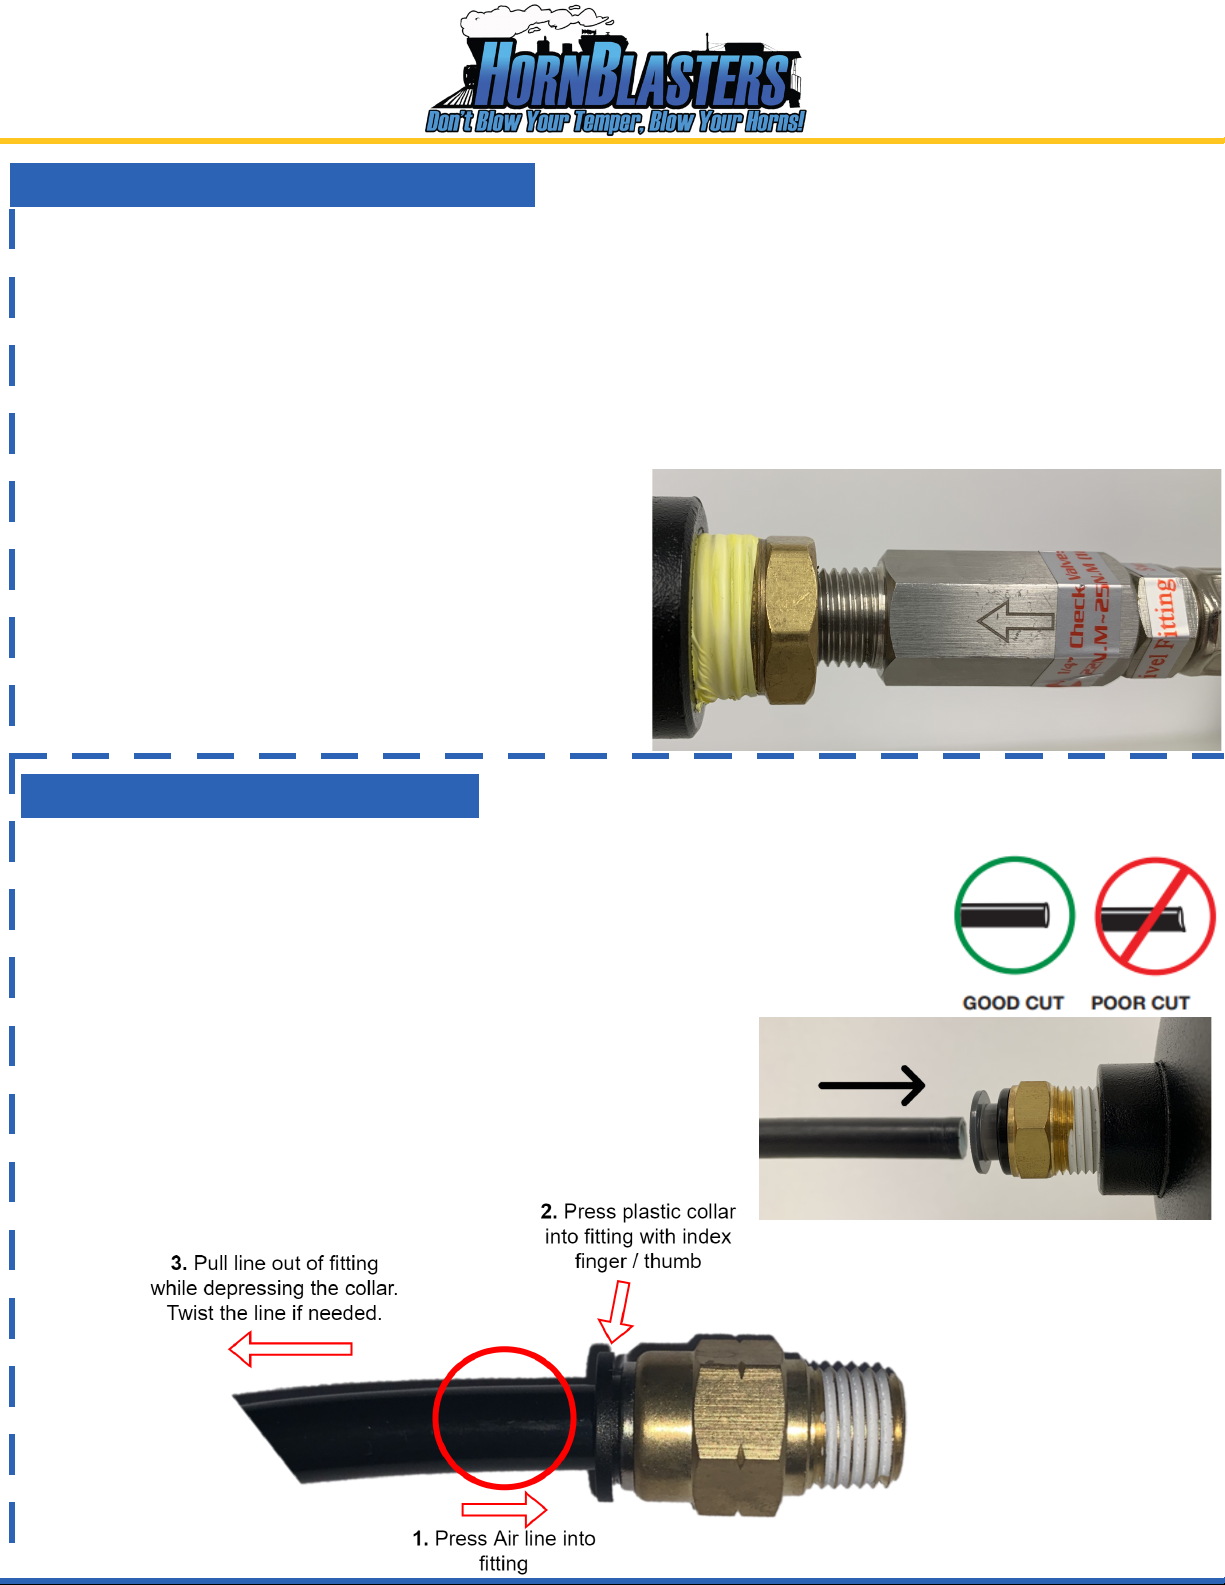
Cut the roll of 5/16" line in half to make two separate lines. Each line must be the same length
so that each bell sounds off at the same time! At this point, connect each length of line from
the 4-way splitter into each elbow fitting on the horns. Make sure every connection is tight and
inserted all the way into each fitting.
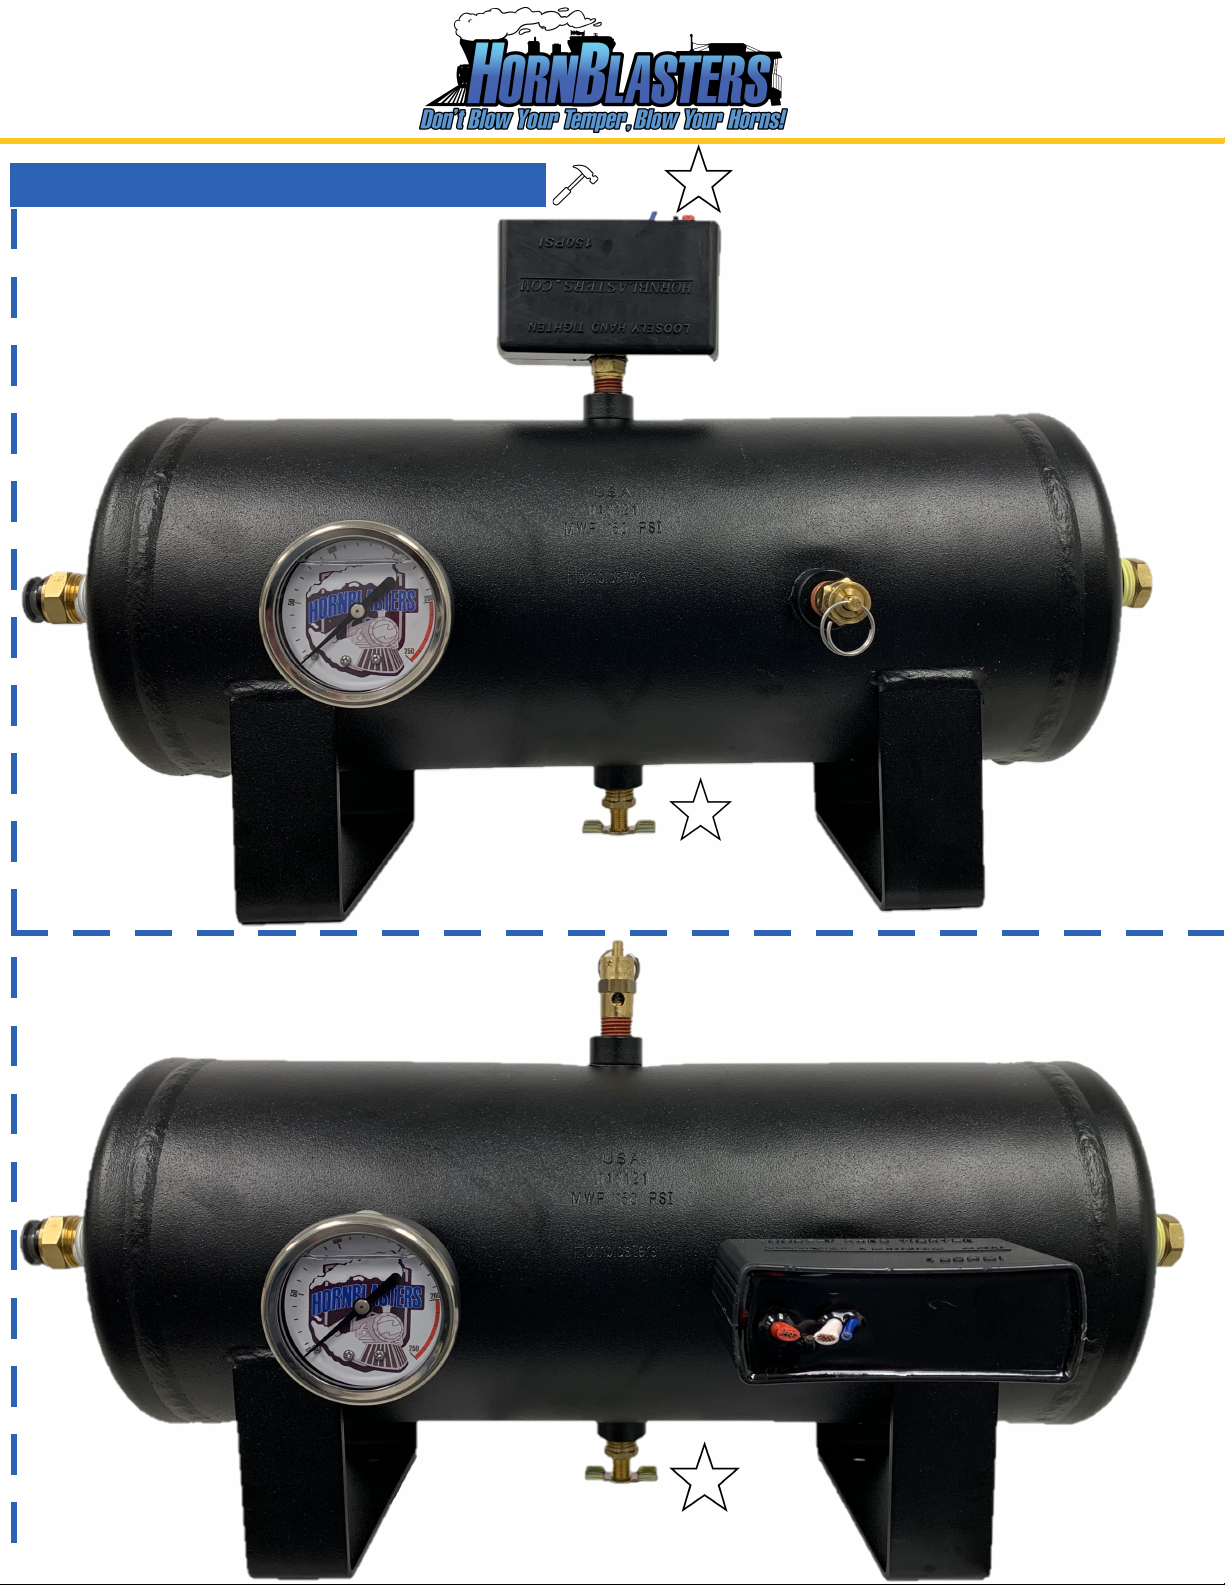
Locate the solenoid valve for your horns. Take note of
the arrow on the bottom of the valve (look at the
bracket reflection). This arrow must point TOWARDS
your horns. If the valve is mounted with the arrow
pointing towards the tank, the valve will not hold air
pressure and leak instantly.
Locate the 2-way splitter that came with your kit. Plumb this
fitting into the outlet side of the air valve. Use a wrench to
tighten the fitting snug. Be careful not to apply pressure to
the plastic portion of the fitting. It can/will break.
Grab the 1/2" line that we plumbed into the tank and route it
up to this valve. Insert the line into the 1/2" fitting on the inlet
portion of the valve.