8
II. Installation and Operating Instructions
A. Checks Before Installation
IMPORTANT
1. Install in accordance with all applicable national, state, and local regulations.
. Remove the shipping carton, tape, and packing material. If any are left in the
icemaker, it will not work properly.
3. Ensure all components, fasteners, and thumbscrews are securely in place
after installation.
1) Remove the front panel to prevent damage when installing the icemaker. See "II.C.
Setup" for details.
) Remove the package containing the accessories.
3) Remove the protective plastic lm from the panels. If the icemaker is exposed to the
sun or to heat, remove the lm after the icemaker cools.
4) Check that the refrigerant lines do not rub or touch lines or other surfaces, and that the
fan blade (if applicable) turns freely.
5) Check that the compressor is snug on all mounting pads.
6) See the nameplate on the rear panel and check that your voltage supplied corresponds
with the voltage specied on the nameplate.
B. Location
CAUTION
1. This icemaker is not intended for outdoor use. Normal operating ambient
temperature should be within +45°F to +100°F (+7°C to +38°C); Normal
operating water temperature should be within +45°F to +90°F (+7°C to
+3°C). Operation of the icemaker, for extended periods, outside of these
normal temperature ranges may affect icemaker performance.
. This icemaker will not work at sub-freezing temperatures. To prevent damage
to the water supply line, drain the icemaker if the air temperature is going to
go below 3°F (0°C). See "III.C. Preparing the Icemaker for Long Storage."
For best operating results:
• Icemaker should not be located next to ovens, grills, or other high heat producing
equipment.
• Avoid choosing a site where dripping is not allowed.
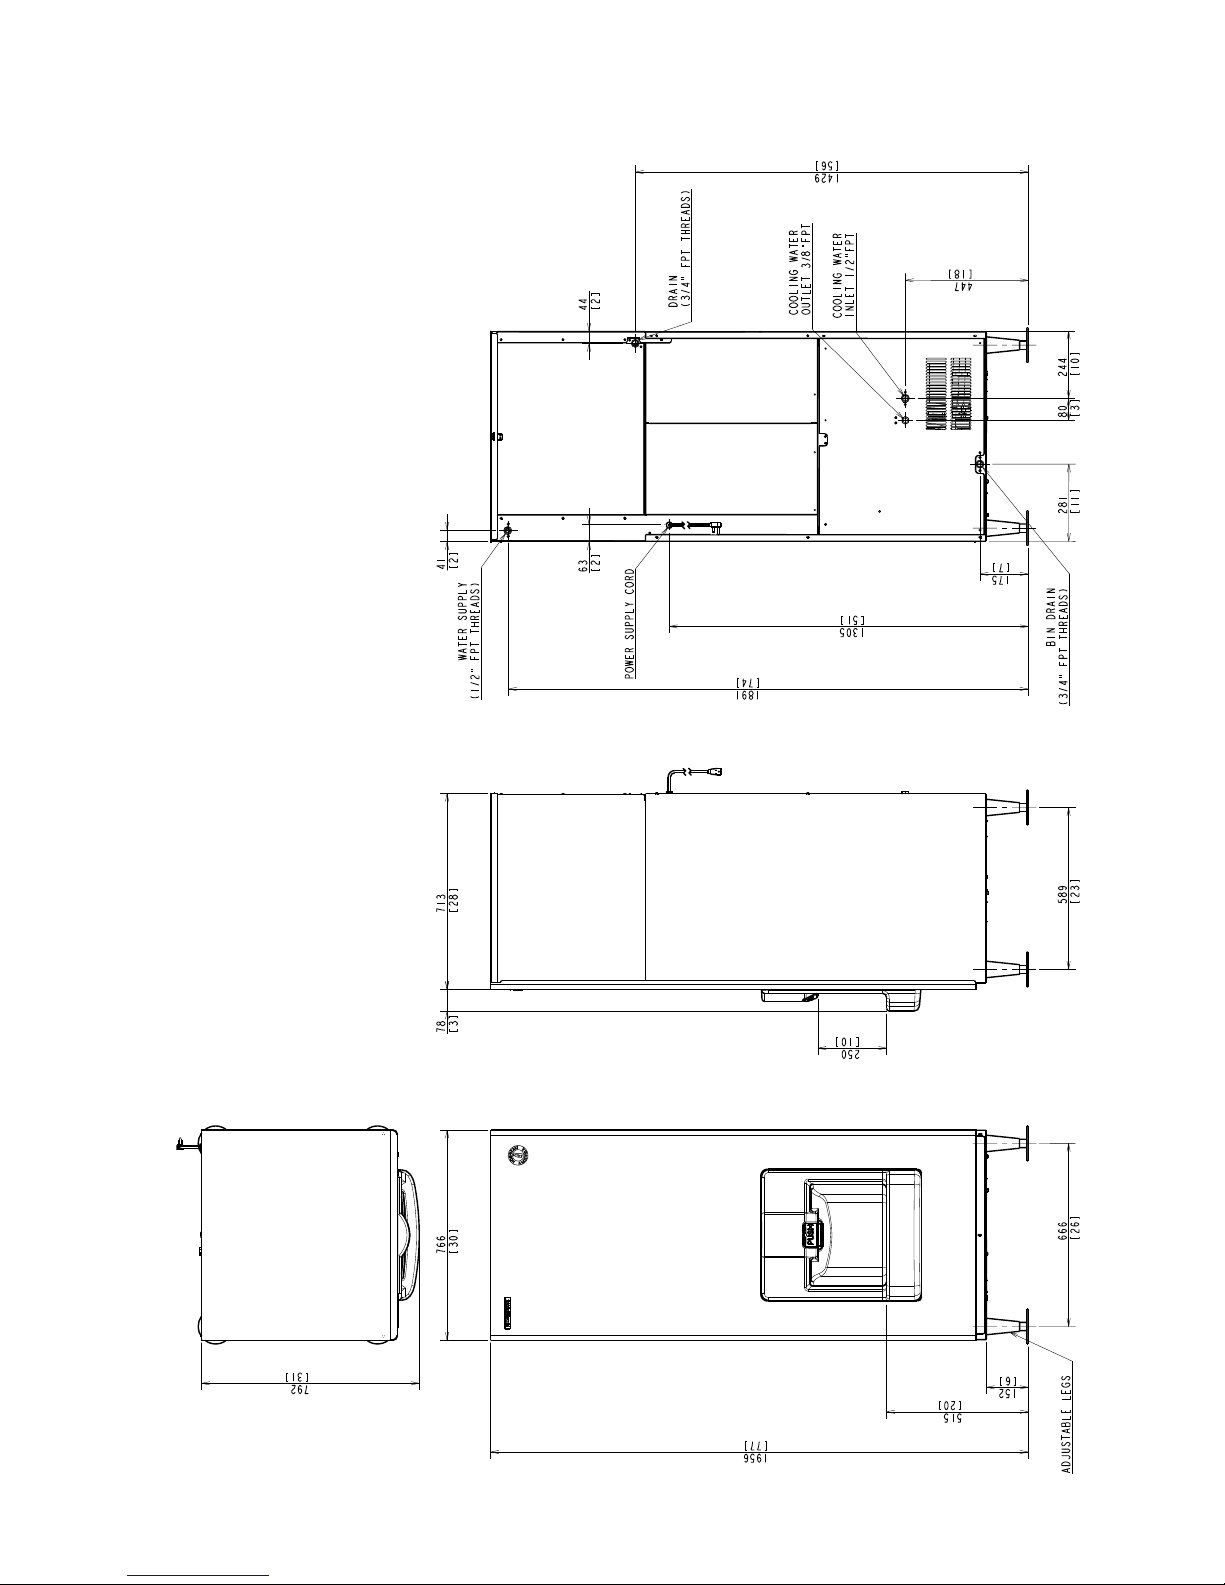
• On air-cooled model, allow at least 1" (30 cm) clearance on the left side and
6" (15 cm) clearance at rear, right side, and top for proper air circulation and ease of
maintenance and/or service should they be required. On water-cooled model, allow 6"
(15 cm) clearance at rear, sides, and top.
• Location should provide a rm and level foundation for the equipment.