7
Figure 10
Figure 8 Figure 9
Figure 11
Figure 11A
Figure 11B
Figure 12
Figure 13
11 22 33 44 55
12345 1
0
0 2 3 4 5
Cut Along This Line Cut Along This Line
BE SURE TO LEAVE ROOM FOR COVER PLATE
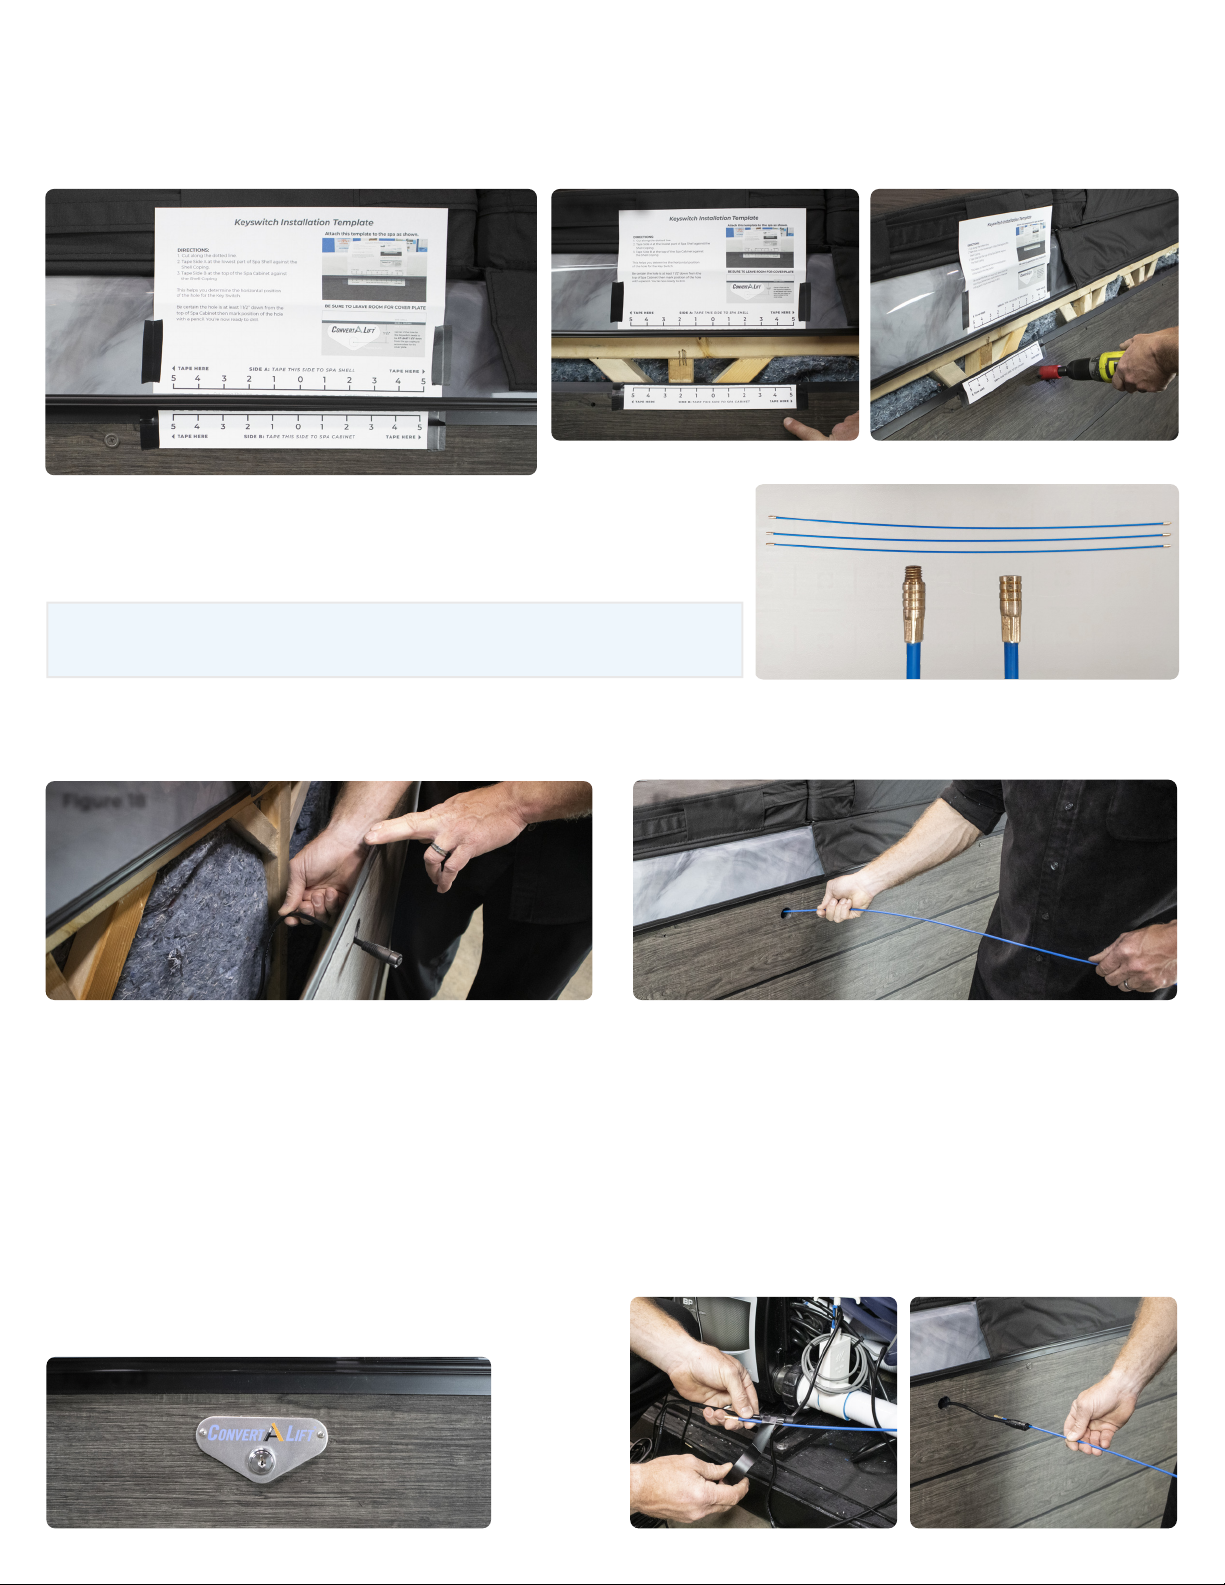
Attach this template to the spa as shown.
DIRECTIONS:
1. Cut along the dotted line.
2. Tape Side A at the lowest part of Spa Shell against the
Shell Coping.
3. Tape Side B at the top of the Spa Cabinet against
the Shell Coping
This helps you determine the horizontal position
of the hole for the Key Switch.
Be certain the hole is at least 1 1/2” down from the
top of Spa Cabinet then mark position of the hole
with a pencil. You’re now ready to drill.
SIDE B: TAPE THIS SIDE TO SPA CABINET
SIDE A: TAPE THIS SIDE TO SPA SHELL TAPE HERE
Keyswitch Installation Template
TAPE HERE
TAPE HERE
TAPE HERE