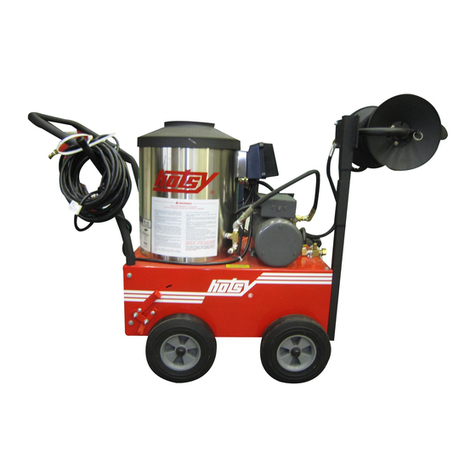
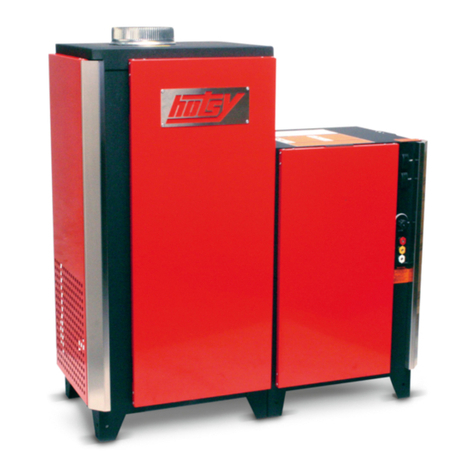
Hotsy 800 Series User manual

8.921-206.0-B 5/31/17
800 Series
Mobile - Hot Water - Oil-Fired
Operator’s Manual
Pressure Washer
MODELS:
821
1.109-120.0
842
1.109-121.0
843
1.109-122.0
844
1.109-123.0
845
1.109-124.0
851
1.109-125.0
873
1.109-131.0
874
1.109-132.0
852
1.109-126.0
853
1.109-127.0
854
1.109-128.0
855
1.109-129.0
856
1.109-130.0
For the Hotsy Dealer nearest you,
consult our web page at
www.hotsy.com
USEONLY KEROSENE, STOVE OIL OR
DIESELFUEL IN THIS TANK
CAUTION:RISKOFFIRE— DO NOT ADDFUEL WHILE MACHINE
ISOPERATING OR WHEN STILL HOT.
UNICAMENTEUSE KEROSENE, ACEITE
COMBUSTIBLEODIESEL EN ESTE TANQUE
PRECAUCIÓN:RIESGODEINCENDIO — NO AGREGUECOMBUS
TIBLECONLA MÁQUINA OPERANDO O AL ESTAR CALIENTE.
UTILISERSEULEMENT DE KÉROSENE,
DEL'HUILE À POELE OU COMBUSTIBLE
DIÉSELDANS CE RÉSERVOIR
ATTENTION:RISQUEDEFEU. NEPAS AJOUTER DE CARBURANT
LORSQUEL'APPAREILEST EN OPÉRATION OU ENCORE CHAUD.
9.800-002.0
CAUTION
PRECAUCION/ ATTENTION
COLDWATER INLET
INGRESODEL AGUAFRíA
ADMISSIOND’EAU FROID
9.800-020.0
EXPOSED PULLEYSAND
BELTSCAN CAUSE INJU RY
KEEPCLEAR WHILE MACHINERY
ISOPERATING
POLEASY CORREAS EXPU ESTAS
PUEDEN CAUSAR DAÑO
NOSE ACERQUE SI MÀQUINA ESTÁFUNCIONANDO
DESCOURROIESOUPOULIESEXPOSÉES
PEUVENTCAUSERDESBLESSURES
NEPASS’APPROCHER LORSQUE L’APPAREIL EST EN OPÉRATION
WARNING
PRECAUCIÓN/ AVERTISSEMENT
8.932-965.0

2Hotsy 800 OIL FIRED OPERATOR’S 8.921-206.0 - B
Machine Data Label

3
Table of Contents
Machine Data Label. . . . . . . . . . . . . . . . . . . . . . . . . .2
Table of Contents . . . . . . . . . . . . . . . . . . . . . . . . . . .3
How To Use This Manual . . . . . . . . . . . . . . . . . . . . .4
Safety
Introduction & Safety Information . . . . . . . . . . . . . . .5
IMPORTANT SAFETY INFORMATION . . . . . . . . . .6
Operations
Technical Specification. . . . . . . . . . . . . . . . . . . . . . .9
Component Identification . . . . . . . . . . . . . . . . . . . .10
Assembly Instructions. . . . . . . . . . . . . . . . . . . . . . .12
Installation Instructions . . . . . . . . . . . . . . . . . . . . . .14
Hotsy Crossfire Burner Air Adjustment . . . . . . . . . .15
Operations Instructions. . . . . . . . . . . . . . . . . . . . . .16
Detergents & General Washing Techniques. . . . . .19
Shut Down And Clean Up. . . . . . . . . . . . . . . . . . . .20
Maintenance
Pump. . . . . . . . . . . . . . . . . . . . . . . . . . . . . . . . . . . .21
Burner Fuel Filter . . . . . . . . . . . . . . . . . . . . . . . . . .21
Heating Coil . . . . . . . . . . . . . . . . . . . . . . . . . . . . . .21
Brake. . . . . . . . . . . . . . . . . . . . . . . . . . . . . . . . . . . .21
Troubleshooting . . . . . . . . . . . . . . . . . . . . . . . . . . .22
Hotsy 800 OIL FIRED OPERATOR’S 8.921-206.0 - B

4
How To Use This Manual
This manual contains the following sections:
• How to Use This Manual
•Safety
• Operations
• Maintenance
The HOW TO USE THIS MANUAL section will tell you
how to find important information for ordering correct
repair parts.
Parts may be ordered from authorized dealers. When
placing an order for parts, the machine model and
machine serial number are important. Refer to the
MACHINE DATA box which is filled out during the
installation of your machine. The MACHINE DATA box
is located on the inside of the front cover of this manual.
The model and serial number of your machine is
located on the back of the machine.
The SAFETY section contains important information
regarding hazardous or unsafe practices of the
machine. Levels of hazards are identified that could
result in product damage, personal injury, or severe
injury resulting in death.
The OPERATIONS section is to familiarize the operator
with the operation and function of the machine.
The MAINTENANCE section contains preventive main-
tenance to keep the machine and its components in
good working condition. They are listed in this general
order:
•Pump
• Pump Motor
• Burner Fuel Filter
•HeatingCoil
•Brake
• Troubleshooting
NOTE: If a service or option kit is installed on your
machine, be sure to keep the KIT INSTRUCTIONS
which came with the kit. It contains replacement parts
numbers needed for ordering future parts.
NOTE: The manual part number is located on the
lower right corner of the front cover.
Model:
Date of Purchase:
Serial Number:
Dealer:
Address:
Phone Number:
Sales Representative:
Hotsy 800 OIL FIRED OPERATOR’S 8.921-206.0 - B

5
Safety
Introduction & Safety Information
Thank you for purchasing this Pressure Washer. We
reserve the right to make changes at any time
without incurring any obligation.
Owner/User Responsibility:
The owner and/or user must have an understanding of
the manufacturer’s operating instructions and warnings
before using this pressure washer. Warning information
should be emphasized and understood. If the operator
is not fluent in English, the manufacturer’s instructions
and warnings shall be read to and discussed with the
operator in the operator’s native language by the
purchaser/owner, making sure that the operator
comprehends its contents. Owner and/or user must
study and maintain for future reference the
manufacturers’ instructions. The operator must know
how to stop the machine quickly and understand the
operation of all controls. Never permit anyone to
operate the engine without proper instructions.
SAVE THESE INSTRUCTIONS
This manual should be considered a permanent
part of the machine and should remain with it if
machine is resold.
When ordering parts, please specify model and
serial number. Use only identical replacement
parts.This machine is to be used only by trained
operators.
Hotsy 800 OIL FIRED OPERATOR’S 8.921-206.0 - B

6
Safety
IMPORTANT SAFETY INFORMATION
WARNING: To reduce the risk of
injury, read operating instruc-
tions carefully before using.
1. Read the owner's manual thor-
oughly. Failure to follow instruc-
tions could cause malfunction of
the machine and result in death,
serious bodily injury and/or
property damage.
2. Know how to stop the machine and bleed pressure
quickly. Be thoroughly familiar with the controls.
3. Stay alert — watch what you are doing.
4. All installations must comply with local codes.
Contact your electrician, plumber, utility company
or the selling dealer for specific details. If your
machine is rated 250 volts or less, single phase a
ground fault circuit interrupter (GFCI) will be
provided. If rated more than 250 volts, or more
than single phase this product should only be
connected to a power supply protected by a GFCI.
WARNING: Must be plugged into properly wired
three hole grounded outlet that accommodates
plug on power cord. Failure to comply could result
in electrical shock.
DANGER: Improper connection of the equipment-
grounding conductor can result in a risk of electro-
cution. Check with a qualified electrician or service
personnel if you are in doubt as to whether the
outlet is properly grounded. Do not modify the plug
provided with the product - if it will not fit the outlet,
have a proper outlet installed by a qualified electri-
cian. Do not use any type of adapter with this
product. DANGER: Keep wand, hose, and
water spray away from electric
wiring or fatal electric shock may
result.
5. To protect the operator from
electrical shock, the machine
must be electrically grounded.It
is the responsibility of the owner
to connect this machine to a UL
grounded receptacle of proper
voltage and amperage ratings. Do not spray water
on or near electrical components. Do not touch
machine with wet hands or while standing in water.
Always disconnect power before servicing.
WARNING: Flammable liquids can create fumes
which can ignite, causing property damage or
severe injury.
WARNING: Risk of explosion —
Operate only where open flame or
torch is permitted.
6. In oil burning models, use only
kerosene, No. 1 home heating
fuel, or diesel. If diesel is used,
add a soot remover to every
tankful.
WARNING: Risk of fire — Do not
add fuel when the product is
operating or still hot.
WARNING: Do not use gasoline
crankcase draining or oil
containing gasoline, solvents or
alcohol. Doing so will result in fire
and/or explosion.
7. Oil burning appliances shall be installed only in
locations where combustible dusts and flammable
gases or vapors are not present. Do not store or
use gasoline near this machine.
8. Do not allow acids, caustic or abrasive fluids to
pass through the pump.
9. Never run pump dry or leave spray gun closed
longer than 1-2 minutes.
10. Keep operating area clear of all persons.
WARNING: High pressure
spray can cause paint chips or
other particles to become
airborne and fly at high
speeds. To avoid personal
injury, eye, hand and foot
safety devices must be worn.
11. Wear properly rated eye protec-
tion such as safety goggles or
face shield while spraying.
(Safety glasses do not provide full protection.)
WARNING:Thismachineexceeds
85 db appropriate ear protection
must be worn.
Hotsy 800 OIL FIRED OPERATOR’S 8.921-206.0 - B
WARNING
READ OPERATOR’S
MANUAL THOROUGHLY
PRIOR TO USE.
OPERATIONS
SAFETY
MAINTENANCE
DANGER
KEEP WATER
SPRAY AWAY FROM
ELECTRICAL WIRING.
WARNING
RISK OF EXPLOSION:
OPERATE ONLY WHERE
OPEN FLAME OR TORCH
IS PERMITTED
WARNING
RISK OF FIRE. DO NOT
OPERATE NEAR
FLAMMABLE LIQUIDS
WARNING
USE PROTECTIVE
EYE WEAR
AND CLOTHING
WHEN OPERATING
THIS EQUIPMENT.
WARNING
EAR PROTECTION
MUST BE WORN

7
Safety
WARNING: Hot discharge fluid.
Do not touch or direct discharge
stream at persons.
WARNING: This machine
produces hot water and must
have insulated components
attached to protect the operator.
WARNING: Risk of injury. Hot
surfaces can cause burns. Use
only designated gripping areas of
spray gun and wand. Do not place
hands or feet on non-insulated
areas of the pressure washer.
12. To reduce the risk of injury,
close supervision is necessary
when a machine is used near
children. Do not allow children to operate the
pressure washer. This machine must be
attended during operation.
WARNING: Grip cleaning wand
securely with both hands before
starting. Failure to do this could
result in injury from a whipping
wand.
13. Never make adjustments on
machine while in operation.
14. Be certain all quick coupler fittings are secured
before using pressure washer.
WARNING: High pressure
developed by these machines will
cause personal injury or
equipment damage. Keep clear of
nozzle. Use caution when oper-
ating. Do not direct discharge
stream at people and animals, or
severe injury or death will result.
WARNING: Protect machine from
freezing.
15. To keep machine in best
operating conditions, it is
important you protect machine
from freezing. Failure to protect
machine from freezing could
cause malfunction of the
machine and result in death,
serious bodily injury, and/or
property damage. Follow storage instructions
specified in this manual.
16. Inlet water must be clean fresh water and no hotter
then 90°F.
WARNING: Risk of asphyxiation.
Use this product only in a well
ventilated area.
17. Avoid installing machines in
small areas or near exhaust
fans. Adequate oxygen is
needed for combustion or
dangerous carbon monoxide will
result.
18. Manufacturer will not be liable for any changes
made to our standard machines or any compo-
nents not purchased from us.
19. The best insurance against an accident is precau-
tion and knowledge of the machine.
WARNING: Be extremely careful
when using a ladder, scaffolding
or any other relatively unstable
location. The cleaning area should
have adequate slopes and
drainage to reduce the possibility
of a fall due to slippery surfaces.
20. Do not overreach or stand on unstable support.
Keep good footing and balance at all times.
21. Do not operate this machine when fatigued or
under the influence of alcohol, prescription medica-
tions, or drugs.
Hotsy 800 OIL FIRED OPERATOR’S 8.921-206.0 - B
WARNING
RISK OF INJURY.
HOT SURFACES
CAN CAUSE BURNS
WARNING
TRIGGER GUN KICKS
BACK — HOLD WITH
BOTH HANDS
WARNING
RISK OF INJECTION
OR SEVERE INJURY
TO PERSONS. KEEP
CLEAR OF NOZZLE.
WARNING
PROCTECT FROM
FREEZING
WARNING
RISK OF
ASPHYXIATION.
USE THIS PRODUCT
ONLY IN A WELL
VENTILATED AREA.
WARNING
RISK OF INJURY
FROM FALLS WHEN
USING LADDER.
WARNING
HOT DISCHARGE FLUID:
DO NOT TOUCH OR
DIRECT DISCHARGE
STEAM AT PERSONS.

8
Safety
WARNING: If connection is made
to a potable water system, the
systemshallbeprotectedagainst
back flow.
Follow the maintenance instructions
specified in the manual.
WARNING: To prevent damage or injury.
Keep brake engaged during machine
operation and storage.
Hotsy 800 OIL FIRED OPERATOR’S 8.921-206.0 - B
89212070-38
Brake
WARNING
DO NOT SPRAY
MACHINE OR ANY
PEOPLE, ANIMALS OR
ELECTRICAL PARTS.
WARNING
NOT SUITABLE
FOR CONNECTION
TO THE POTABLE
WATER MAINS.

9
Operations
Technical Specification
Model #
Pump
Volume@
Pump
Head
Pump
Pressure
at Pump
Head
Burner Type Burner Fuel
Pressure Motor
HP Machine
Voltage
Total
Machine
Amperage
821 4 GPM /
228 GPH 2300 PSI Fuel Oil Fired,
381,000 BTU/Hr. NOT TO EXCEED
200 PSI 6.2 208VAC/
60Hz/1Ph 33 Amps
842 4 GPM /
234 GPH 2000 PSI Fuel Oil Fired,
381,000 BTU/Hr. NOT TO EXCEED
200 PSI 5.0 208VAC/
60Hz/3Ph 20 Amps
843 4 GPM /
234 GPH 2000 PSI Fuel Oil Fired,
381,000 BTU/Hr. NOT TO EXCEED
200 PSI 5.0 230VAC/
60Hz/1Ph 29 Amps
844 4 GPM /
234 GPH 2000 PSI Fuel Oil Fired,
381,000 BTU/Hr. NOT TO EXCEED
200 PSI 5.0 230VAC/
60Hz/3Ph 19 Amps
845 4 GPM /
234 GPH 2000 PSI Fuel Oil Fired,
381,000 BTU/Hr. NOT TO EXCEED
200 PSI 5.0 460VAC/
60Hz/3Ph 10 Amps
851 4 GPM /
234 GPH 3000 PSI Fuel Oil Fired,
381,000 BTU/Hr. NOT TO EXCEED
200 PSI 8.2 208VAC/
60Hz/1Ph 41 Amps
852 4 GPM /
234 GPH 3000 PSI Fuel Oil Fired,
381,000 BTU/Hr. NOT TO EXCEED
200 PSI 7.5 208VAC/
60Hz/3Ph 25 Amps
853 4 GPM /
234 GPH 3000 PSI Fuel Oil Fired,
381,000 BTU/Hr. NOT TO EXCEED
200 PSI 7.5 230VAC/
60Hz/1Ph 37 Amps
854 4 GPM /
234 GPH 3000 PSI Fuel Oil Fired,
381,000 BTU/Hr. NOT TO EXCEED
200 PSI 7.5 230VAC/
60Hz/3Ph 25 Amps
855 4 GPM /
234 GPH 3000 PSI Fuel Oil Fired,
381,000 BTU/Hr. NOT TO EXCEED
200 PSI 7.5 460VAC/
60Hz/3Ph 14 Amps
856 4 GPM /
234 GPH 3000 PSI Fuel Oil Fired,
381,000 BTU/Hr. NOT TO EXCEED
200 PSI 8.2 575VAC/
60Hz/3Ph 11 Amps
873 5 GPM /
300 GPH 3000 PSI Fuel Oil Fired,
404,000 BTU/Hr. NOT TO EXCEED
200 PSI 10 230VAC/
60Hz/3Ph 42 Amps
874 5 GPM /
300 GPH 3000 PSI Fuel Oil Fired,
404,000 BTU/Hr. NOT TO EXCEED
200 PSI 10 230VAC/
60Hz/3Ph 29 Amps
Model # Machine
Weight Shipping
Weight Exhaust Stack
Size Machine Dimensions
821 582 Lbs 632 Lbs 8” L 51” X W 28” X H 52”
842 572 Lbs 622 Lbs 8” L 51” X W 28” X H 52”
843 572 Lbs 622 Lbs 8” L 51” X W 28” X H 52”
844 572 Lbs 622 Lbs 8” L 51” X W 28” X H 52”
845 641 Lbs 691 Lbs 8” L 51” X W 28” X H 52”
851 625 Lbs 675 Lbs 8” L 51” X W 28” X H 52”
852 615 Lbs 665 Lbs 8” L 51” X W 28” X H 52”
853 615 Lbs 665 Lbs 8” L 51” X W 28” X H 52”
854 615 Lbs 665 Lbs 8” L 51” X W 28” X H 52”
855 615 Lbs 665 Lbs 8” L 51” X W 28” X H 52”
856 630 Lbs 680 Lbs 8” L 51” X W 28” X H 52”
873 760 Lbs 760 Lbs 8” L 51” X W 28” X H 52”
874 765 Lbs 765 Lbs 8” L 51” X W 28” X H 52”
Hotsy 800 OIL FIRED OPERATOR’S 8.921-206.0 - B

10
Operations
Component Identification
Hotsy 800 OIL FIRED OPERATOR’S 8.921-206.0 - B
89212070-12
USE ONLYKEROSENE, STOVE OIL OR
DIESEL FUEL IN THIS TANK
CAUTION:RISKOF FIRE — DO NOT ADD FUELWHILE MACHINE
IS OPERATING OR WHEN STILL HOT.
UNICAMENTEUSE KEROSENE, ACEITE
COMBUSTIBLEODIESEL ENESTE TANQUE
PRECAUCIÓN:RIESGODE INCENDIO — NO AGREGUE COMBUS
TIBLECON LA MÁQUINA OPERANDO O AL ESTAR CALIENTE.
UTILISER SEULEMENT DE KÉROSENE,
DE L'HUILE À POELE OU COMBUSTIBLE
DIÉSEL DANS CE RÉSERVOIR
ATTENTION:RISQUEDE FEU.NEPAS AJOUTER DE CARBURANT
LORSQUEL'APPAREILEST EN OPÉRATION OU ENCORE CHAUD.
9.800-002.0
CAUTION
PRECAUCION / ATTENTION
COLDWATER INLET
INGRESODEL AG UAFRíA
ADMISSIOND’EAU FROID
9.800-020.0
EXPOSED PULLEYS AND
BELTSCAN CAUSE INJURY
KEEPCLEAR WHILE MACHINERY
ISOPERATING
POLEASYCORREASEXPUESTAS
PUEDENCAUSAR DAÑO
NOSE ACERQUE SI MÀQUINA ESTÁFUNCIONANDO
DESCOURROIESOUPOULIESEXPOSÉES
PEUVENTCAUSER DESBLESSURES
NEPAS S’APPROCHER LORSQUE L’APPAREILEST EN OPÉRATION
WARNING
PRECAUCIÓN/ AVERTISSEMENT
8.932-965.0
TACH/HOUR
Burner
Exhaust
Vent
High
Pressure
Nozzle
High Pressure
Hose
Detergent Bucket
(not included)
Relief
Valve
Garden Hose
(not included)
Spray
Gun
Oil Burner
Assembly
GFCI
(Single Phase
MachinesOnly)
Wand
Nozzles
Thermostat
Detergent
Metering
Valve
Burner Switch
Pump Switch
Hose Reel
Bracket

11
Operations
Pump — Develops high pressure by pumping water
volume through nozzle (Not shown).
Spray Gun — Controls the application of water and
detergent onto cleaning surface with trigger device.
Includes safety latch.
Detergent Metering Valve — Controls detergent
mixture.
Wand — Must be connected to the spray gun.
GFCI — Provided on all single phase machines. Trips
when there is current leakage.
Relief Valve — Ruptureswhen pressureexceeds7000
psi.
High Pressure Hose — Connect one end to water
pump discharge nipple and the other end to spray gun.
Pressure Nozzle — Inserted into wand quick coupler
to develop pressure
Adjustable Thermostat — Prevents water tempera-
ture from exceeding high temperatures. Is not used to
maintain constant temperature setting.
Oil Burner Assembly— Converts fuel oil from a liquid
state into a combustible mixture.
Hose Reel Bracket — Mounts optional hose reel.
Hotsy 800 OIL FIRED OPERATOR’S 8.921-206.0 - B

12
Operations
Assembly Instructions
Unpacking
Unpack carefully. Wear safety glasses or goggles while
unpacking,assemblingor operatingpressurewasher. If
there are missing components or hidden damage
immediately contact dealer or carrier concerning
discrepancies.
1. Cut strapping band from pressure washer and
pallet.
2. Remove pressure washer from pallet.
Parts Included
• Pressure Washer
• Pressure Hose
•Wand
• Hose Reel Mount W/Hardware
• Trigger Gun
• Operating Instructions and Parts Manual
Tools Required
10" Adjustable Crescent Wrenches (2 ea.) ?
Blade Screwdriver
Pressure Hose
1. Use teflon tape on plumbing connections to
prevent leakage.
2. Install pressure hose on machine as shown.
NOTE: The safety relief valve must be inspected and
tested annually.
Wand Components
1. Assemble wand components as shown. Connect
pressure hose to trigger gun.
NOTE: The nozzle is not to be installed at this time.
2. Make sure that all plumbing connections are tight.
Hotsy 800 OIL FIRED OPERATOR’S 8.921-206.0 - B
Quick Disconnect Plug Wand
Quick
Disconnect
Trigger Gun
Pressure Hose
Relief Valve
Pressure Hose

13
89212070-18
Pressure
Nozzle
Coupler
Collar
Operations
STEP 1: Attach a 5/8" water supply
hose to inlet connector. Minimum
flow should be 5 GPM depending
on model of machine. Do not
exceed 65 psi incoming water
pressure.
STEP 4: Attach the high pressure
hose to the spray gun using teflon
tape on hose threads. The end
with the longest shroud or bend
restrictor is attached to spray gun.
STEP 7: Check oil level by using
supplied dip-stick. Use SAE 10W-
40 non-detergent only.
STEP 2: Attach high pressure hose
to discharge nipple using quick
coupler. Lock coupler securely by
pulling back coupler collar,
inserting onto discharge nipple and
pushing collar forward until secure.
STEP 5:
Before installing nozzle,
turn on water supply and run
machine allowing water to flush
through the system until clear. Pull
the spring-loaded collar of the wand
coupler collar back to insert your
choice of pressure nozzle.
CAUTION: Never replace nozzles
without engaging the safety latch
on the spray gun trigger.
STEP 8: Fill fuel oil tank. Do not
confuse gasoline and fuel oil tanks.
Keep proper fuel in proper tank.
STEP 3:Attach variable pressure
control wand to spray gun using
teflon tape on threads to prevent
leakage.
STEP 6: Release the coupler collar
and push the nozzle until the collar
clicks. Pull the nozzle to make sure
it is seated properly.
Hotsy 800 OIL FIRED OPERATOR’S 8.921-206.0 - B
COLD WATERINLET
INGRESO DEL AGUA FRíA
ADMISSION D’EAU FROID
9.800-020.0
Garden
Hose
Water
Inlet
High
Pressure
Hose
Discharge
Nipple
Collar
Trigger
Gun
Wand
Safety Latch
Coupler
Collar
Pressure
Nozzle
Dipstick
Y
AS
FU
NCIONAND
O
S
EXP
OSÉES
S
B
LE
SSURES
AP
PAREILEST EN OP
ÉRATION
Fuel Oil
Tank
Pressure
Nozzle
Coupler
Collar
High
Pressure
Hose
Spray Gun
Shroud

14
Operations
Installation Instructions
Venting
CAUTION - RISK OF ASPHYXIATION: Do not run
machine indoors or in an enclosed area without the
required venting, as exhaust fumes may be
hazardous to your health.
CAUTION: All venting must be in accordance with
applicable federal and state laws, and local ordi-
nances. Consult local heating contractors.
IMPORTANT: A draft regulator shall be installed.
INSTALLER UNE HOTTE DE TIRAGE.
If the pressure washer is to be used in an enclosed
area, a flue must be installed to vent burner exhaust to
the outside atmosphere. Exhaust gases should not be
vented into a wall, a ceiling, or a concealed space of a
building. Be sure the flue is the same size as the burner
exhaust vent on the pressure washer. Poor draft will
cause the pressure washer to soot and not operate
properly. When selecting the location for installation,
beware of poorly ventilated locations or areas where
exhaust fans may cause an insufficient supply of
oxygen available for the amount of fuel being burned. If
it is necessary to install the machine in a poorly venti-
lated area, outside fresh air may have to be piped to the
burner and a fan installed to bring sufficient air into the
machine. Locate the pressure washer so that the flue
will be as straight as possible and protrude through the
roof at a proper height and location to provide adequate
draft. This oil fired pressure washer must have a draft
regulator installed in the flue (available from most
heating contractors). A draft regulator will permit proper
upward flow of exhaust flue gases.
Electrode Setting:
Periodically Check Wiring Connections. If
Necessary To Adjust Electrodes, Use Diagram.
Burner Air Adjustment
The oil burner on this machine is preset for operation at
altitudes below 500 feet. If operated at higher altitudes,
it may be necessary to adjust the air band for a #1 or #2
smoke spot on the Bacharach scale.
To adjust, start machine and turn burner ON. Loosen
two locking screws found on the air band and close air
band until black smoke appears from burner exhaust
vent. Note air band position. Next, slowly open the air
band until white smoke just starts to appear. Turn air
band halfway back to the previously noted position.
Tighten locking screws.
For higher altitudes, the air band opening may need to
be increased; for lower altitude, the air band may need
to be decreased.
For higher humidity, the air band opening may need to
be increased; for lower relative humidity, the air band
may need to be decreased.
For higher ambient temperatures the air band opening
may need to be increased; for lower ambient tempera-
tures, the air band opening may need to be decreased.
Adjust to your operating location's environment as-
needed for best smoke spot and performance
compliant with local, state, and federal regulations.
CAUTION: If white smoke appears from burner
exhaust vent during start-up or operation, discon-
tinue use and readjust air bands.
NOTE: If a flue is installed, have a professional
serviceman adjust your burner for a #1 or #2 smoke
spot on the Bacharach scale.
For additional burner component information, see
Burner Assembly Exploded View page. It is recom-
mended that the oil burner be serviced yearly or as
needed. Contact your local service center.
Hotsy 800 OIL FIRED OPERATOR’S 8.921-206.0 - B

15
Operations
Fuel Pressure Air Adjustment
To adjust fuel pressure, First install a pressure gage
into the port just after the pump fuel exit. Turn the
adjusting screw (located at the regulator port)
clockwise to increase, and counterclockwise to
decrease. Do not exceed 200 psi or lower the pressure
below 130 PSI, when checked at the post-pump
pressure port.
The fuel pressure may need to be adjusted due to
altitude. For every 500 ft altitude above sea level, the
boiling point of water goes down 1 °F. At high altitude
environments, this boiling point change may require the
heat input to be lowered so the water input does not
turn to steam earlier than at the factory settings and
activate the pressure sensors and pressure relief
equipment when the unit is operated and much higher
altitudes from factory settings or local dealer site
settings. Check with your dealer before making local
site fuel pressure adjustments.
Also, as ambient temperature changes seasonally, the
fuel temperature in the feed tank and air temperature
inlet can impact fuel flow. In more extreme tempera-
tures, this local-site adjustment may also require
different fuel nozzles for fuel inlet temperatures that are
at seasonal extremes (higher or lower) in locations
where the temperature changes are beyond moderate
temperatures of between 40°F and 90°F. Colder
temperatures will make for a thicker flow and less fine a
fuel spray while hotter temperatures will make for a
thinner flow a more fine spray with the same nozzle.
Consider alternate nozzle configurations from the
baseline factory-supplied nozzle for operating in such
temperature extremes if performance is not meeting
needs with air band and fuel pressure settings alone.
NOTE: When changing fuel pump, a by-pass plug
must be installed in return line port or fuel pump will
not prime.
Water Supply
Connect water supply hose to water inlet. The water
faucet and supply hose must be capable of providing a
minimum of 4.0 gallons per minute (GPM) and a
maximum pressure of 65 psi.
Electrical
WARNING: Make sure all switches and controls are
in the OFF position prior to connecting electrical
supply.
WARNING: DO NOT stand in water while
connecting and disconnecting electrical supply.
WARNING: Always disconnect power before
servicing your pressure washer.
IMPORTANT: Consult local buildingcodes for exact
electrical requirements. Licensed contractors may
be required.
IMPORTANT: This machine must be electrically
grounded. LA MACHINE DOIT ÊTRE MISE À LA
TERRE.
Grounding Instructions
This product must be electrically grounded. If it should
malfunction or break down, grounding provides a path
of least resistance for electric current to reduce the risk
of electric shock. This product is equipped with a cord
having an equipment grounding conductor and a
grounding plug. The plug must be plugged into an
appropriate outlet that is properly installed and
grounded in accordance with all local codes and ordi-
nances.
DANGER: Improper connection of the equipment
grounding conductor can result in a risk of electro-
cution. Check with a qualified electrician or service
personnel if you are in doubt as to whether the
outlet is properly grounded.
DANGER: Do not modify the plug provided with the
product - if it will not fit the outlet, have a proper
outlet installed by a qualified electrician. DO NOT
use any type of adapter with this product.
Extension Cords: The models 980SS and 1410SS
should not be used with extension cords. All other
models must be used only with UL listed extension
cords that are rated for the voltage and amperage
requirements of the machine. In no case should more
than one cord be used and cord length should be kept
to a minimum to reduce the risk of severe electrical
shock and/or damage to the machine.
WARNING: To reduce the risk of electrocution,
keep all connections dry and off the ground. DO
NOT touch plug with wet hands.
Hotsy 800 OIL FIRED OPERATOR’S 8.921-206.0 - B

16
Operations
Operations Instructions
Before Starting
1. Read all manuals provided with this pressure
washer. Become familiar with location and function
of all operating and safety controls.
DANGER: Improper wiring connections of the
equipment can result in a risk of electrocution.
Check with a qualified electrician or service
personnel if you are in doubt as to whether the
outlet is properly grounded.
WARNING: Check hoses, fittings, wand, trigger gun
and fuel connections daily for signs of wear, cracks
and looseness, and replace as required.
2. Connect water supply hose to the standard garden
hose connector. The water faucet and supply hose
must be capable of providing 4.0 GPM.
3. Fill oil burner fuel tank. Use kerosene, #1 grade
home heating oil, #1 or #2 diesel fuel.
IMPORTANT: Do not use gasoline, crankcase
draining, used oil or oil containing gasoline or
solvents.
NE PAS UTILISER D’ESSENCE, DE PRODUITS DE
VIDANGE NI D’HUILE CONTENANT DE L’ESSENCE
OU DES SOLVENTS.
4. Check pump oil level.
5. If detergents are to be used, only use detergents
intended for pressure washers. Follow instructions
on the detergent container.
IMPORTANT: Before installing pressure nozzle on
initial start-up, turn on the water supply, start the
pump by pressing the pump ON switch, and hold
the trigger gun open until water appears at the end
of the wand. Allow water to run from the end of the
wand until clear to prevent the nozzle from
clogging.
IMPORTANT: If the pressure washer has not been
used for an extended period of time, remove the
pressure nozzle from the end of the wand and turn
on water supply, and start the pump by pressing
the pump ON switch. Hold the trigger gun open and
allow water to run from the end of the wand until
clear.
6. Install the pressure nozzle on end of wand.
IMPORTANT: The trigger gun provided with this
pressure washer is equipped with a manual trigger
lock to prevent accidental operation of the trigger
gun. The trigger lock should be used whenever the
trigger gun is not in use.
To Start
WARNING: Risk of injection or severe injury - Keep
clear of nozzle - DO NOT direct discharge stream at
persons - This machine is to be used only by
qualified operators.
AVERTISSEMENT: RISQUE D’INJECTION ET DE
BLESSURES GRAVES. SE TENIR À L’ÉCART DU
JET. NE PAS DIRIGER LE JET DE SORTIE VERS
D’AUTRES PERSONNES. CONFIER L’UTILISATION
DE CE MATÉRIEL À UN OPÉRATEUR QUALIFIÉ.
WARNING: Wear eye, ear, hand, foot and skin
protection at all times while operating pressure
washer.
WARNING: Before changing pressure nozzle,
engage manual trigger gun lock.
IMPORTANT: The water must be turned on before
starting. Running the pump dry will cause damage
and void warranty.
IMPORTANT: Do not allow the machine to run with
trigger of the trigger gun released for more than
10 minutes at any one time or damage to pump may
occur.
1. If equipped with a GFCI, test the GFCI using the
reset and test procedures provided on the GFCI
device. The GFCI must be tested with every use.
2. Turn ON water supply.
3. Hold wand firmly, release trigger of trigger gun and
turn pump switch ON. Squeeze trigger of trigger
gun and allow air to purge from system.
Hotsy 800 OIL FIRED OPERATOR’S 8.921-206.0 - B
Pressure Nozzle
Manual Trigger Lock

17
Operations
4. If HOT water is desired, adjust the thermostat to
the proper temperature and turn burner switch ON.
The burner will light immediately with a small puff
of smoke. You may need to initially adjust your
burner for peak performance. See Oil Burner
section under Installation. If smoke continues,
refer to the Troubleshooting Guide in this
manual. When the trigger of the trigger gun is
released or when the thermostat temperature
setting is reached, the burner will automatically
turn off.
IMPORTANT: If ignition or flame failure is experi-
enced, discontinue use of pressure washer at once.
Turn off burner and shut off fuel supply. Have cause
of failure corrected by an authorized service techni-
cian before use of pressure washer is continued.
To Clean
1. Insert detergent inlet line into container of mixed
detergent. Open detergent ON/OFF valve. The
detergent will be pulled automatically into the
system. Allow detergent to reach end of wand
before proceeding to step 3.
2. Select pressure nozzle with spray pattern that
matches your cleaning needs. Engage manual
trigger lock and install selected nozzle.
3. Wash from the bottom to the top, using side to side
motions. This washes away heavy dirt and allows
the detergent to soak as you work toward the top.
4. Do not wash at a 90° angle to the work (straight at
it. This will allow water to splash back at you and
reduces your cleaning power. Wash at a 30° to 60°
angle to the work. This will allow the water to
splash away from you and the water will wash the
dirt away faster and easier.
5. Use the width of the spray pattern to wash in a
wide path. Overlap spray paths for complete
coverage. Wash from side to side, using slow,
steady motions.
6. The nozzle should be 12" to 24" from work, closer
for tough areas. Be careful on painted or delicate
surfaces, the pressure may damage surface if
nozzle is too close.
7. Small parts should be washed in a basket so the
pressure does not push them away. Larger, light
weight parts should be clamped down so the
pressure does not push them away.
8. Close the detergent ON/OFF valve to permit rinse.
Always rinse with cold water after using detergents.
Rinse from the top to the bottom to prevent
detergent from dripping onto a rinsed area. For the
best results, contact your Hotsy dealer to help you
select the best detergent for your application.
Hotsy 800 OIL FIRED OPERATOR’S 8.921-206.0 - B

18
Operations
Operations Instructions
STEP 1: Turn on the water. Check
for water leaks, tighten as needed.
STEP 4: For hot water, turn the
thermostat knob to 210° then push
the burner switch to ON when a
steady stream of water flows out of
the spray gun. Burner will now light
automatically. NOTE: Do not start
machine with burner switch on.
STEP 2: Plug unit into power
source and activate pump switch.
Push re-set button on GFCI.
STEP 5: For steam, open the
steamvalvecounterclockwise.This
lowers the pressure and raises the
temperature.
STEP 3: With the spray nozzle
pointed away from you or anybody
else, press the trigger on the spray
gun to obtain pressurized cold
water spray.
STEP 6: The four color-coded quick connect nozzles
provide a wide array of spray widths from 0° to 40° and
are easily accessible when placed in the convenient
rubber nozzle holder, which is provided on the front of
the machine. NOTE: For a more gentle rinse, select the
white 40° nozzle. To scour the surface, select the
yellow 15° or red 0° nozzle.
Hotsy 800 OIL FIRED OPERATOR’S 8.921-206.0 - B
TACH/HOUR
Burner
Switch
Thermostat
Adjust Knob
Detergent
Valve
Nozzles
TACH/HOUR
TACH/HOUR
Pump
Switch
GFCI

19
Operations
Detergents & General Washing Techniques
WARNING: Some detergents may
be harmful if inhaled or ingested,
causing severe nausea, fainting
or poisoning. The harmful
elements may cause property
damage or severe injury.
STEP 1: Use detergent designed
specifically for pressure washers.
Household detergents could
damage the pump. Prepare
detergent solution as required by
the manufacturer. Fill a container
with pressure washer detergent.
Place the filter end of detergent
suction tube into the detergent
container.
STEP 2: With the engine
running, pull trigger to operate
machine. Liquid detergent is
drawn into the machine and
mixed with water. Apply
detergent to work area. Do not
allow detergent to dry on
surface.
IMPORTANT: You must flush the detergent after
each use by placing the suction tube into a bucket
of clean water, open detergent valves then run the
pressure washer for 1-2 minutes.
Thermal Pump Protection
If you run your pressure washer for 3-5 minutes without
pressing the trigger on the spray gun, circulating water
in the pump can reach high temperatures. When the
water reaches this temperature, the pump protector
engages and cools the pump by discharging the warm
water onto the ground. This thermal device prevents
internal damage to the pump.
Cleaning Tips
Pre-rinse cleaning surface with fresh water. Place
detergent suction tube directly into cleaning solution
and apply to surface at low pressure (for best results,
limit your work area to sections approximately 6 feet
square and always apply detergent from bottom to top).
Allow detergent to remain on surface 1-3 minutes. Do
not allow detergent to dry on surface. If surface
appears to be drying, simply wet down surface with
fresh water. If needed, use brush to remove stubborn
dirt. Rinse at high pressure from top to bottom in an
even sweeping motion keeping the spray nozzle
approximately 1 foot from cleaning surface. Use over-
lapping strokes as you clean and rinse any surface. For
best surface cleaning action spray at a slight angle.
Recommendations
• Before cleaning any surface, an inconspicuous
area should be cleaned to test spray pattern
and distance for maximum cleaning results.
• If painted surfaces are peeling or chipping, use
extreme caution as pressure washer may
remove the loose paint from the surface.
• Keep the spray nozzle a safe distance from the
surface you plan to clean. High pressure wash
a small area, then check the surface for
damage. If no damage is found, continue to
pressure washing.
CAUTION - Never use:
• Bleach, chlorine products and other corrosive
chemicals
• Liquids containing solvents (i.e., paint thinner,
gasoline, oils)
• Tri-sodium phosphate products
• Ammonia products
• Acid-based products
These chemicals will harm the machine and will
damage the surface being cleaned.
Rinsing
It will take a few seconds for the detergent to clear.
Apply safety latch to spray gun and close detergent
valve. Select and install the desired high pressure
nozzle.
Hotsy 800 OIL FIRED OPERATOR’S 8.921-206.0 - B
WARNING
USEONLYKEROSENE, STOVE OIL OR
DIESELFUEL IN THIS TANK
CAUTION:RISKOFFIRE—DONOTADDFUEL WHILEMACHINE
ISOPERATINGORWHENSTILLHOT.
UNICAMENTEUSEKEROSENE, ACEITE
COMBUSTIBLEODIESELEN ESTE TANQUE
PRECAUCIÓN:RIESGODEINCENDIO—NOAGREGUECOMBUS
TIBLECONLAMÁQUINAOPERANDOOALESTARCALIENTE.
UTILISERSEULEMENT DE KÉROSENE,
DEL'HUILE À POELE OU COMBUSTIBLE
DIÉSELDANS CE RÉSERVOIR
ATTENTION:RISQUEDEFEU.NEPASAJOUTER DECARBURANT
LORSQUEL'APPAREILESTENOPÉRATIONOUENCORECHAUD.
9.800-002.0
CAUTION
PRECAUCION/ ATTENTION
EXPOSEDPULLEYS AND
BELTSCAN CAUSE INJURY
KEEPCLEARWHILE MACHINERY
ISOPERATING
POLEASYCORREAS EXPUESTAS
PUEDENCAUSARDAÑO
NOSEACERQUE SI MÀQUINAESTÁ FUNCIONANDO
DESCOURROIESOUPOULIESEXPOSÉES
PEUVENTCAUSERDESBLESSURES
NEPASS’APPROCHERLORSQUEL’APPAREIL ESTEN OPÉRATION
WARNING
PRECAUCIÓN/AVERTISSEMENT
8.932-965.0
Detergent Tube

20
Operations
Shut Down And Clean Up
STEP 1: Removedetergentsuction
tube from container and insert into
one gallon of fresh water. Open
detergent valve, pull trigger on
spray gun and siphon water for one
minute.
STEP 4: Turn off water supply.
STEP 2: Turn thermostat adjust
knob off and continue spraying,
allowing the water to cool to below
100°.
STEP 5: Squeeze trigger on spray
gun to relieve remaining pressure.
STEP 3: Turn pump switch off.
Storage
CAUTION: Always store your pressure washer in a
location where the temperature will not fall below
32°F (0°C). The pump in this machine is susceptible
to permanent damage if frozen. FREEZE DAMAGE
IS NOT COVERED BY WARRANTY.
1. Stop the pressure washer, squeeze spray gun
trigger to release pressure.
2. Detach water supply hose and high pressure hose.
3. Turn on the machine for a few seconds, until
remaining water exits. Turn engine off immediately.
4. Drain the fuel and oil from the engine.
5. Do not allow high pressure hose to become kinked.
6. Store the machine and accessories in a room
which does not reach freezing temperatures.
CAUTION: Failure to follow the above directions
will result in damage to your pressure washer.
When the pressure washer is not being operated or is
being stored for more than one month, follow these
instructions:
1. Replenish engine oil to upper level.
2. Drain diesel from fuel tank, fuel line, fuel valve and
carburetor.
3. Cover the pressure washer and store in a clean,
dry place that is well ventilated away from open
flame or sparks.
After Extended Storage
CAUTION: Prior to restarting, thaw out any
possible ice from pressure washer hoses, spray
gun or wand.
DANGER: Do not store flammable liquids (gasoline,
fuel oil, petroleum, solvents, etc.) near pressure
washer, or in non-ventilated areas.
IMPORTANT: Machine must be stored indoors.
1. Protect from freezing by storing in a heated area,
or by flushing the system with antifreeze (use an
automotive engine antifreeze or windshield washer
solvent to antifreeze). To flush the system fill the
float tank with antifreeze and remove pressure
nozzle from wand. Start the machine and allow it to
run until antifreeze runs from the end of the wand.
Place wand into float tank and circulate the solution
through system for several minutes. Open and
close the trigger gun several times to circulate anti-
freeze through the unloader valve system. Also
draw antifreeze through the detergent inlet line to
antifreeze the detergent system. For added protec-
tion after antifreezing, disconnect the pressure
hose from machine and remove the coil drain plug.
After coil has drained, replace pressure hose and
coil drain plug. If the pressure washer is not to be
used for an extended length of time, it is recom-
mended that the system be flushed with antifreeze
for rust protection.
Hotsy 800 OIL FIRED OPERATOR’S 8.921-206.0 - B
Thermostat
Adjust Knob
Pump
Switch
Other manuals for 800 Series
1
This manual suits for next models
13
Table of contents
Other Hotsy Pressure Washer manuals

Hotsy
Hotsy 680SS Service manual

Hotsy
Hotsy HWE-4020C User manual

Hotsy
Hotsy 1467SS User manual

Hotsy
Hotsy 1200 Series User manual

Hotsy
Hotsy 1800 Series User manual

Hotsy
Hotsy 5645 User manual

Hotsy
Hotsy HHD 5/30 G User manual

Hotsy
Hotsy 558 User manual

Hotsy
Hotsy 797SS Service manual

Hotsy
Hotsy BX-2527 User manual

Hotsy
Hotsy Trailer 3500 User manual

Hotsy
Hotsy 781SS Service manual

Hotsy
Hotsy 790SS Service manual

Hotsy
Hotsy 781SS Service manual

Hotsy
Hotsy HC-232439 User manual

Hotsy
Hotsy 1720 User manual

Hotsy
Hotsy EP-2010 User manual

Hotsy
Hotsy DB-2323 User manual

Hotsy
Hotsy 555 HE Service manual

Hotsy
Hotsy PCA3-27324 User manual