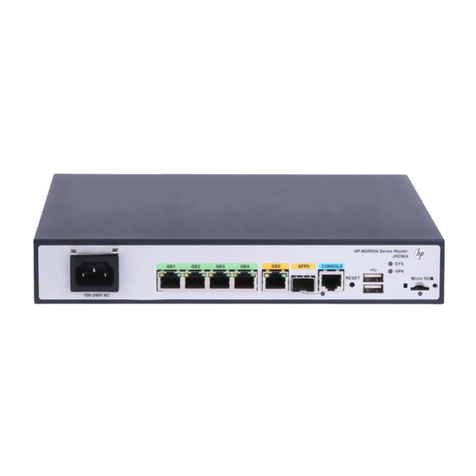
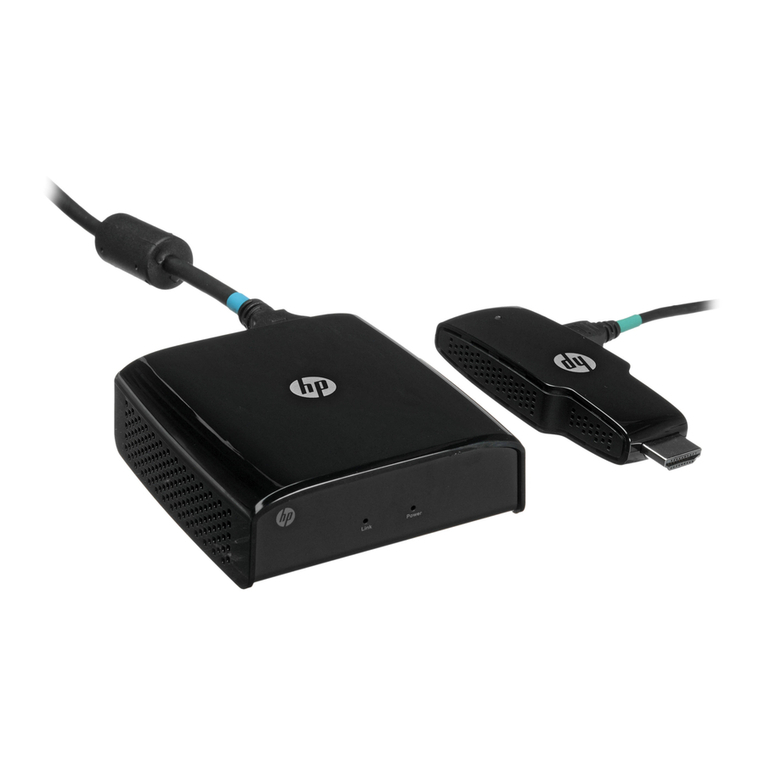
HP StorageWorks MPX200 User manual

HP StorageWorks
MPX200 Multifunction Router Data Migration
Solution Guide
This guide describes how to effectively use the MPX200 Multifunction Router Data Migration Service. This
document is intended for system administrators with knowledge of HP StorageWorks EVA4x00/6x00/8x00
storage systems, configuring LUNs using HP Command View EVA, HP Fibre Channel SANs, Ethernet, TCP/IP
networking, and iSCSI.
Part Number: 5697-0701
Second edition: October 2010

Legal and notice information
© Copyright 2010 Hewlett-Packard Development Company, L.P.
Confidential computer software. Valid license from HP required for possession, use or copying. Consistent with FAR 12.211
and 12.212, Commercial Computer Software, Computer Software Documentation, and Technical Data for Commercial Items
are licensed to the U.S. Government under vendor's standard commercial license.
The information contained herein is subject to change without notice. The only warranties for HP products and services are set
forth in the express warranty statements accompanying such products and services. Nothing herein should be construed as
constituting an additional warranty. HP shall not be liable for technical or editorial errors or omissions contained herein.
Microsoft® and Windows® are U.S. registered trademarks of Microsoft Corporation.
Oracle® is a registered trademark of Oracle Corporation and/or its affiliates.

Contents
1 Introduction ..................................................................................... 11
Features overview ..................................................................................................................... 11
Feature details .......................................................................................................................... 12
Job scheduling ................................................................................................................... 12
Immediate schedule ..................................................................................................... 12
Delayed schedule ........................................................................................................ 12
Serial schedule ............................................................................................................ 13
Configure only ............................................................................................................ 13
Data migration job groups ................................................................................................... 13
Array properties ................................................................................................................. 14
Data migration jobs ............................................................................................................ 14
Offline data migration .................................................................................................. 14
Online data migration .................................................................................................. 15
Data migration job attributes ......................................................................................... 15
Data migration job states .............................................................................................. 15
Data migration job CLI commands ................................................................................. 16
Protection .......................................................................................................................... 16
Logs ................................................................................................................................. 16
Users ................................................................................................................................ 17
2 Getting started ................................................................................ 19
Supported configurations ........................................................................................................... 19
Supported topologies ......................................................................................................... 19
Fabric configuration ..................................................................................................... 19
Data migration Configuration ........................................................................................ 20
Supported Fibre Channel fabrics .......................................................................................... 25
Supported storage arrays .................................................................................................... 25
Hardware setup ........................................................................................................................ 25
Software setup ......................................................................................................................... 26
Installing the HP StorageWorks mpx Manager .............................................................................. 27
Download the application ................................................................................................... 27
HP StorageWorks mpx Manager for Windows ............................................................................. 27
HP StorageWorks mpx Manager for Linux .................................................................................... 28
HP StorageWorks mpx Manager for Mac OS X ............................................................................ 28
3 Data migration licenses ..................................................................... 29
Types of data migration licenses ................................................................................................. 29
Capacity-based licenses ...................................................................................................... 29
Array-based licenses ........................................................................................................... 29
Installing a data migration license key ......................................................................................... 29
Installing a data migration license key in the GUI ................................................................... 30
Installing a data migration license key in the CLI ..................................................................... 31
Applying an array-based license to a specific array ....................................................................... 32
Applying an array-based license to a specific array in the GUI ................................................. 32
MPX200 Multifunction Router Data Migration 3

Applying an array-based license to a specific array in the CLI .................................................. 34
Viewing data migration license usage ......................................................................................... 35
Viewing data migration license usage in the GUI .................................................................... 35
Viewing data migration license usage in the CLI ..................................................................... 35
4 Using DMS for data migration ........................................................... 37
General steps for data migration ................................................................................................ 37
Presenting LUNs to the HP MPX200 ............................................................................................ 37
LUN presentation from Fibre Channel arrays .......................................................................... 37
LUN presentation from iSCSI arrays ...................................................................................... 38
Presenting LUNs to the server for online data migration .................................................................. 39
Mapping initiators to LUNs ........................................................................................................ 40
Setting array properties ............................................................................................................. 41
Setting array properties in the GUI ....................................................................................... 41
Setting the array bandwidth .......................................................................................... 42
Setting array properties in the CLI ......................................................................................... 43
Creating a data migration job group ........................................................................................... 44
Creating a data migration job group in the GUI ..................................................................... 44
Creating a data migration job group in the CLI ...................................................................... 45
Using the Data Migration Wizard ............................................................................................... 45
Starting the Data Migration Wizard ...................................................................................... 45
Scheduling an individual data migration job in the GUI .......................................................... 46
Scheduling an individual data migration job in the CLI ............................................................ 48
Scheduling data migration jobs in batch mode ....................................................................... 51
Starting serial scheduled jobs ..................................................................................................... 53
Migrating data to an EVA configured for iSCSI ............................................................................. 53
Creating a DMS iSCSI host entry with HP Command View EVA ................................................ 54
Adding LUNs to the DMS iSCSI host entry with HP Command View EVA ................................... 55
Viewing the status of data migration jobs ..................................................................................... 57
Viewing data migration job status in the GUI ......................................................................... 57
Viewing data migration jobs status in the CLI ......................................................................... 58
Rescanning targets .................................................................................................................... 59
Viewing job details and controlling job actions ............................................................................. 60
Viewing job details and controlling job actions in the GUI ....................................................... 60
Viewing job details and controlling job actions in the CLI ........................................................ 62
Viewing system and data migration job logs ................................................................................. 63
Viewing logs in the GUI ...................................................................................................... 64
Viewing logs in the CLI ....................................................................................................... 67
Using the Verify Migration Job wizard ......................................................................................... 68
Starting the Verify Migration Job wizard ................................................................................ 68
Scheduling verification of job options .................................................................................... 69
Acknowledging a data migration job .......................................................................................... 70
Removing an offline array .......................................................................................................... 71
5 Command line interface .................................................................... 73
User accounts .......................................................................................................................... 73
User sessions ............................................................................................................................ 73
Admin session ................................................................................................................... 73
miguser session .................................................................................................................. 73
Commands .............................................................................................................................. 74
array rm ............................................................................................................................ 76
array_licensed_port rm ....................................................................................................... 77
compare_luns add ............................................................................................................. 78
compare_luns rm ................................................................................................................ 80
4

compare_luns stop ............................................................................................................. 81
compare_luns start ............................................................................................................. 82
compare_luns pause ........................................................................................................... 83
compare_luns resume ......................................................................................................... 84
compare_luns acknowledge ................................................................................................. 85
migration_group add .......................................................................................................... 86
Creating a Data Migration Job Group ............................................................................ 86
migration_group rm ............................................................................................................ 87
migration_group edit .......................................................................................................... 88
migration add .................................................................................................................... 89
Scheduling an Individual Data Migration Job .................................................................. 92
migration rm ...................................................................................................................... 95
migration stop ................................................................................................................... 96
migration start ................................................................................................................... 97
migration pause ................................................................................................................. 98
migration resume ............................................................................................................... 99
migration acknowledge ..................................................................................................... 100
migration rm_peer ............................................................................................................ 101
initiator mod .................................................................................................................... 102
iscsi discover ................................................................................................................... 103
iscsi login ........................................................................................................................ 104
lunmask .......................................................................................................................... 105
readjust_priority ............................................................................................................... 107
reset ............................................................................................................................... 108
save capture .................................................................................................................... 109
set system ........................................................................................................................ 110
set features ...................................................................................................................... 111
set fc .............................................................................................................................. 112
set array ......................................................................................................................... 113
Setting array properties .............................................................................................. 113
Applying an array-based license to a specific array ........................................................ 114
set VPGroups ................................................................................................................... 116
start_serial_jobs ............................................................................................................... 117
show fc ........................................................................................................................... 118
show migration ................................................................................................................ 119
show array ...................................................................................................................... 120
show compare_luns .......................................................................................................... 122
show luninfo .................................................................................................................... 123
show migration_luninfo ..................................................................................................... 125
show migration_params .................................................................................................... 127
show mgmt ...................................................................................................................... 128
show memory .................................................................................................................. 129
show properties ............................................................................................................... 130
show migration_usage ...................................................................................................... 131
show perf ........................................................................................................................ 132
show perf byte ................................................................................................................. 133
show features .................................................................................................................. 134
show feature_keys ............................................................................................................ 135
show migration_logs ......................................................................................................... 136
Viewing the data migration job log .............................................................................. 136
show logs ....................................................................................................................... 138
show luns ........................................................................................................................ 139
show targets .................................................................................................................... 141
show vpgroups ................................................................................................................ 142
show iscsi ....................................................................................................................... 143
MPX200 Multifunction Router Data Migration 5
show initiators ................................................................................................................. 144
show initiators_lunmask .................................................................................................... 145
show presented_targets ..................................................................................................... 146
targetmap ....................................................................................................................... 147
target rescan ................................................................................................................... 148
6 Performance and best practices ........................................................ 149
Performance factors ................................................................................................................. 149
Maximizing performance ......................................................................................................... 149
Optimal configuration and zoning ............................................................................................ 149
Best practices ......................................................................................................................... 150
High availability and redundant configurations .................................................................... 150
Choosing the correct DMS options ...................................................................................... 150
General precautions ......................................................................................................... 150
7 Restrictions .................................................................................... 153
Reconfiguring LUNs on a storage array ..................................................................................... 153
Removing an array after completing data migration jobs .............................................................. 153
8 Support and other resources ............................................................ 155
Intended audience .................................................................................................................. 155
Related documentation ............................................................................................................ 155
Contacting HP ........................................................................................................................ 155
HP technical support ......................................................................................................... 155
Subscription service .......................................................................................................... 156
Product feedback ............................................................................................................. 156
Documentation feedback ................................................................................................... 156
Related information ................................................................................................................. 156
HP Websites .................................................................................................................... 156
Typographical conventions ....................................................................................................... 157
A Configuring host multipathing software ............................................. 159
Windows multipath configuration .............................................................................................. 159
HP-UX multipath configuration .................................................................................................. 161
B Simple Network Management Protocol ............................................. 165
SNMP parameters .................................................................................................................. 165
SNMP trap configuration ......................................................................................................... 166
Notifications .......................................................................................................................... 166
qsrDMNotification object definition .................................................................................... 166
Data Migration Service notification object types ................................................................... 167
C Troubleshooting ............................................................................. 169
D Data migration planning ................................................................. 173
Overview ............................................................................................................................... 173
Terminology .................................................................................................................... 173
Relationship between application data and physical storage .................................................. 173
LUN access to a server ..................................................................................................... 174
General steps for data migration ........................................................................................ 174
Inventory checklists .................................................................................................................. 175
6

Step 1. List the source and destination storage array ............................................................. 175
Step 2. List the servers impacted by the data migration project ............................................... 175
Step 3. List the applications, mount points, and paths to the physical devices ........................... 175
Step 4. List and create LUN ID mappings ............................................................................. 176
Step 5. List and create Fibre Channel zoning ....................................................................... 177
Performance and downtime ...................................................................................................... 177
Optimizing performance during data migration .................................................................... 177
Minimizing downtime ....................................................................................................... 178
Before application downtime ....................................................................................... 178
During application downtime ...................................................................................... 178
Validating integrity of the data .................................................................................... 179
Operating systems dependencies .............................................................................................. 179
Windows operating system ................................................................................................ 179
HP-UX operating system .................................................................................................... 179
Checklist examples ................................................................................................................. 180
Step 1. List the source and destination storage array ............................................................. 180
Step 2. List the servers impacted by the data migration project ............................................... 181
Step 3. List the applications, mount points, and paths to the physical device ............................. 181
Step 4. List and create LUN ID mappings ............................................................................. 182
Step 5. List and create Fibre Channel zoning ....................................................................... 182
Assigning LUNs to the MPX200 for data migration ...................................................................... 183
Assigning LUNs from an MSA2012fc array ......................................................................... 183
Assigning LUNs from an MSA1000/1500 array .................................................................. 186
Assigning LUNs from an HDS array .................................................................................... 188
Assigning LUNs from an IBM DS4K/DS5K/LSI array ............................................................. 193
Assigning LUNs from an EVA 4/6/8000 series array ........................................................... 198
Assigning LUNs from an EMC CLARiiON array .................................................................... 202
Assigning LUNs from an HP StorageWorks XP Disk Array ...................................................... 207
Glossary .......................................................................................... 215
Index ............................................................................................... 219
MPX200 Multifunction Router Data Migration 7

Figures
Single and dual blade high-availability setup ............................................................. 191
Migration between dissimilar vendor SANs ................................................................ 202
Offline—Two Fibre Channel Arrays ........................................................................... 213
Online and Offline—Two Fibre Channel Arrays .......................................................... 224
Online and Offline—Two Fibre Channel Arrays (MPX200) ........................................... 235
Online and Offline—Two Fibre Channel Arrays (MPX200; Fabric Upgrade) ................... 246
Offline—Fibre Channel and iSCSI Arrays ................................................................... 247
Features page: License Information ............................................................................ 308
New License Key dialog box .................................................................................... 309
Add license dialog box ........................................................................................... 3110
License Array dialog box ......................................................................................... 3311
Information page showing array is licensed ................................................................ 3412
Data Migration Info ................................................................................................. 3513
Setting array properties: target type .......................................................................... 4214
Setting array bandwidth .......................................................................................... 4315
Migration Schedule Options: individual job ................................................................ 4616
Create data migration job: individual job ................................................................... 4717
Data migration jobs options: individual ...................................................................... 4818
Migration Schedule Options: batch mode .................................................................. 5119
Create Data Migration Job: batch ............................................................................. 5220
Serial Data Migration Jobs Options ........................................................................... 5321
DMS iSCSI host entry in HP Command View EVA ........................................................ 5522
Virtual disk creation ................................................................................................ 5623
DMS virtual disk presentation ................................................................................... 5724
Active Data Migration Jobs ...................................................................................... 5825
Viewing migration job details ................................................................................... 6126
mpx Log: System Log ............................................................................................... 6527
mpx Log: Migration Log ........................................................................................... 6628
Verify Migration Job wizard ..................................................................................... 6929
Verifying jobs options .............................................................................................. 7030
Viewing the Storage Management Utility ................................................................. 18431
Viewing WWPNs in MSA Storage Management Utility .............................................. 18532
8

Selecting LUNs in MSA Storage Management Utility .................................................. 18633
Configure Available Device(s) ................................................................................. 18734
Entering a connection name ................................................................................... 18735
Selecting the host mode ......................................................................................... 18836
Selecting LUNs ..................................................................................................... 18837
Changing to Management Mode ............................................................................ 18938
Selecting a port for New Host Group ...................................................................... 19039
Selecting DM-Host nodes ....................................................................................... 19140
Array System Viewer ............................................................................................. 19241
Modify Mapping .................................................................................................. 19342
Selecting host to define .......................................................................................... 19443
Defining the host ................................................................................................... 19544
Selecting host operating system .............................................................................. 19645
Defining additional mapping .................................................................................. 19746
Opening HP StorageWorks Command View EVA ...................................................... 19847
Adding a host ...................................................................................................... 19948
Adding a second host port ..................................................................................... 20049
Presenting Vdisks .................................................................................................. 20150
Viewing Enterprise Storage .................................................................................... 20251
Register Initiator Record ......................................................................................... 20352
Create Storage Group ........................................................................................... 20453
Adding DM-Host to storage group ........................................................................... 20554
Adding LUNs to DM-Host ....................................................................................... 20655
Changing configuration ......................................................................................... 20756
Adding a group .................................................................................................... 20857
Naming the group ................................................................................................ 20958
Selecting WWN ................................................................................................... 21059
Selecting ports ...................................................................................................... 21160
Setting host mode ................................................................................................. 21161
Adding a LUN ...................................................................................................... 21262
Setting LUN parameters ......................................................................................... 21263
MPX200 Multifunction Router Data Migration 9

Tables
Data Migration Job States ........................................................................................ 151
Migration rates for single blade configuration ............................................................. 202
Supported storage arrays ......................................................................................... 253
Component requirements ........................................................................................ 274
CLI commands ........................................................................................................ 745
Document conventions ........................................................................................... 1576
Configuring Microsoft MPIO on Windows 2008 ....................................................... 1597
Configuring array-specific multipathing on Windows ................................................. 1608
Configuring HP PVLinks on HP-UX 11.23 .................................................................. 1619
Configuring EMC PowerPath on HP-UX 11.23 ........................................................... 16210
Configuring native multipathing on HP-UX 11.31 ...................................................... 16311
SNMP parameters ................................................................................................ 16512
SNMP trap configuration parameters ....................................................................... 16613
Troubleshooting .................................................................................................... 16914
Storage array information ...................................................................................... 17515
Server information ................................................................................................. 17516
Physical device information .................................................................................... 17617
LUN ID mappings ................................................................................................. 17618
Pre-migration Fibre Channel zoning information ........................................................ 17719
Post-migration Fibre Channel zoning information ....................................................... 17720
Example: Storage array information ........................................................................ 18021
Example: Server information ................................................................................... 18122
Example: Physical device information ...................................................................... 18123
Example: LUN ID mappings ................................................................................... 18224
Example A: Pre-migration Fibre Channel zoning information ....................................... 18225
Example B: Pre-migration Fibre Channel zoning information ....................................... 18326
Example: Post-migration Fibre Channel zoning information ......................................... 18327
10

1 Introduction
This chapter provides a high-level overview of the DMS features and details about each feature.
The HP MPX200 route-based data migration service (DMS) is SAN, server, storage protocol (Fibre
Channel and iSCSI), and storage vendor agnostic. Application downtime during data migration is
always critical. DMS supports both online and offline data migration across Fibre Channel and iSCSI
storage arrays. Even offline data migration using DMS is designed to minimize application downtime
by allowing the user to configure all migration related tasks while the application remains online, and
to migrate the data at a very high speed while the application is offline. DMS is designed such that
any person with knowledge of SAN or SAN storage administration can use this service.
Features overview
The main data migration service features that can be configured on the HP MPX200 router using the
HP StorageWorks mpx Manager utility include the following:
•Fibre Channel SAN vendor independent: The HP MPX200 router supports B-series, C-series and
H-series fabrics. HP StorageWorks mpx Manager allows data migration across multi-vendor fabrics.
•Heterogeneous array support: HP StorageWorks mpx Manager supports data migration across
heterogeneous arrays (arrays manufactured by different vendors). For a list of the storage array
types for which DMS currently provides support, see Supported storage arrays, page 25.
•Ease of use: HP StorageWorks mpx Manager is designed for ease of use. The graphical user in-
terface (GUI) and command line interface (CLI) provide many wizard-based operations and user-
level protection.
•Data security and sanity: HP StorageWorks mpx Manager provides features to classify a storage
array as “source only”. This classification ensures that you cannot configure LUNs out of this array
as destination LUNs, and thus minimizes the chances of data corruption. It also provides a Verify
Migration Job wizard to compare data on the source LUN with that on the destination LUN to in-
dicate that the data copy occurred without any data loss or corruption.
•Migration job scheduling: Data migration may be disruptive to business-critical applications;
therefore, minimizing application downtime is very important. DMS provides several job
scheduling options, including the Configure Only option, which allows you to complete the time-
consuming task of configuring data migration jobs without requiring any downtime. The different
I/O size capabilities for migration jobs enables you to tune storage array performance during
sequential read/write operations. The Load Balancing option is also very useful when dealing
with older-generation, lower-speed arrays (such as 2-Gb and 4-Gb Fibre Channel) being migrated
to higher speed (4Gb and 8Gb Fibre Channel) arrays using higher-speed (4-Gb and 8-Gb) Fibre
Channel switches.
•Data migration service logs: DMS logs are maintained separately from the system logs. DMS logs
are designed to help the service professional maintain a full, detailed history of each job performed,
and can be submitted as a part of the migration report to the customer.
•Logging and troubleshooting: System logs are designed to store a significant number of details
that can be used for debugging and troubleshooting. The save capture command helps to capture
the configuration details, system logs, and HP MPX200 router state at any time, and can be used
for troubleshooting if the need arises. See save capture, page 109.
MPX200 Multifunction Router Data Migration 11

•Licensing: DMS licenses provide capacity (per TB) and array-based licenses. For more information,
see Chapter 3.
Feature details
This section describes the offline and online features of the data migration service.
Offline data migration. DMS as an offline service allows you to migrate data between both Fibre
Channel and iSCSI storage arrays. Offline service assumes that when a data migration job for the
specified LUN starts, access to the LUN is blocked for servers and applications (Microsoft Exchange,
Oracle Applications, and other applications that are using the source LUNs for data storage). You
do not need to bring down these applications during the initial setup and configuration of DMS. DMS
minimizes the downtime by allowing the complete setup and configuration of data migration jobs
(except for immediate scheduling of the jobs) without bringing down the other applications. The
application and server must be offline only during the actual data migration.
Online data migration. DMS as an online service allows you to migrate data only between Fibre
Channel storage arrays. Online service assumes that when a data migration job for the specified
LUN starts, access to the LUN is continued for servers and applications (Microsoft Exchange, Oracle
Applications, and other applications that are using the source LUNs for data storage). You do not
need to stop or pause these applications or the server during the initial setup, configuration, and
migration of data. The application and server may be online during the actual data migration.
Job scheduling
HP StorageWorks mpx Manager provides multiple data migration job scheduling options to optimize
bandwidth and provide maximum usage of SAN resources. It provides a priority-based serial scheduling
feature that enables you to line up migration jobs and execute them in serial or parallel fashion, based
on available resources.
You can schedule data migration jobs for execution in the following ways:
•Immediate Schedule (start now)
•Delayed Schedule (start at a later time within the next 30 days)
•Serial Schedule (priority-based scheduling)
•Configure Only (manually start later)
Immediate schedule
Use the Immediate Schedule option to schedule a data migration job to instantly start data migration.
You must ensure that both the source and destination LUNs are not being accessed by any application
when this option is selected.
Delayed schedule
Use the Delayed Schedule option to schedule a data migration job to start at a later time. When you
select this option during configuration of a migration job, you are requested to enter the start time.
This allows you to configure a migration job during normal business hours and perform actual data
migration during off peak hours, so that the application remains down only for a short period of time
and during the off peak hours.
Introduction12

Serial schedule
The Serial Schedule option is designed to provide maximum flexibility for data migration. Even though
DMS supports 256 simultaneous migration jobs, typical array performance can be maximized by
having only 4 to 8 LUNs under migration. Serial scheduling of the job allows configuration of all 256
jobs at the same time, while having fewer active jobs at a time.
Serial scheduling allows you to configure migration jobs that can have the same or different priority.
If you need to configure a large number of jobs (256, for example), you can configure them in batches
such that the first four to eight jobs are scheduled at priority 1, the next four to eight jobs at priority
2, and so on. This scheduling arrangement ensures that when the serial schedule starts, no more than
four to eight jobs are running simultaneously, and DMS can provide better performance.
In order to achieve this, serial scheduling requires a job priority for each data migration job. Multiple
data migration jobs can have the same priority. Migration jobs with the same priority are run together.
Job priority 1 is highest and job priority 255 is lowest. After all the jobs are configured for serial
execution, you must schedule this batch of serially-scheduled jobs. The batch can be started immediately
or at a later time. The Serial Data Migration Jobs Options dialog box provides an easy way to start
or schedule the batch. See Figure 21 on page 53.
After the serial batch starts to run, all jobs having the highest priority are completed before the jobs
scheduled at the next priority level start to execute.
Only one serial schedule can be active at any time.
Configure only
The Configure Only option enables you to configure migrations jobs without a specified start time.
With this option, you must start the migration jobs when system downtime begins. This option provides
the advantage that migration jobs can be started only with explicit user intervention.
This option is very useful for offline migration jobs when the exact downtime of the application is not
known. Specify Configure Only when you need to configure all migration jobs without requiring any
application downtime.
Another important use of the Configure Only option is to verify all configured migration jobs at your
desk. When a migration job is configured, a detailed entry is created in the migration log. After
configuring all migration jobs, you can export the migration logs to a comma separated values (CSV)
file that you can use to validate the migration jobs using tools such as Microsoft Excel.
Data migration job groups
HP StorageWorks mpx Manager uses the concept of job groups to associate data migration jobs
with user-defined groups. A job group allows better management of data migration jobs. You can
create a maximum of eight job groups. HP StorageWorks mpx Manager also has commands to
remove and edit job groups.
The groups can be classified for data migration jobs related to application type or server class. For
example, a data migration job related to the Microsoft Exchange application could be part of group
named “Exchange,”and a data migration job related to a payroll application could be part of group
named “Payroll.”The data migration jobs are tracked separately within each group. You can schedule
the data migration of all LUNs related to one application, followed by other applications.
If no group is defined, all jobs are assigned to the default group, Group 0. You cannot delete Group
0.
MPX200 Multifunction Router Data Migration 13

Array properties
DMS either discovers the Fibre Channel target ports zoned in with the HP MPX200 router Fibre
Channel ports, or it discovers and logs into iSCSI IQN targets using iSCSI login. It forms an array
when at least one data LUN is presented to the DMS running in the HP MPX200 router from that
array. If no data LUN is presented to the HP MPX200 router, all array ports are shown in the HP
StorageWorks mpx Manager GUI and CLI as target ports.
DMS classifies the discovered storage array controllers into two categories: targets and arrays. All
array controller ports are initially identified as targets by the HP MPX200 router. After a single data
LUN is detected on the target, DMS forms an entity called an array. A specific LUN seen through
multiple Fibre Channel target ports are grouped under a single array.
Configure the array entity created by the DMS for the following attributes:
•Symbolic name: Upon forming an array, the HP MPX200 Multifunction Router automatically assigns
a symbolic name to an array. HP highly recommends that the you assign a more meaningful name
to an array because the migration logs identify the source and destination LUNs with the symbolic
names of the source and destination arrays.
•Array type: DMS requires the classification of each array as either Source, Destination, or
Source+Destination. During the creation of migration jobs, the Data Migration wizard restricts the
assignment of a source LUN only from arrays that have an attribute Source and assignment of a
destination LUN only from the arrays with attribute Destination. Use the array attribute
Source+Destination only when you need to create copies of a LUN on the same array.
Select the array type attribute None to exclude the storage array from participating in data migra-
tion. The HP MPX200 router simultaneously supports both iSCSI connectivity and data migration
service. Typically, you would use the “None”attribute when the HP MPX200 router is used to
provide only iSCSI connectivity for that storage array.
•Array bandwidth: This feature is applied only to a source array. This value indicates the maximum
bandwidth available from the array for a data migration task. The bandwidth is computed over
all paths. The HP MPX200 router uses only the user-assigned array bandwidth to migrate the data.
This allows other applications and servers using the same source array to continue to perform at
an acceptable performance level.
•Load Balancing: The HP MPX200 router detects all available multiple active and passive paths to
the LUN. Load balancing distributes the load for migration jobs over multiple active paths, thus
improving the migration rate. Load balancing should be disabled only in case of trouble performing
data migration.
Data migration jobs
DMS manages the data migration processes in terms of data migration jobs. A maximum of 256 jobs
can be scheduled to run at any time.
Offline data migration
DMS as an offline service allows you to migrate data between any Fibre Channel storage arrays,
iSCSI storage arrays, or Fibre Channel and iSCSI storage arrays. Offline service assumes that when
a data migration job for the specified LUN starts, access to the LUN is blocked for servers and
applications—Microsoft Exchange, Oracle Applications, and other applications that are using the
source LUNs for data storage. You do not need to bring down these applications during the initial
setup and configuration of DMS. DMS minimizes the downtime by allowing the complete setup and
configuration of data migration jobs (except for immediate scheduling of the jobs) without bringing
Introduction14

down the other applications. The application and server must be offline only during the actual data
migration.
Online data migration
DMS as an online service allows you to use the HP MPX200 router to migrate data while the application
remains online and continues to access the data. Currently, online service supports data migration
between Fibre Channel arrays. While performing online data migration, the data path for the source
LUNs must be configured through the HP MPX200 router.
Data migration job attributes
Configure a data migration job for the following attributes:
•Source and Destination LUN: For an offline migration job, you can configure a single source LUN
to migrate to one or multiple destination LUNs. For an online migration job, you can configure a
single source LUN to migrate to only one destination LUN. Any specified destination LUN can be
part of a single data migration job.
•Job groups: For better manageability, you can configure data migration jobs to belong to a spe-
cific, user-defined job group. By default, a job is assigned to a default group, Group 0.
•Scheduling: You can configure data migration jobs to start immediately, to start at a specified
time, or to use a priority-based serial scheduling.
•I/O size: You can configure each data migration job to migrate data using a specified I/O size.
Different types of arrays and LUNs may provide optimum performance based on the I/O size.
The default size is 64K.
The Data Migration wizard enables you to configure multiple jobs in a batch mode. The jobs configured
in batch mode have the same common attributes. For details, see the “Scheduling...”topics in the
Data Migration Wizard section of the help system.
Data migration job states
Table 1 lists the possible data migration job states.
Table 1 Data Migration Job States
DescriptionJob state
Job is currently running. You can pause or stop a running job.Running
Job is waiting to be run.Scheduled
Job is complete. You must acknowledge a completed job.Completed
A running job has been interrupted.Paused
A running, scheduled, failed, or pending job has been halted. You can restart
or remove a job in the Stopped state.
Stopped
The HP MPX200 router lost access to the LUN during a data migration job,
causing it to fail.
Failed
MPX200 Multifunction Router Data Migration 15

DescriptionJob state
A job configured for a delayed start (either due to Delayed Scheduling or
Serial Scheduling) cannot start at the specified time because the source or
destination LUN is offline. When the LUN becomes online, the job goes into
the Running state. If you determine that the specified LUN will never come
back online, you can remove the pending job.
Pending
A job was added with the Configure Only option.Configured
Data migration job CLI commands
DMS provides CLI commands (migration stop/start/pause/resume) to alter the state of the
migration job. The migration stop/start command causes a job to be stopped and then restarted
from the beginning. The migration stop command rewinds the job to the beginning.
You can use the migration pause/resume commands only on running jobs. The migration
pause command causes the job to halt temporarily. The migration resume command causes the
job to resume from the point where it was paused; it does not start from the beginning of the LUN.
Pause a migration job if it is taking excessive array bandwidth and causing other processes on the
array to slow down. You can later resume the job when the I/O activity on the array is reduced.
Protection
DMS provides data protection against some of the common user errors by enforcing the following
restrictions:
•An array must have an attribute of either Source, Destination, or Source+Destination to participate
in the migration. When you configure a data migration job, Source LUNs can be assigned only
from an array with the attribute Source (or (Source+Destination), and Destination LUNs can be
assigned only from an array with the attribute Destination (or Source+Destination). Use these at-
tributes properly to avoid errors.
•A user acknowledgment is required for a data migration job after the job is completed. This feature
provides better accounting and record-keeping for the job. The data migration log indicates when
the job was completed and when you acknowledge the completion status of the job.
•After a LUN is configured as a Destination LUN for a specific data migration job, the LUN cannot
be configured for a different job until the current job is completed and you acknowledge or remove
the job.
•DMS detects the normal configuration of partitions on the data LUN. Before fully configuring a
data migration job, DMS provides a warning if it detects valid partition tables on the destination
LUN.
Logs
DMS manages the following two log types:
•Migration logs: Migration logs provide a detailed history of each data migration job. The job
history contains information such as the start and end time of the job, source and destination LUNs
and arrays, size of the job, total time consumed for the job, and so on. Using the HP MPX200
manager GUI, you can export the migration logs out of the HP MPX200 router. You can open this
file with a spreadsheet application such as Microsoft Excel and use it as a data migration task
report. HP highly recommends that you save migration logs after the data migration job is completed
and cleared from the HP MPX200 router. This provides a record of every data migration job and
makes it easier to differentiate between them.
Introduction16

•System logs: System logs primarily record events, errors, and configuration changes, and can be
used for troubleshooting.
Users
The HP MPX200 router supports two types of users:
•Administrative user (admin): For managing the HP MPX200 router, you must be in an administrative
session. The default password for the administrator is config.
•Data migration user (miguser): This user session is required to configure migration-related activities.
The default password is migration.
MPX200 Multifunction Router Data Migration 17

Introduction18

2 Getting started
This chapter helps you get started using data migration service by providing information on supported
configurations and instructions for setting up the hardware and software.
Supported configurations
This section describes and illustrates the supported topologies ( fabric and multipath), and lists the
supported fabric and array types.
Supported topologies
Supported topologies include fabric configuration and multipath configuration as described in this
section.
Fabric configuration
Figure 1 shows a typical setup for data migration with a dual-fabric high-availability (HA) configuration
with both array controller ports and one port from each MPX200 blade connected to each fabric.
This configuration enables the MPX200 to perform load balancing.
Figure 1 Single and dual blade high-availability setup
.
MPX200 Multifunction Router Data Migration 19

Table 2 on page 20 shows the migration rates that can be achieved for single blade, depending on
the bandwidth capability of the storage array.
Table 2 Migration rates for single blade configuration
Two Ports per Array
Controller Connected to
Each Fabric
One Port per Array
Controller Connected to
Each Fabric
Fibre Channel FabricSource or Destination
Array
2.5 TB/hour1.25 TB/hour4 Gb2 Gb Fibre Channel
4 TB/hour2.5 TB/hour8 Gb4 Gb Fibre Channel
4 TB/hour4 TB/hour8 Gb8 Gb Fibre Channel
Figure 2 shows the configuration used when you are:
•Migrating from one vendor SAN to another vendor SAN.
•Installing a new fabric and do not have enough ports available in the new fabric.
Figure 2 Migration between dissimilar vendor SANs
.
Data migration Configuration
Figures in this section show the typical configurations used for online and offline data migration using
HP MPX200 routers. The following figure legend applies to all data migration figures in this section.
Figure Legend
Host Bus Adapter port number
HBA<n>
Source array controller A port number
SA<n>
Source array controller B port number
SB<n>
Destination array controller A port number
DA<n>
Destination array controller B port number
DB<n>
MPX200 blade number, Fibre Channel port number, and virtual port group
number
BL<n> FC<n> :VPG<n>
Getting started20
Other manuals for StorageWorks MPX200
7
Table of contents
Other HP Network Router manuals