HP 182C Service manual

HP
182C
OPERATING AND SERVICE MANUAL
OSCILLOSCOPE
182C
4•
A9«HB
HEWLETT iho] PACKARD
HP
182C

CERTIFICATION
The Hewlett-Packard Company certifies that this instrument was
thoroughly tested and inspected and found to meet its published
specifications when it was shipped from the factory. The Hewlett-
Packard Company further certifies that Us calibration measure-
ments are traceable to the U.S. National Bureau of Standards to
the extent allowed by the Bureau's calibration facility.
WARRANTY AND ASSISTANCE
This Hewlett-Packard product is warranted against defects
in materials and workmanship. This warranty applies for
one year from the date of delivery, or, in the case of certain
major components listed in the operating manual, for the
specified period. We will repair or replace products which
prove to be defective during the warranty period provided
they are returned to Hewlett-Packard. No other warranty
is expressed or implied. Wearenot liable for consequential
damages.
Service contracts or customer assistance agreements are
available for Hewlett-Packard products that require main-
tenance and repair on-site.
For any assistance, contact your nearest Hewlett-Packard
Sales and Service Office. Addresses are provided at the
back of this manual.

OPERATING AND SERVICE MANUAL
MODEL 182C
OSCILLOSCOPE
SERtALS PREFIXED: 1342A
Refer to Section VII for instruments with the following
serial prefix numbers: 1311A, 1248A, 1241A, 1240A.
Refer to Section VII for instruments with the following
standard options: 001, 002, 003, 007, 010, 011, 013, 807,
X95.
HEWLETT-PACKARD COMPANY/COLORAOO SPRINGS DIVISION
IdOO GARDEN OP THE GODS ROAD. COLORADO SPRINGS, COLORADO, U.S-A.
Manual Part Number 00182-90906.
Microfiche Part Number 00182-90806.
PRINTED FEB 1974

Model 182C Table of ContenU
Section
TABLE OF CONTENTS
Page Section Page
GENERAL INFORMATION 1-1
1-1, Introduction 1-1
1-4. Instrument Description 1-1
1-14. Cathode-ray Tube 1-1
1-17. Warranty 1-2
1-19, Instrument Identification 12
1-21. Manual Identification and Changes 1-2
1
24, Accessories Furnished 12
1-27. Available Accessories 1-2
4-21. Input Power 4-2
4-24. Low Voltage Power Supply 42
4-40. Gate Amplifier 4 4
4-48. High Voltage Power Supply (HVPS) ..4-4
4-55. Calibrator 4-5
4-59. Sweep Gate Output Amplifiers 4-6
4-62. Horizontal Amplifier 4-6
4-76. Power Supply Decoupling 4-7
II INSTALLATION 2-1
2-1. Introduction 2-1
2-3. Initial Inspection 2-1
2-8. Claims 2-1
2-11. Repacking for Shipment 2-1
2-14. Preparation for Use 2-1
2-15. Power Requirements 2-1
2-19. Three-conductor Power Cable 2-2
2-22. Instrument Mounting 2-2
2-25. Instrument Cooling 2-2
2-28. Contrast Filter 2-2
2-31. Cleaning CRT Faceplate 2-2
2-
33. Instrument Compatibility 2-2
III OPERATION 3-1
3-
1. Introduction 3-1
3-3. General 3-1
3-6. Pushbutton Switches 3-1
38. Front Panel Controls and Connectors 3-1
3-10. Calibrator 3-1
3-12. Scale 3-1
3-14. Trace Align 3-1
3-16. Focus and Astigmatism 31
3-18. Find Beam 3-1
3-20. Line Power Switch 3-2
3-22. Horizontal External Coupling 3-2
3-24. Horizontal Magnifier 3-2
3-26. Horizontal Display 3-2
3-28. External Vernier 3-2
3-30. Rear Panel Controls and Connectors .... 3-2
3-32. Outputs 3-2
3-36- Z-axis Input 3-2
3-37. AC Line Input 3-2
3-39. Phase/BandwkJth Switch 3-2
3-41. Phase Measurement 3-2
3-45. Plug-in Units 3-4
VPERFORMANCE CHECK AND
ADJUSTMENTS 5-1
5-1. Introduction 5-1
5-3. Test Equipment 5-1
5-5. Performance Check 5-1
5-9. Preliminary Setup 5-1
5-11. Calibrator Check 5-1
5-12. Horizontal Magnifier Check 5-1
5-13. Horizontal Bandwidth Check 5-1
5-14. Beam Finder Check 6-2
5-16. Adjustment Procedure 5-3
5-19. Cover Removal 5-3
5-21 .Preliminary Setup 5-3
5-25. Low Voltage Power Supply 5-4
5-26- High Voltage Power Supply
Adjustment 5-5
S27. Intensity Limit Adjustment 5-5
5-28. Astigmatism Adjustment 5-5
5-29. Flood Gun Adjustment 5-5
5-30- Trace Alignment Adjustment .... 5-5
5-31. Gate Amplifier Response
Adjustment 5.5
5-32. DC Balance 5-6
5-33. Vernier Balance 5-6
5-34. Gain Adjustment 5-6
5-35. Gain Adjustment
(Alternate Procedure) 5-7
5-36. Phase Adjustment 5-7
5-37, Transient Response Adjustment .... 5-8
5-
38. Horizontal Linearity Adjustment ... 5-8
VI REPLACEABLE PARTS 6-1
6-
1. Introduction 6-1
6-3- Ordering Information 6-1
IV PRINCIPLES OF OPERATION 4-1
4-1 .Introduction 4-1
4-3. General Description 4-1
4-8. Input Power 4-1
4-1 1.Horizontal Deflection 4-1
4-20. Circuit Details 4-2
VII MANUAL CHANGES AND OPTIONS 7-1
7-1. Introduction 7-1
7-3. Manual Changes 7-1
7-5. Special Options 7-1
7-9. StarKlard Options 7-1

Table of Contents
List of Illustrations TABLE OF CONTENTS (cont'd)
Model 182C
Section Page Section Page
VIII SCHEMATICS AND TROUBLESHOOTING . . 8-1 8-35. Low Voltage Power Supply .... ,8-3
8-1. Introduction ..8-1 8-41. High Voltage Power Supply and
R-.3 Rchfimalins 8-1 Reaiilalor R-d
8-7, Reference Designations .8-1 8-46. Disassembly Information 8-4
R-1 1Component 1oration 8-1 8-49. Cover Removal R.d
8-14. Troubleshooting .8-1 8-51. Power Module Removal 8-5
8-19. Preliminary Checkout .8-2 8-54. Control Assembly Removal .... 8-5
8-21. Detailed Checkout .82 8-57. AC Power Input Module Removal .8-5
8-24. Troubleshooting Tables .8-2 8-61. Sweep-Gate Assembly Removal . . 8-6
8-26. Repair and Replacement .8-2 8-63. Gate Amplifier Assembly Removal 8-6
8-28. Servicing Etched Circuit Boards .. . . 8-2 8-65. Horizontal Module Removal .... 8-6
8-30. Semiconductor Replacement ,. . . 8-3 8-67. CRT Removal 8-6
8-33. Detailed Troubleshooting .8-3 869. High Voltage Module Removal . . 8-7
LIST OF ILLUSTRATIONS
Figure Title Page
1-1. Model 182C Oscilloscope 1-0
1-2. Instrument Identification 1-2
1-
3. Model 182C Outline Dimensions 1-2
2-
1. Contrast Filter Removal 2-2
3-
1. Front and Rear Controls and Connectors .... 3-3
3-
2. Phase Measurement 3-4
4-
1. Overall Block Diagram 4-0
4-2, Simplified Low Voltage Power Supply 4-2
4-
3. High Voltage Power Supply Block Diagram .. 4-5
5-
1. Cover Removal 5-3
5-2. Low Voltage Power Supply Adjustments .... 5-4
5-3. Calibration Display 5-7
5-4. Phase Adjustment Test Setup 5-7
5-5. Transient Response Adjustment
Test Setup 5-8
5-
6. Adjustment Locations 5 9
6-
1. Model 182C Mechanical Parts 6-0
6-2. Low Voltage Power Module Exploded
View 6-3
6-3. Series Regulator Parts Identification 6-4
6-4. Control Module Mechanical Parts 6-6
6-5. AC Power Module Parts Identification 6-8
6-6. Interconnect Module Parts Identification .... 6-1
1
6-7. Horizontal Amplifier Module Mechanical
Parts 6-12
6-
8. CRT Module Parts Identification 6-16
7-
1, OptionOII Beam Finder Schematic 7-4
7-2. Location of Option 01 1Circuit Change ... .7-4
7-3. Auxiliary Output Board Component and
Connection Identification 7-5
7-4. Auxiliary Output Schematic 7-5
7-5. Low Voltage Rectifier (A1A1) Component
Identification 7-6
7-6. Low Voltage Regualtor (A1 A2) Component
Identification 7.7
Figure Title Page
7-
7. Low Voltage Power Supply (AD
Schematic 27-8
8-
1. Semiconductor Identification 8-3
8-2. Cover Removal 8-5
83. Mainframe Component Identification .... 8-9
8-4. Interconnect Assembly (A3) Component
Identification 8-10
8-5. Mainframe Wiring Diagram, Schematic 18-11
8-6. Low Voltage Rectifier (A1A1) Component
Identification 8-12
8-7. Low Voltage Regulator (A1 A2) Component
Identification 8-12
8-8. Low Voltage Power Supply (A1)
Schematic 28-13/8-14
8-9. Sweep-Gate Output Amplifier (A8) Component
Identification 8-15
8-10. Sweep-Gate Output Amplifier (A8)
Schematic 3 8 15
8-11. Gate Amplifier (A7) Component
Identification 8-16
8-12. Gate Amplifier (A7) Schematic 48-17
8-13. Horizontal Amplifier (A5) Component
Identification 8-18
8-14. Horizontal Amplifier {A5) Schematic 5. . 819
8-15. Control Module (A2) Component
Identification 8-20
8-16. Control Module (A2) Schematic 68-21
8-17, H.V. Oscillator &Rectifier (A6)
Component Identification 8-22
8-18. H.V. Multiplier (All) 8-23
8-19. H.V. Regulator (A10) Component
Identification 8-24
8-20. High Voltage Power Supply Schematic 7. . 8-25
8-21. Horizontal Plug-In Connections,
Schematic 88-26
IV

Model 182C List of Tables
LIST OF TABLES
Table Title Page
11. Specifications 1-3
1-
2. Reference Designators and Abbreviations 1-4
2-
1. Shipping Carton Test Strength 2-1
3-
1.Available Plug-ins 3-5
4-
1, LVPS Current Capabilities 4-4
5-
1. Recommended Test Equipment 5-0
Performance Check Record 5-2a/b
6-
1. Abbreviations for Replaceable Parts List 6-1
6-2. Replaceable Parts 6-2
6-3. List of Manufacturers' Codes 6-17/6-18
Table Title Page
7-1. Manual Changes 7-1
7-
2. Model 182C Options 7-2
8-
1. Schematic Notes 8-8
8-2. MiscellaneousTroubleshootingTips 811
8-3. Low Voltage Power Supply
Troubleshooting Tips 8-13/8-14
8-4. Low Voltage Power Supply Measurement
Conditions 8-13/8-14
8-5. Gate Amplifier Voltage Measurement
Conditions 8-17
8-6. Horizontal Amplifier Voltage Measurement
Conditions 8-19
8*7. High Voltage Power Supply
Troubleshooting Tips 8-23
8-8. CRT Intensity Troubleshooting Tips .... 8-24
8-9. H.V. Power Supply Voltage Measurement
Conditions 8-25
V

General Information Model 182C
Figure 1-1. Model 182C Oscilloscope
1-0

Model 182C General Information
SECTION I
GENERAL INFORMATION
1-1. INTRODUCTION.
1-2. This manual provides operating and servicing infor-
mation for the Hewlett-Packard Model 182C Oscilloscope.
The manual is divided into eight sections, each covering
aspecific topic or aspect of the instrument. All schematics
are located at the rear of the manual and can be unfolded
and used for reference while reading any part of the
manual
1-3. This section contains complete instrument specifi
cations {Table 1-1), adescription of features, warranty in-
formation, data for manual and instrument identification,
and information regarding accessories available for use
with the instrument. Table 1-2 lists and describes the
abbreviations used in this manual.
1-4. INSTRUMENT DESCRIPTION.
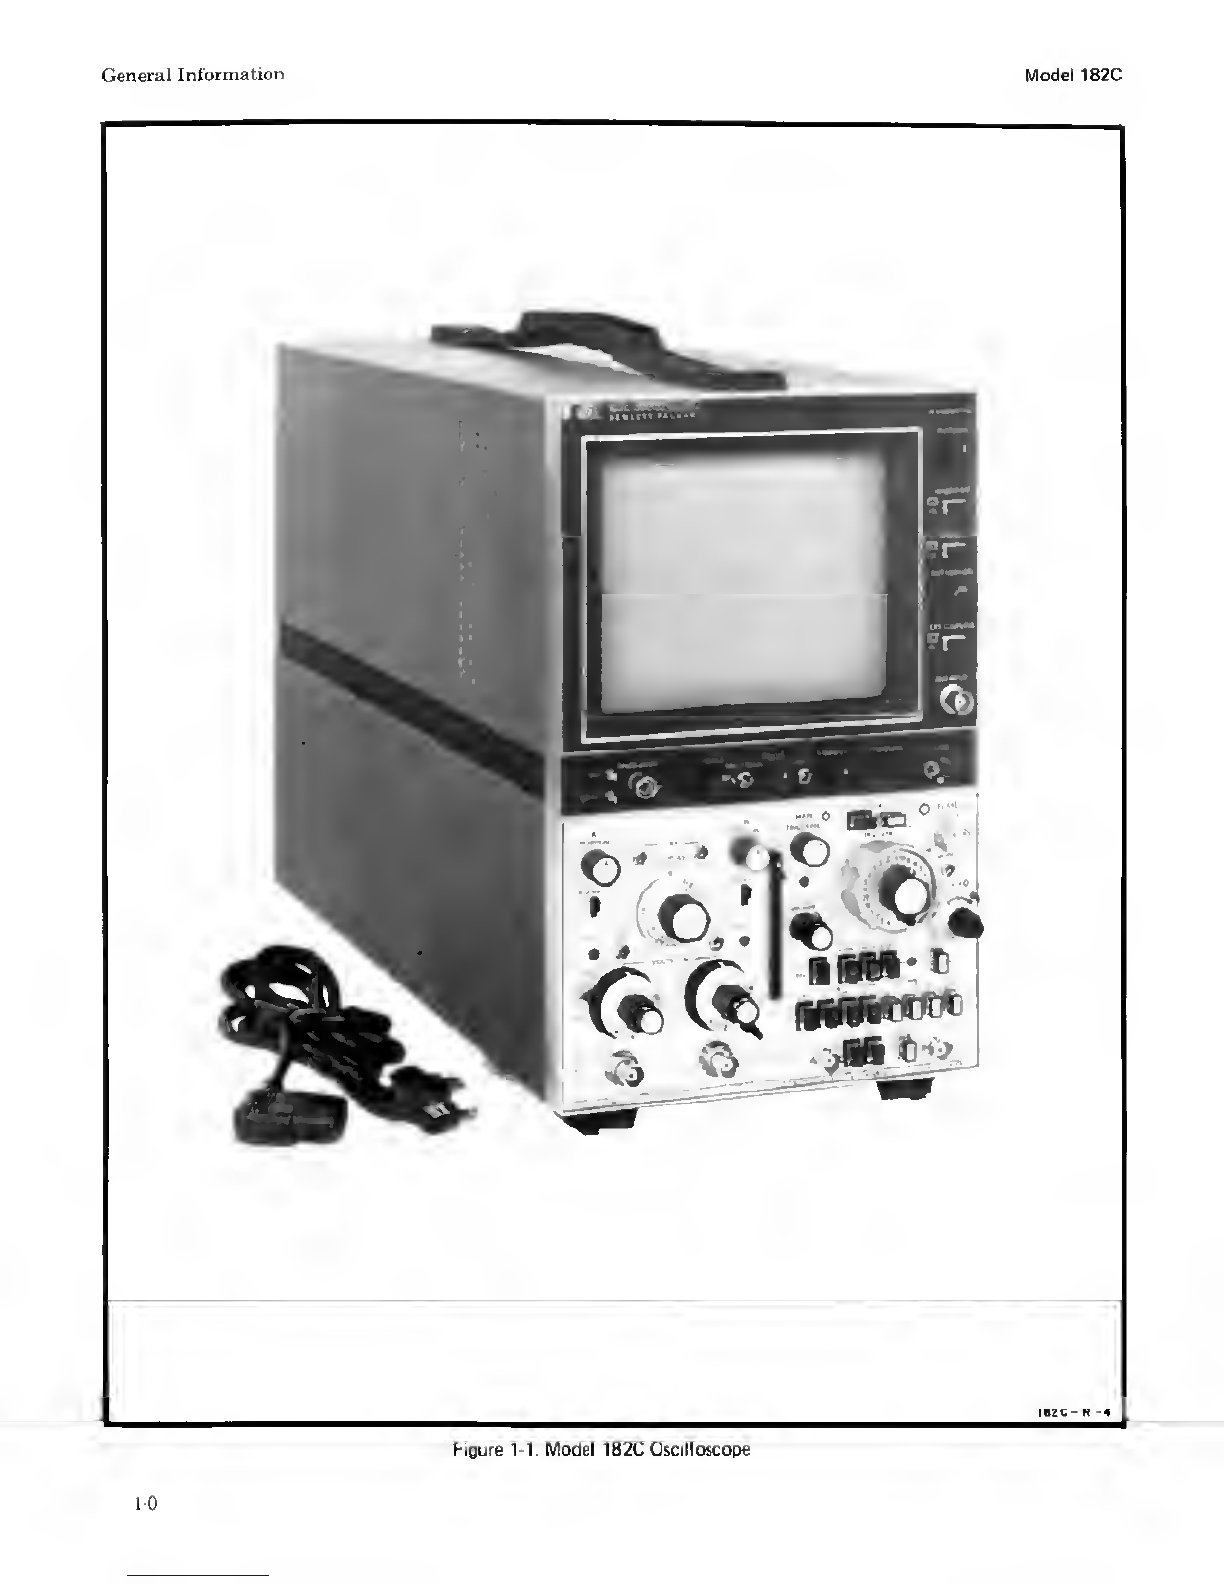
1-5. The Model 182C (Figure 1-1) is asolid-state, light-
weight laboratory and general-purpose oscilloscope with
plug-in capabilities. It is designed to display complex high
frequency waveforms and to measure alternating- and
direct-current voltages. Complete specifications are given
in Table 1-1.
1-6. The Model 182C is acabinet type instrument with a
built-in tilt stand, convenient carrying harrdle on top, and
feet mounted on both bottom and rear for either bench or
upright operation. Controls are arranged and located to
simplify operation.
1-7. For minimum size and weight with maximum reli-
ability. the Model 182C has solid-state circuitry through-
out except for the CRT. Power consumption, with plug ins,
is less than 120 watts at normal line voltage. The instru-
ment is convection cooled and designed to operate within
specifications at temperatures between 0° Cand 55° C
with up to 95% relative humidity at 40° C.
1-8. Alt power supplies, adual output calibrator, ahori-
zontal amplifier, agate amplifier and the CRT are
contained in this instrument. Operation at either 115V or
230V ac is selectable by aswitch located on the rear panel
of the oscilloscope. Located on the rear panel are
connectors for main and delayed gate, and main and
delayed sweep output signals. Connection for input of an
external signal for intensity modulation (Z-axis input) is
provided at the rear panel. An input signal of approx-
imately -I-2V having apulse width of greater than about
50 ns will blank atrace of normal intensity.
1-9. The Model 182C is designed to operate with a
number of different plug-in vertical amplifiers and time
bases. Presently available plug-ins provide awide choice
of operating capabilities such as wide bandwidth, sensi-
tivities, dual or four-channel operation, single or delayed
sweeps, sampling and time-domain reflectometer oper-
ation.
1-10. Modular type construction has been used through-
out the instrument. This makes it easy and simple to
remove units for quick maintenance. Assemblies are
constructed with interconnecting plugs and jacks and
each assembly can be removed without unsoldering
connections.
1-11. Acalibrator provides asquare-wave signal of
approximately 1kHz with arisetime of less than 3fxsec.
The calibrator output is available at the front panel at
amplitudes of 250 mV and 10V p-p with an accuracy
of ±1%. The signal may be used to check horizontal and
vertical deflection factors and to compensate divider
probes.
1-12. The oscilloscope horizontal amplifier accepts sweep
signals from the time base plug-in or an external signal.
Bandwidth is dc to 5MHz. dc-coupled, and 5Hz to 5MHz
with capacitive coupling. Two deflection factor ranges are
front panel selectable: 1V/div (XI), and 0.1 V/div ±5%
(X10). In addition, avernier control provides continuous
adjustment between ranges, The maximum external input
level is 3(X) Vdc, ac-coupled. with adynamic range of
+20V.
1-13. Abeam finder pushbutton control assists the oper-
ator in rapidly bringing adisplaced beam on screen. Its
use increases intensity and reduces vertical and horizontal
amplifier gain to quickly locate trace position.
1-14. CATHODE-RAY TUBE.
1-15. The Model 182C uses apost-accelerator aluminized
CRT with alarge eight by ten division display area of
133 cm^. Each division is 1.29 cm with 0.2-div sub-
divisions provided on the major axes. The graticule is
internal to the CRT, eliminating display parallax. Option
01 1instruments are provided with aP11 phosphor CRT.
The display intensity will not Increase when FIND BEAM
is depressed. This prevents phosphor burn.
1-16. The standard CRT supplied with this instrument
has aP31 aluminized phosphor, P2. P7 and P1 1phosphors
are also available as options.
1-1

General Information Model 182C
M7. WARRANTY.
M8. This instrument is certified and warranted as stated
on the inside front cover of this manual. The CRT is
covered by aseparate warranty. The CRT warranty and
warranty claim form are located at the rear of this manual.
Should the CRT fail within the time specified on the
warranty, fill out the failure report form on the reverse side
of the warranty statement and return it with the CRT. In
all correspondence with aHewlett-Packard Sales/Service
Office concerning an instrument, reference the complete
serial number and model of the instrument,
119. INSTRUMENT IDENTIFICATION.
1-20. Hewlett-Packard usesa two-section serial number for
instrument identification (Figure 1-2). The first numerical
group Is the serial prefix number. It identifies aseries of
instruments. The last numerical group identifies apartic-
ular instrument in the series. The serial number appears on
aplate located on the rear panel.
SERIAL PREFIX NUMBER SERIAL SUFFIX NUMBER
\
HEVVieTT-PAC'tARD
SERIAL NO. oooo aooooo
III
COMPLETE SERIAL NUMBER
TOOO-A-22
Figure 1-2. Instrument Identification
1-21. MANUAL IDENTIFICATION AND
CHANGES.
1-22. This manual provides operating and service infor-
mation for the HP Model 182C. Information in this
manual applies directly to irtstruments (as manufactured)
with aserial prefix as indicated on the title page. If the
serial prefix of your instrument is different from that on
the title page, aMANUAL CHANGES insert sheet, or
Section VII of this manual will describe the changes
necessary to adapt this manual to provide correct in-
formation,
1-23. Technical corrections (if any) to this manual due
to known errors in print are called Errata and are shown
on the manual changes sheet. For information on manual
coverage of any HP instrument, contact the nearest HP
Sales/Service Office (addresses are listed at the rear of this
manual).
Figure 1-3. Model 182C Outline Dimensions
1-24. ACCESSORIES FURNISHED.
1-25. The Model 182C is equipped with ablue plexiglas
contrast filter which provides improved viewing and greater
contrast under ambient light conditions. The filter slides
into place in the CRT bezel and may be removed if
preferred.
1-26. Adetachable power cord Is supplied with each
instrument. The three-conductor power cord and instru-
ment receptacle conform to International Electrotechnical
Commission (I EC) safety standards.
1-27. AVAILABLE ACCESSORIES.
1-28. Aseries of mobile test stands is available for the
Model 182C. The Model 1118A Is aportable tripod test-
mobile which provides adjustable height, tilt and rotation,
It is also equipped with locking wheels and is readily
collapsible for transport. The 11 19-serles testmobiles are
general-purpose test stands designed for maximum utility
while requiring aminimum of floor space. These test-
mobiles allow the instrument to be tilted at least 40
degrees above and below horizontal in 10-degree steps.
1-29. The Model 101 72Acover, made of flexible material,
covers the entire instrument. The cover top is slotted for
access to the carrying handle.
1-2

Model 182C General Information
Table 1-1. Specifications
CATHODE.RAY TUBE AND CONTROLS
TYPE:
Post-accelerator, 22 kV accelerating potential: alumin-
ized P3t phosphor (other phosphors available, refer
to Options).
GRATICULE;
8X10 div graticule. 0.2-div sub-div on major axes.
1div =1.29 cm. Front panel recessed screwdriver
adjustment aligns trace with graticule. Scale control
illuminates graticule for viewing with hood or
taking photographs.
SEAM FINDER:
Returns trace to CRT screen regardless of setting of
horizontal, vertical or intensity controls.
INTENSITY MODULATION:
Approx -K2V, >50ns width (< 10 MHz CW) will
blank trace of normal intensity. Input R, approx
5k ohms. Maximum input voltage, ±20V (dc *pk ac).
CALIBRATOR
TYPE:
Approx 1kHz square wave, <3psec risetime.
VOLTAGE:
Two outputs, 250 mV p-p and 10V p-p; accuracy, +1%.
HORIZONTAL AMPLIFIER
EXTERNAL INPUT:
BANDWIDTH: DC-coupled, dc to 5MHz; AC-coupled,
5Hz to 5MHz;
DEFLECTION FACTOR: XI, 1V/div;X10. 0.1 V/div.
Vernier provides continuous adjustment between
ranges. Accuracy. ±5%.
DYNAMIC RANGE: +20V.
MAXIMUM INPUT: 300V (dc pk ac).
INPUT RC: 1megohm shunted by approx 30 pF.
INTERNAL SWEEP:
OUTPUTS
Four emitter follower outputs on rear for main and
delayed gates, main and delayed sweeps, or vertical
and horizontal outputs when used with sampling
plug-ins; maximum current available, ±3 mA; outputs
will drive impedances down to 1000 ohms without
distortion.
GENERAL
WEIGHT:
(without plug-ins) net, 26 1/2 lb (12,02 kg); shipping,
38 1/2 lb (17,46 kg).
DIMENSIONS:
See outline drawing (figure 1-3).
ENVIRONMENT;
Temperature: 0° Cto 55® C.
Humidity: Up to 96% relative humidity at 40® C.
Altitude: Up to 16,000 ft.
Vibration: Vibrated in three planes for 15 minutes
each with 0.010 inch excursion, 10 to 55 Hz.
POWER:
115V or 230V ±10%, 48 to 440 Hz. Approx
120 watts with plug-ins at normal line, 200 VA
max.
ACCESSORIES FURNISHED:
Blue plexiglas contrast filter; power cord,
OPTIONS
Refer to Section VII for listing of options.
SWEEP MAGNIFIER: X10; accuracy ±5%.
1-3

General Information Model 182C
1-30. Waveform photography of the Model 182C display
can be accomplished with the Model 10367A Camera
Adapter, The adapter fits into the Model 182C bezel,
replacing the contrast filter, for use with the Model 195A
and Model 197A Oscilloscope Cameras.
131. AHorizontal Gain Calibrator, HP Model 10411A,
facilitates rapid and accurate calibration of the horizontal
deflection factor of the Model 182C. Also available is a
Service Extender, HP Model 10133A, which is useful for
troubleshooting the complete power supply module when
removed from the oscilloscope mainframe.
1-32. For case of calibration and maintenance, the HP
Model 10407 APlug-in Extender can be obtained. It
provides for removal of the vertical and time base plug-ins
from the oscilloscope mainframe and exposes components
and adjustments of the plug ins for servicing.
1-33, Blank plug-ins are available for use with the Model
182C. These units fit into the oscilloscope vertical and
time base compartments and provide the necessary inter-
face connections and operating power for user designed
vertical amplifier and/or time base circuitry. Refer to
Section IV for the operating power available from the
oscilloscope mainframe. The following units are available:
HP Model 10408A Vertical Blank Plug-in, HP Model
10409A Horizontal Blank Plug-in. and HP Model 10410A
Dual Blank Plua-in.
134. Ametallic mesh contrast filter which functions as
an RFI shield is available for the Model 182C. The mesh
filter, HP Part No. 00182-62701, is directly interchang-
able with the standard blue plexiglas filter. When installed,
the metallic mesh filter is electrically grounded to the
oscilloscope chassis, thereby furnishing RFI shielding.
1-35. Cameras, probes, viewing hoods, terminations and
other accessory items arc available for specialized require-
ments. Information on these and the above described
accessories may be obtained from HP Sales/Service Offices
listed in the rear of this manual.
Table 1-2. Reference Designators and Abbreviations
REFERENCE DESIGNATORS
A=aaaemblv E=misc. electrical part p - plug uintegrated circuit
AT *attenuator. F=luse PS =power supply (unrepairable)
resistive termination FU -filter Q~transistor V—vacuum tube neort
B*motor, fan H*hardware RVR bulb, photocell, etc.
BT
C=battery
-capacitor J
K~Jack
relay RT =thermistor voltage regulator
(diode)
CP -coupling L-inductor bswitch W«cable
CR =diode LS “soeaker T-transformer X=socket
DL -delay line M=meter TB =terminal board Ycrystal
DS ~device si9naling {lamp) MP -mechanical part TP =test point 2network
ABBREVIATIONS
A=ampere{s) F6T *• liald^Hect n—9
=nano (10 )rti Kradio frequency
ampi *arnplif ier(s) transistor(s) nc -normally closed interference
a«sy assembly no. =normally open rms aroot mean square
empltd =amplitude Anpn =negaTive*positive* rwv areverse working
G-gigs (10 )negative uoltege
bd -board(s) 9nd -groundfed) ns -nanosecond
bp 'bandpass SCR -silicon controlled
c-cent! (10 H
hr
-henrv{ies)
~hourls) 0-pico (10"'^)
-printed (etched)
circuit(s)
'peak
=posit ive* negative•
positive
part of
-peak'tO'peak
-program
-peak inverse
voltaga(s)
'* picosecond
sec _rectifier
secorxKs)
c-carbon HP -- Hewlett-Packard std 9Standard
ccw =cpuntercIPCkwiSA H? -hert? Pk
onp
coax.
coef *coaxial
~coefficient 11. interinetliate Iraq. trmr trimmer
com -comn^n inti 'internal p/a u»micro (10
CAT
cw
d
^eathede-rsy tube
~clockwise
"deci (10 '
1
k
lb
-kilo (10^)
ppund(s)
P.P
prgm
pfv
uiac
V
var
-
microsecond
volts
variable
dB =decibel Ipf -low-passfllterH) ps w/ »with
axt raxtarnal m‘mini (10 Owv -peak working w/o 9without
M-mega <10") voltage wiv 9working inverse
Ffarad(s) ms -millisecond rf radio frequency voltage
3/70
1-4

Model 782C Installation
SECTION II
INSTALLATION
2-1. INTRODUCTION.
2-2. This section of the manual contains inspection and
installation procedures for the Model 182C Oscilloscope.
In addition, packing and claims procedures are discussed
in the event damage occurs during shipment,
2-3. INITIAL INSPECTION.
2-4. The instrument was carefully inspected, mechan-
ically and electrically, prior to shipment. On receipt,
inspect It for any mechanical damage which may have
occurred during shipment and test the electrical perform-
ance.
2-6. Check for physical damage such as bent or broken
parts and dents or scratches. If damage is found, refer to
the recommended claims procedure. Retain the packaging
material for future use.
2-6. Check the electrical performance of the instrument
as soon as possible after receipt. The performance check
Is contained in Section Vof this manual. This check will
verify that the instrument is operating to the specifications
listed in Table 1-1
.
2-7, The initial performance and accuracy of this instru-
ment are certified as stated in the warranty on the inside
from cover of this manual. If the instrument does not
operate as specified, refer to the recommended claims
procedure.
28. CLAIMS.
2-9. If physical damage is found or if the instrument is
not within specifications when received, notify the carrier
and the nearest Hewlett-Packard Sales/Service Office
immediately. The Sales/Service Office will arrange for
repair or replacement of the instrument without waiting
for aclaim to be settled with the carrier.
2-10. The warranty statement for this Hewlett-Packard
Instrument is on the inside front cover of this manual.
Contact the nearest Sales/Service Office for information
and assistance with warranty claims.
211. REPACKING FOR SHIPMENT.
2-12. If the instrument is to be shipped to aHewlett-
Packard Sales/Service Office, attach atag to it showing
owner's name and address, instrument model number,
and serial number, and adescription of service required.
2-13. Use the original shipping carton and packaging ma-
terials for reshipment. If they are not available, repack-
age the instrument with the following materials;
a. Adouble walled carton (refer to Table 2-1 for test
strength required).
b. Heavy paper or sheets of cardboard to protect all in-
strument surfaces (use a nonabrasive material such as
polyurethane or acushioned paper such as Kimpak around
all projecting parts.
c. At least 4inches of tightly-packed, industry-
approved, shock-absorbing material such as extra-firm
jMlyurethane foam.
d. Heavy-duty shipping tape to secure outside of
carton.
Table 2-1. Shipping Carton Test Strength
Gross Weight (lb) Carton Test Strength (lb)
up to 10 200
10 to 30 275
30 to 120 350
120 to 140 500
140 to 160 600
214. PREPARATION FOR USE.
215. POWER REQUIREMENTS.
2-16. The standard Model 182C requires a115 or 230
Vac ±10%, single phase, 48 to 440 Hz power source
capable of supplying 200 VA maximum. It requires ap-
proximately 120 watts at normal line voltage with the
plug-ins installed.
2-17. 115 VAC OPERATION. This instrument, as ship-
ped, is ready for operation on 115 Vac. Before applying
power, check the rear-panel slide switch, labeled SELECT-
OR, for proper position. Positioning it so that the legend
115 is visible connects the power transformer primary
windings in parallel for 115 Vac operation. This also
selects the proper fuse for this voltage.
2-18. 230 VAC OPERATION. If the instrument is to be
operated from a230 Vac power source, set the rear-
panel SELECTOR slide switch to 230. This connects the
2-1

Installation Model I82C
power transformer primary windings in series for 230
Vac operation and selects the proper fuse for 230 Vac.
2-1D. IHKbb-CUNUUCTUK PUWfcK CABLE.
2-20. The National Electrical Manufacturer's Association
(NEMA) recommends that the instrument panel and
cabinet be grounded to protect operating personnel.
The Model f82C is provided with adetachable three-
conductor power cord which, when plugged into an
appropriate outlet, grounds the Instrument. The oscil-
loscope mainframe power jack and the mating plug of the
puwei uuid cunfutm to International Electrotechnical
Commission (lEC) safety standards.
2-21, When operating the Model 182C from atwo-
contact power outlet use athree-conductor to two-
conductor adapter. Preserve the safety feature by ground-
ing the adapter flexible (third) lead. Asuitable three- to
two-pin adapter is available from Hewlett-Packard. Order
HP Part No. 125t-0048.
2-22. INSTRUMENT MOUNTING.
2-23. The Model 182C is intended for berKh use. It has a
built-in tilt stand and feet mounted on both bottom and
rear for bench or upri^t operation.
2-2^. To use the tilt stand, lift the front of the instrument
or place it vertically on the rear feet. The tilt stand is
folded and locked Into r^lrtce against the cahlnet bottom
cover. Hold the instrument steady and squeeze the two
tilt stand legs together to release them from the lock. Pull
the stand toward the front of the instrument. When fully
forward, release the legs and they will lock into position.
The tilt stand will support the instrument with the front
elevated,
2-25. INSTRUMENT COOLING.
2-26. This instrument does not require forced-air cooling
when operated at room temperature or between 0to +55
degrees centigrade. Normal air circulation will maintain a
reasonable operating temperature within the instrument.
2-27. Perforations in the two covers provide for the
required air flow. Do not obstruct them. Provide scverel
inches of clearance around the top, rear and sides.
Adequate airflow from the bottom of the instrument is
provided by the mounting feet.
228. CONTRAST FILTER.
2-29. The contrast filter is designed to be easily removed
from the CRT bezel. Use of the light blue contrast filter
provides comfortable viewing when the instrument is
operated in normal and high ambient light.
2-30. To remove the contrast filter, as is desirable Tor
photographing the display, grasp the top portion of the
bezel frame and pull straight up. Remove the filter
by lifting it straight up and out of the bezel. Figure 2-1
shows the filter being removed from the instrument.
.Vr
A— 9
Figure 2-1. Contrast Filter Removal
2-31. CLEANING CRT FACEPLATE.
2-32. When the contrast filter has been removed, the CRT
faceplate can be cleaned using asoft cloth or tissue. Never
use coarse or abrasive tissues; these will scratch the plastic
CRT faceplate.
2-33. INSTRUMENT COMPATIBILITY.
2-34. The Model 182C Oscilloscope is designed to operate
with awide variety of time base and vertical plug-ins.
Table 3-1 lists the plug-ins currently available.
Note
Plug-ins specifically designed for use
with the 500 MHz Model 183A/B Os-
cilloscopM will not tit into or operate
in the Model 182C. Amechanical inter-
lock is provided on these plug-ins which
prevents their full insertion into the
Model 182C. Additionally, the Model
182C does not supply the required
operating power.
2-2

Model 182C Operation
SECTION III
OPERATION
3-1. INTRODUCTION.
3-2. This section of the manual presents information
on Che operation, function and capabilities of (he instru-
ment controls. Information regarding control turn-on
procedures and front panel adjustments is explained to
assist the operator in properly setting up and using the
Model 182C.
3-3. GENERAL.
3-4. The Model 182C is designed to operate with plug-in
time bases, and vertical amplifiers or sampling and time
domain reflectometers. These plug-ins are accommodated
in the lower portion of the instrument. The required oper-
ating power is obtained from the oscilloscope mainframe
Time base and vertical amplifier units must be locked
together before being installed in the mainframe.
3-5. The vertical amplifier is always installed in the left-
hand side and the time base on the right-hand side of the
mainframe compartment. Refer to the plug-in operating
and service manuals for mating and installation instruc-
tions.
3-6. PUSHBUTTON SWITCHES.
37. Three switches are of the two position push-push
type. These are; MAGNIFIER. DISPLAY and EXT
COUPLING. The pushbuttons for these functions are color
coded to indicate the function selected. When the released
position is selected, the white skirt of the pushbutton is
exposed. This corresponds to the control function on the
panel outlined in while. For example: if MAGNIFIER is
depressed, only the black portion of the pushbutton is
visible. Magnification is therefore XI 0. When MAGNI FIER
is released, the white skirt of the pushbutton can be seen
and magnification is XI.
3-8. FRONT PANEL CONTROLS AND CON-
NECTORS.
3-9. All operating controls and front panel adjustments
are identified and described in Figure 3-1 The information
presented gives the operator aquick reference regarding
the operating function of each. Additional information
regarding some of these is explained below in greater
detail.
3-10. CALIBRATOR.
3-11. The calibrator has two outputs. 10V and 250 mV
peak-to-peak. negative-going from ground, with an am-
plitude accuracy of The output is asquare wave
at afrequency of approximately 1kHz. Risetime of the
signal is less than 3microseconds. These outputs are
useful for checking vertical and horizontal sensitivity
calibration, and divider probe calibration. A3-way bind-
ing post provides aconvenient ground connection point
and may be used with banana plug, wire or spade lug
connection.
3-12. SCALE.
3-13. This control adjusts the overall brightness of the
CRT graticule. It should be adjusted for good contrast
between the background and the graticule. The SCALE
control is useful when using ahood to view the display
or when photographing waveforms. Rotate the SCALE
control counterclockwise to OFF when graticule illumir>-
atlon is not needed.
3-14. TRACE ALIGN.
3-15. This screwdriver adjustment is used to compensate
for external magnetic fields that may affect alignment of
the horizontal trace with the graticule Use it to position
the trace parallel to the graticule horizontal lines. The
alignment should be checked when the instrument is
moved to anew location and adjustment made whenever
necessary.
3-16. FOCUS AND ASTIGMATISM.
3-17. These controls are used to obtain adisplay of
uniform focus. Adjust both controls for the sharpest
display possible.
3-18. FIND BEAM.
3-19. Occasionally the CRT beam may be driven off-
screen by large dc input levels or improper control settings.
Pressing the pushbutton increases intensity and reduces
horizontal and vertical amplifier gains enough to always
return adisplaced beam to the viewing area. This enables
the operator to determine the action necessary to center
the display. All operating controls function while the
FIND BEAM control is depressed. Obtaining acentered
display may require adjustment of the deflection factor,
horizontal and vertical position, coupling, trigger level
or intensity for example. If the controls are properly set,
the display will remain visible when FIND BEAM is
released.
3-1

Operation Model 182C
Note
Option 01 1instruments do not increase
intensity when FIND BEAM is pressed.
Use the INTENSITY control to set
Intensity to viewing level.
3-20. LINE POWER SWITCH.
3-21. This toggle switch applies or removes ac line input
power to the instrument. When ON, an indicator lamp,
located immediately above the switch, is illuminated.
Power for the lamp is obtained from the low voltage power
supply. Both sides of the ac power line input are
interrupted when switched to OFF.
3-22. HORIZONTAL EXTERNAL COUPLING.
3-23. An external input signal may be connected to the
hori2ontal amplifier via the EXT INPUT BNC connector
when DISPLAY is set to EXT. The EXT COUPLING
switch is used to select ac coupling (capacitive coupling)
to the amplifier tor alternating voltages or dc coupling.
3-24. HORIZONTAL MAGNIFIER.
3-25. This pushbutton switch controls the gain of the
horizontal amplifier. When switched from XI to XIO, the
gain is increased ten times. For example, one volt into the
horizontal amplifier EXT INPUT jack produces 1division
of deflection in XI and 10 divisions of deflection in XIO.
3-26. HORIZONTAL DISPLAY.
3-27. Either of two modes of operation can be selected
with this switch. It selects the origin of the input signal
applied to the horizontal amplifier. When INT is selected,
the input signal to the horizontal amplifier is obtained
from the time base plug-in. With the switch in EXT. the
sweep signal input from the plug in is disconnected, and
input to the horizontal amplifier is obtained from the
EXT INPUT connector located on the front panel.
328. EXTERNAL VERNIER.
329. The deflection factor of an external Input signal can
be continuously varied to decrease deflection by afactor
of approximately 10 by using diis control. When the
vernier is in the maximum clockwise position (CAL
detent), the horizontal amplifier is calibrated to provide
1.0 V/div deflection in the XI magnifier range and
0.1 V/div in the XIO range.
330. REAR PANEL CONTROLS AND CON-
NECTORS.
3-31. Rear panel controls and connectors are identified
and described in Figure 3-1. Additional information
regarding these is explained below in greater detail.
3-32. OUTPUTS.
3-33. Four BNC connectors on the rear panel of the
Model 182C are provided to supply signals from the time
base or sampling plug-in to external equipment. The low
impedance outputs are isolated from the high impedance
input signals. The period of the signal output is directly
related to the main and delayed sweep speed selected for
the time base plug-in or the vertical and horizontal outputs
when used with sampling plug-ins. Refer to the Operating
and Service Manual for the plug-in to determine signal
identification.
3-34. The output of the MAIN SWEEP OUTPUT and the
DELAYED SWEEP OUTPUT is apositive-going ramp of
about 6volts amplitude. The output of the MAIN GATE
OUTPUT and the DELAYED GATE OUTPUT is a
negative-going pulse of about 3volts amplitude. These
outputs can supply 3mA and will drive impedances as low
as 1000 ohms wiihoutdlsiortion.
3-35. Z-AXiS INPUT.
3-36. An external signal can be utilized to control the
CRT intensity. The intensity modulation signal is applied
directly to the CRT intensity gate amplifier. Apulse of
approximately -f2V amplitude and awidth of at least 50
nanoseconds or a-t-2V continuous wave (cw) input of
10 MHz or lower will blank atrace of normal intensity.
Input of anegative signal can be used for display intens-
ification,
3-37. AC LINE INPUT.
3-38. Athree-conductor ac power cord is provided for ac
input. Apower line ground is obtained through the power
cord. Also located on the rear panel is the SELECTOR
line slide switch, which allows operation from either 115V
or 230V ac power line. Fuses are provided for both 115V
and 230V operation.
3-39. PHASE/BANDWIDTH SWITCH.
3-40. APHASE/0ANDWIDTH switch is located within
the instrument on the horizontal amplifier assembly. The
instrument top cover must be removed for access to this
switch Positioning the PHASE/BANDWIDTH switch to
PHASE causes the horizontal input signal to be delayed
the same amount of time as the vertical input signal. This
delay allows the Model 182C to be used for phase
measurement. The switch should always be in the
BANDWIDTH position unless the instrument is being used
for phase measurement.
3-41. PHASE MEASUREMENT.
3-42. Channel Aof multi-channel vertical plug-ins should
be used when making phase measurements. When adif-
ferent channel (other than A) is to be used, the
oscilloscope horizontal amplifier should be properly ad-
justed (or that channel. Section Vof this manual contains
the adjustment procedure. Accurate phase measurements
may be made at frequencies up to 100 kHz.
32

Model 182C Operation
II 10 98
1. POSITION. Single knob provides coarse and
fine ddju»(meiil uf Ui^pley'^ liuii^uiildl puMliun.
2. MAGNIFIER. Determines gain of horizontal
amplifier.
3. OISPI AY Selects sniirce of horizontal input
signal.
4. EXT VERNIER ,Provides continuous odjusimoot
of deflection factor for external horizontal Input
signals. In CAL detent position, deflection factor
is selected by Magnifier switch position.
5. EXT COUPLING. Selects AC ur DC coupling lor
external horizontal Input signal.
G. EXT INPUT. BNC connector for coupling an
external horizontal input signal to horizontal
amplifiei
,
7. LINE. Toggle switch with irxlicator light for
turning oscilloscope on artd off.
8FIND BEAM. Intensifies trace and always returns
display to on-screen.
9. INTENSITY. Controls brightness of display.
10. ASTIG. Adjusts roundness of writing beam.
11. FOCUS. Adjusts writing beam for sharpest trace.
12. TRACE ALIGN. Rotates trace around longitu-
rlinal avisnf CRT.
13. SCALE. Controls graticule illumination.
I8ZC- '*
14. Ground Connector. Provides a chassis ground
connection point.
15. CALIBRATOR. Provides a1kHz squarewaveat
two amplitudes: 250 mV and 10V p-p.
A. MAIN GATE OUTPUT. BNC connector for
main gate signal to external equipment.
BDELAYED GATE OUTPUT. BNC connector for
output of delayed gate signal to external equip-
ment.
C. DELAYED SWEEP OUTPUT. BNC connector
for output of delayed sweep signal to external
equipment.
D. MAIN SWEEP OUTPUT. BNC coiinctioi fur
output of main sweep signal to external equip-
ment.
E. Z-AXIS INPUT. RNC connector for input of
CRT iniensificaiiuM ui blaiiKiny signal.
F. FUSE. 230V operation ac line fuse.
GSELECTOR. Provides for external selection of
line operating voltage.
H. FUSE. 115V operation ac line fuse.
IPower Connector, 3-wire ac power lir>e input.
J. Ground Connector Provides a chassis ground
connection point.
Figure 3-1 .Front and Rear Controls and Connectors
33

Operation Model 182C
3-43. To measure phase, set the internal PHASE/
BANDWIDTH switch to PHASE and connect the input
si9nal$ to the vertical amplifier Channel Ainput and the
oscilloscope HORIZONTAL EXT INPUT. Set the HORI-
ZONTAL DISPLAY to EXT. Adisplay similar to Figure
3-2 will be observed. The size of the opening of the display
Is arelative indication of the phase difference of the input
signals.
3-44. To obtain amore exact measurement of the phase
difference, center the display in the X-axis and Y-axis.
Increased measurement accuracy will be obtained by using
horizontal and vertical deflection factors which result in
maximum display size. The phase shift in degrees is deter-
mined by the following;
.,/Lopening\
0=sin -1 I.]
\Ltotal /
As an example, assume that ^total is 8divisions. If
Lopening is 1division, the phase shift is approximately
7degrees.
Note
Make certain that the switch is returned
to BANDWI DTH position after making
phase measurements. This will allow
normal operation.
345. PLUG-iN UNITS.
3-46. The Model 182C Oscilloscope requires time base
artd vertical or samplirtg plug-in units. The deflection
sensitivity of the CRT may vary slightly with different
units. Vertical plug-ins should be calibrated when first
installed or when shifted between oscilloscopes. The time
base ar>d vertical plug-ins must be locked together prior to
insertion into the Model 182C. Consult the respective
plug-in Operating arvj Service Manuals for operation and
capability information, Table 3-1 lists the plug-ins cur-
rently available.
3-4

Model 182C Operation
Table 3-1. Available Plugins
Vertical Plug-ins Sampling
(Vertical Section)
Model No. 1801A 1803A 1804A 1805A 1806A
1
1
1d07A 1808A 1810A 1815A/B 1811A
Bandwidth MHz 50 40
(30) 50 0.5 35 75 1GHz 4 or
12.4 GHz.
Min. deflection
factor/dlv
5mV
(500 uV
opt OOl
cascad-
ed)
10 mV
(1 mV
cascad-
ed)
20 mV H100 uV 10 mV 5mV 2mV r, mV fl
Channels
'1 (opt
001, 1
cascad-
ed)
1diff 12
(both
dim 2 2 212
Input RC 1MU
27 pF
1MU-
25 pF
1MU
13 pF
or 50U
IMU
45 pF
1MU
27 pF QSil >uu •50U 5I)U
Differential
input yes nn yes yes yes yes yes no yes
Time Base Plug-ins Sampling
(Time Base Section) TDR
Model No. 1820C 1821
A
1824A 182SA 1810A 181SA/B 1811A 181 8A 1815A/B
150 100 150 150
i
<1 GHz 18 GHz
with trigger
countdown
18 GHz
with trigger
countdown '
<160 ps
risetime un
Determined by Vertical
Amplifier Plug-in 1GHz TDK Sy.stem TDK
Sweep
Speeds/div 5 ns*
1see 10 ns*
1see 5 ns*
1sec 5ns*
1sec
100 ps
(expand-
ed) -.50
usee
10 ps
-1usee 10 ps
(expand- i
ed) 1
usee
tlalibratcd
in feet,
meters,
and nano-
1815A
calibrated
in feet,
Delayed and
mixed sweep No Yes Yes No No No seconds 1815H
calibrated
in meters.
'Irifliides XII) mainframi* magnification.
3-5

Theory Model 182C
Figure 4-1. Overall Block Diagram
4-0

Model 182C Theory
SECTION IV
PRINCIPLES OF OPERATION
41. INTRODUCTION.
4-2. This section provides information about the circuits
used in the Model 182C and how they operate. Refer to
the overall block diagram (Figure 4-1) and the schematics
in Section VIII while reading the text.
4-3. GENERAL DESCRIPTION.
4-4. The Model 182C is an X-Y axis display instrument
designed to be used with a plug-in vertical amplifier and a
plug-in time base generator. The instrument contains the
CRT and its controls, low voltage and high voltage reg-
ulated power supplies, ahorizontal amplifier, and agate
amplifier. Asweep-gate output amplifier and acalibrator
are also included,
4-5. To obtain auseful display on the CRT, three signals
are necessary: vertical deflection, horizontal deflection
and intensity. The signal required for vertical deflection
(Y-axis) of the CRT is supplied from aplug-in vertical
amplifier. This signal is connected directly to the CRT
vertical deflection plates. The horizontal (X-axis) deflec-
tion signal Is generated by the time base plug in. It is
further amplified by the oscilloscope horizontal amplifier
before being applied to the CRT horizontal deflection
plates.
4-6. The signal for CRT intensification must be time
coincident with the horizontal deflection signal to increase
the CRT brightness as the beam is swept through the CRT
display area. This intensity determining signal is called the
unblanking gate. It is developed in the time base plug-in
and amplified by the gate amplifier for application to the
CRT control grid.
47. Signals for horizontal deflection and intensity mod-
ulation may also be applied to the oscilloscope from
external sources other than the plug-in units. External
input jacks are provided for this purpose.
4-8. INPUT POWER.
4-9. Either 115V or 230V ac (±10%) single phase, 48 to
440 Hz, can be applied as operating power. Arear-panel
SELECTOR switch allows operation from either Input
line voltage. This switch connects two windings of the
instrument power transformer in parallel for 115V oper-
ation. The SELECTOR switch also selects the proper size
fuse for 115V or 230V operation. It is not necessary to
change fuses.
410. With power applied to the power transformer pri-
mary windings, several secondary voltages are produced.
Rectified, filtered and regulated as required, they are used
as the source of power for the various circuits of the
oscilloscope and for operation of the vertical and time
base plug-ins.
4-11. HORIZONTAL DEFLECTION.
4-12. The horizontal amplifier may be used with either
internal or external deflection signal sources. Positioning
the HORIZONTAL DISPLAY switch to INT arranges the
circuitry to operate from signals supplied from the time
base plug-in. In this condition ihe-IOOV power is applied
to the plug-in, allowing it to operate and produce both a
sweep signal and an unblanking gate signal.
413. The sweep signal from the time base plug-in is
coupled to the oscilloscope horizontal output amplifier.
Here it is converted to adifferential signal, amplified
and applied to the CRT horizontal deflection plates.
414. Horizontal position of the Xaxis sweep signal is
controlled at the input to the first stage of the horizontal
output amplifier. Atwo section potentiometer, mechan-
ically interconnected, is used to provide both fine and
coarse positioning controls from asingle knob.
4-15. Horizontal amplifier gam is controlled by the
MAGNIFIER switch. Two settings can be selected:
XI or XI 0. With XI selected, the sweep speed corresportds
to the selected time base plug-in sweep speed. In X10
operation the sweep speed is ten times that selected at
the time base plug-in.
4-16. The unblanking gate from The Time base plug-in is
coupled to the gate amplifier where it is summed with the
Z-axis input and chopped blanking signals (if they are
applied). The resulting signal is amplified and coupled
through the high voltage supply to the CRT control grid
to set the intensity of the displayed signals.
4-17, At the end of each unblanking gate the gate ampli-
fier produces an alternate trigger signal. This signal is
coupled to the vertical plug-in and is anegative going
pulse. The alternate trigger is used by the vertical plug-in
to synchronize the channel switching of multichannel
vertical plug-ins.
4-18. With the HORIZONTAL DISPLAY switch set to
EXT. operating power (-100V) is removed from the time
base plug-in. Without this -100V, the time base plug-in
does not produce an internal sweep signal or an unblanking
gate.
4-1
Table of contents
Other HP Test Equipment manuals
Popular Test Equipment manuals by other brands

HBM
HBM K800 operating manual

Emerson
Emerson Rosemount FS-HR-975 Reference manual

Grason-Stadler
Grason-Stadler GSI NOVUS user manual

Extech Instruments
Extech Instruments VT10 user guide

SENSIT Technologies
SENSIT Technologies SMART-CAL Operation manual

Tempo Fitness
Tempo Fitness 24A STATION MASTER PRO instruction manual