manuals.online logo
Brands
  1. Home
  2. •
  3. Brands
  4. •
  5. HP
  6. •
  7. Touch Terminal
  8. •
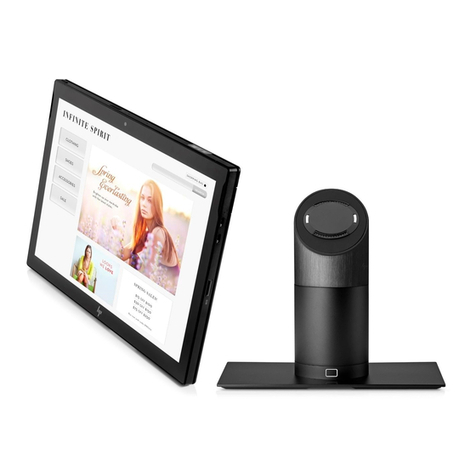
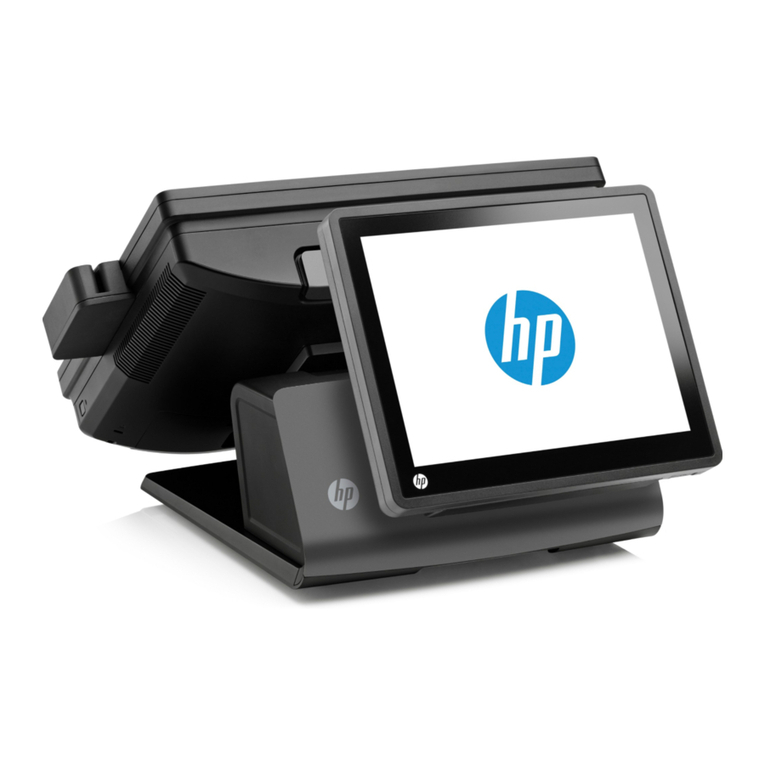
  9. HP Engage Go Mobile System Assembly instructions

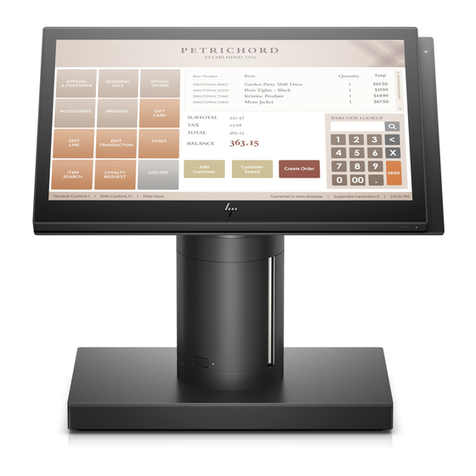
HP Engage Go Mobile System Assembly instructions

EL-MF877-00 Page 1
Template Revision C
Last revalidation date 09-May-2018
HPI instructions for this template are available at EL-MF877-01
Product End-of-Life Disassembly Instructions
Product Category: External Options
Marketing Name / Model
[List multiple models if applicable.]
HP Engage Go Mobile System
Purpose: The document is intended for use by end-of-life recyclers or treatment facilities. It provides the basic instructions for the
disassembly of HPI products to remove components and materials requiring selective treatment, as defined by EU directive
2012/19/EC, Waste Electrical and Electronic Equipment (WEEE).
NOTE: Recyclers should sort plastic materials into resin streams for recycling based on the ISO 11469 plastic marking code on the
plastic part. For any questions on plastic marking, please contact HP’s Sustainability Contact.
1.0 Items Requiring Selective Treatment
1.1 Items listed below are classified as requiring selective treatment.
1.2 Enter the quantity of items contained within the product which require selective treatment in the right column, as applicable.
Item Description
Notes
Quantity of
items
included in
product
Printed Circuit Boards (PCB) or Printed Circuit
Assemblies (PCA)
With a surface greater than 10 sq cm
2
Batteries, excluding Li-Ion batteries.
All types including standard alkaline, coin or button style
batteries
Li-Ion batteries. Include all Li-Ion batteries if more than
one is provided with the product (such as a detachable
notebook keyboard battery, RTC coin cell, etc.)
Battery(ies) are attached to the product by (check all
that apply with an “x” inside the “[ ]”):
[6] screws
[X] snaps
[X] adhesive
[ ] other. Explain
NOTE: Add detailed removal procedures including
required tools in the sections 3.1 and 3.2.
1(Main
battery)
Mercury-containing components
For example, mercury in lamps, display backlights,
scanner lamps, switches, batteries
0
Liquid Crystal Displays (LCD) with a surface greater than
100 sq cm
Includes background illuminated displays with gas
discharge lamps (12.3”LED)
1
Cathode Ray Tubes (CRT)
0
Capacitors / condensers (Containing PCB/PCT)
0
Electrolytic Capacitors / Condensers measuring greater
than 2.5 cm in diameter or height
0
External electrical cables and cords
DC Cable for External Power Supply
1
Gas Discharge Lamps
0
Plastics containing Brominated Flame Retardants
Excluding B&S parts (EPS)
0
EL-MF877-00 Page 2
Template Revision C
Last revalidation date 09-May-2018
HPI instructions for this template are available at EL-MF877-01
Item Description
Notes
Quantity of
items
included in
product
weighing > 25 grams (not including PCBs or PCAs
already listed as a separate item above)
Components and parts containing toner and ink,
including liquids, semi-liquids (gel/paste) and toner
Include the cartridges, print heads, tubes, vent
chambers, and service stations.
0
Components and waste containing asbestos
0
Components, parts and materials containing refractory
ceramic fibers
0
Components, parts and materials containing
radioactive substances
0
2.0 Tools Required
List the type and size of the tools that would typically be used to disassemble the product to a point where components and
materials requiring selective treatment can be removed.
Tool Description
Tool Size (if
applicable)
Electric screwdriver (Cross)
#1
Electric screwdriver (Trox)
T8
Plastic stick
M/B Support Fixture
3.0 Product Disassembly Process
3.1 List the basic steps that should typically be followed to remove components and materials requiring selective treatment
including the required steps to remove the external enclosure:
1. Follow steps described in Disassembly instruction (file attached)
2. If parts can be removed without using a tool, remove it first
3. Use correct screwdriver and torque value before unlock the screw.
4. Disconnect RTC battery cable and remove battery from M/B.
5. Dispose of all removed components according to regulation requirements.
3.2 Optional Graphic. If the disassembly process is complex, insert a graphic illustration below to identify the items contained in the
product that require selective treatment (with descriptions and arrows identifying locations).
制表:审核: 楊洋 陈燕淋
Sta. Ver. Sta. Ver. Sta. Ver. Sta. Ver. Sta. Ver. Sta. Ver.
1 0.10 9 0.10 17 0.10 24 0.10
2 0.10 10 0.10 18 0.10 25 0.10
3 0.10 11 0.10 19 0.10 26 0.10
4 0.10 12 0.10 20 0.10 27 0.10
5 0.10 13 0.10 21 0.10 28 0.10
6 0.10 14 0.10 22 0.10
7 0.10 15 0.10 23 0.10
8 0.10 16 0.10 24 0.10
Sta. Ver.
ALL 0.1*
2018/4/4
首份SOP制作
陳博
A.Current station version list:
B.Version Modify list:
Date
Content
Design
Written by:
陳博
Date:
2018/4/4
Page:
1 of 42
Sub-assembly name:
CNNB 拆机 SOP
Document No.:
CNNB 拆机 SOP
Revision:
0.10
MANUFACTURING PROCESS INSTRUCTIONS
MECHANICAL ASSEMBLY
MODEL : CNNB
注意事项︰PCB板需轻拿轻放,不得碰触板上之零件,如有不良,请立即通知领班或助理。
作 業 指 導 書
治具清单(治具规格)数量 治具清单(治具规格)数量
步骤:
Document No. : CNNB 拆机SOP 站 別 :
作 業 名 稱 : Ver. : 编辑日期 :
發行部門:制表: 陈燕淋 工業工程課
1(1/1)
0.10
1. pull up the belt
2. hold against the belt cover (shown as the
red arrow)(Pics1)
3. push it out, remove the cover and put
away(pics 1)
Dis-assembly Hand Strap Cover 2018/4/4
Cover(black)
6053B1546401 black
6053B1573201 white
cover disassemble fixture 1
图一
注意事项︰PCB板需轻拿轻放,不得碰触板上之零件,如有不良,请立即通知领班或助理。
作 業 指 導 書
治具清单(治具规格)数量 治具清单(治具规格)数量
步骤:
Document No. : CNNB 拆机SOP 站 別 :
作 業 名 稱 : Ver. : 编辑日期 :
發行部門:制表: 陈燕淋 工業工程課
1. Remove the screws(6052B0101901
M2*L4)*2(pics2)
2. Remove the sheet metal*2 (pics2)
3. Remove the belt
Dis-assembly Hand Strap BRKT
2(1/1)
0.10 2018/4/4
tips:
❖torque:1.5±0.5 kg/cm
❖no screw stripped, cannot drop into the
system
❖screw tighten order:pics shown
❖vertical fasten,no tilt
Black item
6051B1234701 belt
6053B1547701 Sheet metal
White item
6051B1253701 belt
6053B1572901 Sheet metal
#1screw driver 1
Pics 1
12
Pics 2
sheet metal
注意事项︰PCB板需轻拿轻放,不得碰触板上之零件,如有不良,请立即通知领班或助理。
作 業 指 導 書
治具清单(治具规格)数量 治具清单(治具规格)数量
步骤:
Document No. : CNNB 拆机SOP 站 別 :
作 業 名 稱 : Ver. : 编辑日期 :
發行部門:制表: 陈燕淋 工業工程課
1. Remove screw(6052B0159001 M2*L3)*2(PICS1)
2. Push down A cove,take off A cover(pics2 )
3. Remove FPR FFC & Pogo FPC(pics3)
4. Remove A cover
Dis-assemblyA cover
3(1/1)
0.10 2018/4/4
2
1
Pics 1
Pics 2
Pics 3
tips:
❖torque:1.5±0.5 kg/cm
❖no screw stripped, cannot drop into the
system
❖ ❖vertical fasten,no tilt
❖cannot pull up A cover,would cause
damage
#1screw drive 1
注意事项︰PCB板需轻拿轻放,不得碰触板上之零件,如有不良,请立即通知领班或助理。
作 業 指 導 書
治具清单(治具规格)数量 治具清单(治具规格)数量
步骤:
Document No. : CNNB 拆机SOP 站 別 :
作 業 名 稱 : Ver. : 编辑日期:
發行部門:制表: 陈燕淋 工業工程課
4(1/1)
0.10
1. remove(6053B1547901)screws6052B01200
01 M2*L2.5)*2 (pics 2)
2. Remove FFC(6035B0182801) (pics2)
3. Take off FPR(6042B0383501) (pics1)
Dis-assembly FPR 2018/4/4
tips:
❖torque:1.5±0.5 kg/cm
❖no screw stripped, cannot drop into the
system
❖screw tighten order:pics shown
❖vertical fasten,no tilt
#1screw driver 1
有FPR才需要此站
1 2
Pics 1
Pics 2
FPC
Sheet
metal
注意事项︰PCB板需轻拿轻放,不得碰触板上之零件,如有不良,请立即通知领班或助理。
作 業 指 導 書
治具清单(治具规格)数量 治具清单(治具规格)数量
步骤:
Document No. : CNNB 拆机SOP 站 別 :
作 業 名 稱 : Ver. : 编辑日期 :
發行部門:制表: 陈燕淋 工業工程課
Dis-assembly Pogo
1. Put A Cover on the fixture(pics 1)
2. Remove (6052B0120001 M2*L2.5 )*8(
pics 2)
3. Take off Pogo,put A Cover and Pogo
away
1
34
2
56
78
5(1/2)
0.10 2018/4/4
#1screw driver 1
A cover support fixture 1
Pics 1
Pics 2
tips:
❖torque:2.0±0.5 kg/cm
❖no screw stripped, cannot drop into the
system
❖screw tighten order:pics shown
❖vertical fasten,no tilt
注意事项︰PCB板需轻拿轻放,不得碰触板上之零件,如有不良,请立即通知领班或助理。
作 業 指 導 書
治具清单(治具规格)数量 治具清单(治具规格)数量
步骤:
Document No. : CNNB 拆机SOP 站 別 :
作 業 名 稱 : Ver. : 编辑日期 :
發行部門:制表: 陈燕淋 工業工程課
5(2/2)
0.10 2018/4/4
A Cover(black)
6070B1294601 W/Finger + W/NFC
6070B1294501
W/O Finger + W/NFC
6070B1294801
W/Finger + W/O NFC
6070B1294701
W/O Finger + W/O NFC
Tips:
•Visual inspect the incoming matl if defect
•Check if the matl PN is correct
W or w/o NFC,would
has different printing
A Cover(white)
6070B1294602 W/Finger + W/NFC
6070B1294502
W/O Finger + W/NFC
6070B1294802
W/Finger + W/O NFC
6070B1294702
W/O Finger + W/O NFC
Dis-assembly Pogo
注意事项︰PCB板需轻拿轻放,不得碰触板上之零件,如有不良,请立即通知领班或助理。
作 業 指 導 書
治具清单(治具规格)数量 治具清单(治具规格)数量
步骤:
Document No. : CNNB 拆机SOP 站 別 :
作 業 名 稱 : Ver. : 编辑日期:
發行部門:制表: 陈燕淋 工業工程課
6(1/1)
0.10
1. Take apart battery connection(pics1)
2. Disassembly LCM FPC(pics1)
3. Disassembly touch control board FFC(
pics1)
Dis-assembly FPC 2018/4/4
tips:
•Carefully handle the matl, watch the direct
to avoid crash
•Be sure ESD protection is workable
Plug off
power at first
Pics 1
注意事项︰PCB板需轻拿轻放,不得碰触板上之零件,如有不良,请立即通知领班或助理。
作 業 指 導 書
治具清单(治具规格)数量 治具清单(治具规格)数量
步骤:
Document No. : CNNB 拆机SOP 站 別 :
作 業 名 稱 : Ver. : 编辑日期:
發行部門:制表: 陈燕淋 工業工程課
7(1/1)
0.10
1. Remove NFC antenna(6036B0209901) (
pics 1)
2. Remove NFC FFC(6035B0183001)&NFC
board(6042B0386301),separately put
away(pics 2)
Dis-assembly NFC 2018/4/4
For NFC SKU only
pics1
tips:
•Carefully handle the matl, watch the direct
to avoid crash
•Be sure ESD protection is workable
pics2
注意事项︰PCB板需轻拿轻放,不得碰触板上之零件,如有不良,请立即通知领班或助理。
作 業 指 導 書
治具清单(治具规格)数量 治具清单(治具规格)数量
步骤:
Document No. : CNNB 拆机SOP 站 別 :
作 業 名 稱 : Ver. : 编辑日期:
發行部門:制表: 陈燕淋 工業工程課
8(1/2)
0.10
1. Remove screws (6052B0138901
M1.2*L2.5)*2(pics2)
2. Remove scanning board connection(
pics 1)
3. Remove the cables and
board(6042B0411801),put away the
scanning board (pics1)
4. Remove buzzer Cable
Dis-assembly BCS/B 2018/4/4
#0 screw driver 1
Cable routing fixture 1
tips:
❖torque:1.5±0.5 kg/cm
❖no screw stripped, cannot drop into the
system
❖screw tighten order:pics shown
❖vertical fasten,no tilt
1
2
For Scanning board SKU only
蜂鸣器
cable
pics 1
Pics 2
注意事项︰PCB板需轻拿轻放,不得碰触板上之零件,如有不良,请立即通知领班或助理。
作 業 指 導 書
治具清单(治具规格)数量 治具清单(治具规格)数量
步骤:
Document No. : CNNB 拆机SOP 站 別 :
作 業 名 稱 : Ver. : 编辑日期:
發行部門:制表: 陈燕淋 工業工程課
8(2/2)
0.10
1. Remove battery sponge
(6054B2077001)*1(pics3)
2. Disassembly SIM board FFC(pics2)
3. remove WWAN terminal or GPS terminal
(pics 1)
Dis-assembly cable 2018/4/4
For WWAN/GPS sku only
tips:
•Antenna terminal should be assembly
vertically ,no tilt
P 1
P 2
WWAN
connection
P 3
SIM FFC
Cable routing bar fixture 1
注意事项︰PCB板需轻拿轻放,不得碰触板上之零件,如有不良,请立即通知领班或助理。
作 業 指 導 書
治具清单(治具规格)数量 治具清单(治具规格)数量
步骤:
Document No. : CNNB 拆机SOP 站 別 :
作 業 名 稱 : Ver. : 编辑日期:
發行部門:制表: 陈燕淋 工業工程課
9(1/2)
0.·10
1. Remove (6052A0034801 M2*L2)*1(pics 1
)
2. Remove SSD(Pics 1)
Dis-assembly SSD 2018/4/4
tips:
❖torque:1.5±0.5 kg/cm
❖no screw stripped, cannot drop into the
system
❖screw tighten order:pics shown
❖vertical fasten,no tilt
#1Screw driver 1
P 1
注意事项︰PCB板需轻拿轻放,不得碰触板上之零件,如有不良,请立即通知领班或助理。
作 業 指 導 書
治具清单(治具规格)数量 治具清单(治具规格)数量
步骤:
Document No. : CNNB 拆机SOP 站 別 :
作 業 名 稱 : Ver. : 编辑日期:
發行部門:制表: 陈燕淋 工業工程課
9(2/2)
0.10
1. REMOVE WLAN terminal *2(P 1)
Dis-assembly cable 2018/4/4
TIPS:
•Antenna terminal should be assembly
vertically ,no tilt
P 1
Cable routing bar 1
注意事项︰PCB板需轻拿轻放,不得碰触板上之零件,如有不良,请立即通知领班或助理。
作 業 指 導 書
治具清单(治具规格)数量 治具清单(治具规格)数量
步骤:
Document No. : CNNB 拆机SOP 站 別 :
作 業 名 稱 : Ver. : 编辑日期:
發行部門:制表: 陈燕淋 工業工程課
10(1/2)
0.10
1. Disconnect Screw Cove downside hook
2. Disconnect Screw Cove side hooks
3. Remove the parts(pics 2)at last
4. Remove Screw Cover(6051B1231401) (Pics
1)
Dis-assembly Screw Cover 2018/4/4
Pics 1
Pics 2
注意事项︰PCB板需轻拿轻放,不得碰触板上之零件,如有不良,请立即通知领班或助理。
作 業 指 導 書
治具清单(治具规格)数量 治具清单(治具规格)数量
步骤:
Document No. : CNNB 拆机SOP 站 別 :
作 業 名 稱 : Ver. : 编辑日期:
發行部門:制表: 陈燕淋 工業工程課
10(2/2)
0.10
1. Remove speaker Cable(pics 1)
2. Disassembly power supply FPC(pics 2)
Dis-assembly FPC 2018/4/4
tips:
•Carefully handle the matl, watch the direct
to avoid crash
•Be sure ESD protection is workable
P1
Cable routing bar 1
注意事项︰PCB板需轻拿轻放,不得碰触板上之零件,如有不良,请立即通知领班或助理。
作 業 指 導 書
治具清单(治具规格)数量 治具清单(治具规格)数量
步骤:
Document No. : CNNB 拆机SOP 站 別 :
作 業 名 稱 : Ver. : 编辑日期:
發行部門:制表: 陈燕淋 工業工程課
11(1/1)
0.10
Dis-assembly Screw 2018/4/4
tips:
❖torque:1.5±0.5 kg/cm
❖no screw stripped, cannot drop into the
system
❖screw tighten order:pics shown
❖vertical fasten,no tilt
1. Remove (6052B0117601 M2*L4)*9(
pics1)
1
2
345 6
7
8
9
#1screw driver 1
P1
注意事项︰PCB板需轻拿轻放,不得碰触板上之零件,如有不良,请立即通知领班或助理。
作 業 指 導 書
治具清单(治具规格)数量 治具清单(治具规格)数量
步骤:
Document No. : CNNB 拆机SOP 站 別 :
作 業 名 稱 : Ver. : 编辑日期:
發行部門:制表: 陈燕淋 工業工程課
12(1/2)
1. remove(6052B0117601 M2*L4)*4(P1)
Dis-assembly display
#1Screw driver 1
tips:
❖torque:1.5±0.5 kg/cm
❖no screw stripped, cannot drop into the
system
❖screw tighten order:pics shown
❖vertical fasten,no tilt
2
13
4
0.10 2018/4/4
P1
注意事项︰PCB板需轻拿轻放,不得碰触板上之零件,如有不良,请立即通知领班或助理。
作 業 指 導 書
治具清单(治具规格)数量 治具清单(治具规格)数量
步骤:
Document No. : CNNB 拆机SOP 站 別 :
作 業 名 稱 : Ver. : 编辑日期:
發行部門:制表: 陈燕淋 工業工程課
12(2/2)
0.10
1. Upend the system ,LCD facing up(pics 1)
2. Disassembly the LCD downside part(pics 2 )
3. Disassembly the LCD upper left part(pics 2 )
4. Disassembly the LCD downside part (pics 2 )
5. Disassembly the LCD upper right part (pics 2)
6. Remove the cables,take out the LCD and put
away(pics 1 )
Dis-assembly display 2018/4/4
Pics 1
Pics 2

Other HP Touch Terminal manuals

HP Rp3000 - Point of Sale System User instructions

HP

HP Rp3000 - Point of Sale System User instructions

HP RP7 Model 7800 User manual

HP

HP RP7 Model 7800 User manual

HP Engage One Retail System 141 Manual

HP

HP Engage One Retail System 141 Manual

HP RP7 Model 7800 Operating and maintenance manual

HP

HP RP7 Model 7800 Operating and maintenance manual

HP RP7 Model 7800 Manual

HP

HP RP7 Model 7800 Manual

HP Rp3000 - Point of Sale System User manual

HP

HP Rp3000 - Point of Sale System User manual

HP 2621B User manual

HP

HP 2621B User manual

HP 2624 User manual

HP

HP 2624 User manual

HP HP700/92 User manual

HP

HP HP700/92 User manual

HP rp5800 User instructions

HP

HP rp5800 User instructions

HP Engage One Retail System 143 Operating and maintenance manual

HP

HP Engage One Retail System 143 Operating and maintenance manual

HP rp5800 User manual

HP

HP rp5800 User manual

HP 262SA User manual

HP

HP 262SA User manual

HP ap5000 Specification sheet

HP

HP ap5000 Specification sheet

HP Rp5000 - Point of Sale System Owner's manual

HP

HP Rp5000 - Point of Sale System Owner's manual

HP RP7 Model 7800 User manual

HP

HP RP7 Model 7800 User manual

HP RP7 Model 7800 User manual

HP

HP RP7 Model 7800 User manual

HP ProLiant ML150 Gen9 Installation instructions

HP

HP ProLiant ML150 Gen9 Installation instructions

HP 13220 Manual

HP

HP 13220 Manual

HP rp5800 Assembly instructions

HP

HP rp5800 Assembly instructions

HP rp5800 Manual

HP

HP rp5800 Manual

HP Engage Go 10 User manual

HP

HP Engage Go 10 User manual

HP invent rp5000 User manual

HP

HP invent rp5000 User manual

HP Engage Go Convertible System Operating and maintenance manual

HP

HP Engage Go Convertible System Operating and maintenance manual

Popular Touch Terminal manuals by other brands

Fujitsu TeamPoS 2000 Installation and maintenance manual

Fujitsu

Fujitsu TeamPoS 2000 Installation and maintenance manual

BEETLE iPRO user guide

BEETLE

BEETLE iPRO user guide

AT&T Callmaster Series Reference manual

AT&T

AT&T Callmaster Series Reference manual

SSD Drives IBT Series Product description

SSD Drives

SSD Drives IBT Series Product description

Siemens 3VL9400-8BH01 manual

Siemens

Siemens 3VL9400-8BH01 manual

Nokia 22 Product guide

Nokia

Nokia 22 Product guide

Motorola HDT 600 Safety and General Information

Motorola

Motorola HDT 600 Safety and General Information

Pyramid TimeTrax bio quick start guide

Pyramid

Pyramid TimeTrax bio quick start guide

DIEBOLD NIXDORF DN Series installation guide

DIEBOLD NIXDORF

DIEBOLD NIXDORF DN Series installation guide

FALCOM STEPPIII Hardware description

FALCOM

FALCOM STEPPIII Hardware description

Symbol PPT 2700 Series user manual

Symbol

Symbol PPT 2700 Series user manual

Partner PT-6910 Series user manual

Partner

Partner PT-6910 Series user manual

Partner SP-1000 Service manual

Partner

Partner SP-1000 Service manual

Nokia 7368 ISAM ONT G-240W-C Product guide

Nokia

Nokia 7368 ISAM ONT G-240W-C Product guide

Nokia Cardphone 2.0 user guide

Nokia

Nokia Cardphone 2.0 user guide

Tysso TP-1715U user manual

Tysso

Tysso TP-1715U user manual

Transax VeriFone Vx510 installation instructions

Transax

Transax VeriFone Vx510 installation instructions

Stahl 8082 Series operating instructions

Stahl

Stahl 8082 Series operating instructions

manuals.online logo
manuals.online logoBrands
  • About & Mission
  • Contact us
  • Privacy Policy
  • Terms and Conditions

Copyright 2025 Manuals.Online. All Rights Reserved.