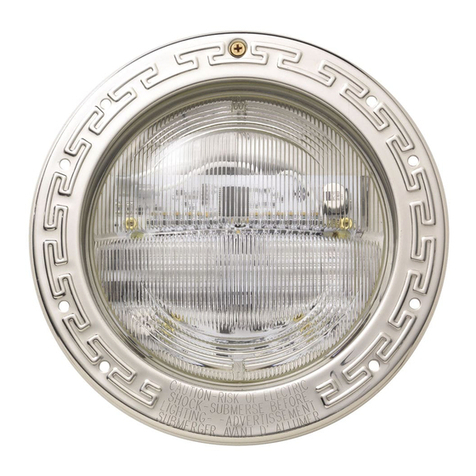
HQUA HQUA-PN02DC User manual

HQUA
Instruction Manual
For Spa Light
HQUA-PN02DC
Section 1 Safety Information
Electrical Safety
Negligence to these instructions may result in serious injury or death.
Always disconnect the power to the spa light at the circuit breaker before
servicing the light. Failure to do so could result in death or serious injury due to
the electrical shock.
Grounding Plug
• This product use 12V-15V AC as the power source, which must be grounded and
protected by a ground-fault circuit interrupter (GFCI) to reduce the risk of electrical shock.
Contact a qualified electrician if you cannot verify that the receptacle is protected by a
GFCI.
• Do not use an appliance leakage current interrupter (ALCI) in place of a GFCI since the
ALCI will not protect people.
Electric Shock

• To reduce the risk of electric shock, do not open the light when someone in the spa
pool.
• Do not throw, drop or drag the product heavily.
• Always disconnect the electrical outlet before removing, cleaning, servicing or making
any adjustment to the product.
• Do not try to repair the LED light or transformer on your own.
• There is no need to worry about the leak damage if you find out the water go
inside the LED light. There is a waterproof layer to avoid the failure.
• Do not disassemble the lens of the LED light or try to remove and damage the
waterproof layer on the surface of LEDs. Figure 1.
Figure 1.
Other Cautions
• Do not stare directly at the light emitted by this product. Long-term gaze may result in
glare and other eye diseases.
Section 2 General Information
HQUA-PN02DC is a dimmable and color changing pool/spa LED light, which is easy
to install and safe to use. Fit for 6 inches standard small wet niche. Replace the old fixture
with this LED light.
It needs 12V-15V AC to power. Due to the resistance of the electric cord, it might

need higher voltage input depending on the length of the cords. 0-30’ electric cord only
needs 12V AC input. 30-60’ needs 13V AC input. 60’-100’ needs 14V AC input.100’ needs
15 AC input.
The voltage on the LED board would be 12V DC, which is not harmful for human body
at all. It could provide enough Illumination equal to the 150W incandescent bulb.
Hereby, we will introduce the structure, specification and installation of the unit.
2.1 System Components
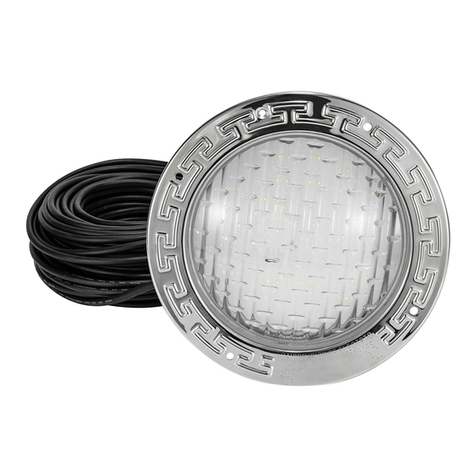
Full Waterproof LED light Assembly with 100’ cord and Face Ring
LED Driver and RGBW control system M4-3A with a waterproof junction box

2.2 Specification
Item
Name
Wattage
Volts
White
Luminous flux
Color
Changing
Dimmable
PN02DC
15W 12V-15V AC 1250lm YES YES
2.3 Installation
Precaution
Keep people out of the spa pool when you operate the installation.
Always turn off the main electrical switch or circuit breaker.
1. Remove the old face ring, then remove the light assembly from the niche. Put it on the
pool deck.
2. Please disassemble the old light and disconnect the wires. Use a fish tape reel puller
to remove the old electric cord. You have to do so because we use 5C cable for the
RGBW system.
3. Please open the waterproof junction box of the M4-3A receiver, and disconnect the
outlet (5 pin side). Pull the new electric cord out from the power supply side through
the conduit and reserve enough cords on the LED light side so you could replace the
light in the future. (We suggest 10 ft long electric cord remained)
We would provide light assembly and waterproof connector as a replacement kit.
Cut the old electric cord, strip each wire and re-connect them with our LED light
replacement by a 5C connector (PN1005). You could just replace the LED light
without replacing the whole electric cord which is in a good condition.
Figure 2.
4. Using a rag to dry the water on the open side of the electric cord. Please follow the
wiring rules to connect the wires with the outlet of the M4-3A controller:

Brown to R
Half Yellow Half Green to G
Blue to B
Black to W
Grey to V+
Figure 3.
5. Roll remain electric cords around the LED light assembly, put it into the wet niche.
Screw on the face ring to secure the light assembly into the niche. Figure 4.
Figure 4.
6. Insert the 2C input wire from the LED driver in the waterproof box into your current
Pool light transformer(we didn’t provide in this product, but you could search Pool light
transformer online to find one; This link provide a suggestion product if you need one).
https://www.amazon.com/dp/B089ZWPQ1Y
7. Apply the power and learn how to control the LED light as follows:
2.4 M4 Remote Controller Operation

Figure 5.
The Instruction of the Control Modes:
No. Mode No. Mode
1 RED 7 White
2 GREEN 8 3-Colors Jump Change
3 Blue 9 7-Colors Jump Change
4 Yellow 10 3-Colors Flashing
5 Purple 11 7-Colors Flashing
6 Cyan 12 Black
In Mode 1-7 : “+” and “–“ control the brightness
In Mode 8-11: “+” and “–“ control the changing speed
When there is no operation about 30 secs, the controller will fall into sleep to save power.
Any button would wake the controller.
Instruction of M4-3A RGBW Control Converter/Receiver
Figure 6.

The Converter/Receiver M4-3A and Remote Controller M4 are already paired. If you find
the connection is failed. You might need to reset the connection:
1. Press the pair button for over 5 seconds. It would delete the pair.
2. Click the pair button for a short time, the operating indicator would keep
working, click any button on the remote controller M4. It would flash a few times,
and pair successfully.

Section 3 Troubleshooting
Problem Cause Solution
There is water inside the light. It is acceptable and
safety.
Nothing needs to do. Unique
waterproof layer will protect the
light.
The LED pool light does not light
up at the beginning.
No power supply. Check the power source.
Loose Connection. Check the connection part in step
2.
The LED pool light is
damaged somehow. Contact HQUA for more help.
The LED pool light does not light
up or it is dim after a while.
The power cord is
loose.
Check the wiring connection first
without power supplying.
LED lights failed Contact HQUA for more help.
The GFCI is tripped. Contact HQUA for more help.
RC01 controller is not working. Battery Dead Look for 23A/A23 battery to
replace the old one.

Section 4 After-Sales Service
Should you need any support, or have any questions about the system,
please contact our Technical Support team via [email protected] and
we will be glad to assist you. We sincerely hope that you enjoy the benefits of
bright and safe pool/spa illumination with HQUA inground swimming
pool/spa light.

Our Commitment
Specific Warranty Coverage
2-Year Limited Warranty for LED Spa light
HQUA warrants that the LED spa light is free from defects of material and workmanship
for a period of 2 years from the date of purchase. During this period, HQUA will repair or
replace, at its option, any defective parts covered by the warranty. Please return the
defective part to your dealer for claim.
General Conditions and Limitations
None of the above warranties covers damage caused by improper use or maintenance,
accidents, acts of God or minor scratches/imperfections that do not materially impair the
product operation. The warranties do not cover products that are not installed as
described in the applicable User Manual either. Parts repaired or replaced under these
warranties will be covered up to the end of applicable warranty period.
The above warranties include the cost of shipment and handling of returned items. The
limited warranties described above are the only warranties applicable to the HQUA series
products. These limited warranties outline the exclusive remedy for all claims based on a
failure or defect of any the products, whether the claim is based on contract, tort
(including negligence), strict liability or otherwise. These warranties are in lieu of all others
regardless of written, oral, implied or statutory ones. Without limitation, no warranty of
merchantability or of fitness for a particular purpose shall apply to any of these products.

Part Number List
Part Number Description
PN02DCL RGBW Led Light Assembly 15W,12V AC/DC
PN01CS M4-3A Control System
PN01CS01 M4 Remote Controller
PN01CS02 M4-3A Control Receiver
PN02CS03 Waterproof Junction Box for M4-3A Receiver
PN01DCC 5C×22 AWG,100’ Weatherproof Electric Cord
Accessories
PN1001 #10-24 x 1-1/4 in. Phillips Flat Head Stainless Steel
Sheet Metal Screw with washer
PN2002 6” face ring for PN02 LED light
PN2004 6” Curve Stainless Steel Washer
PN2003 6” silicone seal
PN1005 5C 22AWG Waterproof Connector
……………………………………………….The End…………..………………………………..
Table of contents
Other HQUA Swimming Pool Lighting manuals
Popular Swimming Pool Lighting manuals by other brands
Westinghouse
Westinghouse SR82SP01A-06 instruction manual

Professional Pool Products
Professional Pool Products 100 Series installation manual

Astral Pool
Astral Pool 25391 Installation and maintenance manual

Sicce
Sicce HALLEY instructions

Interline
Interline 57113000 instruction manual

ENERGY FOCUS
ENERGY FOCUS Fiberstars Y20-6000 Procedure