HTC LD-70 User manual

User’s Manual
Laser Distance Meter
Please read this user's manual thoroughly before using this
unit and keep it properly for your future reference.

1
Contents
1. Safety regulations ............................................ 2
2. Installation and replacement of battery..................... 3
3. Features ...................................................................... 4
4. Specifications.............................................................. 4
5. LCD description........................................................... 6
6. Meter description....................................................... 6
7. Operations .................................................................. 7
8. Notes ........................................................................ 13
9. Troubleshooting........................................................ 14
10. Accessories ............................................................. 14

2
1. Safety regulations
Please read all of the operational guide and safety regulations in this
manual before operation. Improper operations without complying with this
manual guided could cause damage to the device, influence on measurement
result or bodily injury to the user.
Do not attempt to disassemble or repair the meter in any way. It is
forbidden to do any illegal modification or performance change for laser
emitter. Please keep it out of reach of children and avoid using by any
irrelevant personnel.
It is strictly prohibited to shoot eyes or other parts of body with the laser.
Do no use the laser on highly reflective surfaces.
Due to electromagnetic radiation interference to other equipment and
devices, please do not use the meter in the plane or around medical equipment.
Do not use it in flammable, explosive environments.
The batteries and meter must be disposed of correctly and in accordance
with any laws or regulations..
Laser Level
●The laser radiation is visible and emitted from the the front operating aperture.

3
The laser guide used in the tool is ClassⅡ, complies with
IEC60825-1:2007 “Safety of Laser products”,Class Ⅱ
●Do not stare into the laser beam. Never aim the beam at any person or an
object other than the work piece.
Warning
Do not view the laser beam with optical instruments like eyepiece and telescope.
Avoid indirect exposure via reflective surfaces, such as glass and mirrors.
2. Installation and replacement of battery
●Remove the battery cover on the back of the device, insert batteries according to
correct polarity, then reattach the battery cover.
●Battery should be replaced when low battery icon appears on the LCD
●Only 1.5V AAA alkaline batteries are compatible with this meter
●Remove the batteries when not in use for a long time to avoid battery corrosion to
meterbody.

4
3. Features
●Measurement time: single measurement 0.3 second/time, continuous
measurement 7 times/second
●Automatically store the measured values, it can record 10 group of data. All the
stored values including each single measurement and the final calculated results
can be reviewed.
●The stored measured values can be performed Added/substracted measurement
●The measured Area/Volume values can be performed Added/substracted
measurement
●Power supply: 2*1.5VV “AA” LR6 Batteries
4. Specifications
Measuring accuracy ±1.5mm
Display accuracy 1mm
Laser level Class II
Laser type
630~670nm
,
< 1mW
Area/Volume measurement function √
Pythagorean proposition measurement
function
√
Add and subtract measurement function √
Continuous measurement function
√

5
MAX/MIN √
Multi-line Backlight display √
Buzzer √
Storage 10 groups
Dust and Water proof IP 54
Operation Temp. Range 0 ℃~ 40 ℃/32℉~104℉
Storage Temp. Range -20℃~70℃/-4℉~158℉
Battery Life 5000~ 8000 times
Battery Type 2 * 1.5V “AA” LR6
Auto Laser Off 30s
Auto Power Off Approx. 80 seconds
Size 118*53*26mm
Weight 225g

6
5. LCD description
1) Laser emission on
2) Measurement
3) Indirect measurement
4) Area and Volume measurement
5) Store data/check stored data
6) The main measurement display
7) Measurement unit instructions
8) Auxiliary display
9) Battery power indication
10) Hardware fault indication
11) MAX/MIN instructions
12) Error operation indication
6. Meter description
1) Sensor area
2) LCD display
3) Laser emission on
4) Bubble spirit level
5) Unit conversion button
6) Pythagorean proposition indirect
measurement key

7
7) TIMER conversion button
8) - key
9) Power OFF/Delete key
10) Storage key
11) Area/Volume measurement key
12) + key
13) Measurement benchmark select key
14) Tripod nut
15) Battery cover
7. Operations
7.1 Power On/Off the meter
●To turn the meter on, hold the key and the display and laser will turn on
simultaneously, ready to begin measuring.
●To turn the meter off, hold the key for 3 seconds. The meter will
automatically turn off after around 80 seconds of no activity.
7.2 Measuring units setting
Press the button to select desired units from “m(meter)、ft(feet)、
in(inch)、ft +/in(feet - inch - 1/16)”
7.3 Time Delay Measurement
After power on the meter, press the key , the measurement will be
delayed in 5 seconds.

8
7.4 Measurement benchmark setting
Press the key to switch between front and end benchmark. System
usually takes end benchmark as default.
7.5 Single Measurement and Continuous Measurement:
● Press the key whilst in measuring mode will emit the laser to the
target measuring location. Re-press the key for a single measurement of
distance. The measured results will be displayed on the LCD screen.
● Long press the key whilst in measuring mode to enter continuous
measurement. Maximum and minimum measured values during continuous
measurement will display on the screen. The current measured values will display
on the main display screen. Press the key again to exit continuous measurement.
7.6 Area Measurement:
Press the key, the rectangle icon with one edge flashing will
appear on the left screen. Complete the following operations according to
screen tips:
1) Press the key to measure the fist edge(length).
2) Press the key to measure the second edge(width). Area will be
calculated automatically by the meter and the results shown on main display
screen.
3) Press the key again to remove previous measured result and to exit the
area measurement.

9
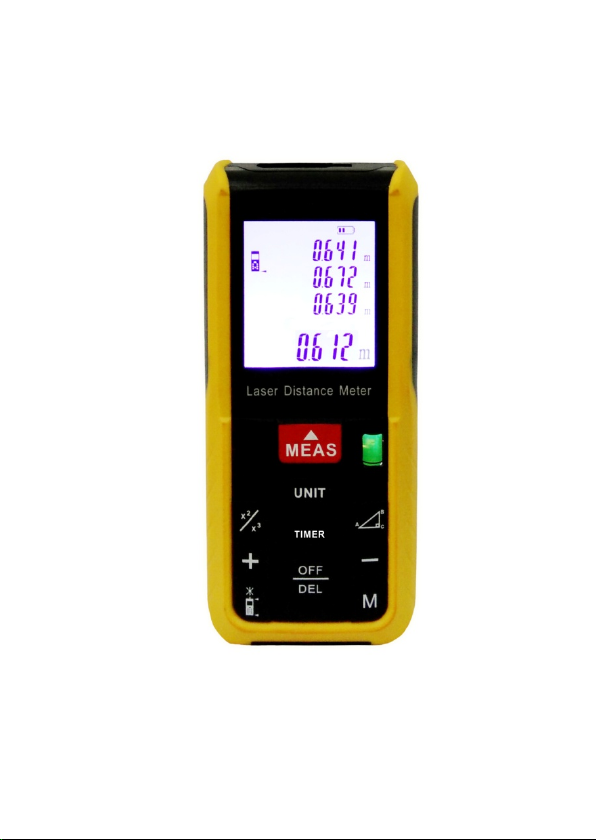
7.7 Volumetric Measurement:
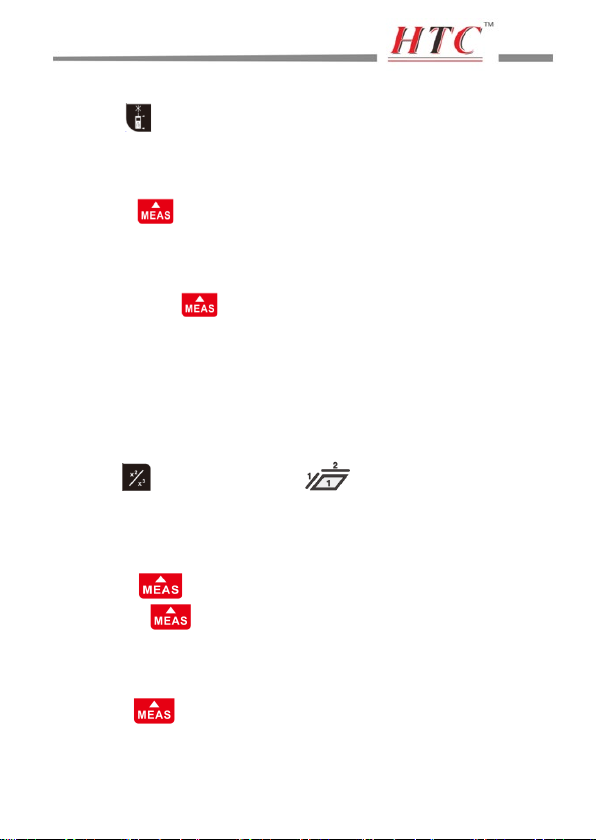
Double press key, the cube icon with one edge flashing will
appear on the left screen. Complete the following operations according to
screen tips:
1) Press the key to measure the fist edge(length)
2) Press the key to measure the second edge(width)
3) Press the key to measure the third edge(height). Volume will be
calculated automatically by the meter and the results shown on main display
screen.
4) Press the key again to remove previous measured result and to exit the
volumetric measurement.
7.8 Pythagorean proposition indirect measurement:
There are three modes to measure the unilateral distance of a triangle by
ways of Pythagorean proposition. This is convenient for users to do indirect
measuring in certain complex environments.
Notes:
●All measuring points must be in the same horizontal or vertical plane.
●To ensure the accuracy of measurement, it must be measured from the same
starting point, based on this point to make rotation measurement, measuring order
of the hypotenuse edge at first, then the vertical edge. It is suggested to fix the
meter in a tripod to proceed measuring.
●Under Pythagorean proposition measurement mode, length of vertical side must

10
be shorter than hypotenuse length so that the instrument can make the calculation,
otherwise an error signal will be displayed.
7.8.1 Indirect measurement--to fix the distance of a vertical edge by
measuring the hypotenuse edge and the other vertical edge
1) Press the key, the triangle icon with hypotenuse edge flashing
will appear on the screen, the laser is turned on.
2) Press the key to firstly measure the length of hypotenuse line (1)
according to screen prompt.
3) Press the key to measure the length of the bottom line (2).
4) Length of the dotted line on the right side will be calculated automatically by
the meter and displayed on the main screen.
7.8.2 Indirect measurement--to fix a distance by measuring its
hypotenuse edges and vertical edge in two right triangles
1) Double press the key, the triangle icon with hypotenuse edge
flashing will appear on the screen, the laser is turned on.

11
2) Press the key to firstly measure the length of hypotenuse line (1)
according to screen prompt.
3) Press the key to measure the length of the second line (2).
4) Press the key to measure the length of the bottom line (3).
5) Length of the dotted line on the right side will be calculated automatically by
the meter and displayed on the main screen.
7.8.3 Indirect measurement--to fix the distance of the hypotenuse edge
by measuring the two vertical edges
1) Press the key 3 times, the triangle icon with vertical edge
flashing will appear on the screen, the laser is turned on.
2) Press the key to firstly measure the length of vertical line (1)
according to screen prompt.
3) Press the key to measure the length of the bottom line (2).
4) Length of the dotted hypotenuse line on the left side will be calculated
automatically by the meter and displayed on the main screen..

12
7.9 Add And Subtract Measurement:
Add and subtract measurement can be done through adding/subtracting single
distance measurements to get accumulated results.
●Press the key, "+" will appear on screen and the device will enter into
accumulated adding mode. Accumulative value of previous measured value and
the current measurement will be displayed.
●Press the key, "-" will appear on screen and the device will enter into
accumulated subtracting mode. Differences between previous measured values
and the most recently measured & total values will be displayed on screen.
●To turn on/off the buzzer, keep pressing the key for 3 second.
7.10 Storage and browse
●Store Measurements: Under measuring mode, the measured value will be
automatically stored into the memory. The device can memory of 10 readings.
●Browse Measurements: Press the key one time to browse stored
measurement data. Press key or key to browse forward or
backward. Press and hold key to remove all stored data.

13
8. Notes
●Using the reflection board while measuring in strong sunlight or the target
locations that have a weaker reflective capability
●Using the meter in harsh environments may affect the measurement results,
such as environments with strong sunlight, high temperatures, or environments
with temperature fluctuations. Surfaces that are not reflective enough and low
battery power can also affect measurement results.
●The meter should not be stored in environments with high temperature and
humidity. If not being used for a long period, remove the batteries and place the
meter in the supplied portable bag and store in a cool dry place.
●Please keep the device clean. Use a soft damp cloth to wipe off dust. Do not
use any corrosive liquids during cleaning or maintenance of this meter. Laser
output window and its focus lens can be maintained according to maintenance
procedures.

14
9. Troubleshooting
During operation, tip information or symbols may appear on the main
display screen, the below error info can be corrected:
Symbol Causes Solutions
Improper measurement; too
weak or too strong signal;
Re-measure
and measure the target
locations that have a stronger or weaker
reflective capability, or use the reflection
board.
Light surrounding the target
object is to strong
Measure the target locations that have
weak surrounding light
Beyond working temperature
(above 40℃or below 0℃)
Carry out measurement with the meter in
the specified scope (0℃to 40℃)
2800 Hardware failure
This symbol appears while the meter is
turned on/off several times, which
indicates the device is damaged. Please
contact your local dealer for help.
10. Accessories
●2 * 1.5V “AA” LR6 batteries
●User manual
●Carry pouch and gift box

Table of contents
Popular Analytical Instrument manuals by other brands

ABB
ABB Endura AZ40 operating instructions

Telestream
Telestream PRISM MPX2-25 Installation and safety instructions

Snap-On
Snap-On BK6500 user manual

VOLTCRAFT
VOLTCRAFT BS-1000T operating instructions

Philadelphia Scientific
Philadelphia Scientific iBOS Pro 6 Series installation manual

RIDGID
RIDGID SeeSnake microReel APX Operator's manual