Contents
System requirements
What's inside the box? 5
What are the system requirements? 5
Headset and headphones
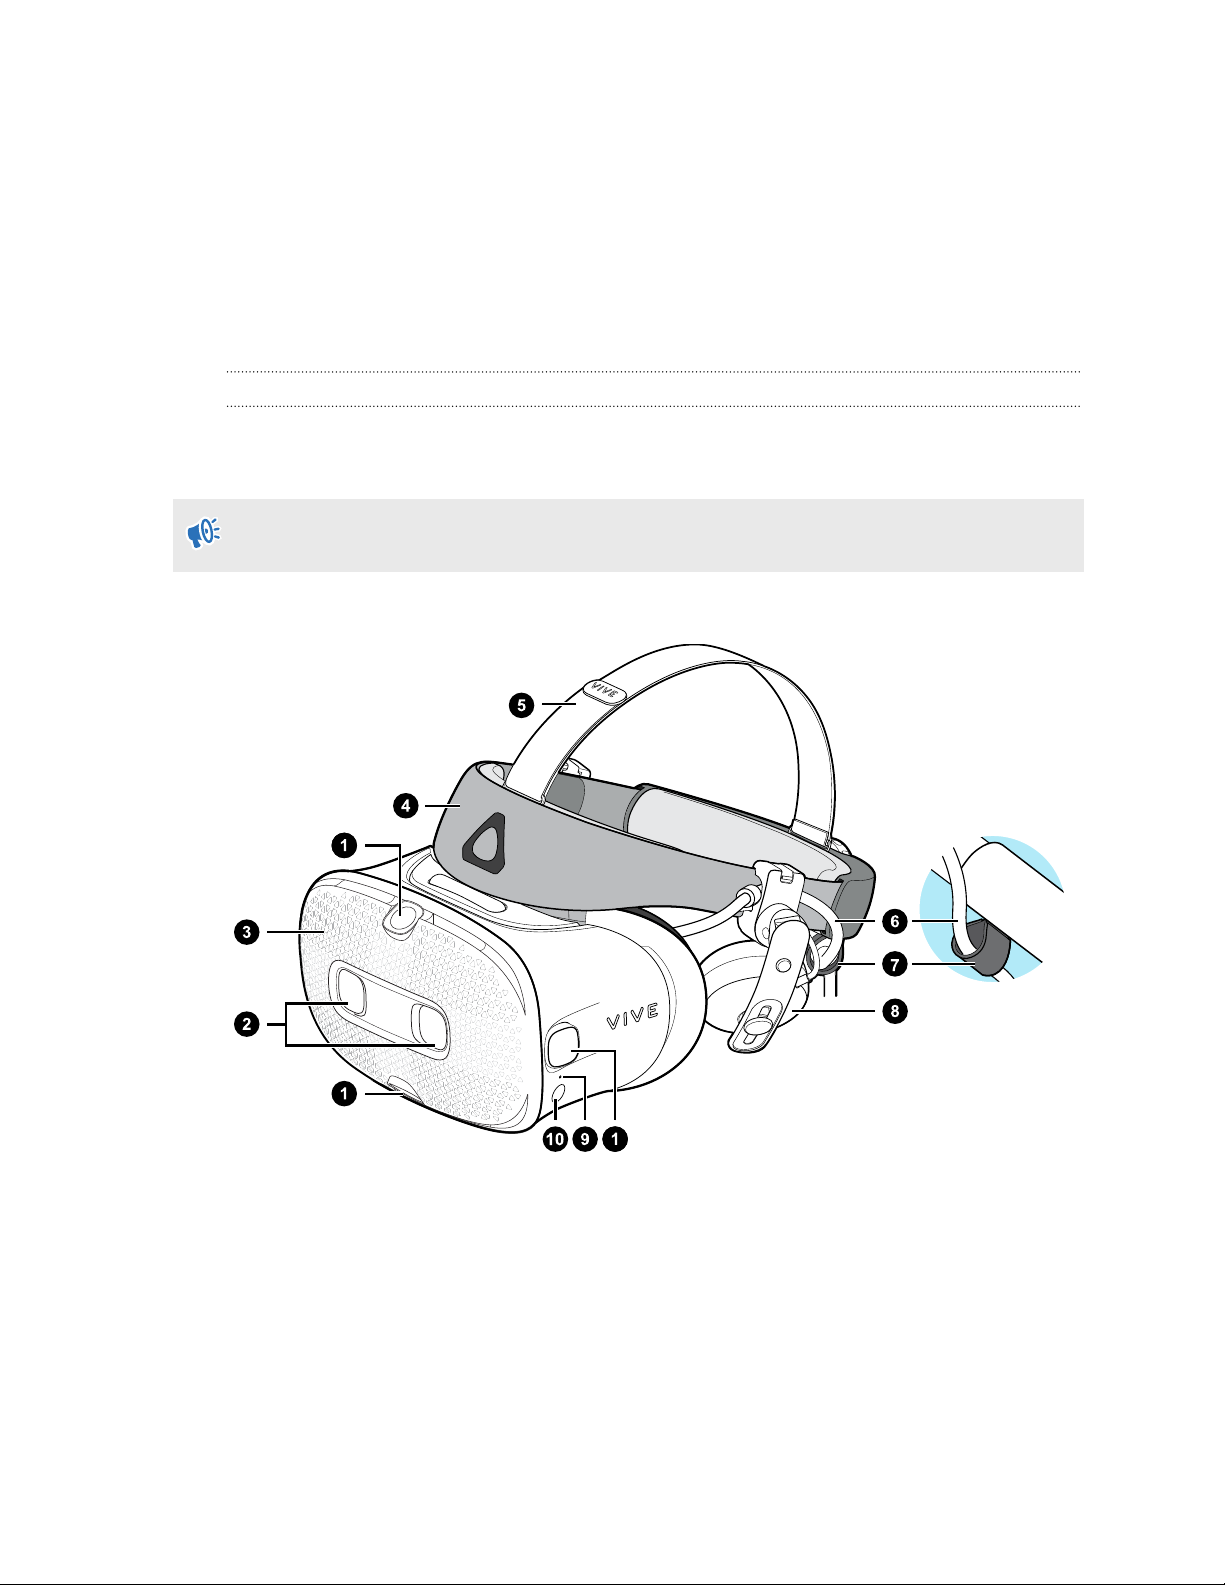
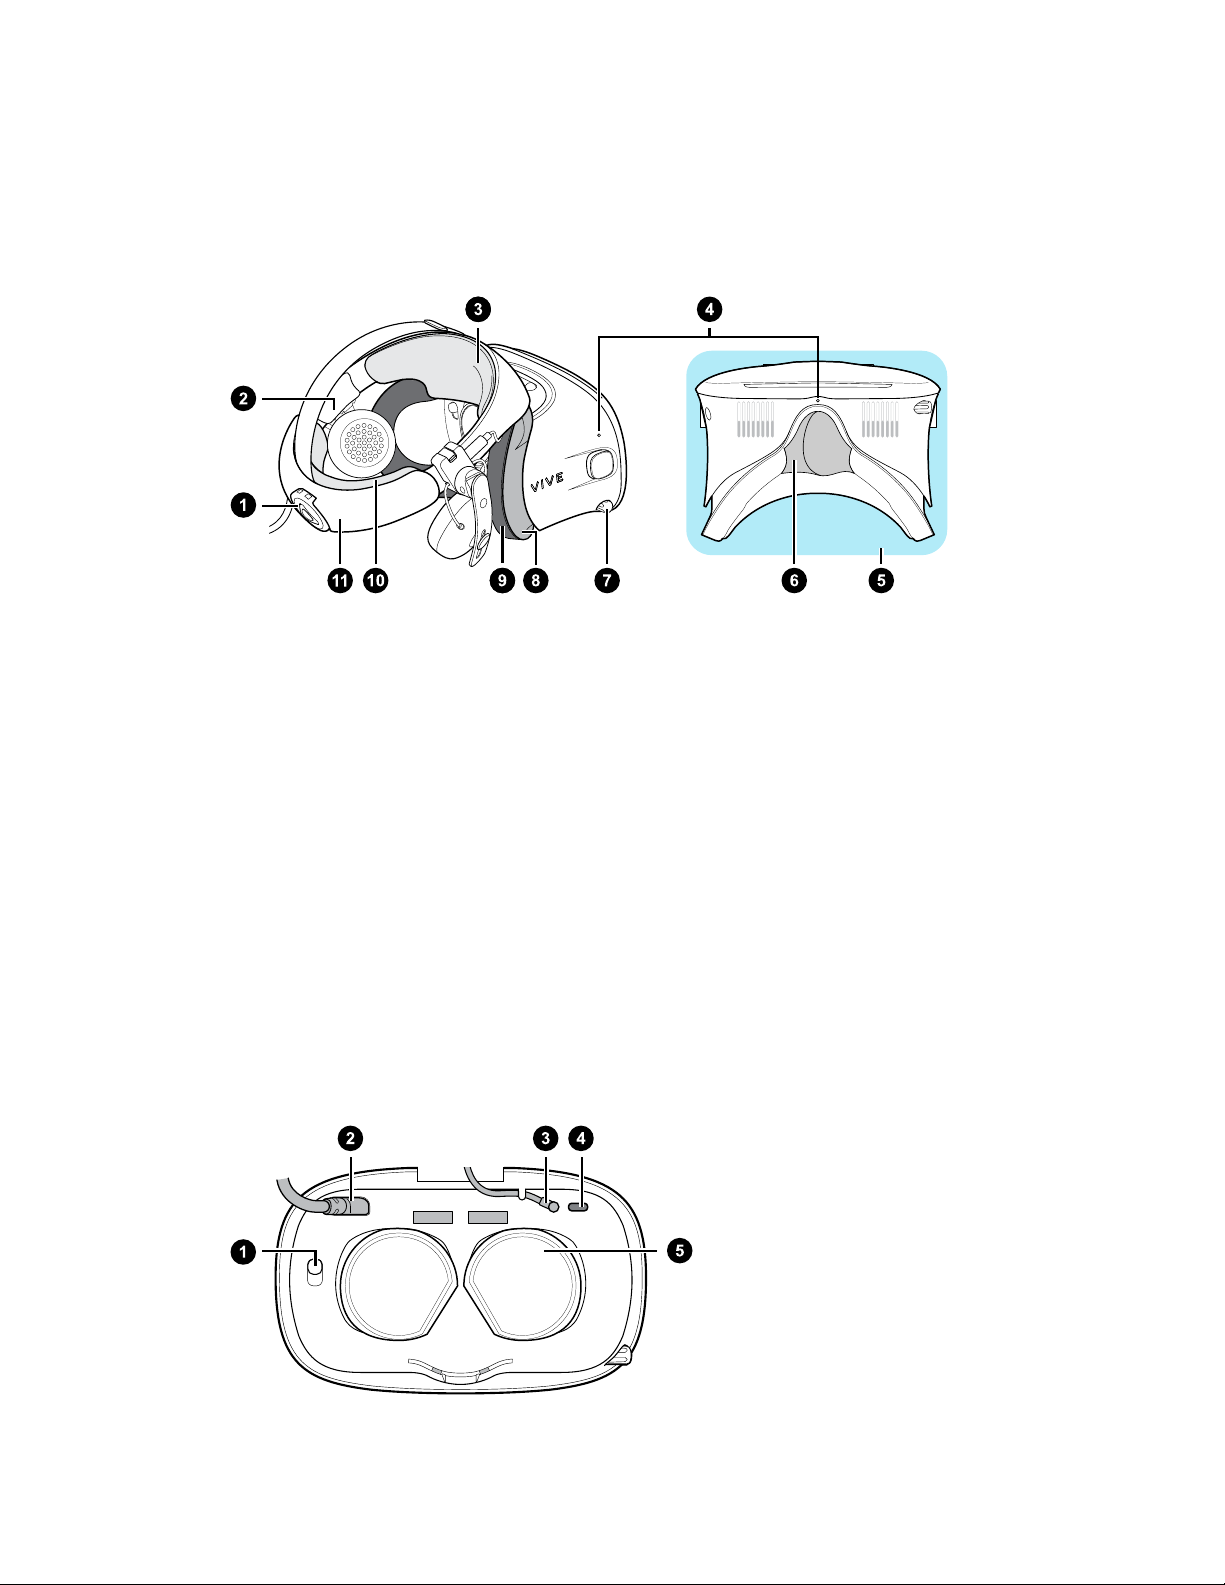
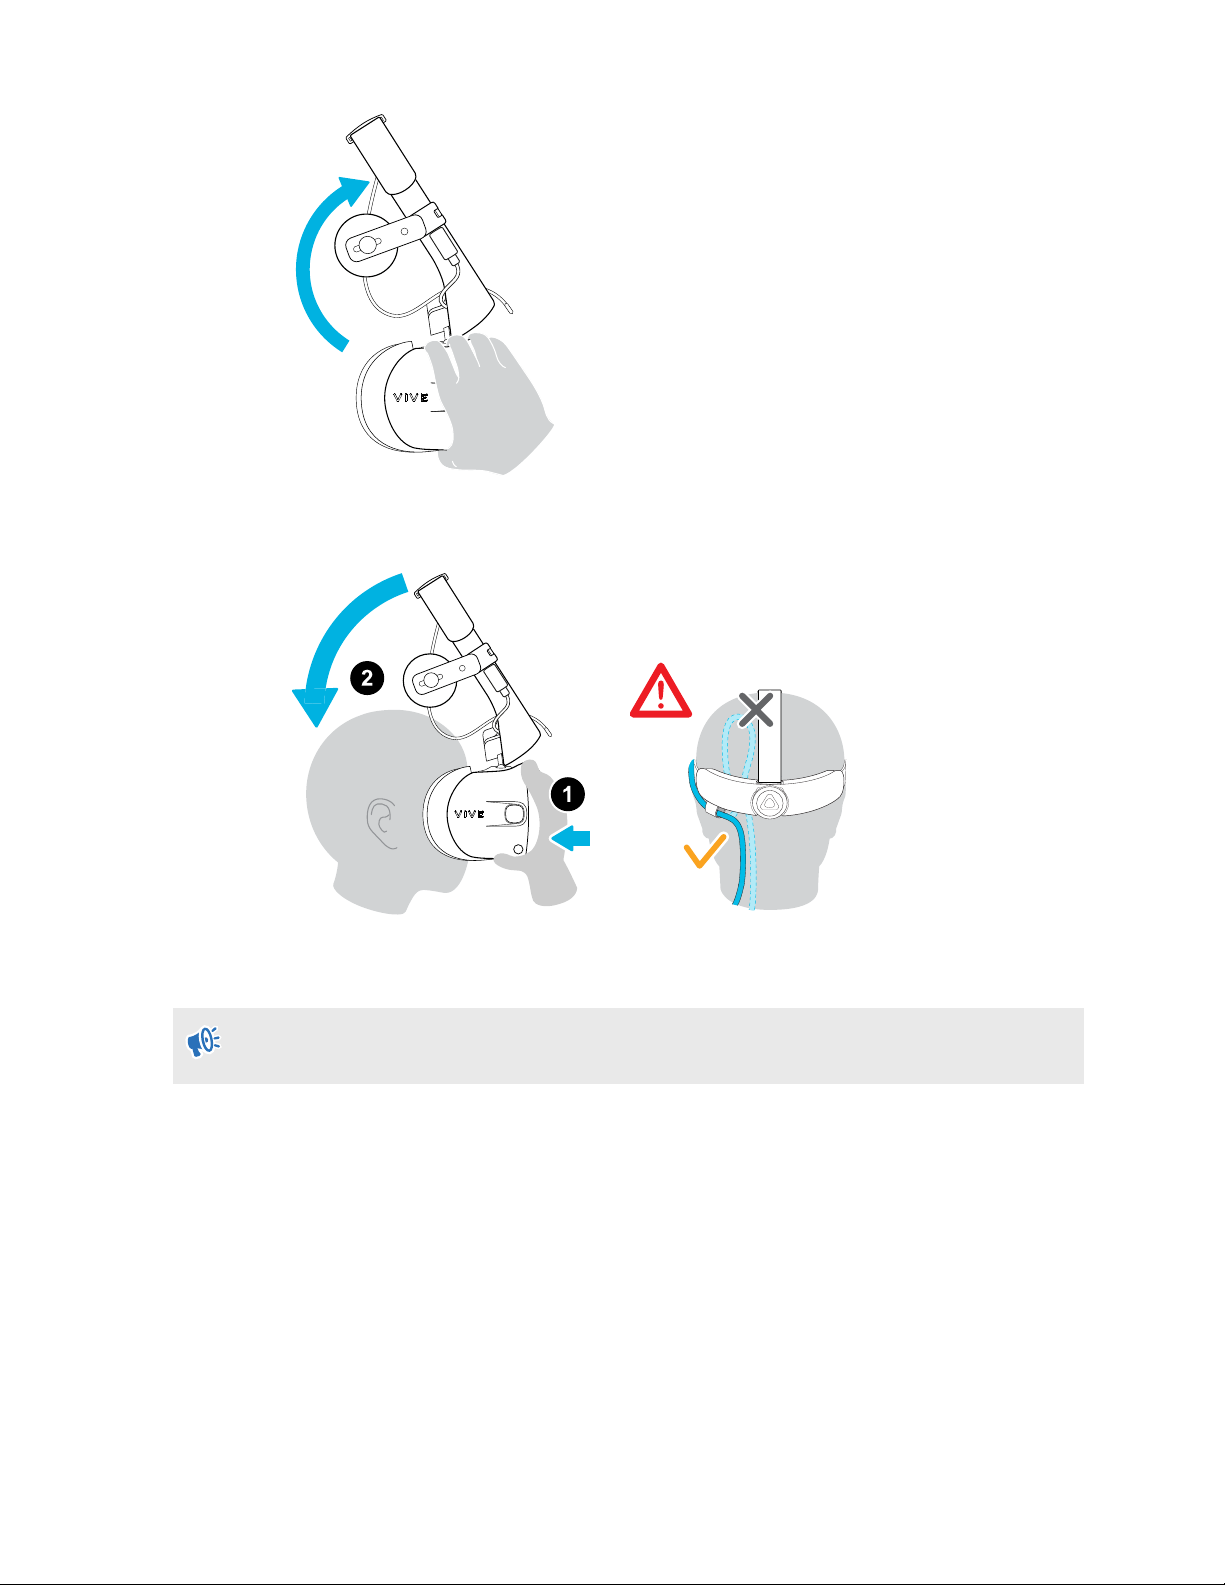
Headset 7
Headphones 24
Common solutions 35
Link box
About the link box for VIVE Cosmos 36
Connecting the headset to your computer via the link box 37
Restarting the link box 37
Can I use older versions of the link box with VIVE Cosmos? 37
Can I use a laptop with VIVE Cosmos? 38
Converter
About the converter for VIVE Cosmos 39
Connecting the headset to your computer via the converter 40
Restarting the converter for VIVE Cosmos 40
Can I use a laptop with VIVE Cosmos? 41
Controllers
About the VIVE Cosmos controllers 42
Inserting the batteries into the controller 44
Removing the batteries from the controller 45
Attaching the lanyards to the controllers 45
Turning the controllers on or off 46
Pairing the controllers with the headset 47
Checking the battery level of the controllers 47
Play area
What is the play area? 48
Planning your play area 48
Choosing the play area 49
Setting up VIVE Cosmos for the first time 49
Setting up the play area 50
Resetting the play area 51
What is the recommended space for the play area? 51
Can I include space occupied by furniture for the play area? 51
Does VIVE Cosmos store my room or environment image? 51
Will VR apps that are for limited spaces or stationary experiences only work with a room-scale setup? 51
How do I resolve download errors during VIVE Setup installation? 51
I can't complete the room setup. What should I do? 52
2 Contents