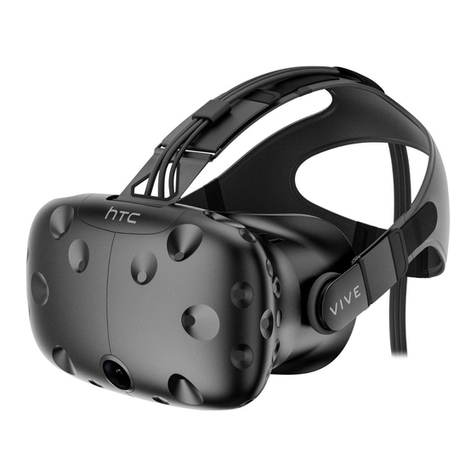
HTC VIVE User manual

Gravity Gaming Phone: 800-900-8809
Page 1 of 9
HTC VIVE Installation Guide
Thank you for choosing Gravity Gaming by ByteSpeed. Get ready for an a azing experience.
To help you setup the VIVE, we highly reco end you follow the steps below.
Please note: if you run into any issues setting up the VIVE, please contact the Gravity
Gaming Team at our toll free number 1-800-900-8809.

Gravity Gaming Phone: 800-900-8809
Page 2 of 9
Deciding on Setup
The VIVE allows for three types of setups; Roo Scale VR (where you can walk around), seated or
standing.
For seated or standing operation you will need a typical office desk area space.
If you will be walking around with the VIVE, you will need to pick a roo with so e free space.
•You will need at least 2 x 1.5 (or 6.5 ft. x 5ft.). The axi u distance supported
between base stations is 5 (or 16 ft).
•Make sure you have so e roo overhead, as so e experiences ay have you reaching
above your head.
•Your VR area should be clear of furniture and anything that can i pede ove ent – look
for two corners of the roo . This is where you will setup the included tripods that the
base stations will be ounted to.
Roo Setup Exa ples:

Gravity Gaming Phone: 800-900-8809
Page 3 of 9
Install Base Stations
1. Deter ine where you want to set up your base stations.
oMake sure you can see both Base Stations fro everywhere in your play area.
Ideally they are placed at opposite corners of your space, near the edges of your
play area.
oThe area doesn't have to be a perfect square.
2. Set up each base station securely
oSet the tripods up diagonally at opposite corners of your space.
oBase stations attach to the top of the tripod and should be above head height
(ideally over 2 or 6.5 feet), and angled down 30-45 degrees.
oThe base stations should have an unobstructed view of each other, to enable
optical sync.
oMake sure the base stations are stable and secure, as vibrations will affect tracking.
3. Plug your base stations into an outlet with the provided power cords.
oIf the provided power cord is too short to reach an outlet, any 12V power cable
extension will work.
4. Put each base station into the correct ode for syncing.
oPress the ode button on the back of one base station, so that the readout on the
front is “b”.

Gravity Gaming Phone: 800-900-8809
Page 4 of 9
oPress the ode button of the other base station until the readout on the front is
“c”.
oIt doesn't atter which base station is in which ode, as long as one is “b” and one
is “c”.
5. Look at base station LEDs and ake sure they are solid white.
6. If both base station LEDs don't turn white after 10-15 seconds, so ething ay be wrong:
oIf the LED is blue, it is still spinning up and waiting to stabilize. If it never changes
fro blue, check to ake sure the base is ounted securely. Vibrations can cause it
to be stuck in this state.
oIf the LED is off, it doesn't have power – ake sure that the power cord is plugged
in and your outlet isn't connected to a light switch.
oIf the LED is slowly blinking white, it's in standby ode. Try unplugging and re-
plugging the base station to fix this.
oIf the LED is solid or blinking purple, the base stations are having trouble seeing
each other. Make sure nothing is in the way.
If your roo akes it i possible for the bases to see each other (and the LED is purple), there is
another way to sync.
In the box you'll find a very long cable – this is the sync cable. Connect the base stations with the
sync cable.
•Push the ode buttons on the back of the base stations so that one base station is “A”
and one base station shows “b”.
•The base station lights should now turn solid white.

Gravity Gaming Phone: 800-900-8809
Page 5 of 9
Install Headset
1. Connect the Link Box to your Co puter
Once you have connected your Link box to your PC, DO NOT unplug it. I portant drivers
will i ediately start installing, and interrupting this can lead to a faulty hardware
installation.
oYou will be connecting the side of the Link Box without the orange ports.
oFirst, use the included HDMI cable to connect the Link Box to your PC. Make sure to
plug it into your co puter's graphics card.
oSecond, use the included (longer) USB cable to connect the Link Box to an available
USB port on your PC. (VIVE supports USB 2.0 or greater)
oFinally, plug the power cord into the Link Box, and plug it into a power outlet.
oYou ay notice an additional DisplayPort port on the Link Box. If you prefer, you
can use a DisplayPort cord (not included) instead of HDMI to connect your Link Box
to your co puter.
2. Connect your Headset to the Link Box
(Orange to Orange)
oThe end of your Headset's attached 3-in-1 tether has three orange tipped cords
(USB, HDMI, and Power). Plug all three of these into the side of the Link Box with
orange ports.
oYour devices should now be set up like this:

Gravity Gaming Phone: 800-900-8809
Page 6 of 9
1. Get your Headset situated
oThere's an audio cable port co ing out of the back of the headset. Plug in the
included headphones here.
oWhen not using your headset, store it with the lenses pointed away fro any
source of direct sunlight. Failure to do so ay cause da age to the headset display.
Install Steam and SteamVR
*Please note if you’ve purchased a Gravity Gaming PC, the VIVE software may have already een
installed so you can skip ahead to step 4.
1. You can download and install Stea at http://store.stea powered.co /about/ . You will
need to create an account.
2. Once Stea is installed, you need to install Stea VR.
oYou can install Stea VR fro Stea > Library > Tools.
3. Once Stea VR is installed, set it to Stea VR Beta.
oTo do this, right click on Stea VR in the Library (under Tools) and click Properties.
oSelect the Betas tab.
oClick the drop down and select beta - Stea VR Beta Update. Wait for it to update.
4. Launch Stea VR.
oYou can launch Stea VR by clicking the VR button that appears in the top right
corner of the Stea client.
oIf the VR button doesn't appear, launch Stea VR fro the Library under Tools.
Then look at the Double check your headset section below.
5. The Stea VR Status window will show up. (You ay also see a Roo Setup screen pop
up)
6. Let's look at the Stea VR Status window.
Gravity Gaming Phone: 800-900-8809
Page 7 of 9
oThis app will report the state of your VR syste . Green is good, flashing green
eans you aren't tracking (ie, the device can't see the base stations), red is bad, and
grey eans off or not connected.
oThere will be so e helpful alerts that will tell you what to do next.
Double check your headset
If you are getting a Headset Not Detected error on Stea VR, or your Headset LED is red and the
displays are dark, do the following:
1. Quit Stea VR
2. Unplug the Power and USB cord fro the PC side of the Link Box (not the orange side).
3. Wait a few seconds, then plug the Power and USB cord back into the Link Box. You ay
see ore drivers install. Wait for this process to finish.
4. Launch Stea VR.
5. You ay need to repeat the steps above ore than once. If it doesn't work, you can also
try plugging into different USB ports on your PC.
Connect your Controllers
1. Power on your Controllers with the Syste Button (pictured below).
oDon't worry right now about plugging the in - they should co e out of the box
so ewhat charged.
oYour controllers will auto atically pair to your Headset when turned on for the first
ti e.
oIf your controllers are on but the icons in Stea VR Status are grey, your controllers
ay not have paired correctly. Click on Stea VR enu and Click Settings. Click
Devices, then click on “Pair Controller” and follow the instructions to pair your
controller.

Gravity Gaming Phone: 800-900-8809
Page 8 of 9
Room Setup and SteamVR Tutorial
1. Follow the instructions for Roo Setup to set up your roo . At the end of Roo Setup it
will launch into a tutorial to teach you about how to use Stea VR.
2. If Roo Setup didn't auto atically launch, click the Stea VR enu and select Run Roo
Setup.
3. The Stea VR tutorial will teach you about Chaperone, how to use your controllers, and
how to bring up the Dashboard.
4. You can run Roo Setup and the tutorial at any ti e by clicking on the Stea VR enu
and selecting Run Roo Setup or Run Tutorial.
5. You are now ready to enjoy VR! You can launch VR applications fro Stea , or fro the
Dashboard inside of VR.
6. To run Stea VR in the future, open Stea and click on the VR button at the top right
corner of the Stea interface.

Gravity Gaming Phone: 800-900-8809
Page 9 of 9
Adjust your Headset
1. Adjust the top and side straps of your VIVE so that it fits securely and co fortably.
2. Adjust eye relief: your VIVE ships at the ost ideal setting for ost people (including
people who wear glasses), so only adjust this if your eyelashes or glasses are touching the
VIVE lenses.
oFind the grey rubbery rings on each side of the headset. They are part of the
attach ent point of the headset straps.
oPull the both out - they should click out about an eighth of an inch.
oRotate these back to ake the lenses closer to the eye. Adjust this as close to your
face as is co fortable – closer eans better field of view.
oMake sure you rotate both sides equally to keep the lenses fro being tilted.
3. Adjust the IPD of your VIVE (do this once you are set up and in VR)
oYour IPD (Interpupillary Distance) is the distance between the centers of both of
your pupils.
oThe IPD adjust ent knob can be found on the botto right corner of the headset.
This knob changes the distance between lenses.
oWhen in VR, you can turn this knob to see and adjust the IPD value.
oA quick search will turn up a nu ber of online tools to calculate your IPD. Once you
know what it is, use the IPD knob to adjust it.
oNote: A good universal or average is 63mm
Should you have any issues, please contact the Gravity Gaming team at our toll free number
800-900-8809.
Enjoy your VR experience!
For more documentation please go to the following link:
http://www.htc.com/managed-assets/shared/desktop/vive/Vive_PRE_User_Guide.pdf
Other manuals for VIVE
11
Other HTC Other manuals

HTC
HTC Vive Focus User manual

HTC
HTC Vive Enterprise User manual

HTC
HTC VIVE User manual

HTC
HTC Vive Cosmos User manual

HTC
HTC VIVE Focus Plus User manual

HTC
HTC VIVE Pro HMD User manual

HTC
HTC HTC One User manual

HTC
HTC VIVE User manual

HTC
HTC Vive Focus Specification sheet

HTC
HTC VIVE Focus Plus Specification sheet