5
1
2
3
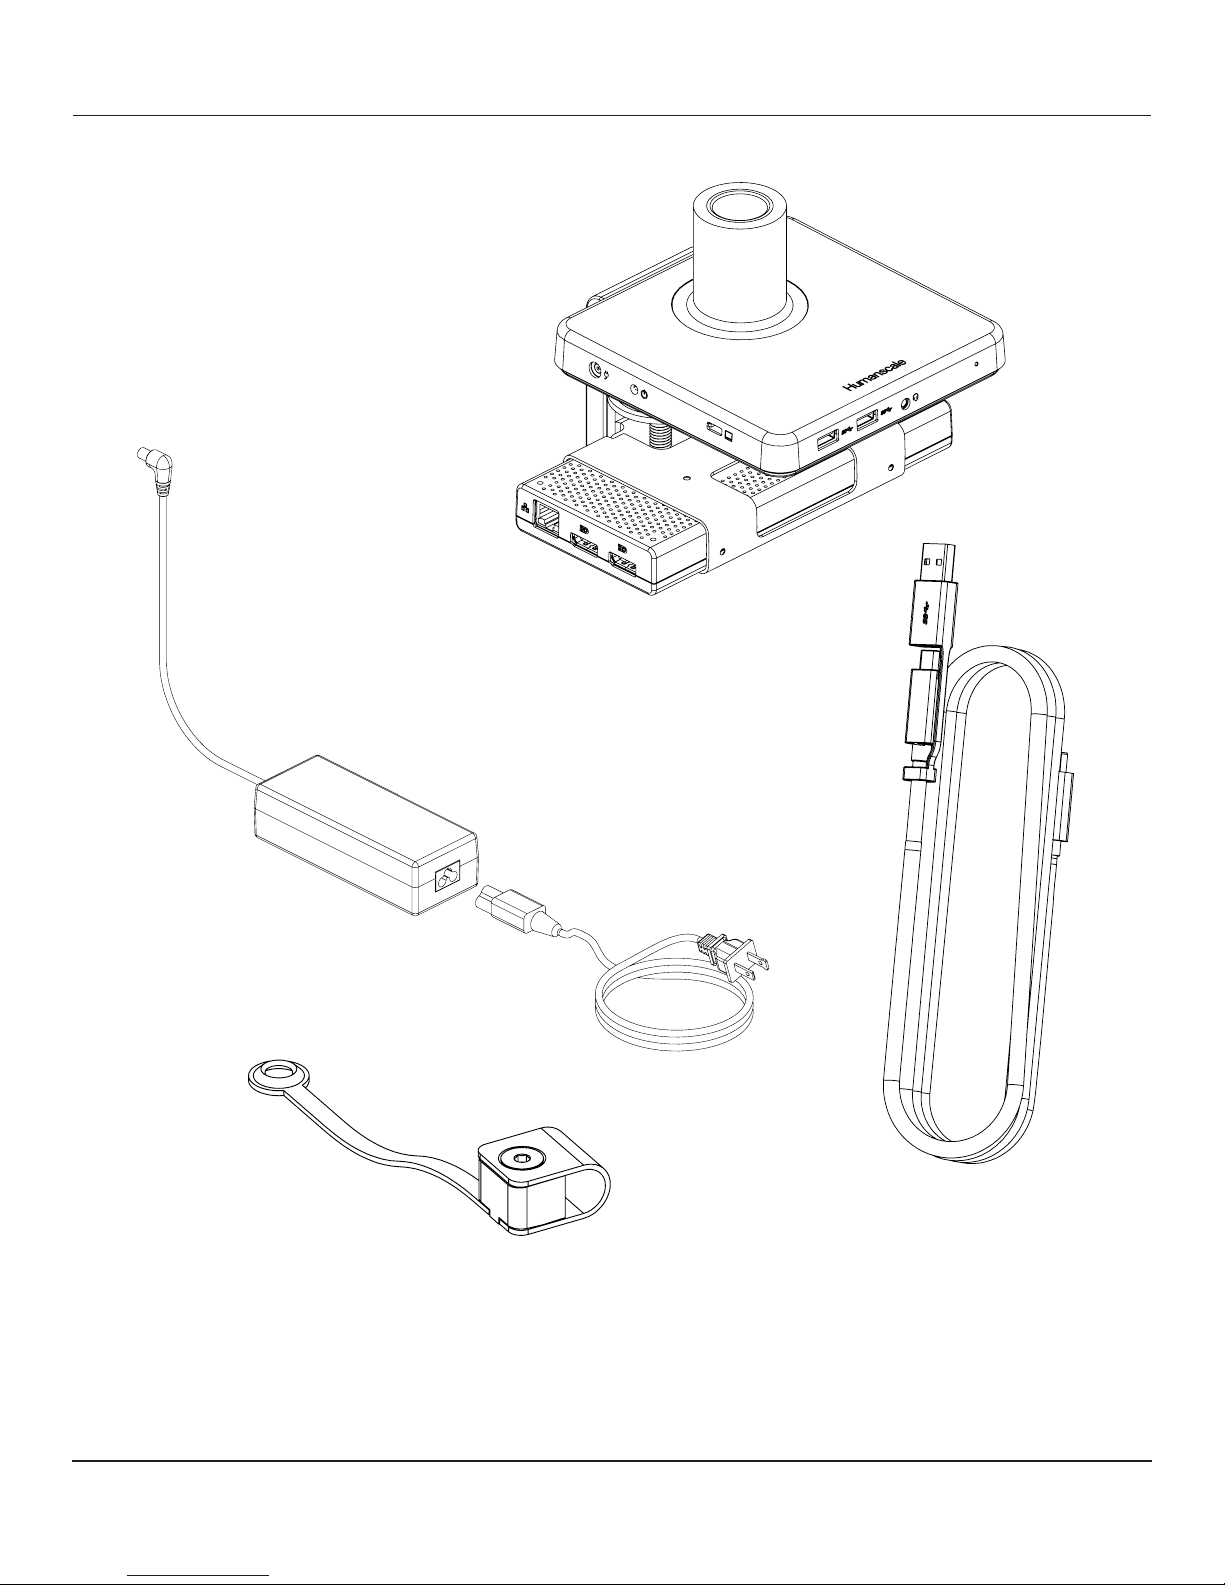
IDENTIFYING COMPONENTS
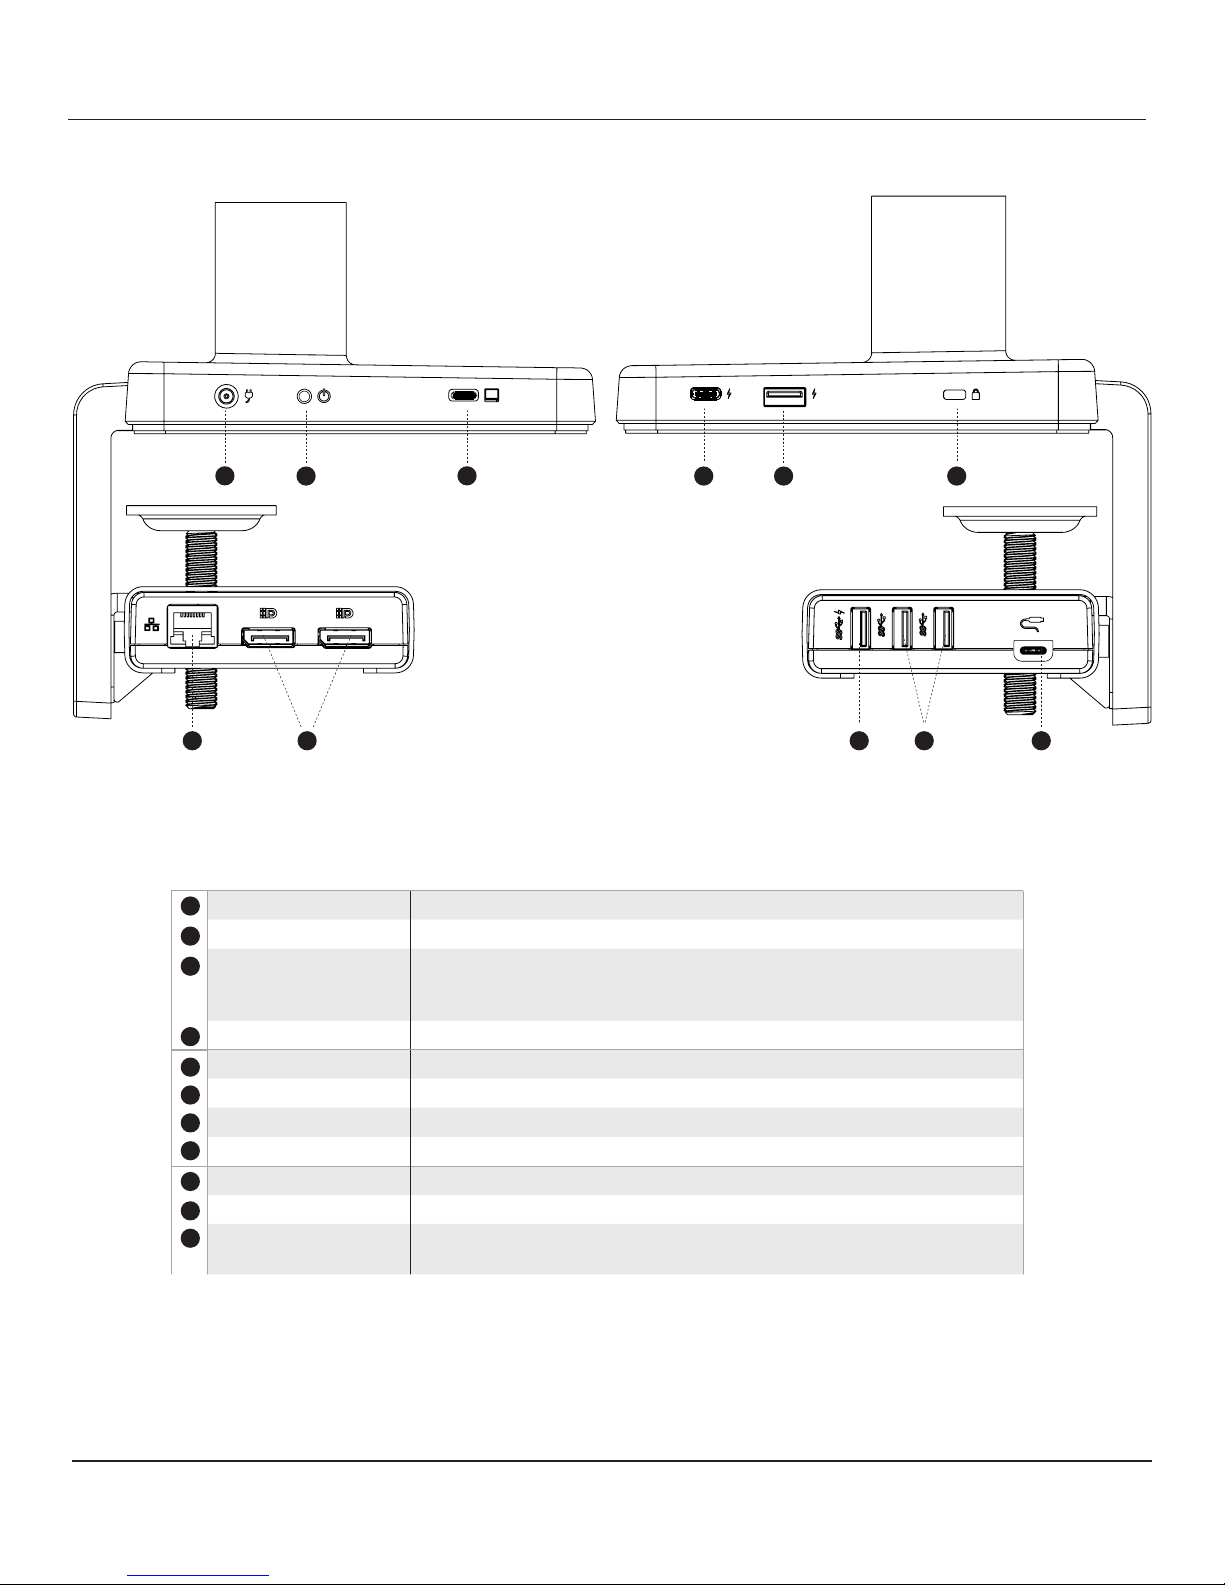
Left Panel Right Panel
Component Description
23
DC in 20V, 7.5A DC to M/Connect 2
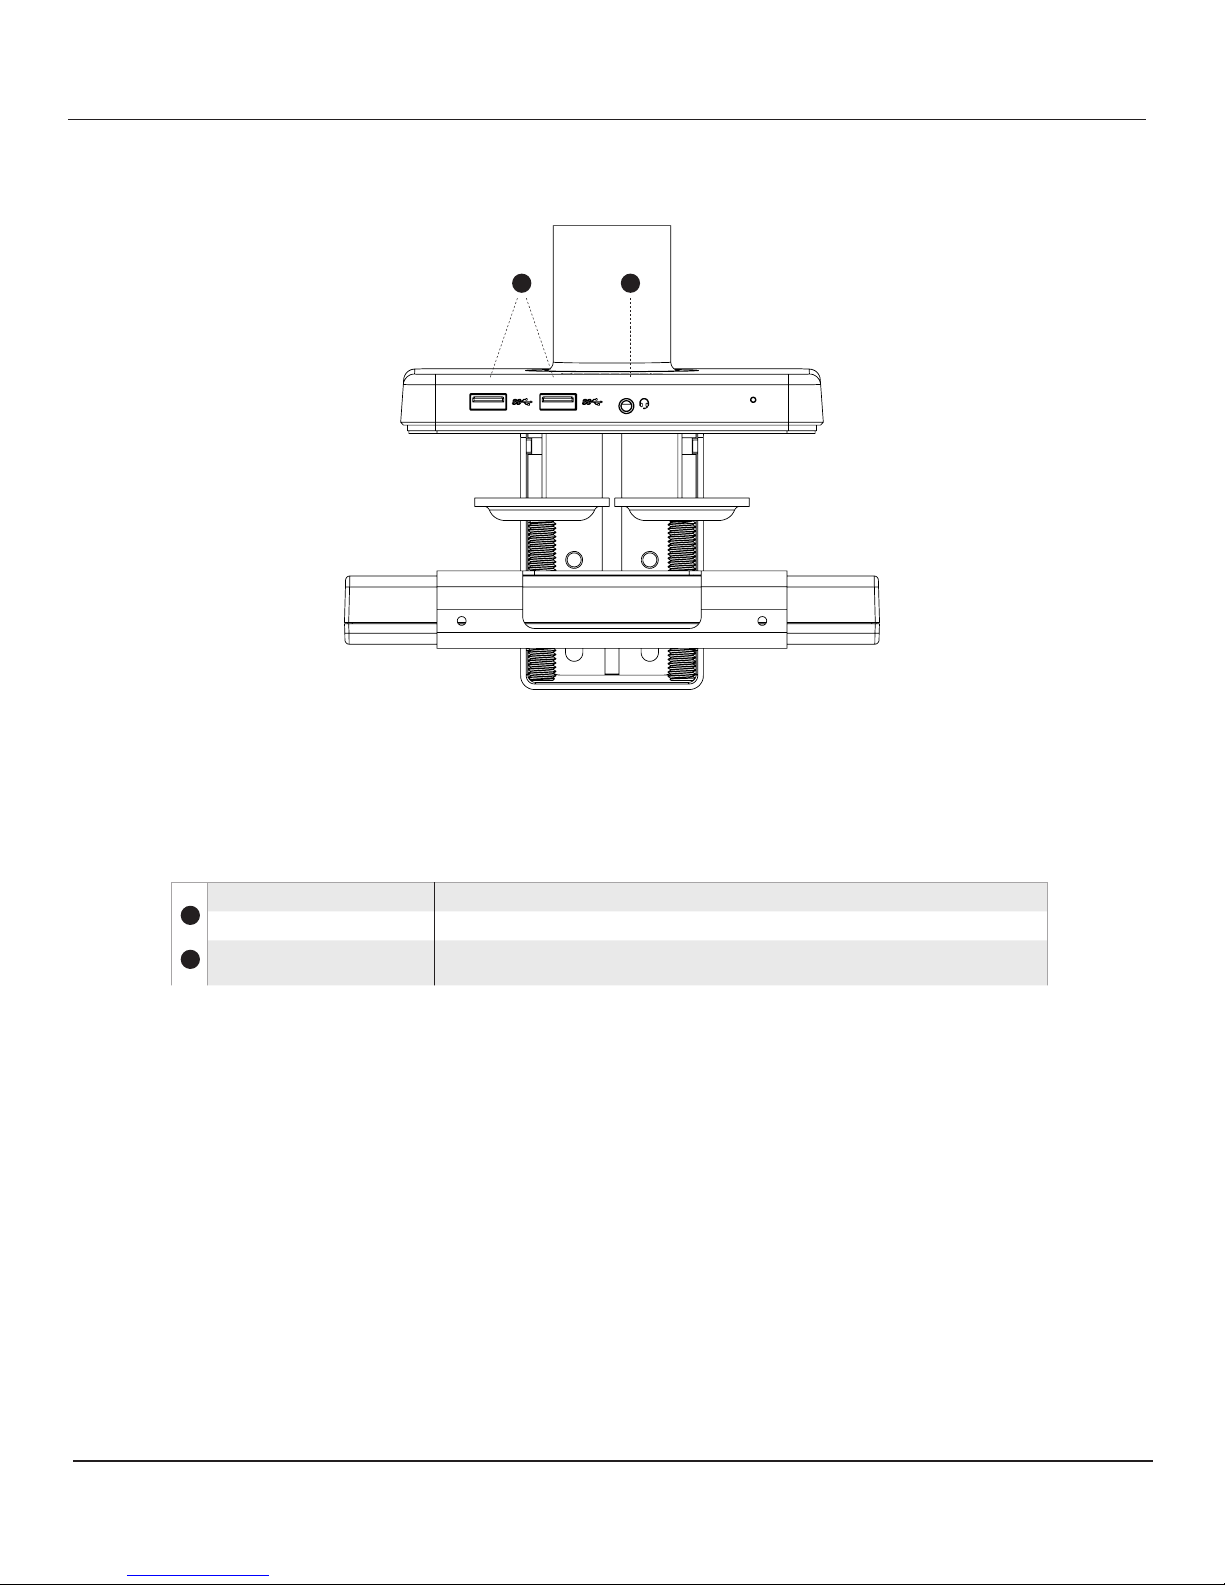
Power Button Powers unit on and off
USB-C Upstream Port Connects full featured USB-C cable to laptop, Supports PD charging at
60W max. Important: only use USB-C cable provided with unit, other
cables may void product warranty
USB-C Charging Port Charges USB-C devices 5V, 3Amax
14 5 6
87 9 10
USB-A Charging Port Charges USB-A devices 5V, 2.4A max
Kensington Slot To secure unit from theft
Ethernet To connect network to M/Connect 2
DisplayPort (2) Connects to DisplayPort of monitor
4
5
6
8
7
USB-A Port USB 3.1 Gen1, Supports charging 5V, 2.4A
USB-A Port (2) USB 3.1 Gen1
USB-C Bridge Port Connects cable supplied from the top hub; at cable plug face has to face
upward when plugging
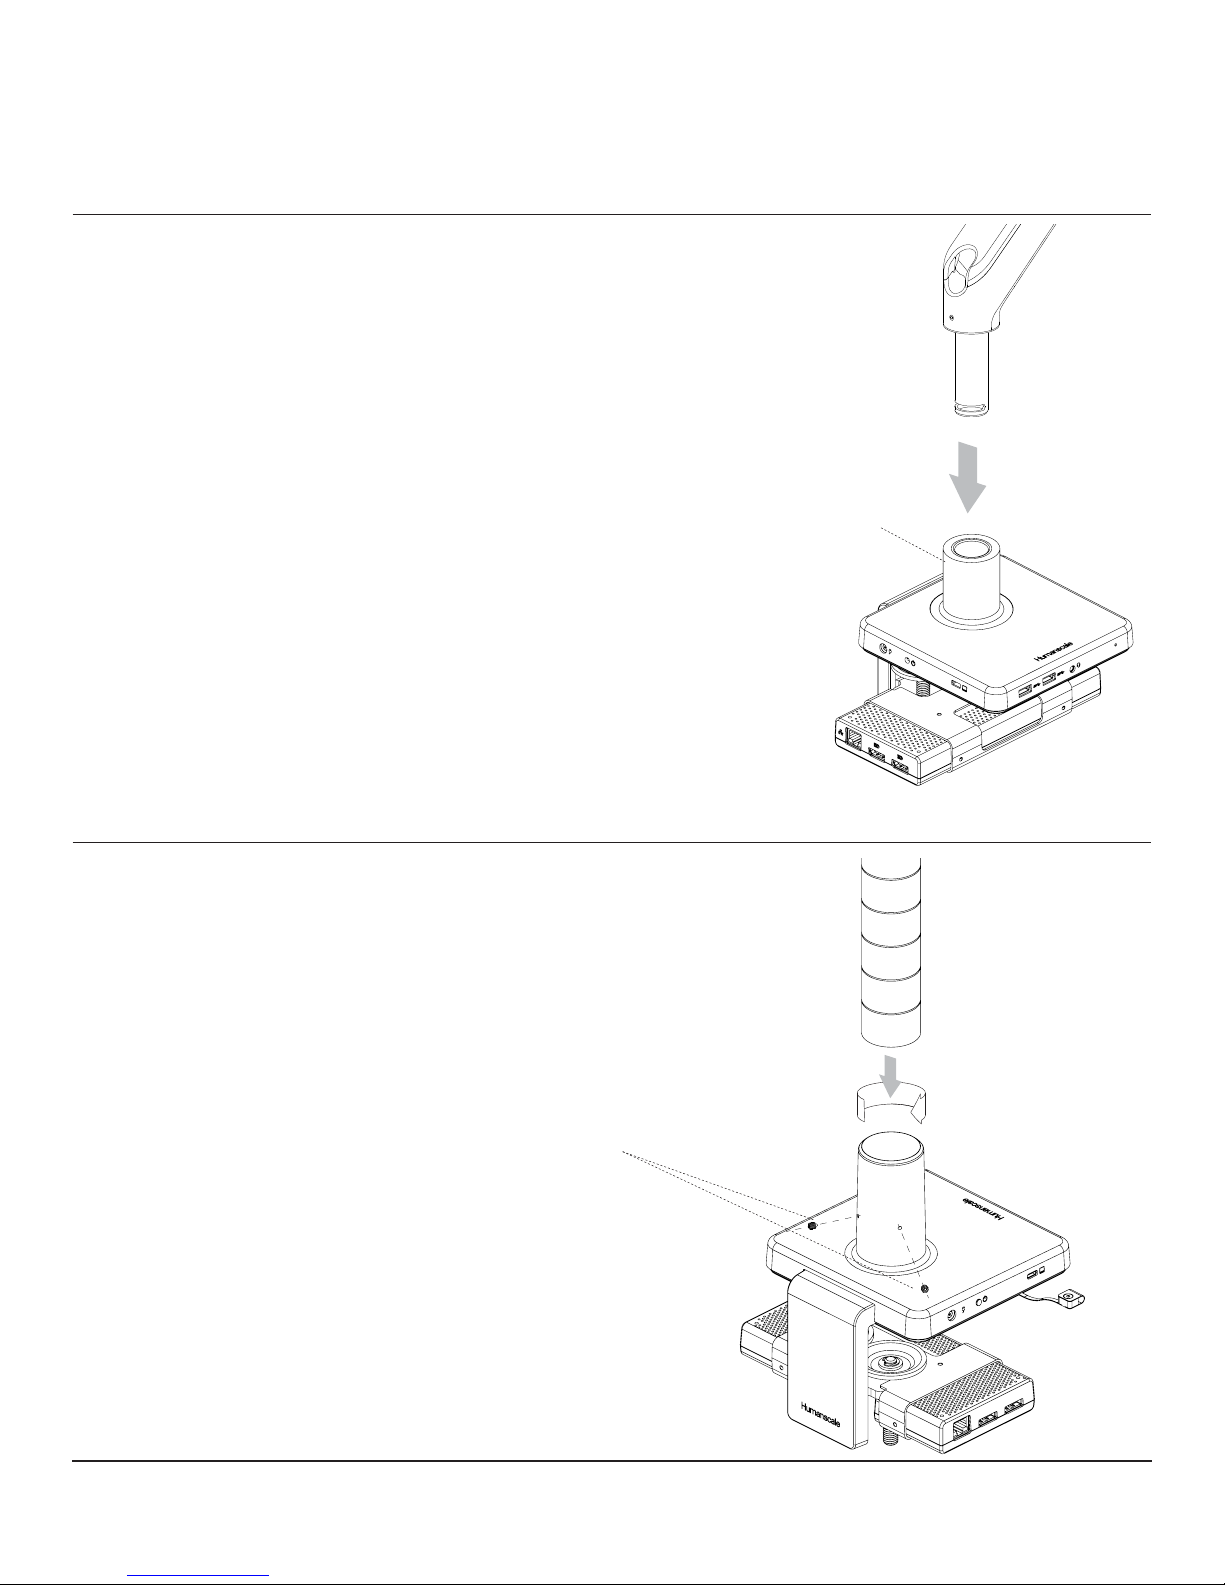
9
10
11
11