Husqvarna PP 325 E User manual

UU
UUSS
SS
CC
CCAA
AA
UU
UUEE
EE
PP 325 E
Oper
ator’s manual Manuel d’utilisation
Manual de instrucciones
Please r
ead the operator’s manual carefully and make sure you understand the instructions before using the machine.
Lire attentivement et bien assimiler le manuel d’utilisation avant d’utiliser la machine.
Lea detenidamente el manual de instrucciones y asegúrese de entender su contenido antes de utilizar la máquina.

KEY
T
O SYMBOLS
2
–
English
Symbols on the mac
hine
W
ARNING! The machine can be a
dangerous tool if used incorrectly or
carelessly, which can cause serious
or fatal injury to the operator or
others.
Please read the operator’s manual
carefully and make sure you
understand the instructions before
using the machine.
Always wear:
• Approved protective helmet
• Approved hearing protection
• Protective goggles or a visor
• Breathing mask
WARNING! Live parts.
En
vironmental marking.
Symbols on the product or its pac
kaging
indicate that this product cannot be
handled as domestic waste. It must
instead be submitted to an appropriate
recycling station for the recovery of
electrical and electronic equipment.
By ensuring that this product is taken care of correctly,
you can help to counteract the potential negative impact
on the environment and people that can otherwise result
through the incorrect waste management of this product.
For more detailed information about recycling this
product, contact your municipality, your domestic waste
service or the shop from where you purchased the
product.
Explanation of warning le
vels
The w
arnings are graded in three levels.
W
ARNING!
CAUTION!
NOTICE!
!
W
ARNING! Used if there is a risk of
serious injury or death for the operator
or damage to the surroundings if the
instructions in the manual are not
followed.
!
CA
UTION! Used if there is a risk of injury
to the operator or damage to the
surroundings if the instructions in the
manual are not followed.
NO
TICE! Used if there is a risk of damage to materials
or the machine if the instructions in the manual are not
followed.

CONTENTS
English
–
3
Contents
KEY
TO SYMBOLS
Symbols on the machine
...................................... 2
Explanation of warning levels ............................... 2
CONTENTS
Contents
............................................................... 3
Note the following before starting: ........................ 4
WHA
T IS WHAT?
What is what on the h
ydraulic unit? ...................... 5
SAFETY INSTR
UCTIONS
Steps bef
ore using a new hydraulic unit .............. 6
Personal protective equipment ............................. 6
Machine
′
s safety equipment ................................. 7
General safety precautions ................................... 7
General working instructions ................................ 8
ASSEMBLING AND ADJUSTMENTS
Chec
k the oil level ................................................ 9
Check the air pressure in the tyres ....................... 9
Connect the hydraulic hoses. ............................... 9
Connect water cooling .......................................... 9
Connect a power source ...................................... 10
ST
ARTING AND STOPPING
Bef
ore starting ...................................................... 11
Starting ................................................................. 11
Stopping ............................................................... 11
After work is completed ........................................ 11
MAINTENANCE
Ser
vice ................................................................. 12
Maintenance ......................................................... 12
TECHNICAL D
ATA
PP 325 E
.............................................................. 14
US
WARRANTY STATEMENT
W
ARRANTY POLICY ........................................... 15
EQUIPMENT ........................................................ 15

4
–
English
CONTENTS
Note the f
ollowing before starting:
!
W
ARNING! Cutting, especially when DRY cutting, generates dust that comes from the material
being cut, which frequently contains silica. Silica is a basic component of sand, quartz, brick
clay, granite and numerous other minerals and rocks. Exposure to excessive amount of such
dust can cause:
Respiratory disease (affecting your ability to breath), including chronic bronchitis, silicosis and
pulmonary fibrosis from exposure to silica.These diseases may be fatal;
Skin irritation and rash.
Cancer according to NTP* and IARC* */ National Toxicology Program, International Agency for
Research on Cancer
Take precautionary steps:
Avoid inhalation of and skin contact with dust, mist and fumes.
Wear and ensure that all bystanders wear appropriate respiratory protection such as dust masks
designed to filter out microscopic particles. (See OSHA 29 CFR Part 1910.1200)
Wet cut when feasible, to minimize dust.

English
–
5
WHA
T IS
WHA
T?
What is what on the h
ydraulic unit?
1
Frame for hydraulic hose
2 Switch
3 Emergency stop
4 Residual Current Circuit Breaker with Overcurrent
Protection (Only on 5-pin machines)
5 Wall socket 2x230 V (Only on 5-pin machines.)
6 Connection for outgoing cooling water
7 Sight gauge
8 Connection for incoming cooling water
9 Hydraulic oil filter
10 Drain plug
11 Hydraulic pressure gauge
12 Hydraulic oil tank
13 Hydraulic hose, pressure OUT
14 Hydraulic hose, return IN
15 Operator’s manual

SAFETY INSTR
UCTIONS
6
–
English
Steps bef
ore using a new
hydraulic unit
•
Please read the operator’s manual carefully and make
sure you understand the instructions before using the
machine.
• This machine is primarily intended for WS 325, DM
406 H, HS 170 and HH 170, but is also highly suitable
as power source for other equipment, e.g. Husqvarna
ring saw.
• Read through the manual supplied with the hydraulic
tool before starting to use the machine.
• The machine can cause serious personal injury. Read
the safety instructions carefully. Learn how to use the
machine.
Al
ways use common sense
It is not possib
le to cover every conceivable situation you
can face. Always exercise care and use your common
sense. Avoid all situations which you consider to be
beyond your capability. If you still feel uncertain about
operating procedures after reading these instructions,
you should consult an expert before continuing.
Do not hesitate to contact your dealer if you have any
more questions about the use of the machine. We will
willingly be of service and provide you with advice as well
as help you to use your machine both efficiently and
safely.
Let your Husqvarna dealer regularly check the machine
and make essential adjustments and repairs.
All information and all data in the Operator’s Manual were
applicable at the time the Operator’s Manual was sent to
print.
P
ersonal protective equipment
•
Protective helmet
• Hearing protection
• Protective goggles or a visor
• Breathing mask
• Heavy-duty, firm grip gloves.
• Tight-fitting, heavy-duty and comfortable clothing that
permits full freedom of movement.
• Boots with steel toe-caps and non-slip sole
• Always have a first aid kit nearby.
!
W
ARNING! Under no circumstances
should you modify the original design of
the machine without approval from the
manufacturer. Always use original spare
parts. Unauthorized modifications and/or
accessories may lead to serious injury or
death to the user or others.
!
W
ARNING! You must use approved
personal protective equipment whenever
you use the machine. Personal protective
equipment cannot eliminate the risk of
injury but it will reduce the degree of
injury if an accident does happen. Ask
your dealer for help in choosing the right
equipment.

SAFETY INSTR
UCTIONS
English
–
7
Mac
hine
′
s safety equipment
This section descr
ibes the machine
′
s safety equipment,
its purpose, and how checks and maintenance should be
carried out to ensure that it operates correctly. See the
”What is what?” section to locate where this equipment is
positioned on your machine.
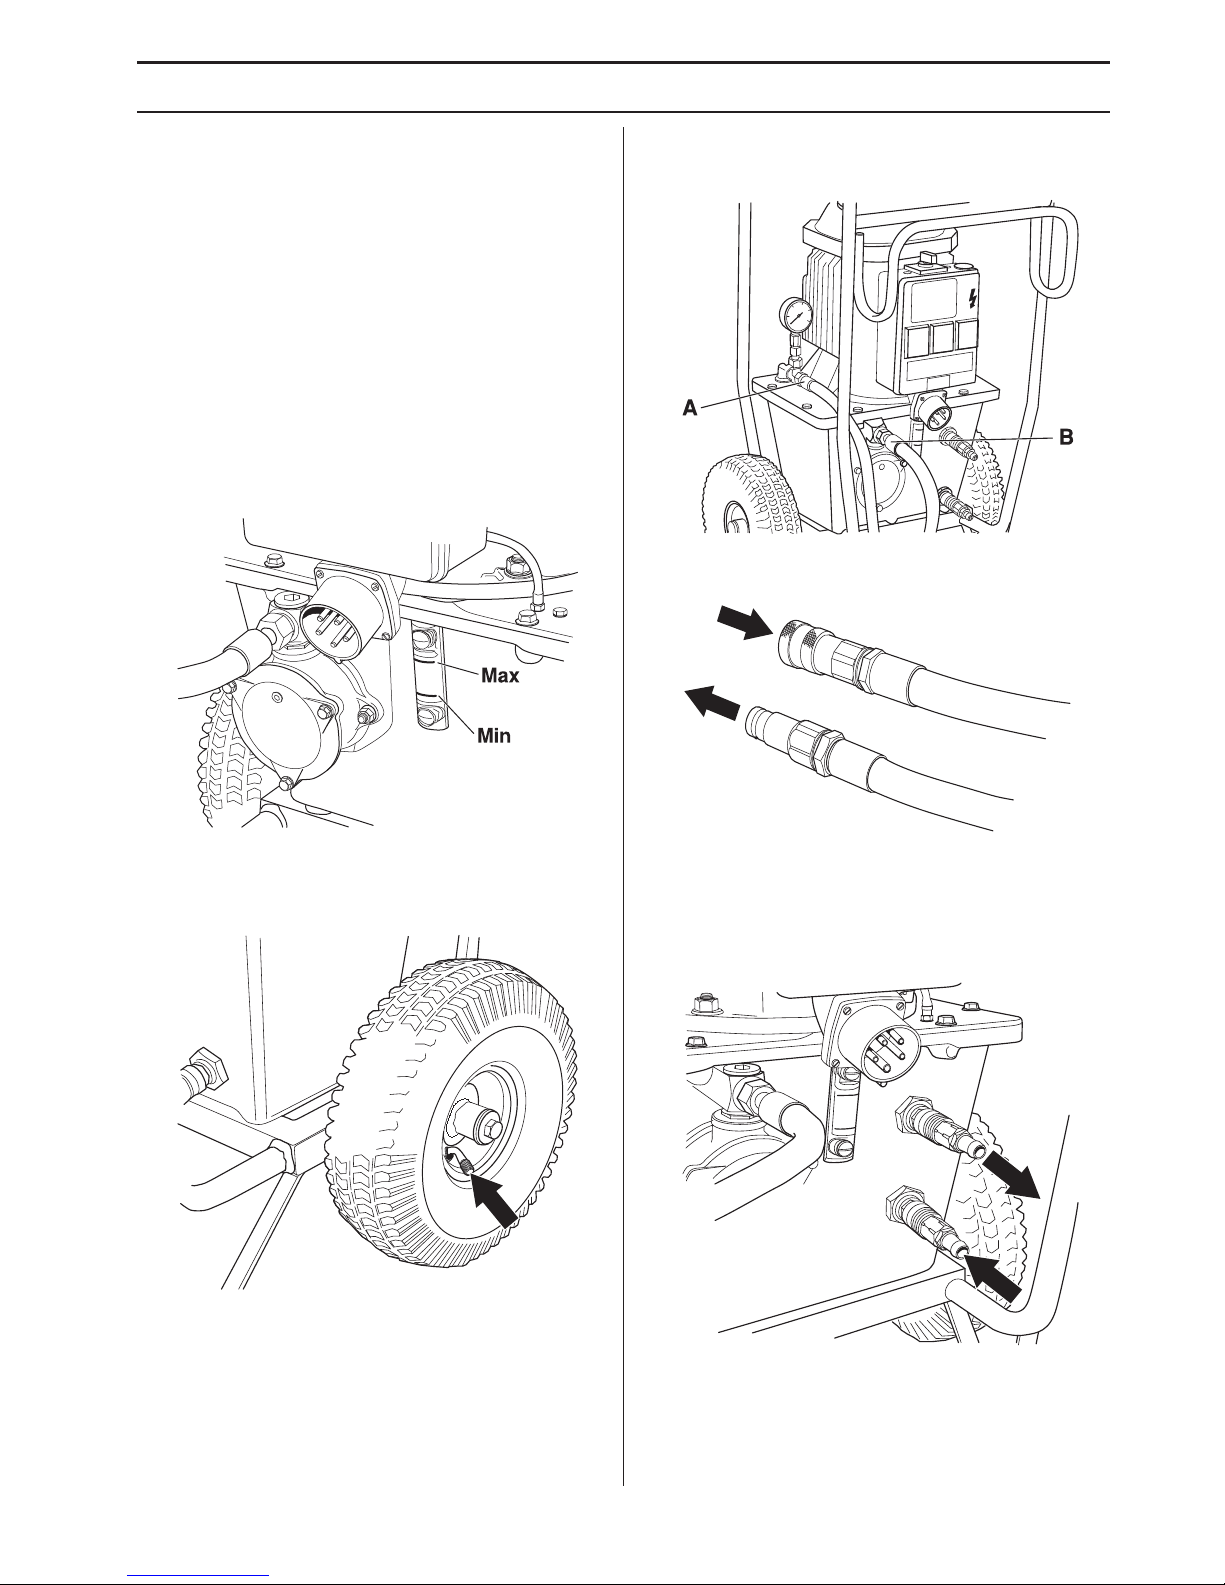
Emer
gency stop
The emergency stop at the machine breaks the mains
power supply.
T
esting the emergency stop
•
Make sure that the hydraulic hoses are connected to
each other.
• Start the machine.
• Press the emergency stop and check that the engine
stops.
General saf
ety precautions
Do not use the machine without fi
rst reading and
understanding the contents of this Operator’s Manual.
• Never use the machine if you are tired, if you have
drunk alcohol, or if you are taking medication that
could affect your vision, your judgement or your co-
ordination.
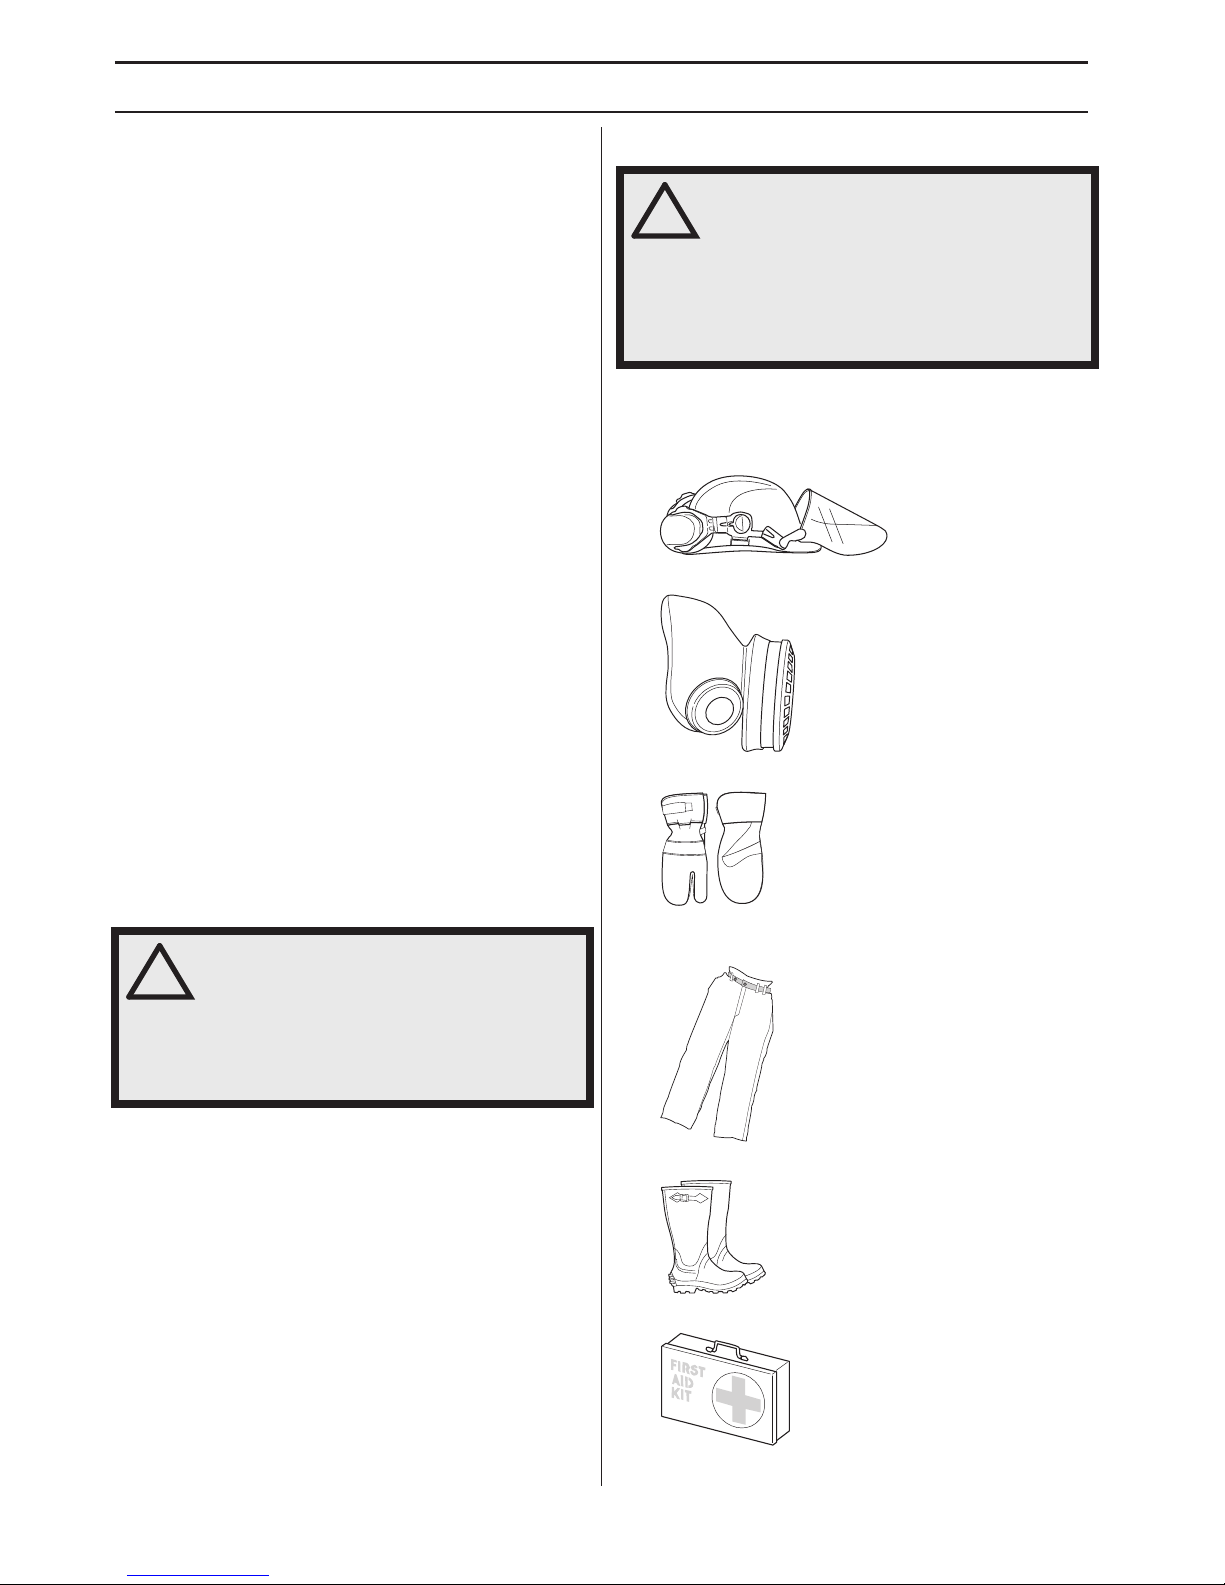
• Wear personal protective equipment.See instructions
under the heading ”Personal protective equipment”.
• Never pull out the plug by pulling the cord.
• Regularly check that the battery charger connection
wire is intact and that there are no cracks in it. Keep
all cables and extension leads away from water, oil
and sharp edges. Make sure the cable is not jammed
in doors, fences or the like.Otherwise it can cause the
charger to become live.
• Check that the cord and extension cord are intact and
in good condition.
• Never use the machine if the cord is damaged, hand
it in to an authorized service workshop for repair.
• To avoid overheating do not use the extension cord
while it is rolled up.
• The machine should be connected to an earthed
outlet socket.
• Check that the mains voltage corresponds with that
stated on the rating plate on the machine.
• Always switch off the power to the hydraulic unit and
pull out the electric cable before moving the
equipment.
• Keep all parts in good working order and ensure that
all fixtures are properly tightened.
• Never use a machine that is faulty. Carry out the safety
checks, maintenance and service instructions
described in this manual. Some maintenance and
service measures must be carried out by trained and
qualified specialists. See instructions under the
heading Maintenance.
• Do not modify safety equipment. Check regularly that
they function as they should. The machine must not
be run with defective or disassembled safety
equipment.
• Never allow anyone else to use the machine without
first ensuring that they have read and understood the
contents of the operator’s manual.
• People and animals can distract you causing you to
lose control of the machine. For this reason, always
remain concentrated and focused on the task.
• Make sure no unauthorised persons are in the
working area, otherwise there is a risk of serious
personal injury.
• Be careful as clothing, long hair, and jewellery can get
caught in moving parts.
• Observe care when lifting.You are handling heavy
parts, which imply the risk of pinch injuries or other
injuries.
T
ransport and storage
•
Always switch off the power to the hydraulic unit and
pull out the electric cable before moving the
equipment.
• If there is a risk of freezing, the machine must be
drained of any remaining water coolant.
• The power pack is constructed as a wheeled cart with
the possibility of hanging hydraulic hoses for simple
transportation at the workplace.
• For transportation between workplaces, the power
pack should be stored in vertical position with the
distribution box facing upwards.
• Store the equipment in a lockable area so that it is out
of reach of children and unauthorized persons.
!
W
ARNING! Never use a machine that has
faulty safety equipment!
All servicing and repair work on the
machine requires special training.This is
especially true of the machine
′
s safety
equipment. If your machine fails any of
the checks described below you must
contact your service agent.When you
buy any of our products we guarantee
the availability of professional repairs
and service. If the retailer who sells your
machine is not a servicing dealer, ask
him for the address of your nearest
service agent.
!
W
ARNING! There is always a risk of
shocks from electrically powered
machines. Avoid unfavourable weather
conditions and body contact with
lightning conductors and metal objects.
Always follow the instructions in the
Operator’s manual to avoid damage.

SAFETY INSTR
UCTIONS
8
–
English
General w
orking instructions
•
All operators shall be trained in the use of the
machine. The owner is responsible for ensuring that
the operators receive training.
• Check that all couplings, connections and hydraulic
hoses are in full working order.
• Keep the hydraulic hoses and couplings free from dirt.
• Do not misuse hoses.
• Do not use hoses that are distorted, worn or
damaged.
• Make sure that all hoses and electrical cables are
connected to the machine correctly before you start
the machine.
• Check that the hoses are connected correctly to the
machine and that the hydraulic couplings lock as
intended before pressurising the hydraulic system.
The couplings are locked by turning the outer sleeve
on the female coupling so that the slot moves away
from the ball.
The pressure hoses in the system must always be
connected to the tool’s intake.The return hoses in the
system must always go to the tool’s outlet. Confusing
the connections can cause the tool to work in reverse,
which can result in personal injury.
• Never use the hydraulic hoses to lift the machine.
• Check the machine, couplings and hydraulic hoses
daily for leakage. A rupture or leak can cause a
”hydraulic oil injection” in the body or result in other
serious physical injury.
• Never disconnect the hydraulic hoses without first
shutting off and disconnecting the hydraulic unit and
ensuring the motors have stopped completely.
• If an emergency situation should arise anyway, push
the red emergency stop button on the power pack.
• Do not exceed the specified hydraulic oil flow or
pressure for the tool being used. Excessive pressure
or flow can result in rupturing.
• Do not check for leakage with your hands. Contact
with the leak can result in serious personal injury
caused by the high pressure in the hydraulic system.
• Check the power supply and the power cables and
make sure that they are not damaged.
• Working close to power lines:
Hoses that are marked and approved as electrically
non conductive must be used when using hydraulic
tools on or in the vicinity of electrical cables. The use
of other types of hoses can result in serious physical
injury or even death.
When replacing hoses, hoses marked 'non-
conducting dielectric” must be used. The hoses must
be regularly checked for their electrical conductive
insulation in accordance with special instructions.
• Working close to gas conduits:
Always check and mark out where gas pipes are
routed. Cutting close to gas pipes always entails
danger. Make sure that sparks are not caused when
cutting in view of the risk of explosion. Remain
concentrated and focused on the task. Carelessness
can result in serious personal injury or death.
• Run the hydraulic system until it reaches its operation
temperature of 30
°
C before starting to saw, to reduce
return pressure and other wear.
• Never leave the machine unsupervised with the motor
running.
• Always saw in a manner that permits easy access to
the emergency stop.
• Make sure that there is always another person close
at hand when you use the machines, so that you can
call for help if an accident should occur.
• People that need to be in close proximity of the
machine must wear hearing protection as the sound
level when cutting exceeds 85 dB(A).
• Do not use the machine in bad weather, such as
dense fog, rain, strong wind, intense cold, etc.
Working in bad weather is tiring and can lead to
dangerous conditions, e.g. slippery surfaces.
• Ensure that the working area is sufficiently illuminated
to create a safe working environment.
• Always ensure you have a safe and stable working
position.
• Observe care when lifting.You are handling heavy
parts, which imply the risk of pinch injuries or other
injuries.
!
W
ARNING! This section describes basic
safety directions for using the machine.
This information is never a substitute for
professional skills and experience. If you
get into a situation where you feel
unsafe, stop and seek expert advice.
Contact your dealer, service agent or an
experienced user. Do not attempt any
task that you feel unsure of!

ASSEMBLING AND ADJUSTMENTS
English
–
9
Chec
k the oil level
The power pack is supplied with 12 litres of hydraulic oil
466 cSt HSH of a well-known brand. The oil is an
environmentally adapted and SP approved ester oil that
will drastically reduce the risk of allergic reaction or skin
irritation upon contact. In addition, the oil is quickly
degradable in case of unintentional release.
• Check the hydraulic oil level in the power pack.This is
checked with the level indicator.
Min. level = red line
Max. level = black line
Do not exceed the max. level when filling the tank with
hydraulic oil. The hydraulic oil expands when it gets hot
and can overflow if the level is too high. Tank volume 12 l
(3.2 US gallons).
Check the air pressure in the tyres
• Check the air pressure in the tyres. This should be 2
bar.
Connect the hydraulic hoses.
• The couplings should be wiped clean to reduce the
risk of leakage before the hoses are fitted.
• The couplings are locked by turning the outer sleeve
on the female coupling so that the slot moves away
from the ball.
Hydraulic hose, return IN (B)
Hydraulic hose, pressure OUT (A)
Connect water cooling
• Connect a water hose between the upper cooling
connection on the hydraulic oil tank and the working
tool, and also a hose from the closest hydrant via a tap
to the lower cooling connection on the tank.
• If no tool requiring water is used, just let the cooling
water flow to the closest floor drain.

ASSEMBLING AND ADJUSTMENTS
10 – English
Connect a power source
• Connect the incoming power cable. The cable must
have three phases and grounding.Neutral should also
be available as the single phase sockets on the
distribution box will not work otherwise. (Only on 5-pin
machines)
• The single phase sockets are protected with a 16 A
residual current circuit breaker with overcurrent
protection (C type). Following the connection on
incoming current, the single phase sockets can be
used for e.g. a drilling machine, water suction
apparatus, etc.
IMPORTANT! Check that the mains voltage
corresponds with that stated on the rating plate on the
machine.

STARTING AND STOPPING
English – 11
Before starting
Make sure that:
• The machine is correctly connected to a suitable
power supply and correctly fused.
• The hoses have been connected to a device.
Starting
The engine is started with a Y/D switch. The start takes
place in two steps to avoid overloading the fuse the
machine is connected to.
• Turn the switch to "START 5 SEC" in the direction
indicated by the lit lamp. The direction of rotation of
the engine will then be correct.
• Turn the switch to "RUN" when the engine speed is
constant after about 5 seconds.
• Open the tap to suitable water flow for the tool in
question.
If the tool does not require water, cooling water should
still flow through the radiator, and then to the closest
floor drain.
Stopping
Switch off by turning the switch to "0".
After work is completed
• Disconnect the hydraulic hoses.
• If there is a risk of freezing, the machine must be
drained of any remaining water coolant. Disconnect
incoming and outgoing water hoses and tilt the
machine forwards.
NOTICE! When starting, the switch must only be turned
to ”START 5 SEC” for about 5 seconds. The switch is
then turned to "RUN". The engine may be damaged if
the switch is in the ”START 5 SEC" position too long or
when operated.

MAINTENANCE
12 – English
Service
Maintenance
Cleaning
Make sure to keep the connectors and pins clean. Clean
with a rag or brush.
CAUTION! Do not use a high pressure washer to clean
the power pack. Do not wash the machine with water, as
water can enter the electrical system or the engine and
cause damage to the machine or short circuit.
Hydraulic oil
The hydraulic oil should be replaced when needed or
once a year.
• Place a collecting vessel under the tank’s drain plug
and open the plug.
• Screw on the drain plug when all the liquid has
drained out.
Hydraulic oil is refilled through the filter on the front of the
tank.
• Lay the power pack down with the filter housing facing
upwards.
• Remove the cover of the filter housing by removing
the three screws.
• Refill hydraulic oil through the filter element.
• Mount the filter housing cover.
• If also the oil filter is replaced, 12 l new hydraulic oil
should be filled.
IMPORTANT! All types of repairs may only be carried
out by authorised repairmen. This is so that the
operators are not exposed to great risks.
IMPORTANT! Inspection and/or maintenance should be
carried out with the motor switched off and the plug
disconnected.
IMPORTANT! Changing liquids and filters must be done
in such a way that the machine’s hydraulic system and
the surrounding environment are not damaged.Dispose
of residual products according to local laws.

MAINTENANCE
English – 13
Hydraulic oil filter
The filter should be replaced twice a year.
• Lay the power pack down with the filter housing facing
upwards.
• Remove the cover of the filter housing by removing
the three screws.
• Lift up the filter element.
• Push the new filter in place over the sleeve coupling in
the bottom of the filter housing.
• Mount the filter housing cover.
Tightening torque
When performing repair and maintenance work that
include demounting and subsequent mounting and
tightening of screws, the following torque should be used:
• M6: 10 Nm
• M8: 25 Nm
• M10: 50 Nm
Daily Maintenance
Regularly check:
• The hydraulic oil level in the hydraulic power unit, to
make sure it lies between the marks on the sight
gauge.
• Check the tire pressures.
• Any abnormal noises.

14 – English
TECHNICAL DATA
PP 325 E
Specified hydraulic output, kW/hp 9,3/12,6
Hydraulic oil flow, l/min / gpm 40/8,8
Hydraulic oil tank, l/gal 12/2,6
Cooling Water cooling
Size, (LxWxH), mm/inch 575x1040x780/22,6x40,9x30,7
Weight, kg/lbs 93/205
Max. working pressure, bar / psi 140/2031
Hose length (1/2" hose), mm/inch 8/315 (When hoses are extended beyond standard
length, 5/8" hose is recommended.)
Power supply
Check that the mains voltage corresponds with that stated on the rating plate on the machine.
200 V 50 Hz
200 V 60 Hz
230/400 V 50 Hz
230 V 60 Hz
400 V 50 Hz
440 V 50 Hz
575 V 60 Hz
Wall socket 2x230 V (Only on 5-pin machines.)

English – 15
US WARRANTY STATEMENT
WARRANTY POLICY
All warranty claims will be determined after inspection at a designated facility. A Returned Goods Authorization is
required for all warranty claims. Contact Husqvarna Customer Service Department at 800-845-1312 for an RGA. The
customer must prepay the freight and absorb any labor expense required to return or replace a product submitted for
warranty consideration. Husqvarna will pay return shipping expenses for repaired or approved replacement products.
EQUIPMENT
Equipment manufactured by Husqvarna is warranted to be free from manufacturing defects in normal service for a period
of two (2) years from date of purchase by the original consumer purchaser. Component manufacturers offer separate
warranty periods. Call Technical Services at 800-288-5040 for complete information.
Our obilgation under this warranty is expressly limited to the replacement or repair at Husqvarna Construction Products
North America, Olathe, Kansas 66061, or at a service facility designated by us, of such part or parts as inspection shall
disclose to have been defective.
This warranty does not apply to defects caused by damage, unreasonable use, faulty repairs made by others than an
approved Husqvarna servicing dealer, or defects cacused by failure to provide reasonable maintenence, while in the
possession of the consumer. Further, the warranty is void if the product, or any of its components, are altered or modified
by the consumer purchaser, or if the product is used in an inappropriate manner or with tools not recommended by the
manufacturer.
Exceptions: Drill motors - 3 months, Wall saws - 1 year, Power cutters - 3 months, DM230 - 1 year, DM225 - 3 months,
Gyro systems - 1 year, CD40 system - 1 year, DS160 C - 1 year, Smart box - 1 year, CS2515 - 1 year, PP455 E - 1 year,
PP345 E - 1 year, HP40 - 1 year.
Wear items: Filters, spark plugs, bearings*, belts, wheels** and wear pads.
*Except IntelliSeal™ system. **Except delamination.

EXPLICATION DES SYMBOLES
16 – French
Symboles sur la machine
AVERTISSEMENT! La machine
utilisée de manière imprudente ou
inadéquate peut devenir un outil
dangereux, pouvant causer des
blessures graves voire mortelles à
l’utilisateur et aux autres personnes
présentes.
Lire attentivement et bien assimiler
le manuel d’utilisation avant
d’utiliser la machine.
Toujours utiliser:
• Casque de protection homologué
• Protecteurs d’oreilles
homologués
• Lunettes protectrices ou visière
• Masque respiratoire
AVERTISSEMENT! Courant élevé.
Marquage environnemental.
Ce symbole figurant sur le produit ou sur
son emballage indique que ce produit ne
peut pas être traité comme déchet
ménager. Il doit être collecté et amené à
une installation de récupération
appropriée de déchets d’équipements
électriques et électroniques.
En veillant à ce que ce produit soit correctement éliminé,
vous pouvez contribuer à prévenir les conséquences
négatives potentielles sur l’environnement et les
hommes, qui pourraient sinon être le résultat d’un
traitement incorrect des déchets de ce produit.
Pour des informations plus détaillées sur le recyclage de
ce produit, contactez votre commune ou le magasin où
vous avez acheté le produit.
Explication des niveaux
d'avertissement
Il existe trois niveaux d'avertissement.
AVERTISSEMENT!
REMARQUE !
ATTENTION !
!
AVERTISSEMENT! Symbole utilisé en
cas de risque de blessures très graves
ou de mort pour l'utilisateur ou de
dommages pour les environs si les
instructions du manuel ne sont pas
suivies.
!
REMARQUE ! Symbole utilisé en cas de
risque de blessures pour l'utilisateur ou
de dommages pour les environs si les
instructions du manuel ne sont pas
suivies.
ATTENTION ! Symbole utilisé en cas de risque de
dommages pour les matériaux ou la machine si les
instructions du manuel ne sont pas suivies.

SOMMAIRE
French – 17
Sommaire
EXPLICATION DES SYMBOLES
Symboles sur la machine ..................................... 16
Explication des niveaux d'avertissement .............. 16
SOMMAIRE
Sommaire ............................................................. 17
Contrôler les points suivants avant la mise en
marche: ................................................................. 18
QUELS SONT LES COMPOSANTS?
Les composantes d'un groupe hydraulique .......... 19
INSTRUCTIONS DE SÉCURITÉ
Avant d’utiliser un nouveau groupe hydraulique .. 20
Équipement de protection personnelle ................. 20
Équipement de sécurité de la machine ................ 21
Instructions générales de sécurité ........................ 21
Méthodes de travail .............................................. 22
MONTAGE ET RÉGLAGES
Contrôler le niveau d’huile .................................... 23
Vérifiez la pression d'air dans les pneus. ............. 23
Branchez les tuyaux hydrauliques. ....................... 23
Raccordez l'eau de refroidissement ..................... 24
Branchez une source électrique ........................... 24
DÉMARRAGE ET ARRÊT
Avant le démarrage .............................................. 25
Démarrage ........................................................... 25
Arrêt ...................................................................... 25
Après le travail ...................................................... 25
ENTRETIEN
Service ................................................................. 26
Entretien ............................................................... 26
CARACTÉRISTIQUES TECHNIQUES
PP 325 E .............................................................. 28
DECLARATION DE GARANTIE ETATS-UNIS
POLITIQUE DE GARANTIE ................................. 29
EQUIPEMENT ...................................................... 29

18 – French
SOMMAIRE
Contrôler les points suivants avant la mise en marche:
!
AVERTISSEMENT! La découpe, particulièrement la découpe à SEC soulève la poussière générée
par le matériau coupé qui contient souvent de la silice. La silice est composée de sable, de
quarts d’argile, de granit et de nombreuses autres substances minérales et rocheuses.
L’exposition à une quantité excessive d’une telle poussière peut causer:
Des maladies respiratoires (altérant les facultés respiratoires), y compris bronchites chroniques,
silicose et fibrose pulmonaire dues à une exposition à la silice. Ces maladies peuvent être
fatales;
Irritation cutanée et démangeaisons.
Des cancers selon NTP* et IARC* */ National Toxicology Program, International Agency for
Research on Cancer
Prendre des mesures préventives:
Éviter l’inhalation et le contact avec la peau de la poussière, des vapeurs et des fumées.
L’utilisateur et les personnes présentes sur le site doivent porter des protections respiratoires
appropriées telles que des masques spécialement prévus pour filtrer les particules
microscopiques. (Voir OSHA 29 CFR Partie 1910.1200)
Couper si possible en utilisant le jet d'eau afin de réduire la poussière dispersée.

French – 19
QUELS SONT LES COMPOSANTS?
Les composantes d'un groupe hydraulique
1 Cadre pour tuyau hydraulique
2 Interrupteur
3 Arrêt d’urgence
4 Coupe-circuit de courant résiduel avec protection de
surintensité (Uniquement sur les machines 5
broches)
5 Prise de courant murale 2x230 V (Uniquement sur les
machines 5 broches.)
6 Raccordement pour sortie d'eau de refroidissement
7 Jauge visuelle
8 Raccordement pour entrée d'eau de refroidissement
9 Filtre d’huile hydraulique
10 Bouchon de vidange
11 Jauge de pression hydraulique
12 Réservoir à essence hydraulique
13 Tuyau hydraulique, SORTIE de pression
14 Tuyau hydraulique, RETOUR de pression
15 Manuel d’utilisation

INSTRUCTIONS DE SÉCURITÉ
20 – French
Avant d’utiliser un nouveau
groupe hydraulique
• Lire attentivement et bien assimiler le manuel
d’utilisation avant d’utiliser la machine.
• La machine est principalement destinée aux WS 325,
DM 406 H, HS 170 et HH 170, mais convient
également très bien comme source électrique pour
d'autres équipements, tels que la scie circulaire
Husqvarna.
• Il convient de parcourir le manuel fourni avec le
groupe hydraulique avant de commencer à utiliser la
machine.
• La machine peut provoquer des blessures
personnelles graves.Lire attentivement les consignes
de sécurité. Apprendre à bien utiliser la machine.
Utilisez toujours votre bon sens
Il est impossible de mentionner toutes les situations
auxquelles vous pouvez être confronté. Soyez toujours
vigilant et utilisez l’appareil avec bon sens. Évitez toutes
les situations pour lesquelles vous ne vous estimez pas
suffisamment qualifié. Si, après avoir lu ces instructions,
vous ne vous sentez toujours pas à l’aise quant à la
manière de procéder, il convient de consulter un expert
avant de poursuivre.
N’hésitez pas à prendre contact avec votre revendeur si
vous avez des questions sur l’utilisation de la machine.
Nous sommes à votre disposition et vous conseillerons
avec plaisir pour vous aider à utiliser votre machine en
toute sécurité et de façon efficace.
Faites régulièrement contrôler la machine par votre
revendeur Husqvarna afin qu’il procède aux installations
et réparations adéquates.
Toutes les informations et toutes les données indiquées
dans ce manuel d'utilisation étaient valables à la date à
laquelle ce manuel a été porté à l'impression.
Équipement de protection
personnelle
• Casque de protection
• Protecteur d’oreilles
• Lunettes protectrices ou visière
• Masque respiratoire
• Gants solides permettant une prise sûre.
• Vêtements confortables, robustes et serrés qui
permettent une liberté totale de mouvement.
• Bottes avec coquille en acier et semelle antidérapante
• Une trousse de premiers secours doit toujours être
disponible.
!
AVERTISSEMENT! Ne jamais modifier,
sous aucun prétexte, la construction
initiale de la machine sans l’autorisation
du fabricant. N’utiliser que des
accessoires et des pièces d’origine.
Toute modification non autorisée et/ou
tout emploi d’accessoires non
homologués peuvent provoquer des
accidents graves voire mortels pour
l’utilisateur et les autres.
!
AVERTISSEMENT! Un équipement de
protection personnelle homologué doit
impérativement être utilisé lors de tout
travail avec la machine. L’équipement de
protection personnelle n’élimine pas les
risques mais réduit la gravité des
blessures en cas d’accident. Demander
conseil au concessionnaire afin de
choisir un équipement adéquat.
Other manuals for PP 325 E
3
Table of contents
Languages:
Other Husqvarna Power Pack manuals

Husqvarna
Husqvarna WS 440HF Instruction manual

Husqvarna
Husqvarna PP 455 E User manual

Husqvarna
Husqvarna PP490 User manual

Husqvarna
Husqvarna PP 325 E User manual

Husqvarna
Husqvarna PP 492 User manual

Husqvarna
Husqvarna PP 492 User manual

Husqvarna
Husqvarna PP 70 User manual

Husqvarna
Husqvarna PP 345 E User manual

Husqvarna
Husqvarna PP65 User manual