manuals.online logo
Brands
  1. Home
  2. •
  3. Brands
  4. •
  5. Husqvarna
  6. •
  7. Sewing Machine
  8. •
  9. Husqvarna VIKING Lisa User manual

Husqvarna VIKING Lisa User manual

Cl)
(D
Cl)
(D
IE
if
I
-
>_
I-.
—E
—
=
Cd
-
L..
Cd
.
J
>
>
—
.0
u_
-
Getting
started
I
npacking.
Pa
king away
(
A
in
t1t(’t
ing
the
It
)(
)t
contri
ii
Connecting
to
the
power
su
PP
1
Y
Acceccor
1
’
hox.
Sewing
stirfae
Spool
[On
lhreachng
the
upper
thread
Threading
for
twin
needles
tlobhiri
winding.
Direct
winding
threading
lower thread
thread
tension.
(
irrectt
and
mci
irrect
thread
tensim
in
Presser
foot
pressure,
Presser
f
mt
lever. (Thanging
the
presser
loot
hanging
the
needle.
I
.(
)vering
feed
teeth
:r
List
of
contents
Safety
instructions
Machine
parts
4
rL,
Cd
=
S
C.)
C.)
2
Sewing
27-45
Sewing
huttons
27
Buttonhole
Stles
229
Sis
)r
Butt
i
mnh
mles.
I
mit
t
in
I
a
ile
5—IS
ciitWr
311
Straight stitch
3
(
Needle
positiutlS
31
;athering
with
straight
6
stitches
32
—
tipper
ileinh
ir
etl
str.i
ht
stitches
i
1)
St
ruk
Ii
st
itt
h.
/
igzag
3
10
lace
edging
1hrce-
step
zigiag
36
It
Sewing
terry
(10th
36
12
\lending
and
darning
30
ll:itlock
7
13
I
lemming
Bridging
stitch
39
Seam
and
(
)vtrcast
/0
11
APpIi(
1
11C
jo
I
)arning
stik
Ii
it
I
—i
!\tit(
iiii;it
ic
km
per
St
itch
it
Decorative
stitches
12
Sewing
hints
i3
rrcc
arm,
leans
hem,
‘-\‘
ing
n
hilt
hi
ips
i
Stiti
Ii
tll
I
H
‘i
IL)
=
—
U
Cd
>
C
4M4)
0
-
2
<-5
C
U
Cd
>
Functions
16-26
lnl(
dispiav
1
I)
Sewing
A
ivisi
ir
21
I-
21
StiR
h
silet
t
t(
in
22
Memory
23
Prgramnniing
\lirri
ir
imnige
2
I
(1
I
)ekting
pr
granmc
Sat
in
lalar
and
mending
st
itches
26
S
Maintenance
46
(
are
of
the
mac
lone
i(i
(
.lmani.ing
lighim
hi
lls
I’
Fault-finding
47-48
Index
49-50
I
‘sir
r
(;f1,(/(
1,1
‘(I
Summary
1.
l)ooi
lid
2.
‘lluc.u
I
take
up
les
er
3.
lir
sser
loot
piessure
(hal
4.
1
hread
guid_
5.
Btit
t(
(flu
ili.
sensur
si
a.
ket
6.
light
7.
Ncr
dIe
bar
8.
lest
i
foot
9.
tree
ai ni
10.
lOl)l)lfl
oser
11.
l.isr
pl.ttc
12.
I
)rop
kr
d
tretli
thai
13.
Nrdk
plate
14.
t
tssci
br
and
Prrssr
r
loot
.inkk
15.
Nccdic
(
I.iiiip
S
16.
Pt
cs.rr
It
it
t
liltet
17,
hOld
tritsioil
18.
I
bread
guide
for
bobbin
inding
19.
Spool
l’
20.
Spot
il
hokkrs
21.
Ret
ess
for
additional
spool
pin
22.
•uk
k
info
(
11kk
23.
1
bread
r
utter
for
bobbin
‘,
inding
2+.
l,tnrlvhieel
25.
lollin
spirudlc.
Bobl
on
sti
26.
lnlodispla
27.
Scs
ing
Ad
isor
28.
I
uta.
tion
‘,ckrlors
29.
\ia
in
l>0\\
er
sss
ll
h
onnrs
it
fl
lit
l>’
er
%llppI\
30.
Stilt.
Ii
panel
Unpacking
1.
Place
the
mahine
on the
tal,k
or
cabinet.
remo
e
the
p.l
kagint.
and
lilt
ott
the
.
o
er
2.
Remove
the side partc
of
the
pat.
king
material,
the
lot
ii
cont
rt
and
finally
the
protection
(over
3.
[he
machine
is
delivered
ith
an
accessory
hag.
a
ma
in
cord
and
a
It
it
contr
d
cord
4.
Wipe
the
machine,
particularly
around
the
needle
and
needle
plate
to
remove
an
dust
heb
a.e
se
ing.
Packing
away
after
sewing
1.
t
Tnplug
the
cords
front
the
sall
sor
ket
and the
mar
lone
2.
\X
md
the
foot
rontrol
cord
in
m
nd
Vt
air
hand
and
pi
ace
in
the
loot
ontrol storage
spm
:t
he
main
ord
and
instnk
tion hot
ik
I
it
in
the
poc
ket
of
the
arr
ing
etc
3.
(hr
k
to
ensure
that all
a(
(
ess
tr
k’s
a
re
in
the
icc esst
)
tra’
Slide
it
onto
the
mac
him
behind
the
free arm
4.
t
o’s
er
the
presser
h
tot
5.
liar
t’
the
loot
contri
ii,
underside
tovard
ou,
on
thi
accessor
tr,i
at
the
hat
k
of
the
mat
hint
i
itch
do
n
the
hiand[
and
rcpiic
e
lice
ov
r
4
1/sec
s
Cuidr
It
sa
L
J
(Icer
s
Gait/c
Lit(1
Connecting
the
foot
control
Ill
LI
IL’
,I
(‘55>1113.5
3
ui
cviii
111(1
ii
ic
13)331
>
11131
3
(1111
JIll
I
t
Ill.’
I
1,1111
I.
PIJ(
V
IlIc’
11>1)1
3.
untrul
1>11
Its
11,1111
)\‘
51(13.
1:11
tIlL
l)lliX
mIt>
the
>
kt’l
lIlILIL’
tIle
1(3(11
(1>011131
(‘1
>IiI)irtllI1:I1
2.
PILSII
It
irmIlly
to
make sure
it
is
prP3.rly
connected.
‘Ibis
pcr
.E
Lu
III
IS
only
necessary
the
very
I
irsl
tulle
yl
>u
ale
g>
>mng
11)
1153.
the
1,
IlIac
Iiiti
3.
Pia
t’
it
111111
tlte
Si)
IL,
set’
ph
lure
Note:
Before
plugging
in,
check
to
ensure
that
the
foot
control
is
of
type
FR
2.
Connecting
to
the
power
supply
)n
the
lin(krside
01
the
miiacliine
you
will
find
inlonnation
Jl’x)LIt
he
pcc’r
supply
IV>
amid
the
frequency
(liz),
(
heck
the
power
supply
setting
ill
the
mtiacluine
to
ensure
that
this
agrees
with
the
main
supply
before
you
connect
hue
imiaclimne,
1.
(01103.3.1
thu
foot
conirl
ii
Lord
LI>
the
first
silL
l<tt
on
tIle
lo\ver
right
513.13.
Of
the
IIIJc’liine.
2.
(0003.3.1
tltc
111,1111
cord
Lu
tIle
hac
1’
SIll
kIt
on
the
lo
3.1
right
side
of
1113.
uIJ(’llinc
3.
\\
lien
VI
iu
the
(
IT
sitili,
1)11th
tlic’
IlIatlIlIlt’
,iittl
thic
III.illt
113.
S\’
ILL
lictI
oil
For
the
LISA
and
Canada
‘his
Suv>
lug
Nl,>J>tuu
his
,>
polu’iiud
plug
(out
1)11(13.’
\VI(k’r
tItan
thu
(litter)
I))
ft(l(>(e
ti>>
usls
((I
el(’(’l>’>I’
shiouk,
his
plug
is
tul(u(luch
1.)
lit
it>
>
pnl>r>ted
untlet
1(013.
(Ste
\Lj\
II
tIle
plug
(I>
(us
Lul
hi
lull’,
in
lie
outlet,
reverse
the
plug
II
it
still
>lt
(us
lIlt
lit,
((I
(tOt
1
1
u>hil
ted
elect
HI
ui
1
uistill
lit’
l>’
per
outlet
)u
(loll
itas
Iths
he
plug
Ill
illS
5%
.33.
6
1
1
cer
‘c
Gui>Ie
1,ttci
Accessory
box
1.
1
)pen
the
AceeLiorv
bOX
lv
placing
3.0111’
linger
iii
tue
‘1)1(3.
on
tlim.’
t(
Ip
and
lifting
upward
2.
in
thu
A(’ceSS(
(fl
box
theft
is
a
special
tra’
f
)r
presser
feet
and
bobbins
plus
space
for
other
accessories.
3.
Store
the
presser
feet
and the
bobbins
in
the
tray
so
they
are
always
easily
accessible
(
rek’r
to
the
picture)
Extended
sewing
surface
1.
keep
the
Accessl
in’
‘trw
(Ill
the
lllIclliIle
to
pr
IVil
Ic
a
larger
flat
work
surface
2.
Slide
the
AccessI
ury
‘tray
to
the
left
when
Vt
uu
wish
to
remove
it
and
use
the
free arm.
3.
‘ho
facilitate
sewing
trouser
legs
and
sleeve
hems
use the
free
anti
4.
‘I
o
replace
the
Aceess
Iry
tray,
slick
it
tightly
(loLl)
he
iii:k
111111’
i
-
(!s3r
c
(;ilik’
1.i
so
Spool
pin
N
I
J’,er
1
(;iide
Lt4.a
Threading
the
upper
thread
r’lake
Sl,li’(’
the
prsser
loot
i
14.
lee(Ne
III
fll
Ill,
%)fl(hut
f)lIlS
‘llIl,llII(’
all
l
p.
s
II
li_ill
I
ht.
iiia(ii
1414441
pIn
(a)
Is
l10iI/o01,lI
1)14.’
IlIftad
reefs
oIl
1)14.
slJtlonai’
s[IooI
‘1,1(4.’
11(4.’
S()1
II
SI.)
lilai
the
tuft
ad
((‘(‘IS
(OtIflk’I
4.
104
ks
54.
I
here
are
Io
spoil)
liold’rs
on the
11
((II
lfl
t
itli
llaILtO(
1)114.
ad
spools
(lie
sinai)
hoidi,’r
(hi
is
iia
‘l
Ii
III
lot
iii
till,’
IIlI’4.’a(i
II
‘,
(10
liSt’
iargt’
tiirt’a(
I
S))(
It
(iS,
liie
large
10)1(11,1
14.
1
is
i)iit
(‘(I
Iii
11(1111
III
1)14.’
(ii
i’.it
I
“h,iv
oR’
t)rrt’t
I
SI/I
‘p(l4Ii
lu,ik’r
(II
pIll.
1.
“II
(III’
il,it
5(114.’
IS
pI(’sSI’d
lIliI\
i(,,(lI1S1
liii,
5)11
(1))
4.511(1,4.11
5)1.14.4
I
i’i’.
It’ll
i
h
Idt’r
arid
5)11)1))
I
litre
IN
list)
l
‘P’°
1t
’
‘sl
)i’i
((II
114
14.’
aii,it
11(4.1
(111111
lIlt’
111,14.111114.’,
I
he
I
ing
rs
oIl
1)14.
extra
spotti
liI’i
Ill
11)114
1114.
144.11
Ioiit,’s
II)
tile
right
iii
tile
IIX(’d
spttti
pii
Push
(ii
04
Ilw,iftl
itt
III
P
1
’’
(‘
1114.
large
5)100)
114)1(14.
r
(
)
is
plaeed
tiiicii’i
1114.
Iiirt’ad
his
spool
)i11
is
Iis(’d
4.4.14.
0
4.5
ndii’ig
.1
1)01)1)111
I
ri
ill)
a
Nl,51)lld
s))OIIi
01
Illread or
lol
a
SI,
(‘011(1
5)14
ol
ss
lien
S(’54.
irig
ss
iii
a
14.4.
III
1)4.
(‘(III.’
ad
-
N
d
1.
Poll
the
Sf1001
pill
(lilt
P1,1(4.’
(iii,’
thread
(10
1)14.’
9)1(0!
flu)
atid
the
sp
to)
liokler
(In
the
cpooi
)lurl
ciest’rihed
iilsi1
the
SlooI
pin
I’Ia4.’k
in.
2.
Bring
tile
thread
in
tile
f
tiireet
ion
of
the
arrow
1111(1(1
Ilic’
thread
guide
(.1)
intl
(44
(‘
(114.
thread
gOld’
I
3.
Bring
tile
thread
<loss
ii
114.155
(‘en
tin’
thread tension
(
hses
4.
(‘ontinuie
threading
by
tirass
ing
the
thread
iron
the
right
into
11)4.’
slot
(Ill
tile
take
II))
levI
‘r
5.
1
hrc’ad
last
guide
list
ah’t
s
e
needle
r
6.
1
lie
nt,’e(hlI’
is
thlr(’:II
Its
I
Irt
oil
Iront to
h;iek
1114.’
5’,
lute
110
(1)4’
pr(’sst’r
ttctt
ankle
iiia
k
“
it
<‘a
s
to
see
(lie
eve
If
th(
ne(’tIlt’
.
Place
thread
111)4
her
1114.’
presser
hIt
It
and
into
1111’
tllrt’,II
1
(11111
here
it
5
(‘lit
(Iser
c
(;ide
1,is<i
Threading
for twin
needle
I
4.4.
1
114.4.)
1l
2.
\X
iti
I
(((ill
(III
((II
Ii
(114
lilr(
.11
I
o1l
.114.
(4((illg
((4
tii.’
.is
(ii
s
.11,
)
r
I
14
.S.
I
ii
4.141
(4.
114
I
1114.
.1’,
4)4.4
iii
4(41
Ill)
1
tic
is
II
C
100114.
(hIl
(hi.
(Iiriid
II4.S
h4.’(v,
4.111
(lic-
1011cr
(ilrei(I
len,
01
(uSc
s
.111(1
ioud’
(Iii.’
h
cs(
(liii.
01
gllI(lc
•l
lireI
14.
c-dk’
—4.
\((.ic
Ii
iIi.
l\(I.l
‘(1(4(41
1)111
((11(14
1114.
n
ic
lillic-
i’I.Ic(.
.1
)
5441
Ii
II)
Iin(1(r
(lii
(1114.
id
5.
i’lit
1’
(14.
L’(
1)11(1
‘))(
4(41
or
(I
(1)111
‘,
iii
1)14.
11114.
ic)
1411
1)14.’
4.)))
(441
))Il1
6.
1
ilrc’id
(114’
111.14.
I(Ilk’
I-.
l(ch)Ie
11111
Ill
is
Iir(’.I4.i
Ii,
((ii))
114’
1)114.444
II
(1111(1
I
Ill4.Jd
111155
Hi
tiic
S
atii
I
C(tlISldc’
1Ili.
il)Ves1
111r(’,id
guide
11114
ii.)
right
000(
lie
Note!
Do
not
use
a
plastic
presser
foot
when
bobbin
winding.
1,
‘Lice
our
elIlfit’,?
hohhn
ith
the
4.111,111
ni,uk
t
(01(4.4.
III
Is
on
the
Ishhin
cpinille
on
he
hoot
01
the
liii
lone
2.
Pull
lie
tlireol
Irlun
lu’
nc’edP’
inlc
the
presslI
tool
,inil
)r)
1)4.
right
‘c
the
thre,id
ctiiide
It
3.
Stjrt
11(101
11)114.4.
10(1
4.’
nd
i
iurn
ol
thiread
arlulnIl the
holihin
(ut
oil
the
lireidon
th
thi,oI
(lIlt)
r
(cli
p1
.
4.
Hrin
the
Is
lhhin
si’)ncfic’
((44.4.11
t’le44.
hi.
h)llt
(‘lfltI(lI
\X
lien
(lit
Is
‘hhui
i.
inding
is
hnishc
d.
(lie
is
NOn
s
ill
5(14(1
l(It(llll((i(,lll\
Rcin,te
Ii,
I1(,hhln,
(lit
((II
tlic’
11)111(1
11(1
hrnci
lie
ts,l’hin
s(
‘tm
lIe
up
(“Jote!
\Xc
(1,4
i1’’l
(‘1
011(1)11
11(1
4.4.
(‘1’
((liZ
sp(’(ilIt\
1111.1(14.
S))(
h
(4.
I
(‘II
114.1)40
01
)‘thl(rstr(t(
hu
tim
1(14.
(lirolIglu
hI
needle
Instead
sec
‘i’,ohhin
4.5
undinp
vt-ri
Clii
SpO(
(I
(00
Bobbin
winding
-
vertical
spool
pin
1.
(‘1,14.4.’
.10
(‘lllptV
hohhin
s
ith
the
‘‘0
(iii.
4.100)1
pun
3.
!nni
114.
Iur
‘iul
‘
InuOr
till
hrl’(d
Cook
lii
ml
‘urtiir’
1)1
p111’!)
Ii
uhic’p
around
((4.
‘4)
p
1)11
‘1
,lS
u1I(is!r,It(
(I
4.
I
rOll)
1)1)4)4.4.
4.4.111(1
I
(4.5
((IllS
If
t’ru
(I
1
m’s’
‘141
1
(‘‘I’!
‘1
(1111
I
(C’
hI
II’
II
IOU
‘lo
I
441)1
(Il
4.11(40])
114’4.4.11
(‘11
4.5
111
1111(1
“Ill
-
I
\\
Ii’
‘I
4.4.
(‘1—’
‘i_!
Ic’’
((14.
STIOl
f’’l’
Bobbin
winding
with
the
machine
threaded
ft
1
L
I
Iakc’
sure
that
(he
po’sser
ol
IS
lip
iml
the
needle
is
in
the
highest
(14.ilSlfl
10
;::
2.
tl,o
tile
I,Irp(
\
SfO)(
(I
tl((t(f
r
(mod))
tc
(((c
ar”.’
b
1/se,
s
Gum1e
1,1
‘,a
(
‘er
Gigolo
l’i,
I)
Placing
the
bobbin
in
the
machine
1.
i’
tti
(t(\vr
tv
hghtI
niIIing
It
It
t\\
Itl’
\
oIl
titti
tiko’
It
/
3.
k
old
ilL
I)obiHn
and
draw
the
thread
t
o
the
right
pasing
t
a
2.
l’l.I
c
tloo,’
I
hil’un
in
tile
I
ouhhin
ise
vitho
tile
iio.irk
licing
oi
1
ivird
and
tile
thread
It)
the
lelt
ol
tiot
h
ohhu’t
tile
hoiiiin
will
ii
on
rc
ola
Ic
(‘(
It
I
lit
(‘1—1,10
x’k
Wise
hiic’
(i\Vlfl
(out
the
thrt’id
4.
I
lotid
the
thread
tight
and
otraw
it
too
the
it_It
SI
I
thu
[lit.,
11111_id
I,ulIs
o
orret.’l
iv
ilto
I
tile
tension
spring.
(
.o
onhinue
thlreaduig
ro
111(1(1
h)
and
Ito
the
right
l
the
thread
knih_
to’)
tpIa’e
the
(1
O’t’.I’
and
slid.
it
IIlt(
n
osil
II
Oil
I
ioo’ii
111111
tilL’
tiiro.td
to
tiio,’
I0II
111
t.’tIl
II
Thread
tension
Aiwas
use
tiic’
reo’
(illnl(ild(d
set
Ii
ng
g
un
m
he
I
fli
td
iSpi
a
V
to
start
with
(Se
page
Jtfl
You (‘an
adjust
the
thread
tensit
on
by
turning the
dial
which
is
numbered.
I
he
hoiuher
the
number
the
tighter
he tens
it
on
Nt
)rma
I
thread
tens
it
m
is
munber
i
\X’hen
sewnt
I
outk
niio
ties
antI
decorative
stitches
SCI
thread
tension
to
number
3,
When
ttopstik
lung
with
a
coarse
thread
in
thick
librie.
increase
the
tensit
(fl
to)
‘_()
‘In
understant
the
co
)rrtct
thread
tension.
se”’
a
1ev
sample
stitches
at
ohifht.renl
settings
1.
t3etin
‘s
ith
a
tenciofl
that
is
It
l0(tOH’.
i.e
set
at
“1”.
he
bower
thread
will
lit’
sIrait.IlI
md
lIt’
upper
thread
will
he
drawn
olo
on the
underside,
2.
tI
loll
cI
till
It’nsit
(Ii
it
tho
llitZll(SI
ntitooher.
lot
toioti
ostIt’
ill
((((Hr.
and
th(’
seam
in
pot
Iso
3
3.
he
otorrec)
tiirtad
tension
is
irt
ovido,d
s’loo
n
tilt’
tlIrtad’
icto.’rlo
ttk
ti
tilt
ill1
loll’
ti
lot
laVo
‘rs
oF
ltl;It
‘ri:l
I
o
or.
in
t
he
t.
o
t’
f
‘(‘to
oral
ito’
“I
(It
lit’s
on
hIt’
I
In(
(‘(‘sit
It’
\lakc
0
(‘st
(‘SI
(((0
1
St
coit
mt
I
10’
1(1,110
11:1
I
V(
‘I
art’
p
Inc
I(
to
(fit
I
t
lit
Is
he
I
1
(‘It
fl
12
liter
v
Guide
Ltsci
F_
_
I
tth
IN
SWN
Correct
and
incorrect
thread
tension
Lffi&J.P
iYVVVVV’I
/,“J’Jvv\Jv
I
2
l’oer
o
(u(4p
Itt.’j
Presser
foot
pressure
Ii<
<fV’.l
to
a
t-mt-
0
adjusted
1
it
<liii
01<
hit’
hont
<1
the
aIhilo
ioniiaI
setting
Is
t
hi<t
ilIgiltr
the
nhIIul)tr
the
note
<rIssure
on
the
lal<ri<
Knit
and
S
<ii
I
Jilt
ItS
slI()Ill(f
I
t
sewn
It
I<
pressure
Presser
foot
lever
I
he
lit
st
r
11>1>1
IS
lU
ise(f
U
losseretl
v
ithi
tile
I1reser
h
lot
kvt-r
‘Ii
presser
I)
>01
must
Ix
h
<wered
V
11(11
sewIng.
ha
n
iclii
11.
Will
1101
sIan
ii
the
presser
l<ot
is
In
th<e
raised
)(0ltlOI1
Ily
raising the
presser
loot
leVer
JS
tat
as
It
g<
Its
Il1d
Ilolding
it
there,
tilt’
lilt
height
of
tile
presser
loot
tai
I>e
mt
ieased
by
several nllllinlettrS
Changing
the
presser
foot
I. Make
sure
that
the
nt-’t(ile
is
in
hit
iligilest
1511
>11
iIlll
the
1055<
r
1<1)31
tii
)W
Il
U
ld
1<
)WU
rds
2.
line
ttp
the
<ross
pin
on
the
h<<i>t
I)elsseel
tile
spring
anti
tilt’
presser
l<>ot
ankle
Press
hatk
1111111
the
1<1<11
snaps
11110
place
Changing
the
needle
I
i(
S
ISCO
the
screw
in
the
needle
(‘itli1p
2.
Rem
o-e
the
neet
lie.
3.
Slide
the
new needle
mip
with
the
flat
side
away
from
you
until
ii
will
go
no
further.
4.
lighten
the screw,
Do
not
over
tighten
Always
use Schmetz
needles
of
system
130/70511.
Lowering
the
feed
teeth
‘Ihe
feed
teeth
are
lowered
when
you
turn
the
dial
to
the
left
to
—
-
lurn
the
dial
to
11w
right
to
———
if
you wish
to
raise
the
feed teeth,
The
teed teeth
wil
tome
up
automatically
when
you
begin
to
sew
The
feed
teeth
are
lowered when
sewing
buttons
and
for
lreehand
w
>rk
-
ily
lowering
the
feed
teeth
it
is
easier
to
gel
thick
garments
under
the
presser
foot
-
I
)o
not
forget
tI
raise
the
feed
teeth
belore
starting
to
sew
‘4
s
Guide
Li,su
4
1<
‘5<
‘<‘‘
User
c
Guide
Lisa
Is
Functions
I
Infodisplay
Note:
liii.
loeills
ill
sti
l[l
in
liii.
UI)
ii
ltloil
.11)
tile
loot
(
ontrol
Is
bring
tile
lKt’tll
t
s
tile
rl
s\vil
sslt
is
in
vetgi
it
v
ii
iu
h
vil
I
be
inc
I
k
ccl
by
iiiiiiil
irrs
(iii
tlit
liilO(lisl)lay.
‘ii
Ill
an
r
lie
the
stituh
width
i
)ressing
the
I
+
)
ir
I
)
butts
iii
lie
Vs
is
ith
can
be
adjusted
het
ren
and
inn.
Not
active
in
REP
l1I
Ii
01
ill
lLi
II,
An
arri
i
Iii
the
ii
‘P
leti
i
>ii
his.
display
iticltta
tes
reverse sewIng
lb
sew
lurVs
ard
again press
ihe
button once
more.
Functions
I
Infodispby
STOP
1
he
STOP
Imiti
In
is
usc.’d
II)
I
inisli
a
si
itch
the
macil
ne
I
ast
ens
t
lie
(Ii
read
a
nc
I
5101)5
automatically
vhen
the
stitch
has
been
completed.
1
he
symbol
e
on
the
display indicates
that
STOP
IS
selected.
STOP
is
cancelled when
iii
press
the
butts
in
again
or
1w
selecting
a
tiew
st
kb
Ihe
STOP
butti
in
has
the
saute
hinctinit
hi
ith
in
NORM
and
REP
p’
isit
5
in
FIX
O
ily
using
the
FIX
bum
m
Vs
ci
can
tie
oil
a
stitch
at
the
beginning and:i
ir
at
the
end
iii
a
stitch
bce
I)
lIX
it
the
is
ginning
-
the
iltl(
lime
se\
c
a
few
tie
1)11
slit,
hues
Ins
I
sc
,ii
Vs
uth
I
ted
ci
ish
touch
FIX
hile
sewing
-
the
liLt
(lii
tiC
sevs
a
kw
I
ft
usii
st
itt
lies
and
Vs
lien
it
cli
itic.
raise
Ic
siit
1mm
pedilllte
sytithol
(}
flashing
on
lie
display indicates
that
FIX
is
selecte[
Mirror
image
ci
can
itt
irr
ir
a
stitch
by
0
using
the
butts
in
mirror
tiage
Si(
Ii
Is)
sic
1
i
•t
hue
svutlsob
c
ill
bc
slispl;ivesl
FUNC
-
Selected
function
,
\Xlicn
‘s(
lit
I
I
rn
I
fl
tin
in
5
uliine
the
huts
sin
s
lisplays
NoRM
t
on
h
tin
a:tnw(:
button
to
P1106
for
gr;iuusutiuuig
ti
VOil sills
Ii
iii:
button
iga
fl
REP
rspe:ut
wilt
1
disph;ived
to
sc\\
vs
stir
pror;luiiTnes
t
sfjt’
hi’.
ci?ir
5
tliiri
‘sits
ii
i’
(iic1’ta\
51
icuiui
Stitch
length
g
\‘hen
you
seler
t
a
stitch,
this.
Reverse
j
iiiachine
vili
autoinati—cally
machine
se’s
s
back—
O
set
the
best
stilt
h
length
wards
when
this
button
is
the
selected
labric
type
i
pressed
the
nta
lime
sews
Vs
eight,
which
Vs
iii
be
tndi- lorwarci
when
the
button
is
ated
h
numbers
on
the
icleased
1
liv’
c
ngest
stitch
length
liiis
sd
1
slac
tin
t
an
liange
the
55
reverse
ceding
is
3
mui.
lor
sIlk
Ii
length
I
pressing
tither
the
periltanent
reverse
tile
button
(
+
I
sir
)
button
(ertain
stitches
(55
ft
e
in
tuis
k
suctession
beiore
have
a
I
united
stitc
h
length
Ns
it
.15 115
e
in
REP
hint
to
iii
Stitch
width
\Xi
len
l
ci
sc
Is
ct
a
51
tk
h
liii.
0
iiai1iie
ailts
siiiatically
sets
O
lie
best
stitch
ssvidtli
br
the
selected
I
ai
re
tV
I
)
and
I
‘ser
.
(;iiide
I
usa
c
Guide
lisa
17
Functions
I
Sewing
Advisor
Fabric
selection
WOV(Al
or
Knit:
\\
1
ci
.c
Sic
S
lit
I
0th
ci
I
ic
is
I
.i
ii.
\\
.1
rp
h
i-c.
cc
Ii
I)
tic
\\
i’sl
that
illuists
I
.11
right
ii
igic
‘
\
I.
lii
Iahric
is
iiiidt’
I
lilt
cit
cc
I
i
ic
\t
oh
iiitirlac
ccl
))ç
ic.’
\
knit
hihrn
is
clastic
\s
a
gc
itc
iii
1(111.
(i)t(i
\\o\tri
ui
t.ihlc
.1
cfl
I
ii)
lii’.
c.
Tic)
‘-I
lilt
Ii
jiitl
Sin
Ii
Ii It
ci
I,il
ti
ii
s
that
hac.
i.
ila’iicity.
Leather/Vinyl:
I
c,itlit’i
is
iiutiial
—kiii
c
iii
tlic
io.lt
(1)11)
iii))
tc.
csl
“c
il)’
I
is
J
s’yl)IItctli
n
alti
i_il
tc
liii
Ii
dliii
Ibis
.1
\‘c
(
cil.fl
cii)
cog
sick
I
catliir
Jilti \
invl
an
hi
nitit
ciii
or
i)atiirlli(l
I
hi
Siii
ing
c.li
iscci
‘‘‘
“i
Icc
is
Iicnn
il
iii
cili
scIt
ing
tic
low
10cc
un
1
cliIIcic.iil
1_ilIric.
‘1t)ii
clii
si’lcii
liii
lain
it
i
pc
arid
cc
tight
Inst
aiid
thin
liii’
5iii
ing
ti’t
Iiiii(Iii(
cr
ti
I
\
c.iSJ
lii
iliac.
I
inc
ScIcI
1.
thu
itt
‘Ills
Ii
hit Ihi
Iahrii
antI
ciii
ing
Iii
hiiic
1
oi
or
c\.lilij)Ic
mm
Ii
13.
oiidiiini
ii
iii
ti-i
I.ilciic
hid
tIiii
2
Ic
ii
ilk
I
ii
i’rcasi
stilt
Ii
1i2
is
mnclic
itici
in
tic.
(lislikiS
Ic
lit
cii
I
iii
it
Ii
iii
ilictiii
20
1.1
‘a
sit
ck
cci!
nit
i
lrc.sccr
Ic
it
itt
Inc
lii
i
icc
I
ii
hit
(lisIihhV.
Stihi
Ii
lcrigtli
anti
ci
idtli
is
sit
alitc
ciliatic
all
II
i
cii
t
liangi
cctiilig
ol
liii
stitch
tlit_
mittihir
(“2”
ol
I32)
gc
cc’.s
(clii
lii
Iihrii
silic.
lion
still
rio
ia
ins
I
131.
Sc
cilic
si_wing
tcihnn
Ims
arc
not
sniiiNc
or
all
InaicriaR,
c
g
hlincl
lic’ni
ni
lightic
iight
matinal
liii
nmmnilli-r
Ic
)r
ilk
sc’c\
ing
tic
hnic
lii
ii
ill
blink
a
liii
Iiliiis
thin
go
Omit.
‘1cm
,iii
I
it
I
ic.
stilt
Ii
ii
cliciricI
c
(;d
I
itt!
Stretch
light:
(
liirriictisc
iii
1<01
cingh
knit
krst
is
Stretch
medium:
<It
iiilili
knit
plush.
ccviitiii
car
(It
Stretch
heavy:
cw
i-a
Icr
knits.
1k-ic
c.
c-Ic.
Leather/Vinyl:
scictit
111(1
rial
c
ir
faux
ltailic.r
Functions
I
Sewing
Advisor
Fabric
(A-G)
Woven
light:
ilulld)n,
organ/a.
lcitictc’.
silkicc.
hillis
dc
Overcast:
I
)c
triad
I
ilirk
cdgtc
to
pr(vtnt
Iravint
intl
to
hc’ip
ihc-m
l:iv
flat.
liii
niachiinc
schetis
ilii
3
dci)
jig/ig
Oil
Woven
medium:
cihic
cc
I
unit
ilig
fulIrics.
cci
cccl
___________________
ri-pc ant
I
I
rt
iachh
illi
<It
Sccvc
lilt’
‘(ccl
Ill
citicl
Woven
heavy:
d(’!)iifl.
Seam
and
Overcast:
ovcrcasts
ilw
cdgi
all
at
ivtotl
stilt
inch
coating
onc
unit
‘1irtr
“c.
ci
iig
inicis
(Ii
‘\tlc
isor
will
sc
lit
I
thtt’
lust
0111
it
ir
il
ciii
filirit
ciicl
niiki
cill
it
hjrisi
iiti—nts
ci
nh
iincil
i
iil
(c.
g
((S
tic
1
1(c)
11
C
a
5
a
WI
[
i_I
—
4-6
:i
AGII.7
—.-
/iIii
it
(1
(
1(111(1
Sc’iiiii,i
i_h
I
•1
I
—
I
/11
Jut
Ic/Ill
(I
)
fl
fl
I
LiLI
U
I
00-29
Baste:
i3:tsting
ic
tt’iiipi
crcirv
slik
lung
It
cr
lilt
lug
gcirlilc’nts
gatlic.
ring
ci
nuci
ni_irk
iiig
I
hi
mac
Ilinc
ccli
Ic
slr.iighh
stilt
h
cc
ill)
litngc-r
51
Ill
Ii
lcngl
Ii
((Ill)
ni
cii
ulc
hum
till
gcu
ruilcilts
lhc Blind
hem
c
r<,ilci
ill
dlii Iiliii<l
htni
((is>
i
uutti
citgi.zstcl
It
ir
light
i’
iigiuI
lil
cut
iii
ii
Vt
cui
St-u
rig
cur
cvii
sub
t
I
tIn
bust
stilt
It
P<
)Sd
ii
ult
‘I
lit
hem
icc.
liluii
lIlt
i’
ill
‘olt
it
iii
is
ci
c
isilclu
icr
lalu
ii
ci
tight
iiui
ii
I(ljl
cliii
hi
lii
iu
Ic
cr
c
iiir
ii
cr
cit
ic-tn
hihirit
Ic—i
for
intl
c
inc-I
a
si
r,i
iglil
stilt
it
(((I))
is
st’lcthi
ci
It
Sr
ci
rc
it
li
ku
tn
s
sirc
it
ci
ilclii-s
in
cc
Itt
1(11
(II?
t
Sewing
technique
(1-7)
OSeam:
A
st’ctini
‘(<ccc
ticci
Bimonhole:
I
ii
ca
c
iiui2
put
c
of
liliric.
Ii
igcihcr
icithi
a
sici
ru
alit
lcv;lni
<
\dvist
n
cciii
si-h
I
liii
hi
—i
that
cc
ill
<isticilli
hi
prt
hi
lilt
tnlit
tic- ii
ir
it
tiur
tin
it
iii
nt
si
t
tic
i
251
I
t
tr
cc-cl
ccpc.fl
I
lit’
unit
hint-
sckt
Is
a
h
atlic
r
inc
I
c
nc
I
i
-iuu
gin
1
ii
it
sIrchuglIt
ci
It
11
I
I
ii
ir
ci
ii
in
I:iln
it
ii!
and
a
lighining
chic
Ii
1(2
Itir
sin
kit
built
cult
cli
ii
I
it
5
cc
it
lahirit
(
‘cer
s
(;iiid<
Ii
(I
‘I
Function
I
Stitch selection
>
I’
I
III
)
_
‘
“It
I
PSI
00
01
0201
OOT
N09
10
11
N
II
))1*
I
12
13
14
15 16
1?
18 19
20
21
22
23 24
23
3ô*7
Li
—
4b
H---
:
P
II
II
H
a
L
LI.LI
LI
Lr—
\\
lit
n
you
isii
ii
on
the
i
iat’hiint
ii
stktis
straight
silk
h
and
the
niiliiI)tr
00
(a
and
os
tr
00
the
Ieiit’r
It
(
1
i
h
sr
iii’clitiiii
I
hrit
is
displa’
‘d
\
oil
selt
i
a
stitch
by
thu
stilt
11
+
sc,’Ic
11011
011101)5
NX
iii
left
fuikin
oii
get
—
tells
and
s
ith
i
ighi
button
0(i
get
((10’S
he
nuiiifxr
ii
the
sc’le
it’d
stilt
Ii
is
thispLi
ccl
in
ilit’
lower
right eornc’r
oh
the
uk
shispIa
Sit
St
u-h
table
page
ii
Stuk
ht’s
(((1
I
3
Ib
4%
I
tiliiv
Stik
lies.
J
r
j
tt’
pages
(
I
i(ì
01
0*
O
01
08
09
10
11
12
2
-
StiiJie
4
b
L
I
I
I
)
)
I
)et
I
S
*#
19
20
*1
23*425i
ratke
silk
hit’s,
st
t
page
i2
Silk
lit’’
2-2)
-
Special
“tilt
lii’s
lot
uion(
)gruhi
I
igt’
iii,
ull(’ul(hil)g
ll)tI
darning
I
2b,
ii)
.111(1
1)001
inht
des
I
tge5
28
(
I
22
(J.ser
s
Guide
lisa
111(1111
WV.
•
to
i
he
right
and
to
the
left.
‘I
hese
htuitons
are
used
in
PROG
niJt
When
pr
)grainhliitlg,
REP
if
VOSI
wish
to
t’hit’<’k
what
is
pr( igra
mmet
I
or
if
‘
to
i
W
ishi
0)
51
I
ri
sewing
a
he
iik
hes
Into
lie
fM’
grain
Programming
i
h
FLJNC
‘o
that
PROG
is
shovs
ii
on the
display
If
‘oii
already
ha
c
a
prograni
in
the
menu
n’
this
ill
nos
be
sh’
n
tOuch
(JR
to
eilif)l’c
the
110
IllS
SR
See
page
2S
Example
“ele-t
a
do.
h
e
g.
£
‘tIfl’
‘isO
11
is
now
entered
in
he
u1i(’nsor
11
tIn,
biuttoti
I
,ituihtt
ct
h
e
g
‘I
‘sits
Ii
hid’
1
sut
n
In
this
i
\
(05
1
an
(olnhin(
dif
Itrent
sI
itt
lies
at
(S
siding
ho
uir
o\\
Ii
ti51(’
anti
ifl0i,tZinat
i
ui
\X
ith
In
hoi
so
•
\
Oil
an
g
h:i
kss
an
Is
to
5(’(
\
sat
\
05
fil\’(’
pr’sgr,uimit’’f
5)
5(’\\
‘,
our
J51’
),0rllI1.
isuls
Ii
F1NC
ho
tin’
REP
1
ssiti’iii
‘I
in,
01St
issue
ill
lx
(Siti(
m
d
it Ifit’
first
progransisied
cnk
h
UICK
INFfl
5
ISS
‘It’
“I)i
is I
i
iii
“
(1
li
(‘)
(.:)
(::,)
[L
Memory
‘I
he
machine
his
i
ox’
‘h
iii
h
prs
Igr;uull
nst
no
try
I
he
mem(
wv
in
if
Is
up
to
it)
siik’hcs
‘5’oti
ci,,
eo,uhinc
my
stilt
Ills
500
vis1i
5?
iii,
time
t’xeept
n
m
(sf
51i(i’iCS
2(-2)
I
se
the
buttons
niarkech
\
ill
a
rru
)Vs
ho
acI’mnt’e
or
return
within
tin
A
‘V
!ui,i(
hint
(;Id
Lisa
Programming
with
stitch
changes
i>
PHO(,
is
sit.
>
tu
I.
dl>
(
iI.Iflg(
Itt
I
It
di
it
Ith
Ii
mirror
-Ill
it
-
I
nun
.lik
lit
s
ti;t.tvt.
.1
1
II
liii
‘—Ilk
1
it_I
11411
I
itt
I
II
t
dl
I
*
Silt_
I
(ItSIRtI
stilt
ii,
2.
I
st
the
slittli
length>
aml
the
silt
Ii
it
liii
hnt
tils
(-f
-
or
lift
1111111)1
tug
htilit
,i>
<)
lii
hiangt
lht
—.t_-lling
Itt_tat.
t.i>it-riilg
sithi
lit.-
•
hiutat
Corrections
II
‘dOi
‘‘t/lShi
It)
thiangi_
1
StIlt
1i
It>
jilt
this-r
tnt.’
in
y
our
i)rt)4rini
I.
lout.
hi
1>1JNC
lii
PROG
2.
st.
lilt
I
uilltnc
niark-t.h
svith
.iIitt’\
S
•
1>1
until
lilt.
Stilt
h
until
s-i
is
this>l,iyt
ci
3.
Sebec
I
the
new
stitthi
Mirror
images
Mirror image
side
to
side
t•
In
NORM
jntb
PROG
only
the
stitch
seIctIetI
is
mirrored
Ilit.-
entire
pmttgouln
Is
itirrttrt.t.i
in
RER
‘ibii
un>
,ilst
i
imlirri
1
die
width
when
t
in
wish
It
it
h,ingt_
liii-
straight
stilt.
1
>
nc-n-tile
ptsilmta>
g
Irtini
it.ll
Iii
right
“Itt.i>
1111111
r
illi;Igi
sh
It
It>
sicit.
is
st.I
ct.lt.d
II
it
syi
iii
it
ii
(
ill
I
ii
;n
in
miii
it.Iisl>Iav.
CLR
-
Deleting
stitches
II
i
in
w
is)>
In
IcIcle
i
eert
.1
in
Slit
viihin
the
prm
igrani
I.
In
the
PROG
mode.
use
one
u)
the
huttons
••
until
time
ittual
stitch
numnher
ci
(IjS))Id\e(I
2.
1
nmich
CLR
Now
the
stitch
•mncl
escrvtli>ng
Itt
the
right
it!
it
vill
he
deleted
3.
ii
in
wish
In
tieiet
e
ii
ie
vl
it
>1
prt
igra
in,
Ii
ott)
i
he
Ft
JNC
I
>cmt
1>
in
In
return
Iii
PROG.
he
nm:mmInne
cviii
lie
pnsilinnetl
at
the
hri
)rm
gr;mnnned
stitch
4.
mc
h
CLR.
CLR
deletes
I
it.
prograni
ol
silk
hes
in
the
seeded
menu
II
on
i
minstake
k
nit
ii
CLR.
simply
lunch
dR
again
Ii)
hring
lat
k
the
1
a
ha
nec
1)1
vi
iii
r
pr
igra
in
as
ii
ing
as
tim
have
not
m
lSc’(
I
an
it)
icr
1)1111>
m
When
the
pr
igra
in
memc
try
is
empty
Iii
e
stile)>
I
engi
ii
and
cci
cith>
is
slit
iwn
as
i)(I
liii
on
the display.
24
(
1
ser
s
Guide
Liia
(cer
c
Guide
i_i
in
Mending
and
taper
satin
stitches
Sewing
buttons
1
ib
(
1>
%(
)I(l1
I
ii
1
t’
>
at
i>i
>1
Ii>
ii>
igrI
Il
til
(ii
((>1
ii
imi
I
at
I
II>
I
,i’.
1
ft
III
>r\
i
>
sl
,0
ii
I.
‘.l
Ik
It
“
Ii
‘ili,I
>1
>\
111111
lll,(
“,
I
.St
\t
HIll!
he
stilt
II
has
‘jt
lied
tilt’
h’siri
>1
It’illil
2.
Ii
lii
till,
q
I
(Illi
ill
II
‘
iIIJ
ill,’
ill
1W
iiil
>lt’tt”
It
‘Ill>
II
3.
\Xlieii
ytIll
Ilave
the result
you
wish,
lull>
Ii
SlOP.
1.
I
lIt’
lIlt
I
ill
iii
H\
rt’
)eal
iii
llt
(
essil
lii
,iiid
lift’
ill>
lIme
\
ill
skill
,lIIllliIIalIt.lib
\\iltii
lie
sillill
IS
(1
>illi)It’lt’d
II
‘j(III
\t
si
II
st\\
In>
>tl
er
stilt
h
and then
1(1111
fl
It>
your
stitch,
vt
Ill
only
stit’>
I
tills
sIlk
md
Ii
meh
STOP.
lift’
i’t’
lt’.ltt’l
I
Slil(ll
I”
rt’la
int’d
>‘
Il
ii
y
Ill
\t
lId)
ill
tilt’
hat
title.
II
>11
,hllt’t
lilt
t
Pr0!4r1tlI
these
‘iltt
lIt’s
iii
till’
PROG
tilt>>
he,
lie
stitch
number
tt
ill
lad>
ii
tift
,llt’
111,11
II
IN
I.
Ill
ii
I>
lS’il
lit
llhI
QUICK INFO
1.
Ntaik
tilt’
lhltrIl,
svhere
the
button
is
to
bt’
located
3.
Selet
I
Jigzal.4
.
ver
tilt’
Iced
teeth
tt
ith
lift’
dIal See
page
I
4.
Snap
1)11
lift’
presser
loot
5,
ii
ace
the
Il
h
I
eria
I
I
Inder
the
rese
r
Icx
it
ankle
6.
liac
e
lilt’
l)(ttttfl)
1>11
iitark
ing
antI
I
>wer
the
pres”t’r
bar
that
lIlt
Preser
loot
ankle
is
bett
eefl
the
holes
oh
the
hutton
(see
pIcture).
7.
I
bid
the
thread
ends
to
me
sltle
I
urn
tile
liandwhet’l
anti
Ileek
In
he
sllre
I
hat
tie
needle
g>>t
ink
the
lelt
hole
oh
tite
h)Illk)n
8.
I
(>11(11
tile
ulirroring
button
It
t
heck
that
the
needle
also
goes
into
tilt’
right
hole,
II
you
hate
a
button
with
a
dillerent
bolt’
spacing
you
tail
adjust
this
by
presssing
one
oh
the
stitch
width
butt>
Ins
I
+
I
I
hr
I
—
9.
Sew
1-
tiules
back
Intl
lorth.
>uch
STOP.
he
Illachine
will
then
tie
oil
iii
one
ol
the
holes
and
sti
p
‘I
ouch
STOP
It
I
Intel
\t>
it
e
to
lilt’
next
IUt
ol
liolt’s
or
the
neXt
butt>
In.
Button
with
a
shank
I
(st
the
liutkm
reed
I>
ft
this
pllr—
p>
ist’
Is>’
lilt’
tiun
t’i’itl
when
set’
ing
hulk
ins
on
light
labrit
s,
the
ihi
k
end
br
heavier
I
abrics.
P11511
in
lilt’
feet
I
between
lilt’
blltk
In
anti
tile
labric,
lower
tile
prt’sst’r
bar
alitl
seW
(Ill
tht’
mIll>
in.
Pull
lilt’
tlireatls
hettt
ten
lilt’
button
a
ixl
tile
I
abrie
\\‘intl
lilt’
threads
a
lest’
luut’s
around
lilt’
sil,lnk
,inci
tie
lilt’
t’nds,
26
titer
s
Guide
I_isa
i
‘ter
.t
Guide
I_isa
27
Buttonholes
Buttonhole
styles
You
can
select
different
buttonhole
styles.
Buttonhole
fl
thu
Fiartauk
butt
mhole,
iISC(l
for
illutilijOl
and
heavy
fabrics.
Buttonhole
j
ke
hole
buttonhole
I
(
r
a
iii
in
ng,
‘o
i
Ia
ble
in
c(
>m
pa
t
VOi
if
ten
u1
ih
e.g.
ha
nml.
Straight
stitch
buttonhole
fl
hir
U
sd\
ing
in
Iratliur
I
his
butti
inl>i
)I(
.tii
ouR
Ix
sukrtid
in
the
‘sving
\k
jS(
ir.
‘cr
ig(
20
21
For
better
visibility
the
machine
sews
buttonholes
away
from
you.
\(
hen
sewing
str(t(
Ii
fabric
s.
usu
a
fusiblu
stabili,er
or
a
c
ord
1
he
Iii!
(
>i.l
i
SPI
iy
V
ill
ad
ise
y
\lark
thu tittonhu
ile
bc
ation
on
your
labri
I
lie
Iutt
mb
ilu
boot
bias
guide
linus
tim
clm.tmriiiiriu
lumtt
mlii
mIt.
Iuigth
1
he
niidrhl
iuirk
iii
Ii
sit
(
gi
(‘5
a
I
S
in>
huitti
mning
edge
PI:i
e
the
button
mn
the
prmsser
kxit
against
thu
needle
and
oui
will
be
able
tm
m
see
vh
o
h
ii
ia
rk
on
thu
lou
t
cm
rresp
ito
Is
to
the
IMition
‘uou
will
‘ew
until
the
I
iist
buittonliolt
olumn
rear
bus this
irma
rk
I
here
i’
a
small
linger
at
the
l,a
k
of
ito
prsscr
loot
I
or
,i
ordud
btitt
mnhi
ilu,
h
mm
ip
v
muir
m.
(
rd
an
mund
th
I
ingur
as
illustrated
1.
Nulu.
a
I
rmItt
mnfiolr
2.
t
‘u
thu
Prusur
I
>01
(
ir
tI>.
MItt(
)nl>
Ii’
s(ns()f
Ii
mot
3.
\tjrk
thu
huittonholu
Imx
at
Ion
in
sour
hahn.
4.
Place
thu
niaturial
in
thu
mac
hii>u
and
begin
at
thu
bottom
of
thu
buttonholu.
5.
Sus
thu
first
coluinm
of
thu
I
‘Ut
U
inhu
Au
to
tI
ie
ruu
ui
trur
I
kngth
usu thu
markings.
6.
I
>>uufi
if
mu
ru\
ursu
button
fl
7.
(
ont
iflulu
to
suw
th>c
1,111k
>nhm
Au
until
the
ithm,r
mliimn
is
thu
saint.
lui>gtli
as
thu
first.
iou.
Ii
thu
q
button
8.
thu
mar
Innu
s
ill
l,artar
k
thu
other
und,
a
luw
iim_
(
ill
.111.
he’
in
the
first
cot
hum
oh
thu
butt
mnholu
and
s
ill
bun
st
>1)
‘a
v
thu nuxt
I
)uttonholu
HI
thu
sailtu
mannur.
NOTE:
Ak
ay
stitch
.m
saiuplu
huittonholu
on
Sc
raps
of
thu
garmc
01
fabric
to
huck
si/u
hut
iru
suwing
hut
toOth
ilus
Nl
thu
garmunt
Buttonhole
knife
I
lx
k
i’tif
is
t
Isu(
I
t(
I
(
ut
lxi
t
u>l
rm
Aus
It
is
also
usc
ful
for
rumo
ing
slit.
bus
su\\n
in
urior.
(!ser
Guide
I.i
so
9
Liii
,*83e
00
I
40
U’
m
eQ
28
(
1
uer
.c
Guide
Lisa
Straight
stitch
(00)
Sensor
buttonholes
1.
Snap
on
the
huttonliole sensor
loot.
Make
sure
that
the
e
ahle
js
irmiv
ph
iggeel
into
the
velh
w
socket
(see
picture).
‘I
he
(.—.
svmln)l
will
hash
until
a
lMittonh(
lie’
is
selee
ted
2.
‘celec
t
a
teiitti
tnhe
dc
e
en
thc
stitch
jia
nel
‘I
he
lei
itl(
inhi
dc
\VIll
he
pre
set
h
cr
a
I
(
nun
hutton
when
the
uiaehine
is
turned
on
the
number
(e
e
thleft’Ie
ere
she
)\Vfl
cn
the
(lisliIav
iii
pLl(
e’
of
the’
stitch
length
egether
w
itli
the’
st
nihe
ci
3.
tl
you
are
using
a
dilierent
size
button, measure
the
button
en
the
buttonhole
rule
below
and
set lie
ci
ernst
size
w
ith
the
stite
h
length
buttons
1+)
or
().
‘t
he
size
svill
clia
nge
I
i
2
ii
mc
at
a
t
tine
4.
turn
the
measurement
wheel
sec
that
the
is
hite area
is
lined
up
with
the
w
lute’
mark
\Xhen
the
measurement
is
heel
is
0
crree
tis
set
the
in
Ic
in
tlti
si
mbe
el
will
step
hashing
Il
the
circle
or
lie
whit
el
e
vi
che
el
(—
is
Ii
a
sl
iiig
t
lie
mae
binc’
(In
ne
et
he
ct.irteeh
Buttonhole
size
the’
mac
lone
is
ill
sew
the
e
orree
size
buttonhole’
br
the
button
size
cett
have
selec
ted
t
lie
butte
enliole
will
be
sew
ii
in
eerie
step.
and
wlie
n
he
hi
it
ti
in
ho
tie
is
or
nplet
eel
t
h
‘
mae
hint’
is
ill
stop
lute
eniati
call
t’lace
the
butte
in
is
she
ew
ii
en
the
ireles
on the
pie
litre
and
ye
eu
an
easily
see
the
size’
needed
leer
cur
hiitte
enhole’.
NOTE:
Alis
,tvs
stikh
a
sample
hi
itk
mb
tIe
em
s
raps
of
the’
gannent
fahrk
to
cheek
size
before
sew
rig
hi
ltt(
nile
1
es
ten
the’
ga
rn
lent
Changing
the
densitylstitch
length
It
change’
the
stitch
density
of
lie
hi
itt(
nh
(dc’
ci
the,
in
ins.
adjust
the
le’ngt
Ii
setting
of
the
stitch
I
enplug
the
hi
it
t
mIme
ele
sense
er
t
he’
t
it
e
h
lengt
hi
ivill
then
lie
shown
on the
lnlodisplav
again
a
nd
ye
mu
w
ill
I
ic
al
ile
to
iii
Iju
st
the
etensits
ol
the
hi
itte
mb
ele.
\\hc’n
ye
m
phi
ig
in
lit’
hut
t
enhe
cle
sensor
hoe
el
the
displas
g
mes
hat
k
tee
slit
cci
ing
the’
size’
of
tIme
liuttionhiecle’,
Itt
re’icmernhers
the’
new
stite
Ii
length
setting
Straight
stitching
5
tise’el
tec
loin
l,ihric
\i
liicli
does
not
stre’i<
Ii
and
for
sc’arils
55
tic
Ii
ii
ill
not
he
sitlijeited
to
great
strain
oii
select
straight
stiti
Ii
the
iuac
hune’
ii
ill
,.iuitouijtie
ally
set
tile.
as
e’rage’
tith
le’ngt
Ii
t\lx-riiiie’nt
until
ou
arris
C
at
tIme
esac
t
setting
for
the’
actual
ci
ork
you
will
he
cluing
25
Needle
Positions
lie
1,1
te
elast
i
ii
ing
uS
ing
t
ra
igh
stite
Ii
and re’inhcre
ed
straight
stite
Ii,
the
needle
position
c
an
Ice
adjusted
in
ste’ps.
I
se’
the
stitch
it
icftli
button
ft
ii
Is
the’
center
pe
isit
ion.
w
Ic
Itli
Ce
is
Ic
Ii
needle
position.
width
6
Inure
er
iuiage’el
is
right
neeehlc
position
to
return
lee
center
tie
en.
cisc
the’
stite
hi
width
button
e
—
antI
step
back
to
0
\djeist
thu
ti
lthi
be’tw
ce
ii
0
te
for
adehit
tonal
pe
esits
ens
to
c
elge’
sliti
h,
‘iou
shiotilet
take
ads ant
age’
of
the
pe
css
cliii
it
y
t
e
e
set
he’
needle’
to
tic’
Ic’
ft
er
the’
rigli
hit
sit
Ic
n
lee
te
cpstite
hi
about
2
toni
from
the’
e’chgc,
snap
on
presser
ft
tot
‘
when
se’cs
ing
I
ight
fabrics
and
presser
hot
et
t)
for
eethe’r
fabrics.
Place
the’
fabric
and
sew
so that
the’
edge’
hoiloss
s
the
inside’
right
edge
of
the
presser
loot
I)
or
the
first
umark
of
the’
le’ht
cs
Ige.’
of
the’
tires.
sc’r
fes
t
A
1
‘ioei
wish
to
sees
abe
melt
mm
fri
mimi
the’
edge
icr
sew
a
narrow
hem,
use
presser
k
cot
A
and
se’t
the
ne’echle
Ic)
tile’
right
needle’
position
(leer
s
(;ietde’
Lisa
PET
5
fNi
i
r9
rf1
Lk
etc
00
31
User
c
Guide
1,1w
Sewing
zippers
Gathering
with
straight
stitch
I
se
a
slightly
longer
stitch
than
n
irma
I
straight
st
tch
3.
S—
(
I.
Always
sew
two
gathering
threads
next
ti
each
other
1.
Pin
the
gathered
part
to
the
ci
irrespi
in
Ii
ng
garment
sect
ii
)fl
Niake
sure
that
the marks
and
the
seaiiis
(
I
irresp(
)fld
to
(‘I(hi
1
ither.
Ir
iiijtihi
iil
ik
hes
2.
Pull
both
bobbin
threads
Irom
the
same
direction
and
distribute
the
gathering
evenly.
\Xhen
hall
the
distance
is
gathered.
wind
the
i
h
rca
ds
a
ri
in
nil
a
i
i
n
then
ga
her
the
other
hall
I
nun
the
i
ither
direction
I
)istribute
the
gathering
(‘ldfll,
3.
Join
the
pieces
with
straight
stik
Ii.
he
ga
tI
ier
d
ii
ia
eria
I
lacing
up.
Sew
het
een
the
straight
gathering
ri
ws
11(11(1
the
gathering
with
vi
mr
lingers
on
both
sides
ol
the
fleedle
to
av
mimi
Ii
ildc.
Remm
mve
i
fly
gathering
thread
that
is
visible
cD
lie
/ippr
liii
ml
l
an he
snapped
i
in
si
I
fiat
ii
i,
Ii
icatci
I
either
to
the
right
ir
to
the
left
of
the
needle,
umaking
it
easy
to
sexy
both
sides
ii!
iii
c
t
ip
icr
lii
sexy
the
other
side
of
the
zipper.
reposition
the
zipper
l’i
ii it
Lapped
zipper
1.
Sew
the
seam
tm
igeiher
to
tIme
I
ot
ti
miii
of
the
zipper
placket
lisIm_
the
rest
of
the
seam.
l.ea
e
about
2
ciii
open
at
the
top.
Press
seani
open
Set
the
needle
to
the
right position.
2.
l’lai
e
loot
P
tim
Ilie
left
of
the
needle.
From
the
xx
rong
side
fold
the
labrk
to
one
side
so
both
seam
allowances
arc
free
told
.mnd
the
felt
alli
>xvaoee
under
approximately
I)
ciii
from
the
hasted
senn.
3.
PI.ic
i
the
tipper
under
tile
I
hi
led
‘c-a
ui
a
Ii
xc
an’.
e
cc
ith
U
me
ts-’.
I
hi
as
near
hi
tie
P
ild
as
p
,sif
Ue
amid
slit’.
ii
zipper
to
fahrft
Poe
Ii
Ii
iii
I.
legin
secc
ing
at
the
hi
ilti
liii
of
the
tipper.
1k-li
ire
re.R
lung
iii’.
upper
pill
lilt
the
presser
Ii
ii
ml
and
slide the
zipper
pull
d
icc
n
pist
the
tipper
foot
i.m
mwer
the
liii
mt
and
sew
to
the
top
ol
the
tipper.
4.
Snap
on
the
zipper
loot
so
it
is
tm
m
the
right
of
the
needle.
Set
the
needle
to
the
left
position.
‘I
urn the
garment
to
the
right
Sim
Ic.
It
is
important
that
the
scam
on the
right
side
is
‘e\\
fl
straight.
1k-li
ire
you
begin
to
secs
-
mark
tIle
seam
line. Sew
the
othmm.-r
side
oh
tIme
zipper
N
Guiile
Li
vu
if
--
3
/4
4
Begin
stitching across
the
hi
rttom
unit
continue
upwards
Itenmoc
c
the
hasting
II
ou
cc
ant
to
sew
a
gentleman
s
tipper.
Ii
mllocc’
the
instructs
mns
hut
insert
in
the
other
i
lireet
ii
mu
(J,cer
c
Guide
l,ica
Lace
edging
Reinforced
straight
stitch
(01)
tii
reinfrce
stra
iglit
stitch
is
st
n
mger
tI
ia
ii
rd
ma
ry
si
right
St
Ic
Ti
it
is
a
tripk
and
elast
ic
St
iii
Ii.
I
lie
reinforced
strnglit
ditch
can
I
k
r
hea
vv
stretch
fai,rk
s.
Ii
ir
(rul(
h
S(ii1ld
vhit
Ti
are
sti1iect
to
I
iflSi(lCMl)I(
Strain
iiid
Ii
)f
topstitching
in
heavy
fahrics,
Stretch
stitch
(02)
•
w
I
lie
stretch
st
ik
h
makes
a
iIi.iiTt,
strel(
lix’
se
liii
that
is
sintahie
fir
se’
ing
k
ge
Tier
pieces
iT
light
st
ret(
h
Iahric
1
he
stretch
St
1(11
is
icheil
h
r
iopstitching
in
Tight
ctretch
fai,rics,
ir
1.
Ilac
c
\\
rung side
ii!
lace
Ii)
right
side
f
Lihri.
111.1
ft
lung
ecIge
Se
al
ing
nni.r
edge
of
I.i
e
\
it
h
iigtag.
‘ntih
length
I
.
‘i
Li.
Ii
‘.\idthi
2.
t’ii.
i.iIii
ilIi
Liii.
tui’.
liii’
lahrii.
Sew
with
satin
siith
Ntitch
width
20,
on
the
right
side
iver
the
zigzag
scanT
in
CD
3
00
Zigzag
(03)
tin
zigzag
is
utilized
for
sewing
on
lai
e. hi
uund
edging
a
ml
apilu
ue
\\
hen
von
d(l(c
t
the
zigzag
the
niac
lone
‘
ill
anti iniaticallv
set
stitc
Ii
length
2
and e
i
liii
3
ui
can
change
this
scoing
h
pressing either
the
(
+
)
or
(
-
1
hutti
in
on the
‘idth
and
ir
length
Fxpcri
nient
until
von reach
the hest
setting
for
v
‘or
actual
c
irk
ii
3.
Cut
i
iff
the
seam
allowance
up
to
the
stitching
on
the
wrong
side.
.s
(;d
Lisa
34
User
c
Guide
Lisa
Flatlock
(07)
Three-step
zigzag
(04)
Overcasting
I
fee
step
/igiag
:
suitable
for
n
ers asi
ing
fliC
ist
fabric
S
‘I
rim
the
edges
of
lie
ahris
hek
re
(ncr
casting
Tlake
sure
that
the
needle
sews
over
I
edge
iii
he
I
a
brie
Place
the
ía!
ri<
a
cs
rd
ing to
iii
s’
presser
k
tot
(see
pi(t1irc’
Sewing
terry
cloth
em
sIt
th
is
a
r
tIic’i
loosely
ss
os
sn
fahn
in
s
ha
h
seams
easil
break
Ses
the
garnient
togetlic
r
‘
ith
straight
slits
h
Ii rn tlic
seams
and
press
the
seam
allo\vans
e
flat
and
ses
the
edges
doss
n
against
the
gannent
on
the
rong
side
s
ith
three step
iigiag
Es
en
th
ugh
the
stilt
hing
goes
right
through
to
11w
right’’
side
of
the
garment,
it
is
nearly
ins
isible
and
even
the
wr
ing
side
looks
neat
‘I
lie
situ
hing
‘
ill
also
he
onsiclerahiv
stronger
Net
klines
and aiuih
ties
are
finished
in
a
sinular
s’
as
‘I
he
Ilath
a
k
,
is
suitable
I(
r
seV
ing
t
eilappecl
se,lili5
and
tfc
(ii
,it
Its’
hen
is
ii
tosen
the
presser
Ii
tot
pressure
to
2
ss
hen
sets
ing
strets
h
labia
You
can
produce
a
decoratis
e
hem
f’m
h
Ading
a
single
hem
to
the
strong
side
and
sev
trig
the flaiha
k
from
the
right
sid’
irimo
ext
css
hem
to
stitching
front
the
strong
side
to
setS
an
overlapped
scant,
lap
inc
pies
s’
of
labra
a
ei
the
>ther
pies
s
and
sets
ilatha
k
slits
Ii
over
the
labris’
edge
on the
right
side
‘I
rim
fri
mi
tile
tt
U
ing
side
or
sets
another
seam
from
the
right
side
Mending
and
darning
I
lireestep
7ig
vag
,
san
he
utih
ied
for
mending
and
darning
thread bare
spot
is
mended
bs
sets
tug
bak
,mcl
forth
ss
ith
three
step
iig,a
se
the
ret
erse
feed
button
1
(
nude
11w
Iabrh
slightly
to
th
stilt’
If
hit’
fabmu
is
sirs
vs
om.
a
pieee
of
fabris
or
linint
oat
hs
Ittas
hed
to
the
rs
serss
,is
is
ink
irs
eme
n
I
Narrow
belts
and
bands
Eolsf
the
fabric
in
thuds
and
sets
in
this
c
nter
I
run
s
xc
ess
material
from
underneath
s
(;d
Lisa
F
/
‘,1
/
cc
36
User
s
(,mde
!,isa
Bridging
stitch
(09)
Blind
hem
(08)
‘nip
(in
prccser
I
st
I)
for
blind
hem
]
It
)i
ci
tie
i
nate
na
I
a
S
sti
iw
n
Make
sure
that
the
told
line
of
the
fabric
rides
in
the
groove
under
the
right
side
of
the
presser
h
lilt
Practice
isi
rig
a
scrap
(if
ma
lena
I
and
ti
inipare
with
the
illustrations
1.
It
the
stitch
(iOes
nut
catc
ii
tile
folded
edge.
i
crease
tue
stitch
width
(+)
2.
lIthe
stitch
catc
iiec
too
11111(11
of
the
h
,ii.
decrease
tile
stitch
vititii
I
—
I.
1
he
bridging
suit
Ii
is
suitable
II
Iifliflt
t
WI)
pieces
f
fabric
with
It
tlilc
I
e(lts
ti
It
fiSt
itd
edges
i
eatliur
anti
inl
aft-
lined
by
butting
tile
edges
Jose
tti
each
(1111cr
using
tilt
bridging
stitch
Ais
Use
U
iOifl
lace
and
rthhon
E)astic
shirring
1
he
I
ridgi
rig
slit
ch
is
a
1st)
useful
It
)r
gathered
elastic
slurring
t
se
the
buttonhole
toot
C.
tighten
the
Upper
thread
tension.
(In
the
\vrong
side
1)1
VOlif
fabric
dracs
hncs
1(1
sew
the
stitchcci
n
)\vs
straight.
temen)her
t
hat
the
elastic
s
ill
aRc
aVs
he
stitched
dl
)(ible
s
1
LI
kc
tli
is
mb
act
olint wficn
c
aictilating
how
iiiticli
Vt
UI
vill need
I
la
cc
tile
sh
irri
ng elastic
(elastic
thread)
around
time
linger
oh
thc
presser
foot
C
Sew
I
ron
i
tile
wrl
ng
side
(
iver
f
51111
lengths
of
the
elastic
following
n
ia
rked
Ii
ne.
t
a
iii
cr
tile
sh
I
rn
rig
I
pulling
the
eiastu.
timreacls
3.
I
Of
an
invisible
hem
lit
needle
silt
ttid
catch
I
sintIc
thi
id
of
the
or
,c
(14it/e
Lioi
I
F
P
ii
‘I
1)
VV
1?
(‘cer
c
Guide
lisa
Overcast
stitch
(A).
ma
lw
used
to
sev
light
and
tnediiiiii
non—streic
h
Iahri
iiid
light
stret(
h
lahrie.
Snap
on
presser
h
n
t
Overlock
(B)
js
(
liiefh
used
for
sewing
hea
v
strek
h
fabric
Snap
on
presser
foot
H
Presser
footj
is
also
used
to
o\
erfoc
k
and
oc
ereast uianv
chile
rent
I
a
h
ries
s
it
h
t
he
ec
e
t
h
m
cii
—
heas
firm
lahrk
s
lie
pin
cm
the
presser
loot
should
follow
the edge
of
the
fabric
and
will
pre’
(ml
the
labrk
from
piickerini.
“titc
hi
with
uirii
\hien
sini.
slit
1
li
w
idthi
I
S
or
kwver.
use
presser
knit
A.
Applique
I
se
pr
sser
k
B
it
H.
1.
Se
the heirk
n
mi
applique
Stiti
hi
:
around
a
binding
at
the
edge.
or
h
ir
hand
in
k
ipplicjuie
2.
the
satin
Stit(
Ii
set
tO
st
it(
ii
‘s
idth
2
iiiiii
‘es\
fsc
autiful
appliques
I
use
or
pin
applique
in
plne
and
satin
stitc
Ii
round
the
out
side
edges
1.
Seleet
NORM,
sew
(lie
I
irt
row
of
stik
lies
.is
long
as
‘you
need
to
io.r
‘onir
tear
or worn
spot
2.
Ii
mcii
the
os
erse
button
q
the
ina,
lime
i.iintinues
uw
ing
the
n.’miiainmng
s(jtc
hie
at
the
same
lengt
Ii
and
fastens
the
thread
3.
hunch
STOP.
‘dove
the
fabric
that
the
needle
is
right
os
er
the
last
stit
ii
Repeat
as
many
till
les
as
voi
need
to
ccw
er
the
hide
See
Sat
in
taper
and
darning
st
1k
hes page
26
Automatic
taper
stitch
(26)
‘I
‘
tapered
tm
sUt
h
iS
tapered
zigzag
w
uk
Ii
makes
it
suitable
ii r
sewing
ii1oniigranm
and
ot
11cr
ci
nlic’hlmslciiiunts
t
e
pi’cer
foot
H
1.
‘i’ram.’e
tile no
inogram
on the
tahoe
and
sew
over
the
lines.
2.
011(11
FITNC
to
NORM
position
and
sc’lect
V
3.
Sew
lint
1
the
desired
length
is
reac
Iced.
4.
‘I
otic
ii
the
res
erse
hot
kin
to
taper
the
end
See
“Satin
taper
and
darning
stitc
los
page
2k
Seam
and
overcast
(05,
06)
S
niie
st
itehes
c
au
be
used
[or
seaming
and veruasling directly
mm
die
edge
s
here
a
S
mlimii
I
i)
seam
is
allowed
Place
the
labrie
o
that
the inside
right
‘‘0
ie
the
presser
loot
follows
the
edge
d
the fabrk
Mending
and
Darning
stitch
(27)
r’
pp
jI
isaperle
t
stith
br
mending
and
r
I
1i:
darning
I
sc’
presser
liii
it
A
—.
}
!ii
Lj
A
B
lip—
•
J.
0
z
00
-
.
-
“.?-‘
llier
s
(;uide
!.m.cu
4/
4()
I
‘cer
S
Guide
1.15(1

Other Husqvarna Sewing Machine manuals

Husqvarna Platinum 730 User manual

Husqvarna

Husqvarna Platinum 730 User manual

Husqvarna VIKING Designer EPIC User manual

Husqvarna

Husqvarna VIKING Designer EPIC User manual

Husqvarna VIKING 350 User manual

Husqvarna

Husqvarna VIKING 350 User manual

Husqvarna Viking Epic 3 User manual

Husqvarna

Husqvarna Viking Epic 3 User manual

Husqvarna 555 User manual

Husqvarna

Husqvarna 555 User manual

Husqvarna Viking Epic 3 User manual

Husqvarna

Husqvarna Viking Epic 3 User manual

Husqvarna Viking Amber Air S 400 User manual

Husqvarna

Husqvarna Viking Amber Air S 400 User manual

Husqvarna Viking Platinum MN 1000 User manual

Husqvarna

Husqvarna Viking Platinum MN 1000 User manual

Husqvarna Viking Tribute 150C User manual

Husqvarna

Husqvarna Viking Tribute 150C User manual

Husqvarna HUSKYLOCK 900 User manual

Husqvarna

Husqvarna HUSKYLOCK 900 User manual

Husqvarna HUSKYLOCK 1002 User manual

Husqvarna

Husqvarna HUSKYLOCK 1002 User manual

Husqvarna V. S. Manual

Husqvarna

Husqvarna V. S. Manual

Husqvarna VIKING Designer Jade 20 User manual

Husqvarna

Husqvarna VIKING Designer Jade 20 User manual

Husqvarna E10 User manual

Husqvarna

Husqvarna E10 User manual

Husqvarna Eden Rose 250M LIMITED EDITION User manual

Husqvarna

Husqvarna Eden Rose 250M LIMITED EDITION User manual

Husqvarna Saphire Series User manual

Husqvarna

Husqvarna Saphire Series User manual

Husqvarna Sapphire 960Q User manual

Husqvarna

Husqvarna Sapphire 960Q User manual

Husqvarna Prisma 980 User manual

Husqvarna

Husqvarna Prisma 980 User manual

Husqvarna Designer Diamond User manual

Husqvarna

Husqvarna Designer Diamond User manual

Husqvarna Prisma 990 User manual

Husqvarna

Husqvarna Prisma 990 User manual

Husqvarna Viking Designer Sapphire 85 User manual

Husqvarna

Husqvarna Viking Designer Sapphire 85 User manual

Husqvarna VIKING Viva User manual

Husqvarna

Husqvarna VIKING Viva User manual
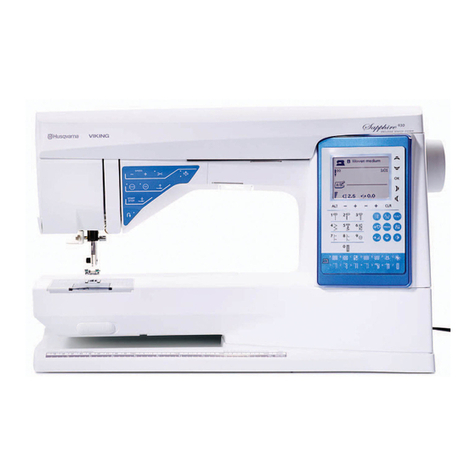
Husqvarna 3240 Reference guide

Husqvarna

Husqvarna 3240 Reference guide

Husqvarna Viking 990 User manual

Husqvarna

Husqvarna Viking 990 User manual

Popular Sewing Machine manuals by other brands

Easy@Home MD 17922 user manual

Easy@Home

Easy@Home MD 17922 user manual

EUROPRO 534DX instruction manual

EUROPRO

EUROPRO 534DX instruction manual

Kauo Heng KH-313 SERIES Operation manual

Kauo Heng

Kauo Heng KH-313 SERIES Operation manual

SunStar KM-235A user manual

SunStar

SunStar KM-235A user manual

Pfaff Expression 3.0 Instruction book

Pfaff

Pfaff Expression 3.0 Instruction book

Duerkopp Adler 524 instruction manual

Duerkopp Adler

Duerkopp Adler 524 instruction manual

Pfaff 84 Instruction book

Pfaff

Pfaff 84 Instruction book

Janome 3434D instruction manual

Janome

Janome 3434D instruction manual

Pfaff hobby GrandQuilter 1200 manual

Pfaff

Pfaff hobby GrandQuilter 1200 manual

EUROPRO 473C instruction manual

EUROPRO

EUROPRO 473C instruction manual

Janome Skyline S5 Service manual

Janome

Janome Skyline S5 Service manual

Singer 451K2 manual

Singer

Singer 451K2 manual

Unicorn LS2-H520 Operation manual

Unicorn

Unicorn LS2-H520 Operation manual

Brother BES-1240BC instruction manual

Brother

Brother BES-1240BC instruction manual

Dürkopp Adler D869 e-con Service instructions

Dürkopp Adler

Dürkopp Adler D869 e-con Service instructions

JUKI Union Special 36200 CLASS Series Adjusting instructions and illustrated parts list

JUKI

JUKI Union Special 36200 CLASS Series Adjusting instructions and illustrated parts list

JUKI HZL-E71 instruction manual

JUKI

JUKI HZL-E71 instruction manual

HappyJapan HCH-701-30 Maintenance manual

HappyJapan

HappyJapan HCH-701-30 Maintenance manual

manuals.online logo
manuals.online logoBrands
  • About & Mission
  • Contact us
  • Privacy Policy
  • Terms and Conditions

Copyright 2025 Manuals.Online. All Rights Reserved.