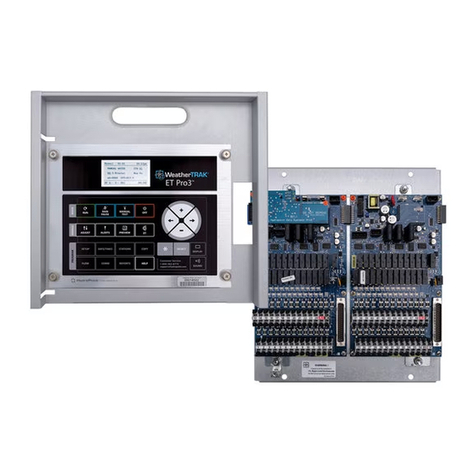
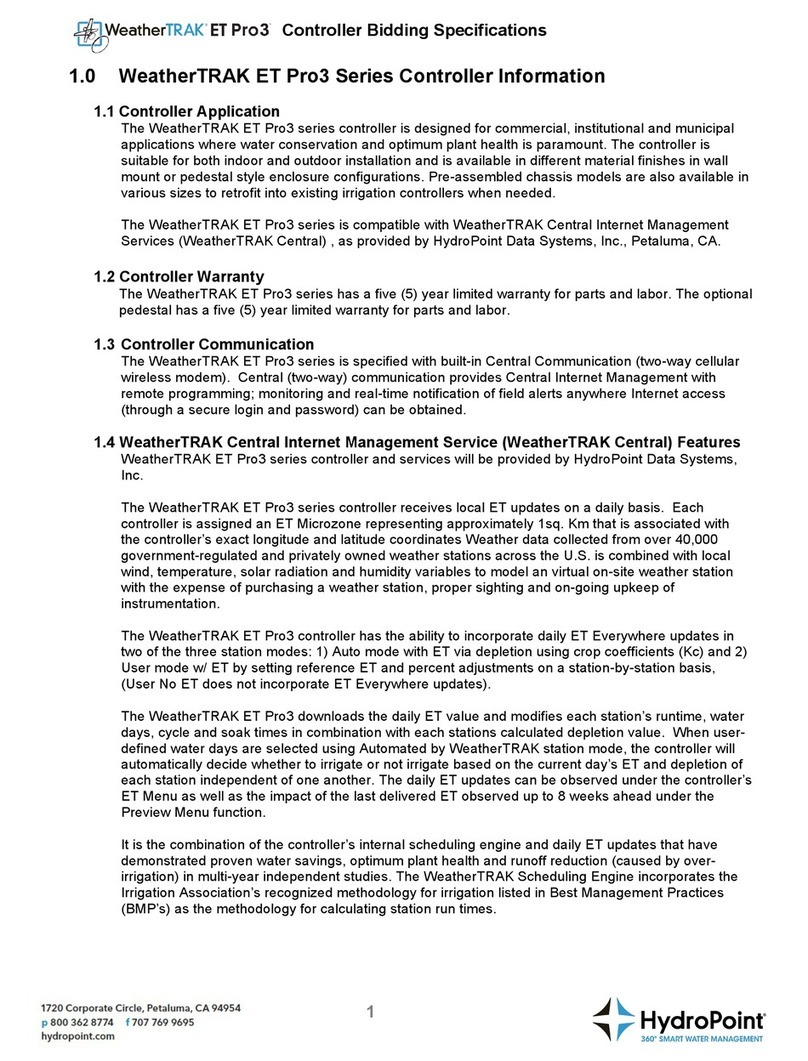
HydroPoint WeatherTRAK ET Pro3 User manual

Questions? Contact Customer Support at
WeatherTRAK ET Pro3 to OptiFlow XR
Upgrade Installation Guide
Included in Guide:
•Installation Procedure
•Controller Activation

Contents
CONTENTS .................................................................................................................................................. 1
GETTING STARTED............................................................................................................................................ 1
OVERVIEW OF THE STEPS FOR UPGRADING FROM ET PRO3TO OPTIFLOW XR.................................................... 1
INCLUDED EQUIPMENT.................................................................................................................................. 2
EXISTING EQUIPMENT THAT WILL BE USED....................................................................................................... 2
T
OOLS
N
EEDED
............................................................................................................................................. 2
CENTRAL INTERNET MANAGEMENT SERVICE (CIM).......................................................................................... 2
GETTING STARTED WITH THE UPGRADE .......................................................................................................... 2
U
PGRADE
I
NSTRUCTIONS
..................................................................................................................................... 3
S
TEP
1
-
R
EMOVE THE
C
OMMAND
M
ODULE AND
D
ISCONNECT
P
OWER
...................................................................... 3
S
TEP
2
-
D
ISCONNECT
A
NTENNA AND
R
IBBON
C
ABLE
............................................................................................. 4
S
TEP
3
-
T
RANSFER THE
S
TATION
K
EYS
.................................................................................................................. 4
STEP 4-DISCONNECT THE RAIN SENSOR............................................................................................................ 5
STEP 5-LABEL AND DISCONNECT THE VALVE WIRES ........................................................................................... 5
S
TEP
6
-
R
EMOVE THE
W
EATHER
TRAK
ET
P
RO
3
M
INI
-C
HASSIS
................................................................................ 5
STEP 7-INSTALL THE NEW WEATHERTRAK OPTIFLOW XR MINI-CHASSIS ............................................................. 6
STEP 8-RECONNECT THE VALVE WIRES AND RAIN SENSOR.................................................................................. 7
STEP 9-INSTALL THE WEATHERTRAK OPTIFLOW XR COMMAND MODULE ........................................................... 7
STEP 10 -UPDATE THE DATE AND TIME.............................................................................................................. 8
SETTING THE DATE ....................................................................................................................................... 8
SETTING THE TIME AND TIME ZONE................................................................................................................ 8
ENABLING AUTOMATIC DAYLIGHT SAVINGS TIME ............................................................................................ 8
STEP 11 -ACTIVATE CONTROLLER WITH HYDROPOINT ......................................................................................... 9
STEP 12 –TESTING THE NEW WEATHERTRAK OPTIFLOW XR CONTROLLER ........................................................... 9
VALVE TEST ................................................................................................................................................. 9
CONTROLLER CONFIGURATION CHECK......................................................................................................... 10
STEP 13 -UPDATING TO OPTIFLOW ................................................................................................................. 10
STEP 14 –PROGRAM OPTIFLOW...................................................................................................................... 10
C
HECKLISTS
.................................................................................................................................................... 11
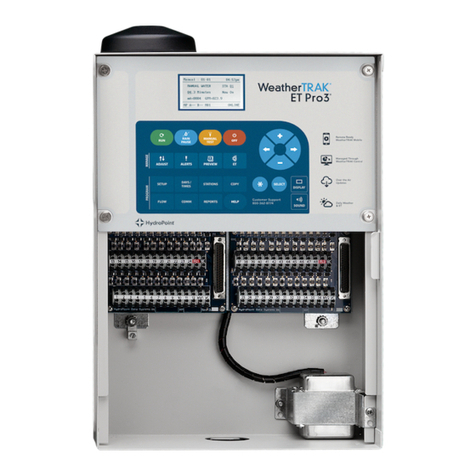
W
EATHER
TRAK
ET
P
RO
3
C
HECKLIST
............................................................................................................. 11
W
EATHER
TRAK
O
PTI
F
LOW
XR
C
HECKLIST
...................................................................................................... 11

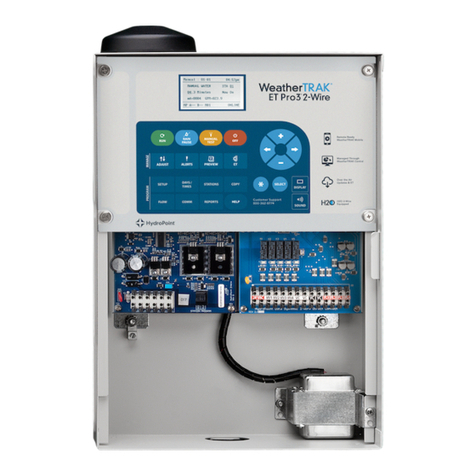
WeatherTRAK Pro3 to WeatherTRAK OptiFlow XR
Upgrade Installation Instructions
1
©2018 HydroPoint Data Systems, Inc. All Rights Reserved 800.362.8774 • hydropoint.com
Getting Started
Thank you for purchasing the WeatherTRAK OptiFlow XR upgrade kit.
OptiFlow enables all of your controllers to share information in the cloud using WeatherTRAK’s
built-in cellular radios. Each controller is then given daily instructions for optimizing how, when,
and where watering takes place inside your water windows, based on your schedules and, of
course, the weather. Using your site’s maximum water flow potential and keeping things
running as close to capacity as possible, water is delivered where it’s needed within the time
available. Users define their own water windows, station priorities, and flow hydraulics, and
then WeatherTRAK OptiFlow does the rest. If your system has a compatible flow sensor, faults
and issues are detected in real time to minimize site disruption, expense, and waste.
Overview of the Steps for Upgrading from ET Pro3 to OptiFlow XR
To upgrade your controller, you need to perform the following steps:
Step 1 -
Remove the command module and disconnect the power from the mini-chassis.
Step 2 -
Disconnect the ribbon cable and the antenna.
Step 3 -
Transfer the station keys from the Pro3 to the OptiFlow XR.
Step 4 -
Disconnect the rain sensor.
Step 5 -
Label and disconnect the valve wires.
Step 6 -
Remove the ET Pro3 mini-chassis.
Step 7 -
Install the OptiFlow XR mini-chassis.
Step 8 -
Reconnect the valve wires and rain sensor.
Step 9 -
Install the OptiFlow XR command module.
Step 10 -
Update the date and time.
Step 11 -
Activate controller with HydroPoint.
Step 12 -
Test the new OptiFlow XR Controller.
Step 13
- Update to OptiFlow.
Step 14
- Log-into WeatherTRAK.net and program WeatherTRAK OptiFlow.

WeatherTRAK Pro3 to WeatherTRAK OptiFlow XR
Upgrade Installation Instructions
2
©2018 HydroPoint Data Systems, Inc. All Rights Reserved 800.362.8774 • hydropoint.com
Included Equipment
•
Pro3 commandmodule
•Pro3 mini-chassis
•
3G modem
•
Ribbon cable
Existing Equipment that will be Used
•
Enclosure/pedestal
•Rain/freeze sensor (if applicable)
•Transformer
•
Antenna
•Station keys
Tools Needed
•7/16” nut driver
•
Flatbladescrewdriver
•Philips screwdriver
•
Pen and notepad to record controller serial numbers and SIM numbers
Central Internet Management Service (CIM)
The upgrade requires an active CIM subscription service. The existing subscription will be
trans
ferred to the upgraded controller with the same end-of-service date.
If you do not have an
active subscription, contact HydroPoint Customer Support at 800.362.8774.
Getting Started with the Upgrade
Be sure to follow the step-by-step procedure when performing your up
grade.
UsetheWeatherTRAK
ETPro3 and WeatherTRAKOptiFlow XR upgradechecklist
to
ensure all steps are completed for the
equipment and softwaretransfer.

WeatherTRAK Pro3 to WeatherTRAK OptiFlow XR
Upgrade Installation Instructions
3
©2018 HydroPoint Data Systems, Inc. All Rights Reserved 800.362.8774 • hydropoint.com
Upgrade Instructions
Step 1 - Remove the Command Module and Disconnect Power
Loosen the 4 corner pop-up screws. Lift the command module then turn it over.
Carefully unplug the power cable from the mini-chassis.

WeatherTRAK Pro3 to WeatherTRAK OptiFlow XR
Upgrade Installation Instructions
4
©2018 HydroPoint Data Systems, Inc. All Rights Reserved 800.362.8774 • hydropoint.com
Step 2 - Disconnect Antenna and Ribbon Cable
Disconnect the antenna cable from the back of the command module.
Disconnect the ribbon cable from the back of the command module.
Remove the command module and set it aside.
Step 3 - Transfer the Station Keys
It is important to take the station keys from the ET Pro3 and move
them to the OptiFlow XR. The controller will not recognize the
station valves unless the station keys have been transferred. A
hardware alert will be received if this is not done.
Locate the station keys on the ET Pro3 and remove them.
Plug the station keys from the ET Pro3 into the ports on the
OptiFlow XR mini-chassis. The order is not important; however,
it is important to start with the left-most port.

WeatherTRAK Pro3 to WeatherTRAK OptiFlow XR
Upgrade Installation Instructions
5
©2018 HydroPoint Data Systems, Inc. All Rights Reserved 800.362.8774 • hydropoint.com
Step 4 - Disconnect the Rain Sensor
If a rain sensor is connected, disconnect it. You will be reconnecting the rain sensor to the new
WeatherTRAK OptiFlow XR mini-chassis in step 9.
Step 5 - Label and Disconnect the Valve Wires
If your valve wires are not labeled, you will need to label them. A wire-marker book or
masking tape and a permanent marker work well for labeling.
Disconnect the valve wires from the mini-chassis board.
Step 6 - Remove the WeatherTRAK ET Pro3 Mini-Chassis
Verify that the power cable has been unplugged from the mini-chassis board.
Remove the grounding wire from the grounding lug.
Remove the grounding lug by unscrewing the nut that is holding it to the mounting bolt
using the 7/16” nut driver.
Remove the nuts that are on the remaining mounting bolts using the 7/16” nut driver.
Set aside the grounding lug and nuts. You will be using them when installing the OptiFlow
XR mini-chassis.
Remove the mini-chassis board and set it aside.

WeatherTRAK Pro3 to WeatherTRAK OptiFlow XR
Upgrade Installation Instructions
6
©2018 HydroPoint Data Systems, Inc. All Rights Reserved 800.362.8774 • hydropoint.com
Step 7 - Install the new WeatherTRAK OptiFlow XR Mini-Chassis
Route the power connector behind the mini-chassis.
Align the new OptiFlow XR mini-chassis board over the mounting bolts and make sure it is
properly seated.
Position the grounding lug on one of the lower corners.
Tighten the nuts on the grounding lug and the remaining 3 nuts, using the 7/16” nut driver.
Connect the grounding wire to the grounding lug.

WeatherTRAK Pro3 to WeatherTRAK OptiFlow XR
Upgrade Installation Instructions
7
©2018 HydroPoint Data Systems, Inc. All Rights Reserved 800.362.8774 • hydropoint.com
Step 8 - Reconnect the Valve Wires and Rain Sensor
Reconnect the valve wires to their appropriate outputs.
Reconnect the rain sensor if applicable.
Step 9 - Install the WeatherTRAK OptiFlow XR Command Module
Connect the antenna cable to the back of the command module.
Insert the OptiFlow key.
Connect the ribbon cable from the back of the command module to the mini-chassis.
Connect the power cord to the mini-chassis.
Note
: Make sure the ribbon cable and the antenna are undamaged and properly connected.
Place the OptiFlow XR command module over the 4 pre-drilled screw holes at the top of
the cabinet.
Hand tighten the four corner pop-up screws. Be careful not to overtighten.
OptiFlow XR Mini-Chassis OptiFlow XR Command Module

WeatherTRAK Pro3 to WeatherTRAK OptiFlow XR
Upgrade Installation Instructions
8
©2018 HydroPoint Data Systems, Inc. All Rights Reserved 800.362.8774 • hydropoint.com
Step 10 - Update the Date and Time
Setting the Date
Press the
SETUP
button.
Press the button. The
DATE (YEAR)
screen displays.
Press the +
or
−
button to set the current year.
Press the button. The DATE (MONTH) screen displays.
Press the +
or
−
button to set the current month.
Press the button. The DATE (DAY) screen displays.
Press the +
or
−button to set the current day.
Setting the Time and Time Zone
Press the
SETUP
button.
Press the button until the TIME (HOUR) screen displays.
Press the +
or
−
button to set the current hour.
Press the button. The TIME (MINUTE) screen displays.
Press +
or
−
to set the current minute.
Press the button. The TIME ZONE screen displays.
Press +
or
−to set the desired time zone.
Enabling Automatic Daylight Savings Time
Your controller can be set to automatically adjust to daylight savings time.
Press the
SETUP
button.
Press the button until the AUTO DAYLIGHT SAVINGS screen displays.
Perform one of the following options:
To set the controller to automatically adjust to daylight savings time, press
+
or
-
to
select
Yes
.
To set the controller so it does NOT automatically adjust to daylight savings time, press
+
or
−to select
No
.

WeatherTRAK Pro3 to WeatherTRAK OptiFlow XR
Upgrade Installation Instructions
9
©2018 HydroPoint Data Systems, Inc. All Rights Reserved 800.362.8774 • hydropoint.com
Step 11 - Activate Controller with HydroPoint
Before calling Customer Service to activate the controller, you will need to know the serial
number, SIM card number, and location of the controller. You can record this information on
the checklist page at the end of this document.
Write down the serial number from BOTH controllers. The serial number can be found on a
sticker attached to the front lower corner of the command module.
Write down the SIM number from the new controller. To find the SIM number:
Press the
HELP
button.
Press the button until the
SIM CARD SERIAL NUMBER
screen displays.
Make note of the location of the controller.
Call customer service 1-800-362-8774 to activate. When calling, let the representative
service tech know you are upgrading a controller and will be transferring data. When
activating, all programming and report data will be transferred from the ET Pro2 SWM
controller to the ET Pro3 controller.
Step 12 – Testing the new WeatherTRAK OptiFlow XR Controller
After the controller has been activated, you will need to test the system to ensure that the new
WeatherTRAK controller is operating properly. You will need to perform a valve test and a
controller configuration check.
Valve Test
To ensure all field wiring is properly connected and all stations are operating properly, conduct
a field wire integrity test.
Press the
MANUAL TEST
button
Press the −button until the
Valve Test
screen displays
Press the button until the
RUN VALVE TEST
screen displays.
Press the
SELECT
button, then press the *button to start the test. It will take about 15
seconds to verify continuity to all stations and the master valve.
If any field wiring issues exist, they will be identified as a “Fault”. A valve fault could be “SH”
(valve short) from a failing solenoid, “OC “ (over current) from valves drawing more than 1000
mA or “NC” (valve no-connect or open), reflecting a broken wire or wire that is not making
good contact in the corresponding station terminal.

WeatherTRAK Pro3 to WeatherTRAK OptiFlow XR
Upgrade Installation Instructions
10
©2018 HydroPoint Data Systems, Inc. All Rights Reserved 800.362.8774 • hydropoint.com
Controller Configuration Check
After installing the WeatherTRAK ET Pro3, you will need to check your controller configuration
to make sure that all the stations are being read by the controller. To check configuration:
Press the
SETUP
button.
Press the * button. The following screen will display something similar:
You want to check to see that the number of Found and Active stations matches the setting for
Max Active stations. SETUP screen 01 is explained as follows:
Config:
Set by WeatherTRAK at the time of manufacture. This is the number of stations that the
controller is capable of managing.
Found:
The number of station outputs enabled on the terminal board via the station keys. If the
controller has been configured properly, this number should never be 0.
Active:
The maximum number of user defined active station that will be programmed.
Step 13 - Updating to OptiFlow
⚠Caution: Please verify with the owner or maintainer of the controller before performing the
OptiFlow updating process. Performing this step will DISABLE the ability to program from the
front panel.
Press the
HELP
button.
Press the button to advance to 3a.
Follow the on-screen prompts to make the upgrade to OptiFlow.
Step 14 – Program OptiFlow
Log into WeatherTRAK.net and program WeatherTRAK OptiFlow.
© Copyright 2018 HydroPoint Data Systems, Inc. All rights reserved. HydroPoint, WeatherTRAK, WaterCompass, and the
HydroPoint logo are registered trademarks and FlowLink and OptiFlow are trademarks of HydroPoint Data Systems, Inc. Other
trademarks may be held by their respective owners. Specifications, user interface, workflow, procedures, and content formats
subject to change without notice

WeatherTRAK Pro3 to WeatherTRAK OptiFlow XR
Upgrade Installation Instructions
11
©2018 HydroPoint Data Systems, Inc. All Rights Reserved 800.362.8774 • hydropoint.com
Checklists
WeatherTRAK ET Pro3 Checklist
Record controller serial number:_____________________________________________
Label station wires and remove
Remove station keys and set aside
Disconnect the rain sensor (if applicable)
Remove the WeatherTRAK ETPro3 hardware parts that are being replaced: mini-chassis,
command module, ribbon cable
Dispose of WeatherTRAK ET Pro3 parts in accordance with local E-waste laws
WeatherTRAK OptiFlow XR Checklist
Record controller serial number:_____________________________________________
Record SIM card number:___________________________________________________
Record location of controller:________________________________________________
Install the WeatherTRAK OptiFlow XR upgrade parts: mini-chassis, command module,
ribbon cable
Install station wires
Transfer station keys from WeatherTRAK ETPro3 to WeatherTRAK OptiFlow XR
Update current date and time on controller
Contact Customer Support at 800.362.8774 to activate the new WeatherTRAK ET OptiFlow
controller
Run valve test and do a controller configuration check to ensure the system is working
properly
Update to OptiFlow
Log into weathertrak.net and program WeatherTRAK OptiFlow
Other manuals for WeatherTRAK ET Pro3
1
Table of contents
Other HydroPoint Controllers manuals

HydroPoint
HydroPoint WeatherTRAK ET Pro2 User manual

HydroPoint
HydroPoint WeatherTRAK LC Controller User manual

HydroPoint
HydroPoint WeatherTRAK ET Pro2 SWM User manual

HydroPoint
HydroPoint WeatherTRAK 2-Wire User manual

HydroPoint
HydroPoint WeatherTRAK ET Pro3 User manual

HydroPoint
HydroPoint WeatherTRAK ET Pro3 2-Wire User manual

HydroPoint
HydroPoint WeatherTRAK Chassis 7 User manual