i-mate 810-F User manual
Copyright i
Copyright© 2009 i-mate™ All Rights Reserved.
No part of this manual, including the product and software described in it, may be reproduced,
transmitted, transcribed, stored in a retrieval system, or translated into any language in any
form, by any means, without prior written permission from i-mate.
i-mate provides this publication “as is” without warranty of any kind. This information could
include technical inaccuracies or typographical errors.
i-mate may make improvements and/or changes in the product. Information and specifications
contained in this document are subject to change at any time without notice. The information
contained in this document does not affect or change the product specifications or warranties.
i-mate is not liable for any damages resulting from the use of this product.
NOTE: Your device may be preset with a ROM Lock Code. If it is, then the number must be entered into the
device if you wish to perform a software upgrade. If a ROM Lock is present, then it will be printed on the
box, and we suggest that you affix the provided peel-off label here ROM Lock Code:
___________________________________________________________
Important Safety Information
Please read the following information carefully before you start using your device to avoid any
damages caused by improper usage:
·The device is partially charged when you take it out of the box.
·The battery should be charged for at least 8 hours before first use. Please use the charger supplied.
·Do not charge the battery with an unspecified AC Adapter, as this may cause damage to both the device and the battery.
·Make sure the SIM card clips correctly into the SIM socket.
·Do not open or tamper with the device cover.
·Do not use the device at gas or refuelling stations, chemical plants, and places containing explosives or
flammable materials.
·Do not strike, shake or heat the device in a way which may cause battery leakage or rupture and damage to the device.
·Use only the manufacturer-specified stylus. Do not scratch the screen with hard objects.
·Do not clean the screen with chemical detergents. Only use cloths specifically designed for cleaning liquid
displays to wipe the device screen.
·Do not expose the device to direct sunlight as this may cause damage to the device and battery.
·The device may interfere with the navigation and/or communication systems on aircraft.
·The use of the device on aircraft might be prohibited or allowed at certain controlled times specified by the airline.
·Use the hands-free mode if you need to use the telephony services while driving a vehicle; where this is permitted
by law.
Interference with Medical Equipment Functions
This product may cause medical equipment to malfunction. The use of this device is forbidden
in most hospitals and medical clinics.
Version 1.2.1

ii i-mate | User Manual
Trademark Information
© 2009 i-mate plc. All rights reserved. i-mate and the i-mate logo are either registered
trademarks or trademarks of i-mate plc or its affiliated companies.
The Bluetooth®
word mark and logos are registered trademarks owned by Bluetooth SIG, Inc.
and any use of such marks by i-mate is under license. Other trademarks and trade names are
those of their respective owners.
Microsoft®
, MS-DOS®
, Windows®
, Windows NT®
, Windows Vista™
, Windows Server®
, Windows
Mobile®
, ActiveSync®, Exchange®
, Excel®
, Internet Explorer®
, MSN®
, Outlook®
, PowerPoint®
,
Windows Live™and Word®
are either registered trademarks or trademarks of Microsoft
Corporation in the United States and/or other countries.

Contents
Table of Contents iii
Chapter 1
Getting to Know Your 810-F
2 Views of the Device
2 Get Started
4 Basic Skills
5 Using the Action button/ Navigation Pad
5 Software Indicators
7 Entering Information
7 Input Panel
8 Voice Recording
Chapter 2
Personalising Your Device
10 Today Screen
11 Navigation Bar and Toolbar
12 Start Menu
13 Ring tones and Notifications
15 General Settings
20 Streaming Player
Chapter 3
Using Your Phone
24 Make a Call
26 In-Call Options
27 Special Dialling Requirements
27 Additional Settings

iv i-mate | User Manual
Chapter 4
Getting Connected
30 Automatic Setup of Your Data Connections
30 Manual Setup of Your Data Connections
34 Beam
35 Bluetooth
38 Connect to a Wireless LAN
Chapter 5
Text Messaging
42 Text Messaging
45 MMS
55 Email
63 Windows Live
Chapter 6
Synchronizing
70 Synchronization
78 Install And Set Up The Synchronization Program
78 Windows Mobile Device Center
Chapter 7
Applications and Multimedia
82 Contacts
83 Games
88 Compass
89 G-Sensor

Table of Contents v
89 Adobe Reader
89 Internal Storage Card
90 Camera
93 Internet Explorer Mobile 6
96 File Explorer
97 Internet Sharing
98 JAVA
100 Notes
101 Pictures & Videos
105 Voice Speed Dial
107 Search
107 Tasks
109 Windows Live
110 Windows Media Player
115 Office Mobile
115 Word Mobile
117 Excel Mobile
119 PowerPoint Mobile
120 ONENOTE Mobile
122 Satellite Navigation System
Chapter 8
Maintaining Your Device
128 Maintain Your Device
128 Reset Your Device
129 Manage Your Program Memory

vi i-mate | User Manual
Appendix
132 Battery Information
133 PC System Requirements for ActiveSync 4.5
134 Regulatory Notices
135 Federal Communications Commission (FCC) Notice
138 RoHS Compliance
139 810-F Specifications

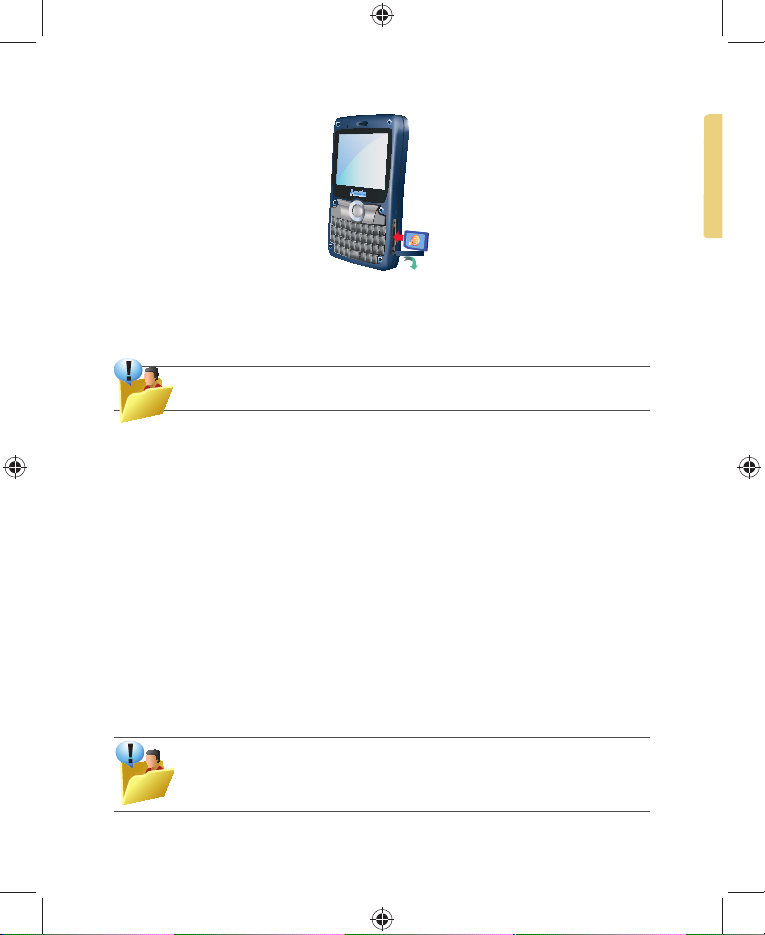
Views of the Device
Get Started
Install the SIM/USIM Card
Basic Skills
Using the Action button/ Navigation Pad
Software Indicators
Entering Information
Input Panel
Voice Recording
Getting to Know Your 810-F Chapter 1

2 i-mate | User Manual
VIEWS OF THE DEVICE
QWERTYUIOP
()
123
4
&
$
56
+
-
/
\
-
@
ASDFGHJKL
Caps
tab
del
sym
ZXCVBNM
;7
=
%
89
#
0
?
!
:
Fn
,
.
OK
Power
SIM Card Slot
Lanyard Retainer Stylus
External RF
Charging Contacts
Soft Reset
Camera
Loudspeaker
Microphone
Earpiece
Softkeys
QWERTY Keyboard
Call
Start
End
Navigation
Control
OK
GET STARTED
Insert the SIM card
Your device supports 3V and 1.8V SIM/USIM cards. Some legacy SIM/USIM cards will
not function within this device. Consult your service provider for a replacement SIM card if
necessary. There might be a fee for this service.
1. Make sure the device is turned off and lay the device flat on a surface.
2. Open the SIM cover by lifting the cover using the tabs at the top of the SIM cover.
3. Place the SIM card in the slot with the gold contacts facing down and gently press the card into place. You may
need to use the stylus to push the SIM card until it clicks in place.
NOTE: When the sim card is correctly inserted, the sim card will be fully inside the unit. If the card will not
fit, check that you are inserting the card as shown in the diagram.
4. Place the sim card slot cover in place and press down to seal.
To eject the card:
1. Use the stylus to gently push the SIM card.
2. When you hear a click, allow the sim card to come out and remove the SIM card from the device.
3. IMPORTANT NOTE : You must make sure the rubber cover is firmly in place to waterproof the device. If the device is
placed in water or a moist environment without the SIM card rubber seal in place, the repair will be outside warranty.
NOTE: Do not insert or eject the sim card while the device is on. If you insert or eject the sim card while the
device is on, the device will shut down.
Getting To Know Your 810-F 3
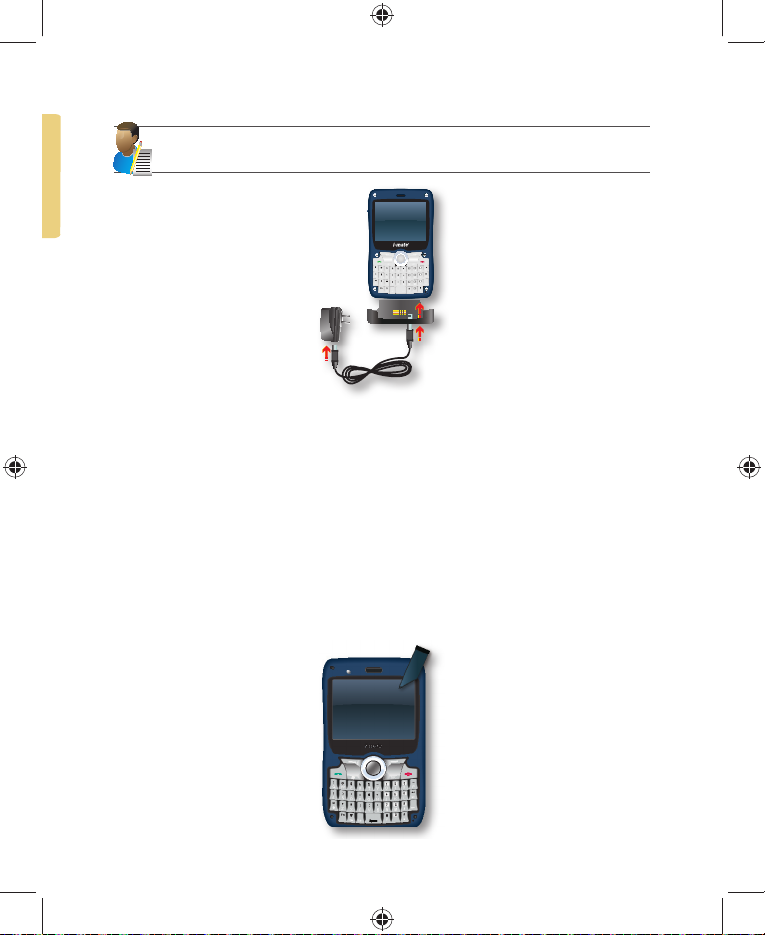
Charge the battery
The device is only partially charged when you take the device out of the box. The battery may
be charged while the phone is on or off.
Warning: Your new 810-F is shipped partially charged. Before you can use your device, you need to
charge the battery using the supplied AC Adapter and charging cradle
Turn on the device
To turn ON the device, press and hold the Power button until the device vibrates. When you
turn on the device for the first time, you will be asked to complete the screen calibration
process. Calibrating the device screen involves tapping the centre of a cross with the stylus
as the cross moves around the screen. This process ensures that when you tap the screen
with your stylus, the tapped item is activated accurately.
Should you wish to repeat the calibration process, you can do this at any time by following the
procedure within Chapter 2.
Connecting to AC Power and Charging the Battery
1. Fully charge the battery before starting to use your Device.
2. Fit the converter plug to the AC adapter. Connect the mini-USB end of the AC adapter to your device charging
cradle and the other end to a wall outlet.
·The charge indicator glows solid red when charging is in progress and changes to solid green when charging
is completed.
·Do not disconnect your Device from AC power until the battery is fully charged. This will take a couple of hours.
·When charging the battery for the very first time, charge it for at least 8 hours.
WARNING:For optimal performance of the lithium battery, take note of the following:
Do not charge the battery where the temperature is high (e.g. in direct sunlight).
If you will not use the product for a long period of time, be sure to fully charge the battery at least once
every two weeks.
4 i-mate | User Manual
NOTE: Your Device can also be charged when it is connected to a computer via the USB cable and
charging/sync cradle.
BASIC SKILLS
This chapter familiarizes you with the basic operations of your Device such as using the
stylus, navigation pad, Today screen, menus, and programs.
You will also know how to enter information and lock your Device.
·Using the Stylus
Use the stylus to navigate and select objects on the screen. Pull the stylus out of the slot. Store it in the slot when
not in use.
·Tap
Touch the screen once with the stylus to open items and select options.
·Drag
Hold the stylus on the screen and drag across the screen to select text and images. Drag in a list to select multiple
items. Drag on windows to scroll up and down.
·Tap and hold
Tap and hold the stylus on an item to see a list of actions available for that item.
On the shortcut menu that appears, tap the action you want to perform.
QWERTYUIOP
()
123
4
&
$
56
+
-
/
\
-
@
ASDFGHJKL
Caps
tab
del
sym
ZXCVBNM
;7
=
%
89
#
0
?
!
:
Fn
OK

Getting To Know Your 810-F 5
USING THE ACTION BUTTON/ NAVIGATION PAD
With the navigation pad, you can move up, down, left and right within a menu. This is
particularly useful for one-hand operation.
To move in a direction, simply push the button toward the corresponding direction. At the
centre of the navigation keys is the Action key to activate the selected item.
QWERTYUIOP
()
123
4
&
$
56
+
-
/
\
-
@
ASDFGHJKL
Caps
del
ZXCVBNM
;7
=
%
89
!
:
OK
Conserve Battery Power
To save battery power, your device will automatically go into Standby mode if not used for a
period of time. In Standby mode, the device can still receive calls and messages. To resume
from Standby mode, press the POWER button briefly to wake up the device.
To power OFF the device completely, press and hold the POWER button and the system will
prompt you to confirm powering off the device. In this OFF state, the device cannot receive
calls or messages. Alarms will not sound while the device is off.
SOFTWARE INDICATORS
Status indicators appear at the top of the screen and on the Today screen.
The following table lists common status indicators and their meanings.
Icon Description Icon Description
Battery level. Voice call in progress.
Battery is very low / Charge
battery soon. Calls are forwarded.
Battery charging. Call on hold.

6 i-mate | User Manual
Icon Description Icon Description
Battery fault. Missed call.
Speaker off. GPRS Connection in progress.
Speaker on. GPRS Connected.
New instant message. GPRS available, but not connected.
Ringer in vibration mode. / Indicates device is locked or unlocked.
New text message. Connected to the PC.
Voice mail notification Connected to the PC.
Synchronization error.
E-mail. Synchronization in progress.
There are more notifications.
Tap the icon to view all. Bluetooth.
No SIM card installed. Indicates Wi-Fi is turned on.
Roaming. Wi-Fi network in range.
Poor signal. Wi-Fi is connected.
GSM and 3G are turned off. 3G connected.
Signal strength. The number of
bars indicates the signal strength.
Enables you to see Help topics for a
program on your device.
3G in coverage. HSDPA connected.
Microphone muted. EDGE connected.
abc Hard keyboard state indicator
Getting To Know Your 810-F 7
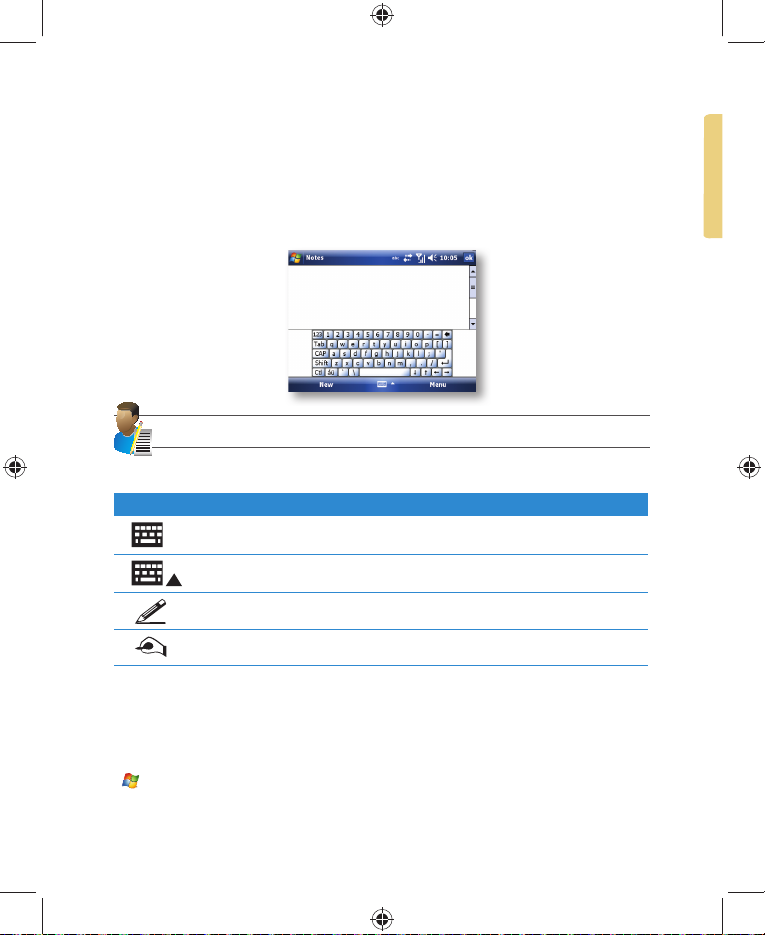
ENTERING INFORMATION
Input Panel
Input Panel provides access to the various available input methods for your device, including
Block Recognizer, Keyboard, Letter Recognizer and Transcriber. By default, the Input Panel
icon appears on the menu bar to indicate which input method is currently selected. The Input
Selector arrow (shown at the right side of the Input Panel icon) opens a list of available
input methods.
NOTE: Not supported on all language versions of the Windows Mobile operating system.
The following input methods are available when text entry is possible:
Icon Input method
Press to switch the keyboard input on or off.
Input Panel Icon / Press the Input Selector Arrow to change input methods.
"Letter Recogniser" or "Block Recogniser."
Transcriber.
For further details of Transcriber and other Input Panel methods, refer to Chapter 7, where the
Notes application is described.
Draw and Write on the Screen
With your device, you can draw directly on the screen or write on the screen and save notes
( Start > Programs > Notes) in your own handwriting. If you prefer to use handwriting or
frequently add drawings to your notes, you may find it helpful to set Writing as the default
input mode. If you prefer typed text, set Typing as the default input mode. To change the
8 i-mate | User Manual
default input mode in Notes, tap Menu > Options in the notes list and then, in the Default
mode box, tap either Writing or Typing, depending on your personal preferences. Tap OK.
NOTE: Not supported on all language versions of the Windows Mobile Operating System
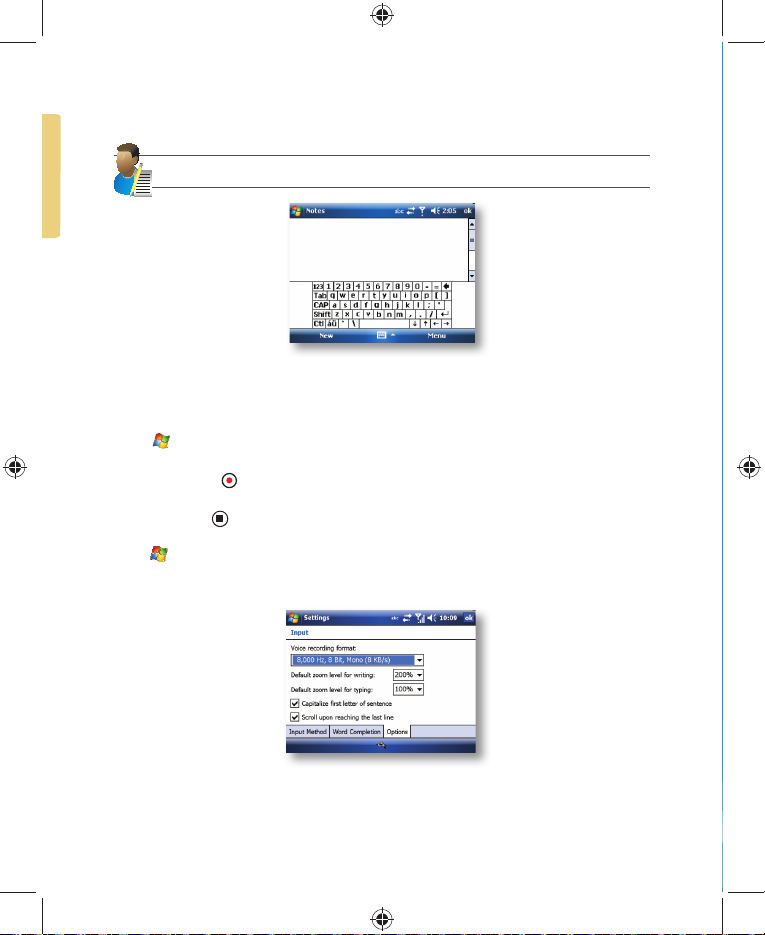
VOICE RECORDING
You can create a standalone voice recording or you can add a recording to a note.
Create a voice note
1. Tap Start > Programs > Notes.
2. If you do not see the Recording Toolbar, tap Menu > View Recording Toolbar.
3. Tap the record icon to begin recording.
4. Hold your device’s microphone near your mouth or other audio source.
5. Tap the stop icon when finished recording.
6. Change recording formats
7. Tap Start > Settings > Personal tab > Input.
8. In the voice recording format list, tap the format you want.
9. Tap OK.

Personalising Your Device Chapter 2
Navigation Bar and Toolbar
Start Menu
Ring tones and Notifications
General Settings
Streaming Player

10 i-mate | User Manual
TODAY SCREEN
The Today screen shows your upcoming appointments, active tasks, and information about
email messages.
Mobile operator
Operator
12345
6
7
8
9
12
10
11
No. Description No. Description
1. Tap to open the Start menu. 7.
Tap to open the Wireless Manager. If the
Wi-Fi on and Bluetooth on icons are
displayed, they are enabled.
2. Tap to view the connectivity status. 8. Tap to view owner information.
3. Indicates the radio signal strength. Tap
to configure the phone settings. 9. Tap to open the related messages, tasks
and appointments.
4. Tap to control device/ringer volume level. 10. Tap to open the calendar screen.
5. Indicates the battery status. Tap to open
the Power Settings screen. 11. Shows missed calls, voice messages, and
emails. Tap to go to Calendar.
6. Displays the current date and time. Tap
to set up date, time, alarm, etc. 12. Tap to open contacts for phone numbers, and
email addresses.
NOTE: *Not supported on all language versions of the Windows Mobile Operating System.
Customise background items on the Today Screen
1. Tap Start > Settings > Personal tab > Today.
2. On the Appearance tab, select the desired theme for the background of the Today screen. You can use one of your
own pictures as the background image on the Today screen by selecting the Use this picture as the background
check box and tap Browse to view a list of your picture files.
3. On the Items tab, select the items you want to appear on the Today screen. To change the order of items displayed
on the Today screen, tap the item and then tap Move Up or Move Down.
4. Tap OK.

Personalising Your Phone 11
NAVIGATION BAR AND TOOLBAR
The Navigation bar is located at the top of the screen. It displays the active program and
current time and allows you to switch programs and close screens.
The Navigation bar and Start menu:
Use the toolbar at the bottom of the screen to perform tasks in programs. The toolbar
includes a left soft key, a right soft key, and the Input panel button in between. The right soft
key is usually Menu while the left soft key varies with programs.
An example of the toolbar:

12 i-mate | User Manual
Enter Owner Information
Entering and displaying Owner Information on the Today Screen is recommended and allows
someone to return the device if lost.
1. Tap Start > Settings > Personal tab > Owner Information.
2. In the Identification tab, enter your personal information.
If owner information is displayed on the Today screen, you can open and edit the information
directly from it. Just tap that section of the screen.
START MENU
The Start menu, located at the top left corner of the Today screen, displays a list of programs.
It lets you close a screen and switch from one program to another. You can start a program by
scrolling through the programs list with the scroll wheel and then depressing the scroll wheel or
by tapping a program with the stylus.
You can choose which items appear in the Start menu:
1. Tap Start > Settings > Personal tab > Menus.
2. Select the check boxes of the items you want to appear in the Start menu. You can select up to seven items.
Create folders and shortcuts
You can also create new folders and shortcuts that appear on the Start menu.
1. Open ActiveSync on your PC (see Chapter 6) and click Explore.
2. In the Mobile Device window, double click Mobile Device > Windows > Start Menu, then create the folders
and shortcuts that you want. You will see the added items after you synchronize.

Personalising Your Phone 13
RING TONES AND NOTIFICATIONS
Change ring tones
You can change the way that you are notified of incoming calls. For example, you can choose to
be notified by a ring, a vibration, or a combination of both.
1. From the Phone screen, tap Menu > Options > Phone tab.
2. In the Ring tone list, select the desired option, and tap OK.
NOTE: To use custom *.wav, *.mid, *.mp3, or *.wma files as ring tones, use ActiveSync on your PC to
copy the file to the Windows/Rings folder on your device. Then, select the sound from the ring tone list.
For more information about copying files to your device, see ActiveSync Help on your PC. Some ringtones
have digital rights that prevent copying directly. Please consult with your mobile operator how to add copy-
protected ringtones to your device.
Assign ring tones to Contacts
It is also possible to assign a specific ring tone to a Contact:
1. Go to Start > Contacts and tap on the desired Contact.
2. Select Menu > Edit.
3. In the Ring tone field, select your desired ring tone.

14 i-mate | User Manual
NOTE: There are two types of Contact, Outlook Contacts and SIM Contacts. An Outlook Contact has the
more extensive list of fields, including the ringtone field.
Set an alarm
1. Tap Start > Settings > System tab > Clock & Alarms > Alarms tab.
2. Tap Description > and enter a name for the alarm.
3. Tap the day of the week for the alarm. You can select multiple days by tapping each desired day.
4. Tap the time to open a clock and set the time for the alarm.
5. Tap the alarm icon to specify the type of alarm you want. You can choose a flashing light, a single sound, a
repeating sound or vibration.
6. If you choose to play a sound, tap the list next to the Play sound check box and tap the sound you want.
Choose how to be notified about events or actions
1. Tap Start > Settings > Personal tab > Sounds & Notifications.
2. On the Sounds tab, choose how you want to be notified by selecting the appropriate check boxes.
3. On the Notifications tab, tap an event name and choose how you want to be notified by selecting the appropriate
check boxes. You can choose from several options, depending on the event, such as a special sound, a message
or a flashing light.
Other manuals for 810-F
1
Table of contents
Other i-mate Cell Phone manuals


