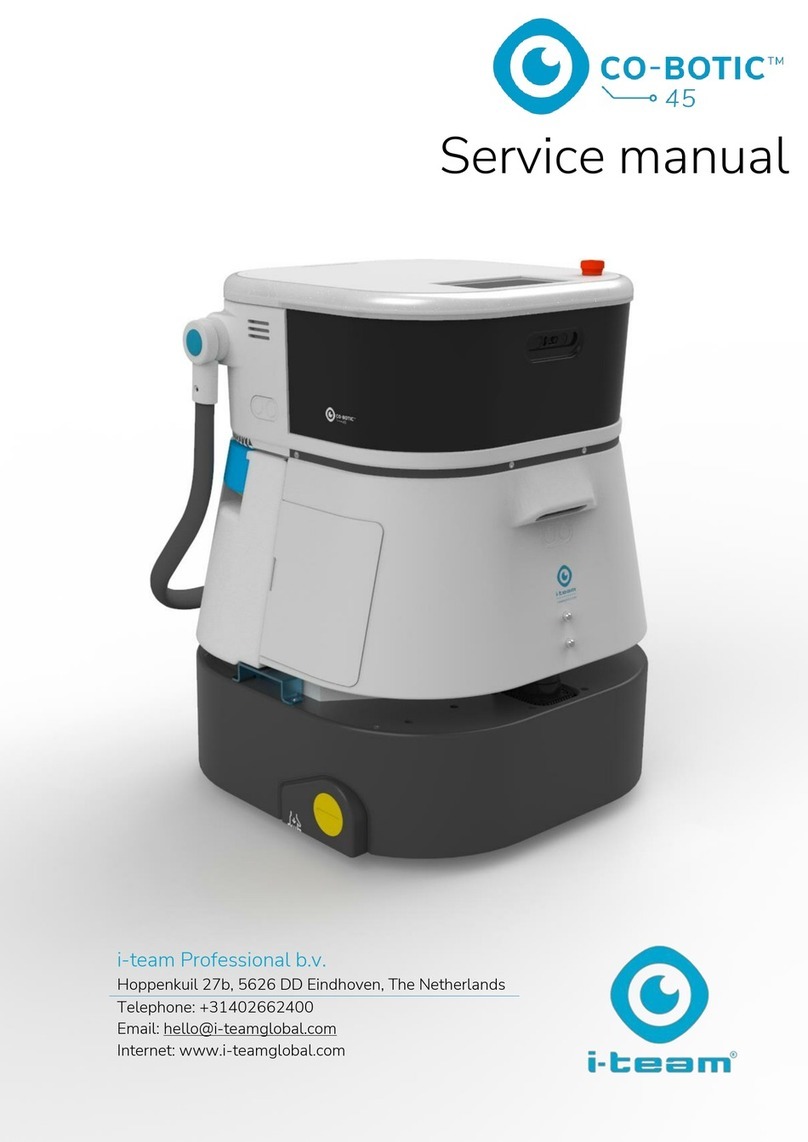
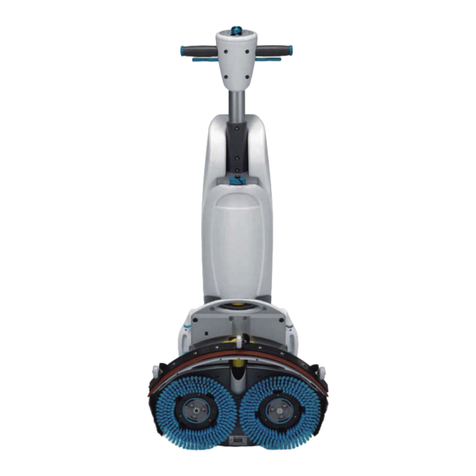
i-team co-botic 45 User manual

User manual
i-team Professional b.v.
Hoppenkuil 27b, 5626 DD Eindhoven, The Netherlands
Telephone: +31402662400
Email: hello@i-teamglobal.com
Internet: www.i-teamglobal.com

2
FASTER:
The co-botic™45 keeps on cleaning for up to 180 minutes. When the battery is
almost empty, the machine can return to its starting point before it runs out of
battery. When working with 2 batteries, the machine can operate 24/7. Bonus: it
can even be used overnight in dark areas without any trouble.
CLEANER:
The cleaner can create their own cleaning routes for the co-botic 45 via the co-
botic app. Alternatively, the co-botic 45 can program itself to perform the most
efficient cleaning job for the desired area. You can use it in all kinds of hard floors
rooms, glossy or rough floors. Also, if the path of the co-botic 45 is blocked it will
come back later to clean the missed spot.
GREENER:
The co-botic 45 is programmed to clean as precisely and efficiently as possible.
Every bit of energy is used for cleaning - nothing is wasted. While the co-botic 45
only consumes 240W in one hour, alternative robots can consume up to 1000W
per hour. Furthermore, it saves as much water as possible while still remaining the
i-mop known and proven cleaning performance.
SAFER:
Because the co-botic 45 is battery-powered, there are no cables involved. There is
also no need for a charging or refill station. This instantly reduces the risk of
tripping and falling hazards. Furthermore, the co-botic 45 will leave the cleaned
floor immediately dry to reduce slipping hazard. By setting virtual boundaries in
the app, the cleaner can rely on the co-botic 45 to stay within the designated
areas. Additionally, the automatic cliff detection feature prevents the co-bot from
falling off stairs or other elevations...
…and BETTER for everyone!
Combining the i-team co-botic performance with the trained human eye, the co-
botic 45 gets the most out of your cleaning operations and needs. The cleaner
and the co-bot make a perfect team, and will never miss a spot. They each execute
the cleaning they can do best, simultaneously and side-by-side.
Original user manual, written in the English Language
Future Cleaning Technologies B.V.
Hoppenkuil 27b, 5626 DD Eindhoven, The Netherlands
Telephone: +31402662400
Internet: www.i-teamglobal.com
Model: co-botic 45
Date: 05/2023
Product code:
Version: v.02
Model year: 2023

3
Preface
Thank you for choosing the co-boticTM 45, the heavy-duty auto scrubber that cleans faster,
cleaner, safer, greener, and is better for everyone. The co-botic 45 compact design allows you
to clean right to any edge, minimizing manual scrubbing. The battery-operated
co-botic 45 is equipped with a brush that provides a deep scrub and a great cleaning result.
The co-botic 45 significantly reduces the amount of chemicals needed, which leads to a
greener result. It also reduces the risk of slippery floors. The co-botic 45 is coated to
withstand abrasive chemicals. This means it can be used at facilities like swimming pools.
i-link®
You can connect your cleaning equipment to i-link, the cloud-based management system. The
co-botic 45 has a small integrated transmitter, already connected to the i-link cloud. This
transmitter will send usage information, battery levels, and even the location of the machine
to the i-link cloud every day. It’s also possible to set rules for notifications (e.g. reminders for
maintenance after X hours of use) and to troubleshoot an issue with the machine through
your i-partner.
Please read this manual carefully for important information and operating instructions before
using the co-botic 45. Save this manual for future reference. This co-botic 45 will provide
excellent performance. The best results are obtained when the co-botic 45 is:
•Regularly maintained per the co-botic 45 preventive maintenance instructions in this
manual.
•Operated with reasonable care and caution.
•Maintained with manufacturer-supplied parts.
When this manual refers to “the manufacturer”, this means Future Cleaning Technologies
B.V., an affiliate company of i-team in Eindhoven, The Netherlands. When this manual
mentions “the partner”, this refers to your local i-team resell and support service partner.
Purpose of the user manual
The purpose of the user manual is to provide the user with information in such a way that
during the lifespan of the co-botic 45, the machine is used correctly, efficiently and safely,
even in the event of reasonably foreseeable misuse, as described in section 1.2 of this
manual.
The user manual contains instructions regarding:
•personal operator safety;
•intended and non-intended use of the co-botic 45;
•instructions for daily use;
•maintenance instructions;
•storage conditions;
•disposal of the co-botic 45.

4
These instructions must be considered to avoid risks that could lead to physical and/or material
damage.
Target audience
This user manual is intended for operators of the co-boticTM 45 and their supervisors, as well
as partners and importers.
Operators of the co-botic 45
The co-botic 45 may only be operated by a person who has correctly read and understood
the instructions in this manual or is trained by an experienced operator who has read and
understood the instructions in this manual.
Reading guide
The following symbols and terms are used throughout this manual to alert the reader to
safety issues and important information:
Symbol
Term
Explanation
WARNING
Indicates a hazardous situation which, if the safety
instructions are not followed, can lead to injuries of
the operator or bystanders, light and/or moderate
damage to the product or the environment.
CAUTION
Indicates a hazardous situation which, if the safety
instructions are not followed, can lead to light and /
or moderate damage to the product or the
environment.
ATTENTION
Indicates a liability situation, where the
manufacturer or its partners and affiliates cannot be
held accountable for damages caused by non-
compliance.
BATTERIES
Indicates a battery-operated machine, batteries
must be charged according to the instructions in the
separate class I battery charger user manual.
Batteries must be disposed of according to your
local laws and regulations.
SLIPPERY
SURFACE
Indicates that the machine can cause floors to
become slippery. In the workplace, it is advised to
place slippery surface signs in these areas.

5
Content
Preface .............................................................................................................................................................................................. 3
Purpose of the user manual .....................................................................................................................................................3
Target audience.............................................................................................................................................................................4
Operators of the co-botic 45....................................................................................................................................................4
Reading guide ................................................................................................................................................................................4
Content .............................................................................................................................................................................................5
1Introduction ...........................................................................................................................................................................8
1.1 Intended use of the product .................................................................................................................................8
1.2 Non-intended use of the product.......................................................................................................................9
1.3 Lifespan........................................................................................................................................................................ 9
1.4 Modifications ........................................................................................................................................................... 10
1.5 Specifications .......................................................................................................................................................... 10
1.6 Warranty................................................................................................................................................................... 11
1.7 Identification ............................................................................................................................................................ 11
2Description ......................................................................................................................................................................... 12
2.1 Remote control....................................................................................................................................................... 13
2.2 Main menu of the display................................................................................................................................... 13
2.3 Main menu of the co-boticTM 45 app ............................................................................................................. 14
3Safety.................................................................................................................................................................................... 15
3.1 General safety instructions................................................................................................................................ 15
3.1.1 Sweep before scrub ........................................................................................................................................ 15
3.1.2 Brush condition ................................................................................................................................................. 15
3.1.3 Machine orientation ......................................................................................................................................... 15
3.1.4 Batteries............................................................................................................................................................... 15
3.2 Risks during operation......................................................................................................................................... 15
3.2.1 Radio interference ............................................................................................................................................ 15
3.2.2 Transparent materials .................................................................................................................................... 15
3.2.3 Mark the job site................................................................................................................................................ 16
3.3 Risks after operation ............................................................................................................................................ 16
3.3.1 Remove the battery ......................................................................................................................................... 16
3.3.2 Careful when storing ...................................................................................................................................... 16
4Transport and storage ................................................................................................................................................... 17
4.1 General ...................................................................................................................................................................... 17
4.2 Store position .......................................................................................................................................................... 17

6
4.3 Transport inside/outside ..................................................................................................................................... 17
4.4 Transport in a vehicle........................................................................................................................................... 18
5Assembly and installation............................................................................................................................................ 19
5.1 Unboxing................................................................................................................................................................... 19
5.2 Assembly.................................................................................................................................................................. 20
5.2.1 Charging the battery ....................................................................................................................................... 20
5.2.2 Inserting the battery ........................................................................................................................................ 20
5.2.3 Charging the remote control battery ........................................................................................................ 20
6Operation ............................................................................................................................................................................ 21
6.1 Before you start...................................................................................................................................................... 21
6.1.1 Filling the clean water tank .......................................................................................................................... 21
6.2 Setting up the co-botic 45 ................................................................................................................................. 22
6.2.1 Powering-on and unlocking the co-botic 45......................................................................................... 22
6.2.2 Connecting the co-botic 45 to the network........................................................................................... 23
6.2.3 Turning on and connecting the remote control. ................................................................................... 23
6.2.4 Downloading the co-botic app ................................................................................................................... 24
6.2.5 Selecting the co-botic 45 in the co-botic App ...................................................................................... 24
6.3 Remote cleaning .................................................................................................................................................... 25
6.4 Creating a map ....................................................................................................................................................... 25
6.4.1 Creating a map via the co-botic app (recommended)........................................................................ 25
6.4.2 Creating a map via the display.................................................................................................................... 26
6.4.3 Overview: Map editing menu....................................................................................................................... 26
6.4.4 Expanding or re-mapping a map................................................................................................................ 27
6.4.5 Changing the starting point on the map ................................................................................................. 27
6.4.6 Editing and optimizing a map ...................................................................................................................... 28
6.5 Creating a cleaning plan..................................................................................................................................... 29
6.5.1 Creating a basic cleaning plan .................................................................................................................... 29
6.5.2 Creating a cleaning plan manually............................................................................................................ 30
6.6 Creating a cleaning task ..................................................................................................................................... 31
6.7 Starting a cleaning task....................................................................................................................................... 32
6.7.1 Position localization......................................................................................................................................... 32
6.8 Cleaning .................................................................................................................................................................... 33
6.8.1 Removing the battery ..................................................................................................................................... 33
6.8.2 Cleaning the recovery tank, float and filter bag ................................................................................... 34
6.8.3 Cleaning the roller brush and squeegee blades.................................................................................. 36
7Maintenance ...................................................................................................................................................................... 37
7.1 Daily maintenance................................................................................................................................................. 37
7.2 Weekly maintenance ........................................................................................................................................... 37
7.3 Two-weekly maintenance ................................................................................................................................. 37
7.4 Monthly maintenance .......................................................................................................................................... 37
7.5 Squeegee replacement ....................................................................................................................................... 38

7
7.6 Roller brush replacement................................................................................................................................... 39
7.7 Recommended additional cleaning................................................................................................................ 40
7.8 Recommend service time ................................................................................................................................... 40
7.9 Accessories .............................................................................................................................................................. 40
8Troubleshooting............................................................................................................................................................... 41
8.1 Problems................................................................................................................................................................... 41
8.2 Fault problems........................................................................................................................................................ 42
8.3 Report a problem via i-link®.............................................................................................................................. 45
9Decommissioning and disposal ................................................................................................................................. 46
10 Attachments ...................................................................................................................................................................... 47
10.1 CE Certificate........................................................................................................................................................... 47
10.2 Specifications .......................................................................................................................................................... 48
10.3 The i-Story................................................................................................................................................................ 49

8
1Introduction
The co-boticTM 45 is a safe, user-friendly machine. This manual helps you to get started and
explains the operation and maintenance procedure. You will be pleasantly surprised by the
fast and effective use of the battery-operated co-botic 45. The battery used in the
co-botic 45 comes from the same family as the ones used in a variety of battery-powered
i-team products. The battery must be fully charged before use. Please see the user manual of
the class I battery charger for the correct procedure.
This manual is intended for those who work with the co-botic 45 and/or perform daily
maintenance. The manual must be read fully before starting to work with the machine. This
manual describes the correct method of use, safety measures, maintenance, and transport.
The manufacturer continuously improves all its products based on user experience and
feedback. Any deviations between the texts and/or images from the manual and your
co-botic 45 can therefore arise from the difference in model, or from possible changes due to
continuous development and innovation.
1.1 Intended use of the product
The co-botic 45 is a specialized machine for
scrubbing hard floor surfaces. It only needs
water as a cleaning agent, it doesn’t need a
water-based scrubbing detergent.
The co-botic 45 offers two cleaning solutions:
1. For regular areas such as an office or a
store.
2. For areas where the floor can become
greasy, such as a kitchen floor or the floor
of a workshop.
Switching from one solution to the other is a
matter of seconds.
Figure 1
The solution can cause floors to become slippery; it is advised to mark the floor of the job site
to warn people. (Please note: the wet floor sign is not part of the co-botic 45 system
delivery).

9
1.2 Non-intended use of the product
WARNING
Non-intended use can have consequences for the safety of operators and
bystanders and will void the warranty on the product.
•DO NOT use the co-boticTM 45 in areas above a sea level of 2000 m.
•DO NOT use or park this product in a pure-slope place with a slope angle greater than 10°.
•DO NOT use this product in an environment with a temperature higher than 40 °C and
lower than 0 °C.
•DO NOT wash or spray the co-botic 45 with water.
•DO NOT place any objects (including children and pets) on the static or moving co-botic 45
body.
•DO NOT use this product to clean
oany burning objects (such as burning cigarette butts),
oany hard objects,
oany sharp objects (such as decoration wastes, glass and nails).
•DO NOT use this product on
osoil surfaces,
ograsses,
oartificial turfs,
ocarpeted floors.
•DO NOT use this product in case of rough surface conditions, such as uneven ground or
ground with large potholes. Bypass these dangerous areas when planning a path.
•DO NOT deploy and use this product in dark and humid environments. Excessive humid
environments may cause damage to electronic circuits or electronic components in this
product.
•DO NOT approach the co-botic 45 suddenly or block the co-botic 45. Prevent both people
and pets from doing this to avoid collision and damage.
1.3 Lifespan
Each co-botic 45 is guaranteed to operate for at least 2000 hours. The wear on brushes and
squeegee heavily depends on the roughness of the surface. These parts need to be checked
regularly.
CAUTION
To ensure proper and safe operation throughout the lifespan of the
co-botic 45, the machine must be checked and serviced by an authorized i-team
partner every 500 hours.

10
1.4 Modifications
It is not permitted to make modifications to the design of the co-boticTM 45 without
consultation and permission from the manufacturer. Doing so affects the warranty, see
section 1.6 of this manual.
1.5 Specifications
Figure 2
Cleaning efficiency:
Roller Scrubber/dryer ~ 1500 –2500 m²
(Single Operation Cycle)
Cleaning pressure:
2-6 kg
Clean water tank capacity:
10 L
Recovery tank:
10 L
Battery Life:
~ 2 –3 hours (1x i-power 20)
Charging time:
~ 2 hours (i-charge 9c)
Sensors:
3D LiDAR (x1)
2D LiDAR (x1)
Cliff Detection Sensor (x1)
Ultrasonic Sensors (x4)
Display screen:
7 inches
Operational speed:
0.8 m/s (adjustable)
Noise level:
68/72/75 dB(A)
Weight:
35 kg
Dimensions (L x W x H):
500 x 504 x 629 mm
Brush speed:
300 –900 RPM
Others:
Remote control

11
Auto route planner
Co-botic management dashboard
Downloadable cleaning reports (pdf file)
Modular design on all parts
1.6 Warranty
The co-botic 45™should be used as intended and described in this manual. Using the
co-botic 45 outdoors will void the warranty on the product.
1.7 Identification
Each co-botic 45 has a unique serial number:
•Serial number (Figure 3, pos. 1).
•Production year (Figure 3, pos. 2).
•Production month (Figure 3, pos. 3).
•Production day (Figure 3, pos. 4).
Your i-team partner needs this number when
you order parts.
Figure 3
The serial number can be found on the inside
of the battery compartment lid
(Figure 4, pos. 1).
Figure 4

12
2Description
The co-botic™45 consists of the following parts:
Figure 5
Legend
1.
Display
10.
Emergency stop
2.
Speaker
11.
Handle
3.
Ultrasonic wave radar
12.
Carrying handle
4.
Battery compartment
13.
Squeegee
5.
co-botic 45 main body
14.
Roller brush
6.
Remote control
15.
2D laser radar
7.
Clean water tank
16.
Cliff detection sensor
8.
SIM-card slot
17.
3D lidar sensor
9.
Recovery tank compartment

13
2.1 Remote control
The remote control consists of:
1. Antenna
2. Joystick
3. Power button
4. Connect button
5. On/Off indicator
Figure 6
2.2 Main menu of the display
The main menu of the display shows the following functions:
1. Cleaning task.
Start cleaning tasks.
2. Remote cleaning.
Allows you to start remote cleaning.
3. One-click return.
Returns the co-boticTM 45 to the starting
position on the selected map.
4. More.
Provides access to other menu’s, such as
settings and maps.
5. Dirty water indicator.
6. Clean water indicator.
Figure 7

14
2.3 Main menu of the co-botic 45 app
Explanation of the main menu of the co-boticTM 45 app.
1. Displays the status of the selected
co-botic 45.
2. Display, start, and create tasks.
3. Gives access to additional options,
including settings.
4. Indicate messages, warnings and
notifications.
5. Account overview.
6. Main menu.
7. Place to view/extract cleaning reports
from the machines.
8. Create and edit maps.
9. Switch to or show other devices.
Figure 8

15
3Safety
Safety comes first. Therefore, please take your time to read and understand these safety
instructions. Improper use can cause harm or void the manufacturer’s warranty.
3.1 General safety instructions
3.1.1 Sweep before scrub
Remove objects from the floor that can be propelled by the rotating brush.
3.1.2 Brush condition
Make sure to check the condition of the brush before use. Change the brush only when the
machine is turned off.
3.1.3 Machine orientation
Always keep the main body of the co-boticTM 45 in an upright position when inserting water
or inserting the battery.
3.1.4 Batteries
Always use the automatic battery charger provided by the manufacturer.
CAUTION
During normal operation, the 25 V batteries cause no safety hazard on their own.
Please adhere to the following safety instructions regarding batteries:
•Do not crush, pierce or damage batteries in any way.
•Do not heat or incinerate batteries.
•Do not short-circuit batteries.
•Do not dismantle batteries.
•Keep all batteries dry.
•Only charge between 5 °C~40 °C / 41 °F~104 °F.
•Only use between 5 °C~45 °C / 41 °F~113 °F.
3.2 Risks during operation
3.2.1 Radio interference
The co-botic 45 is a Class A product which may cause radio interference. If this is the case,
the operator may need to take practical steps against interference, such as planning another
path or shutting down equipment.
3.2.2 Transparent materials
Although additional sensors have been installed and measures have been taken, glass walls
or other highly transparent materials may affect the co-botic 45 sensor function. Therefore, it
is recommended to keep the co-botic 45 away from such materials.

16
3.2.3 Mark the job site
The co-boticTM 45 is designed to leave a dry floor without slippery patches, no additional
drying is required.
WARNING
In the event of an accident, press the emergency button on top of the
co-botic 45. This will prevent the co-botic 45 from causing harm.
3.3 Risks after operation
3.3.1 Remove the battery
CAUTION
Before removing the battery, make sure to turn off the co-botic 45 via the power
button inside the battery compartment (see Figure 11, pos. 3). Removing the
battery without turning off the co-botic 45 may result in the battery ‘sparking’ and
causing problems with the connectors.
It is best practice to remove the battery after executing any cleaning or maintenance task. Be
sure to take the battery out in case of long-term storage.
3.3.2 Careful when storing
Do not store the co-botic 45 on ramps or slopes. Always store the co-botic 45 on a level,
hard surface.

17
4Transport and storage
4.1 General
CAUTION
Always keep the main body of the co-boticTM 45 in the upright position. Make
sure the clean water tank and recovery tank are part of the main body during
transport.
Before storage or transport, drain the machine. Remove the battery after each use.
4.2 Store position
The correct store position is the upright vertical position. When stored, the clean water tank
and recovery tank should be installed in the main body.
4.3 Transport inside/outside
CAUTION
The wheels of the co-botic 45 are not designed to roll over dirty surfaces. Sand
can cause the wheels to block. Lift the co-botic 45 while moving it from one
building to another.
CAUTION
The co-botic 45 is heavy. Do not try to carry the unit by yourself. You should
always use someone's help.
When transporting the co-botic 45 inside:
1. Put the co-botic 45 in store position.
2. Move the co-botic 45 to its destination
using the handle (Figure 9, pos. 1), or the
carrying handle on both sides
(Figure 9, pos. 2).
When transporting the co-botic 45 outside:
1. Put the co-botic 45 in store position.
2. Carry the co-botic 45 to its destination,
using the carrying handle on both sides
(Figure 9, pos. 2).
Figure 9
TIP: Dry the tanks
Slightly open both tank caps before storage to allow the tanks to dry.

18
4.4 Transport in a vehicle
The co-botic™45 is a compact machine and fits in the trunk of your car. Before loading the
co-botic 45 into your vehicle, make sure that:
•Both tanks are part of the main body.
•Both tanks are empty.
•The battery is removed.
Do the following:
1. Put the co-botic 45 in store position, see section 4.2.
CAUTION
The co-botic 45 is heavy. Do not try to carry the unit by yourself. You should
always use someone's help.
2. Lift the co-botic 45 into your vehicle using the carrying handles (Figure 9, pos. 2).
3. Prevent the co-botic 45 from moving around during transport by using a tension belt or
another appropriate restraint.

19
5Assembly and installation
The co-botic™45 does not require much assembly. Most importantly, you will have to insert
a battery.
5.1 Unboxing
The co-botic 45 is packed in a single box. The battery and the charger are optional. They can
be ordered separately as they can also be used for other i-team products. When ordered with
the co-botic 45, they are packed in the same box in a separate compartment.
Figure 10
Legend
1.
Dual battery charger (when ordered)
12.
Rear squeegee blade, red*, (standard)
2.
Manual dual battery charger
13.
Front squeegee blade, red*, (standard)
3.
USB-C to USB-A cable
14.
Rear squeegee blade, blue**, (optional)
4.
Remote control
15.
Front squeegee blade, blue**, (optional)
5.
Single battery charger (when ordered)
16.
Android phone with co-botic app installed
6.
Battery
17.
Charger + cable for android phone
7.
Key (battery compartment lid)
18.
Clean water tank
8.
Squeegee and roller brush holder
19.
Recovery tank
9.
Roller brush
20.
This manual
10.
Squeegee blades holder
21.
Extra filter bag
11.
Main body
22.
Power cable (when ordered)
* The red squeegee blades (made of Linatex) are used for regular spaces such as an office or a store.
** The blue squeegee blades (made of Primothane) are mainly used for greasy floor surfaces, such as a kitchen
floor or the floor of a workshop.

20
5.2 Assembly
5.2.1 Charging the battery
Charge the battery according to the instructions in the battery charger manual. Make sure the
battery is charged regularly.
5.2.2 Inserting the battery
CAUTION
Only use i-power®batteries specifically designed for use in the co-botic™45.
1. Open the battery compartment lid using
the supplied key (Figure 11, pos. 1).
2. Push the battery in the battery slot
(Figure 11, pos. 2). A click indicates that
the battery is locked.
3. Close and lock the battery compartment
lid.
Figure 11
5.2.3 Charging the remote control battery
To charge the remote control battery, you must use the supplied USB-C to USB-A cable.
To charge the remote control battery, do the
following:
1. Connect the USB-C connector from the
USB-C to USB-A cable to the USB-C port
(Figure 12, pos. 1) of the remote control,
see Figure 12.
2. Connect the USB-A connector to the
USB-A port of a power adapter or a
laptop.
The battery will be charged.
Figure 12
Other manuals for co-botic 45
1
Table of contents
Other i-team Scrubber manuals
Popular Scrubber manuals by other brands

Pacific Floorcare
Pacific Floorcare S-24XM Parts & operating manual

Nobles
Nobles EZ Rider HP Service information

Clemas & Co
Clemas & Co i-mop Lite Operator's manual

Tennant
Tennant M30 Operator's manual

Kärcher
Kärcher BR 47/35 ESC Original instructions

Nilfisk-Advance
Nilfisk-Advance Advance SC1500 Service manual