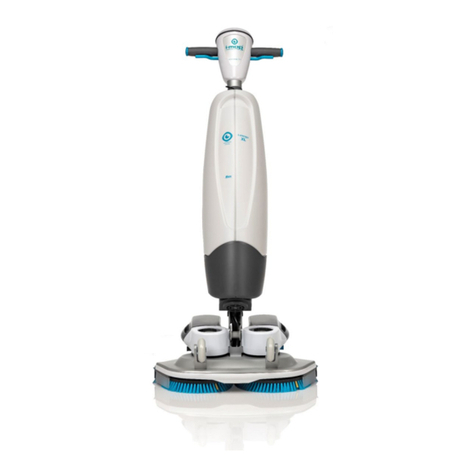
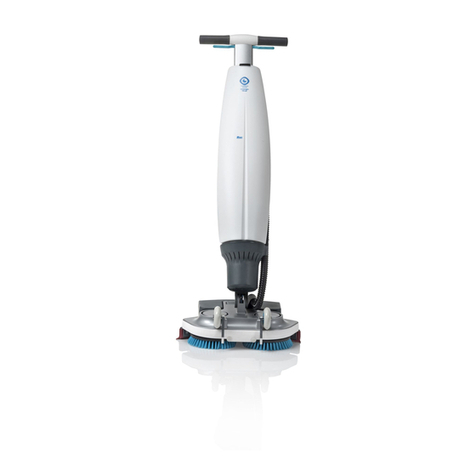
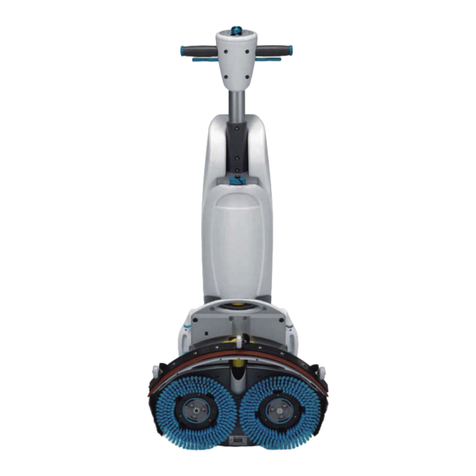
i-team i-drive User manual

3
Preface
Thank you for choosing the i-drive®, the ride-on auto scrubber that cleans faster, cleaner, safer,
greener, and is better for everyone. The battery operated i-drive is equipped with two counter-
rotating disc brushes that provide a deep scrub and a great cleaning result. The i-drive significantly
decreases the amount of water and chemicals needed, which leads to a greener result and reduces
the risk of slippery floors.
Please read this manual carefully for important information and operating instructions before using
the i-drive. Save this manual for future reference. This i-drive will provide excellent performance. The
best results will be obtained when the i-drive is:
•regularly maintained per the i-drive preventive maintenance instructions in this manual;
•regularly serviced per service instructions in the service manual.
•operated with reasonable care and caution;
•maintained with manufacturer supplied parts.
Whenever this manual refers to “the manufacturer”, it means: Future Cleaning Technologies B.V., an
affiliate company of i-team in Eindhoven, the Netherlands. Whenever this manual mentions “the
partner”, it refers to your local i-team resell and support service partner.
Purpose of the user manual
The purpose of the user manual is to provide the user with information during the life of the i-drive
in such a way that the i-drive is used correctly, efficiently and safely, even in the event of reasonably
foreseeable misuse, as described in section 1.2 of this manual.
The user manual contains instructions regarding:
•personal operator safety;
•intended and non-intended use of the i-drive;
•instructions for daily use;
•maintenance instructions;
•storage conditions;
•disposal of the i-drive.
These instructions must be considered to avoid risks that could lead to physical and/or material
damage.
Target audience
This user manual is intended for operators of the i-drive and their supervisors, as well as partners
and importers.
Operators of the i-drive
The i-drive may only be operated by a person who:
•has correctly read and understood the instructions in this manual;
•is trained by an experienced operator who has read and understood the instructions in this
manual;
•is trained on an i-drive before using it.

4
Reading guide
All forward, backward, front, rear, right, and left indications in this manual refer to the operator
sitting in the driving position on the operator's seat.
The following symbols and terms are used throughout this manual to alert the reader regarding
safety issues and important information:
Symbol
Term
Explanation
WARNING
Indicates a hazardous situation which, if the safety
instructions are not followed, can lead to injuries of the
operator or bystanders and light or moderate damage
to the product or the environment.
CAUTION
Indicates a hazardous situation which, if the safety
instructions are not followed, can lead to light
and/or moderate damage to the product or the
environment.
ATTENTION
Indicates a liability situation for which the
manufacturer or its partners and affiliates cannot
be held accountable for damages caused by non-
compliance.
BATTERIES
Indicates a battery-operated machine. Batteries
must be charged according to the instructions in
the separate class I battery charger user manual.
Batteries must be disposed of according to your
local laws and regulations.

5
Content
Preface................................................................................................................................................................3
Purpose of the user manual ................................................................................................................................3
Target audience ..................................................................................................................................................3
Operators of the i-drive ......................................................................................................................................3
Reading guide .....................................................................................................................................................4
1Introduction ...............................................................................................................................................8
1.1 Intended use of the product...............................................................................................................8
1.2 Non-intended use of the product.......................................................................................................9
1.3 Lifespan .............................................................................................................................................9
1.4 Modifications.....................................................................................................................................9
1.5 Specifications...................................................................................................................................10
1.6 Warranty..........................................................................................................................................12
1.7 Identification....................................................................................................................................12
2Description...............................................................................................................................................13
2.1 Control panel on the steering wheel ................................................................................................14
2.1.1 Multifunctional display ................................................................................................................15
2.1.2 Codes alarm display.....................................................................................................................16
2.2 Solution level indicator ....................................................................................................................17
2.3 Safety features on the i-drive®.........................................................................................................17
2.3.1 The emergency stop ....................................................................................................................17
2.3.2 The electromagnetic brake ..........................................................................................................18
2.4 Different types of squeegee blades..................................................................................................18
2.5 Disc brushes and pads......................................................................................................................18
2.6 Cleaning agent .................................................................................................................................18
3Safety .......................................................................................................................................................19
3.1 General safety instructions ..............................................................................................................19
3.1.1 Sweep before scrub .....................................................................................................................19
3.1.2 Disc brush condition ....................................................................................................................19
3.1.3 Batteries......................................................................................................................................19
3.2 Risks during operation .....................................................................................................................20
3.2.1 Dress adequately ......................................................................................................................... 20
3.2.2 Mark the job site..........................................................................................................................20
3.2.3 Careful when parking...................................................................................................................20
3.3 Risks after operation........................................................................................................................20
3.3.1 Remove battery packs .................................................................................................................20
4Transport and storage ..............................................................................................................................21
4.1 General............................................................................................................................................21

6
4.2 Transport outside.............................................................................................................................21
4.3 Transport in a vehicle.......................................................................................................................21
4.4 Pushing or towing the i-drive ...........................................................................................................22
5Assembly and installation.........................................................................................................................23
5.1 Unboxing .........................................................................................................................................23
5.1.1 Contents of the delivery...............................................................................................................23
5.1.2 Detaching the i-drive from the pallet ........................................................................................... 24
5.2 Assembly..........................................................................................................................................24
5.2.1 Attaching the disc brushes and brush covers ...............................................................................24
5.2.2 Attaching the squeegee ...............................................................................................................24
5.2.3 Inserting the batteries .................................................................................................................24
5.2.4 Attach the i-mop bar....................................................................................................................24
5.2.5 Load the i-mop® lite.....................................................................................................................24
6Operation.................................................................................................................................................25
6.1 Before you start ...............................................................................................................................25
6.1.1 Inserting the batteries .................................................................................................................25
6.1.2 Filling the detergent tank.............................................................................................................28
6.1.3 Filling the solution tank................................................................................................................29
6.1.4 Adjusting the seat........................................................................................................................30
6.1.5 Personal locker ............................................................................................................................30
6.2 Operation procedure .......................................................................................................................31
6.2.1 Driving on the jobsite...................................................................................................................31
6.2.2 Using reverse drive ......................................................................................................................33
6.2.3 Using the horn .............................................................................................................................33
6.2.4 At the job site ..............................................................................................................................34
6.2.5 Working in ECO mode..................................................................................................................35
6.2.6 Checking the solution level ..........................................................................................................35
6.2.7 Making an emergency stop..........................................................................................................36
7Maintenance ............................................................................................................................................37
7.1 Cleaning...........................................................................................................................................37
7.1.1 Clean the machine .......................................................................................................................37
7.2 Checking the machine operating hours ............................................................................................38
7.3 Maintenance tasks on the squeegee ................................................................................................39
7.3.1 Removing the squeegee body from the squeegee lifting plate.....................................................39
7.3.2 Placing the squeegee body back on the squeegee lifting plate.....................................................40
7.3.3 Cleaning, checking and replacing the squeegee blades ................................................................41
7.4 The disc brushes .............................................................................................................................. 44
7.4.1 Removing the disc brushes ..........................................................................................................44
7.4.2 Placing back the disc brushes.......................................................................................................45
7.4.3 Cleaning the disc brushes.............................................................................................................45
7.4.4 Replacing the disc brushes...........................................................................................................46
7.4.5 Replacing the pads.......................................................................................................................46
7.5 Cleaning the recovery tank...............................................................................................................47
7.5.1 Cleaning the separator.................................................................................................................49
7.5.2 Cleaning the recovery water inlet ................................................................................................50
7.6 Cleaning the detergent filter and detergent tank .............................................................................51
7.7Charging the batteries......................................................................................................................54

7
7.8 Unloading, loading and refilling the i-mop® lite................................................................................56
7.8.1 Unloading and loading .................................................................................................................56
7.8.2 Refilling the cleaning solution tank of the i-mop lite ....................................................................56
7.9 Cleaning the i-mop® lite plateau ......................................................................................................57
7.10 Cleaning the suction line..................................................................................................................58
7.11 Cleaning the water filter...................................................................................................................60
7.12 Damaged or worn parts ...................................................................................................................61
7.13 Maintenance frequency ...................................................................................................................61
7.13.1 Maintenance frequency table..................................................................................................61
7.13.2 Servicing the i-drive.................................................................................................................62
7.14 Storage ............................................................................................................................................62
8Trouble shooting ......................................................................................................................................63
9Decommissioning and disposal.................................................................................................................64
10 Attachments.............................................................................................................................................65
10.1 CE Certificate ...................................................................................................................................65

8
1Introduction
The i-drive® is an easy and safe machine to use. This manual helps you to get started and explains the
operation and maintenance procedure. You will be pleasantly surprised by the fast and effective use
of the battery operated i-drive. The battery packs contain the standard Li-ion battery used in various
i-team products. When fully charged before use, the i-drive will operate up to 2 hours, depending on
the brush pressure, surface and driving speed. Please refer to the user manual of the i-charge 9® for
correct procedure.
This manual is intended for those who work with the i-drive and perform daily maintenance. The
manual must be read in full before the first actions. This manual describes the correct method of use,
safety measures, maintenance and transport.
i-team continuously improves all their products based on user experience and feedback. Any
deviations between the texts and/or images from the manual and your i-drive could therefore arise
from the difference in model or from possible changes due to continuous development and
innovation.
1.1 Intended use of the product
The i-drive is a specialized machine for scrubbing hard floor surfaces, in civil and industrial
environments, under verified safe conditions, and must be driven by a qualified operator. It is
intended for use indoors and in a dry environment only. You must only use foam reduced detergents.
Foam from normal scrubbing detergent will damage the vacuum motor.

9
CAUTION
Dish washing soap is not suitable as a scrubbing detergent. It creates too much foam
and can damage the vacuum motor and voids the warranty.
1.2 Non-intended use of the product
WARNING
Non-intended use can have consequences for the safety of operators and bystanders
and will void the warranty on the product.
•do not use the i-drive® to clean carpets or rugs;
•do not fill the i-drive with any flammable detergent. ONLY use water-based cleaning solutions;
•do not use water that exceeds 113° F/45° C. Using water above this temperature will void the
tank warranty;
•do not use cleaning solutions with pH below 3 or above 11 in order to prevent damage to
sensitive components;
•do not use the i-drive on rough surfaces. The i-drive is designed for smooth, hard surfaces only.
rough surfaces will not give the desired result and increase the wear on the disc brushes;
•do not use the i-drive on surfaces exceeding the maximum allowed slope gradient;
•do not operate this i-drive over electrical floor outlets to avoid electrical shock;
•do not use the i-drive to scrub oil, diesel, petrol or other chemical components. While the i-drive
wheels are resistant to oil, diesel or petrol chemicals will contaminate the wastewater and the
recovery tank, as well as the disc brushes and squeegee. Oil resistant squeegee blades and disc
brushes are available;
•do not use the i-drive as stepladder or platform;
•do not carry passengers on top of the i-drive, no riders;
•do not store the i-drive outside in order to avoid damage to electronic components;
•never operate the i-drive® near flammable dusts, liquids or vapors;
•never operate the i-drive when flammable or poisonous liquids like gasoline, oil, acids, or other
volatile substances are on the floor;
•keep away from children! The i-drive is a professional cleaning machine to be used by trained
adult operators;
•only use manufacturer-supplied parts for maintenance;
•remove the ignition key to prevent unauthorized personnel from using the i-drive;
•do not leave the i-drive unattended without ensuring that it cannot move by itself;
•do not drive the i-drive on public roads;
•do not use the i-drive in insufficiently lit or highly dusty environments.
1.3 Lifespan
To ensure proper and safe operation throughout the life of the i-drive, the machine must be checked
and serviced by an authorized i-team partner, see also section 7.13.2.
1.4 Modifications
It is not permitted to make modifications to the design of the i-drive without consultation and
permission from the manufacturer. Doing so affects the warranty, see section 1.6.

10
1.5 Specifications
Figure 1
Machine size (L x W x H):
146 x 60 x 149 cm
Working width disc brush deck:
61 cm
Working width squeegee:
79 cm
Typical Operational Weight (GVV)
(i-drive with 6 Li-Io batteries + i-mop lite +
chemical tank):
208 kg
Gross Vehicle Weight (GVW)
(i-drive with 6 Li-Io batteries + i-mop lite +
chemical tank full + solution tank full + operator
(75kg):
349 kg
Li-on batteries:
DC (25.2V, 14 Ah, 2117 Wh in total)
Battery capacity:
6 batteries
Operation time of batteries:
120 min
Operating temperature:
5° C up to +40° C
Storage temperature:
-20° C up to +70° C
Humidity:
30% up to 90%
Disc brush pressure:
24.8 gr/cm2
Disc brush speed:
175 RPM
Solution tank capacity:
58 L
Detergent tank capacity:
5.5 L
Recovery tank capacity:
54 L
Vibration:
Acceleration: 0.299 m/s²

11
Noise levels:
Operators ear when seated: 64,3 dB(A) (Sound
pressure)
Average around the machine: 68,5 dB(A) (Sound
pressure)
Sound power (sticker): 84,4 dB(A) (Sound power)
Theoretical performance:
Up to 2745 m2per hour
Practical performance:
1400 m2per hour
Speed:
Forward: 2.5/4.0/4.5 km/h
Reverse: 3 km/h
Turning circle:
Left: 166 cm
Right: 215 cm
Maximum slope normal operation:
10%
Maximal truck ramp:
18%
Working lights:
YES
Autobrake:
YES
i-mop lite storage:
YES
Disc brush wear indicator:
YES
Operation timer:
YES

12
1.6 Warranty
The i-drive® should be used as intended and described in this manual. Using the i-drive outdoors will
void the warranty on the product.
The i-drive should only be operated with the materials supplied. Using alternative supplies may cause
damage to the i-drive and may cause a risk to the operator. The use of alternative supplies voids the
manufacturer's warranty. The warranty period is 1 year.
1.7 Identification
Each i-drive has a unique serial number that can be found on the platform for the i-mop lite, at the
back side of the i-drive. Your i-team partner needs this number when you order parts.
Explanation type plate:
Distributer:
i-team Professional
Hoppenkuil 27 b
NL-5626 DD Eindhoven
Product type: SCRUBBER
Model: IDRIVE 65
Serial number: 000040
Figure 2

13
2Description
The i-drive® consists of the following parts:
Figure 3
Legend
1.
Two tail lights (drive and brake).
11.
Two work lights.
2.
An i-mop lite (back view).
12.
An electromagnetic autobrake.
3.
A detergent tank.
13.
A squeegee and a vacuum hose.
4.
A steering column and steering wheel.
14.
A front-wheel (20 x 6 cm) motor.
5.
An accelerator pedal.
15.
A front-light (drive).
6.
Two deflector rollers and tilt protection wheels.
16.
A main squeegee body.
7.
Two rotating disc brushes.
17.
A recovery tank.
8.
Two back-wheels (25 x 7.5 cm).
18.
A solution tank.
9.
A battery drawer.
19.
An adjustable operator seat.
10
An i-mop lite ramp.

14
2.1 Control panel on the steering wheel
Figure 4
1.
Detergent consumption, proportional to water consumption. Push the (-) touch button to
diminish the consumption. Push the (+) touch button to increase the detergent consumption.
There are five different levels indicated by the LEDs in the blue arch:
1 LED on:
1%
2 LEDs on:
2%
3 LEDs on:
3%
4 LEDs on:
4%
5 LEDs on:
5%
2.
Combined squeegee and disc brush ON/OFF touch button.
3.
Squeegee and vacuum ON/OFF touch button.
4.
Disc brush ON/OFF touch button.
5.
Multifunctional display. See section 2.1.1
6.
ECO mode ON/OFF touch button. If you switch the ECO mode to "ON", the voltage level on the
disc brushes and vacuum motor is decreased by 30%. It does not slow down the speed of the i-
drive.
7.
Reverse touch button. If reverse is activated, the i-drive produces a sound and it drives at a
reduced speed.
8.
Horn touch button.
9.
Working lights ON/OFF touch button.

15
10.
Speed adjustment touch button. Five different speed levels, indicated by the LEDs in the blue
arch. Push the push button to increase/decrease the speed. There are five different speed levels
indicated by the LEDs in the blue arch:
1 LED on:
Max. 2.5 km/h
2 LEDs on:
2.5 km/h
3 LEDs on:
4 LEDs on:
5 LEDs on:
Max. 4.5 km/h
11
Water consumption. Push the (-) button to diminish the water consumption. Push the (+) button
to increase the consumption. There are five different levels indicated by the LEDs in the blue
arch:
Level 1:
0.8 L/min (≈78 minutes using a full tank)
Level 2:
1.5 L/min
Level 3:
2.3 L/min
Level 4:
3,0 L/min
Level 5:
3.5 L/min (≈18 minutes using a full tank)
2.1.1 Multifunctional display
The multifunctional display has the following
functions:
1. Indicate battery level (Figure 5, pos 2).
2. Indicate operation time in hours and
minutes (Figure 5, pos 1).
3. Indicate i-drive “Ready” (Figure 5, pos 3).
4. Indicate alarm codes, see also section 2.1.2.
5. Indicate "Schedule service".
Figure 5

16
2.1.2 Codes alarm display
ATTENTION
In case an alarm code occurs on the display, please contact service personnel or your
i-team partner.
Alarm summary table control panel
Alarm
Description
Solution
AL_1: Function
Brushes
Ammeter
Brushes ammeter
protection.
Check brushes motor working current. Excessive and continuous working current
detected on the brushes motor.
AL_2: Function
Vacuum
Ammeter
Vacuum ammeter
protection.
Check vacuum motor working current. Excessive and continuous working current
detected on the brushes motor.
AL_3: Function
Power stage Fail
Power circuit damaged.
Brushes or vacuum power circuit damaged: replace the power board. The alarm may
also be displayed if the machine is started when being towed or moving.
AL_4: Function
Overcurrent
Brushes or vacuum
overcurrent.
Short circuit on brushes or vacuum motor detected: check wirings and motors.
AL_5: Function
Overtemperature
Brushes or vacuum
circuit overtemperature.
Brushes and vacuum circuit power stage overtemperature: check if disc brushes run
freely. Measure voltage output.
AL_7: Function
Act2 endsw fail
Squeegee actuator limit
switch reading failure.
Limit switch setting failure. Check connections and squeegee end switch position.
AL_8: Function
Act1 timeout
Brush actuator
movement over the
time limit (12s):
Check connections and any mechanical obstructions.
AL_9: Function
Act2 timeout
Squeegee actuator: end
switch position not
reached.
Squeegee actuator position not reached within the maximum time set. Check actuator
connections and/or any mechanical obstructions.
AL_11: Function
Water Level
Recovery water tank
full.
Empty recovery tank. Check if the recovery tank floating switch works correctly.
“DRIVE” ALARM SUMMARY TABLE
Alarm
Description
Solution
AL_13: Traction
Pedal Failure
Pedal tear.
Check pedal potentiometer wirings.
AL_14: Traction
Release Pedal
Pedal active at power
on.
Moving switch active at power on: release the pedal.
AL_15: Traction
Overtemperature
Traction circuit
overtemperature.
Traction power stage overtemperature: check absorption.
AL_16: Traction
Power stage Fail
Traction circuit
damaged.
Traction circuit damaged: replace the power board. The alarm may also be displayed if
the machine is started when being towed or moving.
AL_17: Traction
Overcurrent
Traction overcurrent.
Short circuit on traction motor detected: check wirings and motors.
AL_18: Traction
Tract. Ammeter
Traction ammeter
protection.
Check traction motor's working current. Traction motor excessive overcurrent
detected.
AL_19: Traction
Motor Voltage
Internal reading
mistake.
If failure persists, replace board.
AL_24: Traction
Batt connection
Battery voltage < 10V.
Recharge batteries. If the batteries have been charged and the alarm occurs, check for
loose connections between battery and electronic board.
“GENERAL” ALARM SUMMARY TABLE
Alarm
Description
Solution
AL_20: General
EEprom Failure
Internal eeprom reading
error.
Replace board.
AL_21: General
Key-off failure
Key-reading failure.
Rebound detected on the key signal: check battery-keyboard-function card
connections.
AL_22: General
Main relay
failure
General relay damaged.
The general relay on the board looks damaged: replace the board. The alarm is
triggered even in the event of a damaged power fuse.
AL_23: General
Overvoltage
Overvoltage.
Function card overvoltage detected. Check battery connections.
AL_25: General
Keyboard fail
Display-function card
communication error.
Check connections between display and function card.

17
2.2 Solution level indicator
The optical solution level indicator is situated on
the solution tank (Figure 6, pos 1) underneath
the seat. This ensures that the solution level in
the tank can be checked during filling of the
tank. The floating switch inside the tank avoids
that the pump runs dry. When it is activated, all
cleaning functions of the i-drive® stop. You are
still able to drive it.
Figure 6
2.3 Safety features on the i-drive®
2.3.1 The emergency stop
The emergency stop button (Figure 7, pos 1) is
positioned on the steering column.
1. To activate it, push it in. The i-drive shuts
down completely.
2. To start the i-drive again, pull it out.
Figure 7

18
2.3.2 The electromagnetic brake
The electromagnetic brake (Figure 8, pos 2) is
integrated in the front wheel. It keeps the i-
drive® in brake mode when the i-drive is in
"OFF" mode or in "ON" mode, but remains
stationary (when your foot is not on the
accelerator pedal).
In case you need to move the i-drive, push the
red lever (Figure 8, pos 1) forward to unlock the
brake. See also section 4.4.
Figure 8
2.4 Different types of squeegee blades
You can order rubber blades or polyurethane blades for the squeegee, depending on the type of
surface that you are going to clean with the i-drive. For more information please visit
www.i-teamglobal.com.
2.5 Disc brushes and pads
You can order disc brushes or pads. Brushes can be used to clean most types of surfaces. Pads are
used in situations in which a low noise level is required, like offices and hospitals. For more
information please visit www.i-teamglobal.com.
2.6 Cleaning agent
You can use different foam reducing cleaning agents for different purposes. For instance, to kill
bacteria, for non food or for an extra shiny effect. For more information please visit
www.i-teamglobal.com.

19
3Safety
Safety comes first. Therefore, please take time to read and understand these safety instructions.
Improper use can cause harm or void the manufacturer’s warranty.
3.1 General safety instructions
3.1.1 Sweep before scrub
Remove objects from the floor that can be propelled by the rotating disc brushes. In case of fire, use
a powder extinguisher instead of water. Keep all protective and safety measures in place.
3.1.2 Disc brush condition
Make sure to check the condition of the disc
brush before use. Check the red indictor mark
before you start (Figure 9, pos 1). See section
7.4.4. Make sure the machine is completely
turned off when replacing the disc brushes.
Figure 9
3.1.3 Batteries
To charge the batteries, always use the automatic battery charger provided by the manufacturer.
CAUTION
During normal operation, the 24 V batteries in itself cause no safety hazard. Please keep
in mind the following safety instructions:
•DO NOT crush, pierce or damage in any way;
•DO NOT heat or incinerate;
•DO NOT short-circuit;
•DO NOT dismantle;
•keep the batteries dry;
•keep away from sparks and flames;
•only charge between 5 °C ~ 40 °C/41 °F ~ 104 °F;
•only use between 5 °C ~ 40 °C/41 °F ~ 104 °F.

20
3.2 Risks during operation
3.2.1 Dress adequately
Do not wear a necktie, scarf, or any loose or dangling clothing or jewelry while operating the i-drive®.
These can tangle in rotating parts, causing serious injury or death.
3.2.2 Mark the job site
The i-drive is designed to leave a dry floor without slippery patches, no additional drying is required.
When running the i-drive with the vacuum function "OFF", please mark the job site with a wet floor
marker.
CAUTION
Marking the jobsite with a wet floor marker is not required when using the vacuum
function of the i-drive, unless this is a mandatory work safety requirement by local law.
When unsure, mark the job site to warn passersby.
3.2.3 Careful when parking
Do not park the i-drive on ramps or slopes. Always park the i-drive on a level, hard surface.
3.3 Risks after operation
3.3.1 Remove battery packs
It is best practice removing the batteries before executing any cleaning or maintenance task or
before storage. Charge the batteries for next use.
This manual suits for next models
1
Table of contents
Other i-team Scrubber manuals
Popular Scrubber manuals by other brands

Minuteman
Minuteman Max Ride MR20ECO Service manual

Nilfisk-Advance
Nilfisk-Advance Captor 5400 Quick start troubleshooting manual

Taski
Taski swingo 450E Instructions of use

Fimap
Fimap FSR7 PRO Configuration manual

DIVAR
DIVAR AH-101CAT INSTALLATION & SPECIFICATIONS

Tennant
Tennant T1 Service information manual