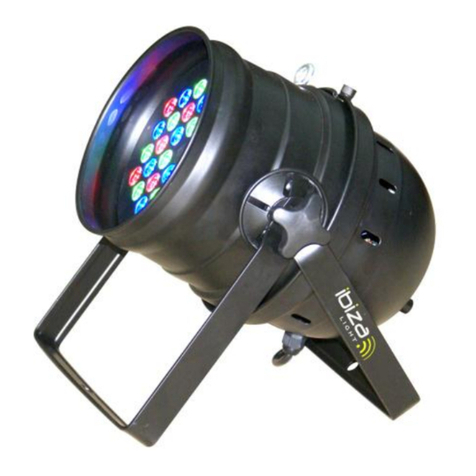
Ibiza LP64LED-FLAT-RC User manual

©Lotronic – 2012 LP64LED-FLAT-RC
E
EX
XT
TR
RA
A
F
FL
LA
AT
T
L
LE
ED
D
P
PA
AR
R6
64
4
C
CA
AN
N
LP64LED-FLAT-RC
INSTRUCTION MANUAL
Thank you for purchasing our extra slim LED PAR-64 can. Every unit has been
thoroughly tested and shipped in perfect operating condition.
Safety Recommendations
•Do not attempt any repairs yourself! Doing so will void your manufactures
warranty. In the unlikely event your unit may require service please contact
us.
•To prevent or reduce the risk of electrical shock or fire, do not expose this
unit to rain or any moisture.
•Please read this user manual carefully to familiarize yourself with the basic
operations of this unit.
•Before plugging to power be sure the local power outlet matches with the
required voltage of the unit
•Do not remove the cover under any circumstances in case you’re not
qualified to do so.
•Never connect to power when cover is removed.
•Never use this unit if it becomes damaged.
•Never connect this unit to any kind of dimmer- and/or power-pack.
•If the unit will not be used for a long time, disconnect it from power supply.
•Always mount this unit safe and stable, and make sure the area will have
proper ventilation.
•Take care this unit will not mounted in areas close to heat sources such as
lighting fixtures, amplifiers, heat registers, stoves and radiators.
General instructions
Before plugging this unit to power make sure the voltage in your area matches
the required voltage for the LED PAR-64 extra flat which is 110-230Vac∼and
50/60Hz.

©Lotronic – 2012 LP64LED-FLAT-RC
Specifications
Operating modes: Remote DMX512, Auto, Sound activated, Master-slave
Lamp: 181 x 10mm hi bright LEDs (49 Red,72 Green,60 Blue)
LED colours: RGB
DMX channels: 3, 5 & 7 channels
Consumption: 20W
Power supply: 100-230Vac ∼50-60Hz
Dimensions: L275 X W275 X H100mm
Weight: 1.95 Kg
Features
3, 5, 7 channels selectable Flat LED PAR light
4 push buttons with 4 Digital LED Display
0—100% strobe
Dimming 0 - 100%: Control Red, Green, Blue LEDs independently
Static colours and RGB colour mixing
Colour strobe effect
Colour gradual change, colour jump change, speed adjustable
Built in programs via sound activation
Very low power consumption, high output
Linkable via 3-pin XLR cable
Includes mounting brackets
Description of the unit
1. Hanging bracket 6. Earth screw
2. LCD display
7. MENU button
3. DMX input 8. UP button
4. DMX output
9. DOWN button
5. Mains input socket 10. ENTER button

©Lotronic – 2012 LP64LED-FLAT-RC
Menu Control Panel
MENU: Selection of program functions
UP: to go forward in the selected function
DOWN: To go backward in the selected functions
ENTER: To confirm the selected function
Press the MENU button repeatedly until you reach the desired menu function.
Use the UP and DOWN buttons to browse through the menu options. Press the
ENTER button to select the menu function currently displayed, or to enable a
menu option. To return to the previous option or menu without changing the
value, press the MENU button.
Addr Enter a001 Up/Down a512 →sets the unit’s DMX address & the DMX
mode
Chnd Enter 3CH UP/Down 5CH Up/Down 7CH →Sets the unit into 3-ch, 5-ch or
7-ch mode
SLAU EnterYES Up/Down NO →Sets the unit into slave mode
SOUn Enter Sd-1 Up/Down Sd-1 Enter →Sets the unit into Sound activated
mode
SP-1 Up/Down SP-8 →Adjustment of sound sensitivity
Jump Enter JU01 Up/Down JU20 Enter →Sets the unit into Colour jump
mode & adjusts colour jump speed
FJ00 Up/Down FJ04 Enter →Sets the unit plus flash speed in colour
jump mode
Fade Enter Fs01 Up/Down Fd15 Enter →Sets the unit in colour fade mode &
adjust colour fade speed
AUT0 sets the unit in stand-alone mode
COLO Enter C000 UP/Down C255 Enter →Sets the unit in static colour mode
& select 255 different colours
FL01 Enter FL15 Enter →Adjust strobe speed on static colour mode
ManU Enter r000 Up/Down r255 Enter →Adjusts the RED LED dimmer
G000 Up/Down G255 Enter →Adjusts the GREEN LED dimmer
b000 Up/Down b255 Enter →Adjusts the BLUE LED dimmer
bLnd Enter YES Up/Down NO →Black out mode
diSP Enter YES up/Down NO →Sets the display to normal or inverted

©Lotronic – 2012 LP64LED-FLAT-RC
REMOTE CONTROLLER OPERATION
1. Press “Auto” to set the unit to Auto run.
2. Press “Sound” to set the unit to Sound activated
mode. Second press to adjust sound active sensitivity.
Note: Use in conjunction with the + & - buttons to
select 3 kinds of sound mode or adjust sound active
sensitivity.
3. Press “DMX” to set the units to DMX mode. Second
press to DMX channel mode. Note: Use in conjunction
with the + & - Buttons to select DMX address or change
DMX channels. Also can use 1-9 Number buttons to set
the DMX address. Example: set DMX address 16, press
button0, button 1 and button 6.
4. Press “BLACK OUT” to switch the unit on or off.
5. The “Red”, “Green”, “Blue” & “White” (Used for four colour LED units only)
buttons are used to control the intensity of individual colours. Note: Use in
conjunction with the + & -Button to change the dimmer.
6. Press “Jump” to set the units to Colour jump change mode. Note: Use in
conjunction with the + & - button to change the speed.
7. Press “Fade” to set the units to Colour fade change mode. Note: Use in
conjunction with the + & - Button to change the speed.
8. Press “Colour” to set the units to static colour mode. Note: Use In conjunction
with the + & - buttons to select 255 kinds different colours. Also, you can press
0-9 Number buttons to select 0 - 255 kinds different colours directly.
9. Press “Flash” to set the units to strobe mode. Note: Use in conjunction with
the + & - Button to change the strobe speed. Also you can change the strobe
speed on colour Jump mode.
10. Note: You can see the value on the LED display when you use the IR remote
controller operation.
DMX values and Functions:
3-CHANNEL MODE:
Channel Value Function
CH1 0-255 RED dimmer
CH2
0-255
GREEN dimmer
CH3 0-255 BLUE dimmer

©Lotronic – 2012 LP64LED-FLAT-RC
5-CHANNEL MODE:
Channel
Value
Function
CH1 0-255 RED dimmer
CH2
0-255
GREEN dimmer
CH3
0-255
BLUE dimmer
CH4
0-255
Master dimmer
CH5
0-6 Dimmer mode
7-65 Slow to fast strobe
66-69
None
70-128 Pulse strobe from slow to fast
129-132 None
133-191
Strobe fading from slow to fast
192-195 None
196-255
Strobe fading out from slow to fast
7-CHANNEL MODE
Channel
Value
Function
CH1 0-255 RED dimmer
CH2
0-255
GREEN dimmer
CH3 0-255 BLUE dimmer
CH4
0-255
Master dimmer
CH5
(CH7<60)
0-6 Dimmer mode
7-65 Slow to fast strobe
66-69
None
70-128 Pulse strobe from slow to fast
129-132 None
133-191
Strobe fading from slow to fast
192-195
None
196-255 Strobe fading out from slow to fast
CH5 (CH7>60) 0-255 In stand alone mode, running speed
from slow to fast
CH6 (static colour mode)
0-255
Static colour select
CH6 (Colour change mode)
0-255
Strobe from slow to fast
CH7 0-59 Dimmer mode
60-119 Static colour mode
120-179
Colour jump change mode
180-239 Colour gradual change mode
240-255
Sound active mode

©Lotronic – 2012 LP64LED-FLAT-RC
DMX512 CONNECTIONS
The DMX512 is widely used in intelligent lighting control, with a maximum of
512 channels.
1. Connect the fixture together in a “daisy chain” by XLR plug cable from the
output of the fixture to the input of the next fixture. The cable cannot be
branched or split to a “Y” cable. Inadequate or damaged cables, soldered joints
or corroded connectors can easily distort the signal and shut down the system
2. The DMX output and input connectors are pass-through to maintain the DMX
circuit when one of the units’ power is disconnected.
3. At last fixture, the DMX cable has to be terminated with a terminator to
reduce signal errors. Solder a 120-ohm 1/4W resistor between pin 2(DMX-) and
pin 3(DMX+) into a 3-pin XLR-plug and plug it in the DMX-output of the last
fixture.
4. Each lighting fixture needs to have an address set to receive the data sent by
the controller. The address number is between 0-511 (usually 0 & 1 are equal to
1).
5. 3 pin XLR connectors are more popular than 5 pins XLR.
3 pin XLR: Pin 1: GND, Pin 2: Negative signal (-), Pin 3: Positive signal (+)
5 pin XLR: Pin 1: GND, Pin 2: Negative signal (-), Pin 3: Positive signal (+), Pin4/5:
not used
Pin configuration
Pin 1 = Ground
Pin 2 = Data compliment (negative)
Pin 3 = Data true (positive)
IMPORTANT NOTE: Electric products must not be put into household waste. Please bring
them to a recycling centre. Ask your local authorities or your dealer about the way to
proceed.

©Lotronic – 2012 LP64LED-FLAT-RC
PROJECTEUR A LED PAR64 EXTRA PLAT
LP64LED-FLAT-RC
MANUEL D’UTILISATION
Lire attentivement ce mode d’emploi avant la première mise en service. Il
contient des consignes de sécurité et de maintenance importantes
Consignes de sécurité
- Conserver le manuel pour référence ultérieure.
- Uniquement pour utilisation à l’intérieur.
- Tenir à l’abri de l’humidité et de la poussière.
- Si la prise et/ou le fil et/ou l'entrée du câble de l'équipement est
endommagé, il doit être réparé par un professionnel.
- Toujours débrancher la prise murale en cas d'orage ainsi que lorsque
l'équipement n'est pas utilisé pendant une période prolongée.
- Ne jamais retirez la prise en tirant sur le fil.
- Installer l'équipement de façon à permettre un refroidissement suffisant.
- Ne jamais utiliser l'appareil à proximité de sources de chaleur et/ou en plein
soleil.
- Assurez-vous qu'aucun objet ou liquide ne puisse pénétrer dans l'appareil.
- Nettoyer l'appareil avec un chiffon légèrement humide. Ne pas utiliser de
produits d'entretien.
- A l'exception de ceux mentionnés dans le manuel, l'appareil ne contient
aucune pièce remplaçable par l’utilisateur.
- Si l'appareil est défectueux, il doit être réparé par un technicien qualifié.
- Tenir hors de la portée des enfants.
Installation
Vérifiez que votre tension secteur correspond à la tension de fonctionnement
du projecteur. Le stroboscope doit être alimenté en 100-230Vac∼et 50/60Hz.
Caractéristiques techniques
Modes de fonctionnement: Télécommande, DMX512, Automatique, activié
par la musique, Maître-esclave
Lampe: 181 LED lumineuses de 10mm (49 rouges,72 vertes,60 bleues)
Couleurs des LED: RVB
Canaux DMX: 3, 5 ou 7

©Lotronic – 2012 LP64LED-FLAT-RC
Consommation: 20W
Alimentation: 100-230Vac ∼50-60Hz
Dimensions: L275 X W275 X H100mm
Poids: 1,95 Kg
Features
•Sélection entre 3, 5 et 7 canaux
•Programmation par boutons avec afficheur à LED
•Fonctionnement automatique, activation audio, maître-esclave ou
DMX512
•Programmes automatiques intégrés via le mode Maître-esclave
•Contrôle individuel du dimmer rouge, vert et bleu, ainsi que du
stroboscope
•Couleurs statiques, stroboscope et mélange de couleurs RVB avec ou
sans contrôleur DMX
•Macros couleurs avec réglage de vitesse
•Mélange de couleurs RVB progressif (changement rapide ou lent)
Description de l’appareil
1. Etrier
6. Contact de terre
2. Afficheur LCD 7. Touche MENU
3. Entrée DMX
8. Touche UP
4. Sortie DMX
9. Touche DOWN
5. Entrée d’alimentation secteur 10. Touche ENTER

©Lotronic – 2012 LP64LED-FLAT-RC
Panneau de commande
MENU: Sélection d’une fonction
UP: Avancer dans la fonction sélectionnée
DOWN: Reculer dans la fonction sélectionnée
ENTER: Confirmer la fonction sélectionnée
Appuyez plusieurs fois sur la touche MENU jusqu’à ce que vous arriviez à la
fonction désirée. Parcourez le menu au moyen des touches UP et DOWN.
Appuyez sur ENTER pour sélectionner la fonction affichée ou pour activer une
option du menu. Pour revenir à l’option ou au menu précédent, sans changer la
valeur, appuyez sur MENU.
Addr Enter a001 Up/Down a512 →Règle l’adresse DMX & le mode DMX
Chnd Enter 3CH UP/Down 5CH Up/Down 7CH →Règle l’appareil sur le mode 3,
5 ou 7 canaux
SLAU EnterYES Up/Down NO →Met l’appareil en mode Esclave
SOUn Enter Sd-1 Up/Down Sd-1 Enter →Met l’appareil en mode d’activation
par la musique
SP-1 Up/Down SP-8 →Règle la sensibilité audio
Jump Enter JU01 Up/Down JU20 Enter →Met l’appareil en mode saut de
couleur & règle la vitesse des sauts
FJ00 Up/Down FJ04 Enter →Règle la vitesse des flashs en mode
saut de couleur
Fade Enter Fs01 Up/Down Fd15 Enter →Met l’appareil en mode fondu de
couleur et règle la vitesse du fondu des couleurs
AUT0 Mode automatique
COLO Enter C000 UP/Down C255 Enter →Mode de couleurs statiques &
sélection de 255 couleurs différentes
FL01 Enter FL15 Enter →Règle la vitesse du stroboscope en mode
couleur statique
ManU Enter r000 Up/Down r255 Enter →Dimmer des LED rouges
G000 Up/Down G255 Enter →Dimmer des LED vertes
b000 Up/Down b255 Enter →Dimmer des LED bleues
bLnd Enter YES Up/Down NO →Mode Black out
diSP Enter YES up/Down NO →Affichage normal ou inversé

©Lotronic – 2012 LP64LED-FLAT-RC
FONCTIONNEMENT PAR LA TELECOMMANDE
1. Appuyez sur “AUTO” pour mettre l’appareil sur le
fonctionnement automatique.
2. Appuyez sur “Sound” pour mettre l’appareil sur le
mode d’activation par la musique. Appuyez deux fois
pour régler la sensibilité audio. Note: Utilisé en
conjonction avec les touches + & -, vous pouvez
sélectionner parmi 3 sortes de modes audio ou régler
la sensibilité audio.
3. Appuyez sur “DMX” pour mettre l’appareil en mode
DMX. Appuyez une deuxième fois pour aller en mode
de canal DMX. Note: Utilisé en conjonction avec les
touches + et – pour sélectionner l’adresse DMX ou
changer de canal DMX. Vous pouvez également régler
l’adresse DMX au moyen des touches numériques 1-9. Si vous souhaitez régler
l’adresse 16, appuyez sur les touches 0, 1 et 6.
4. Appuyez sur “BLACK OUT” pour allumer ou éteindre l’appareil.
5. Les touches “Red”, “Green”, “Blue” & “White” (utilises uniquement pour les
appareils à LED de 4 couleurs), permettent de contrôler l’intensité de chaque
couleur.
6. Appuyez sur “Jump” pour mettre l’appareil en mode saut de couleur. Note:
Utilisé en conjonction avec les touches + & -, vous pouvez changer la vitesse.
7. Appuyez sur “Fade” pour régler le mode de fondu couleurs. Note: Utilisé en
conjonction avec les touches + & -, vous pouvez changer la vitesse.
8. Appuyez sur “Colour” pour mettre l’appareil en mode couleur statique. Note:
Utilisé en conjonction avec les touches + & -, vous pouvez sélectionne –r 255
couleurs différentes. Vous pouvez également utiliser les touches numériques 0-
9 pour sélectionner directement les couleurs 0-255.
9. Appuyez sur “Flash” pour mettre l’appareil en mode stroboscope. Note:
Utilisé en conjonction avec les touches + & -, vous pouvez changer la vitesse des
flash. Vous pouvez également changer la vitesse du stroboscope en mode saut
de couleur.
10. Note: Vous pouvez voir la valeur sur l’afficheur à LED lorsque vous utilisez la
télécommande.
©Lotronic – 2012 LP64LED-FLAT-RC
Valeurs et fonctions DMX:
MODE 3-CANAUX
Canal
Valeur
Fonction
CH1
0-255
Dimmer ROUGE
CH2
0-255
Dimmer VERT
CH3
0-255
Dimmer BLEU
MODE 5-CANAUX:
Canal Valeur Fonction
CH1
0-255
Dimmer ROUGE
CH2 0-255 Dimmer VERT
CH3 0-255 Dimmer BLEU
CH4
0-255
Dimmer Master
CH5
0-6 Mode Dimmer
7-65 Strobo lent vers rapide
66-69
Aucune
70-128 Strobo à impulsion de lent vers rapide
129-132 Aucune
133-191 Fondu strobe de lent vers rapide
192-195
Aucune
196-255 Fondu en sortie du strobo de lent en
rapide
MODE 7-CANAUX
Canal
Valeur
Fonction
CH1
0-255
Dimmer ROUGE
CH2
0-255
Dimmer VERT
CH3 0-255 Dimmer BLEU
CH4 0-255 Dimmer Master
CH5
(CH7<60)
0-6
Mode Dimmer
7-65 Strobo lent vers rapide
66-69
Aucune
70-128 Strobo à impulsion de lent vers
rapide
129-132
Aucune
133-191 Fondu strobe de lent vers rapide
192-195
Aucune

©Lotronic – 2012 LP64LED-FLAT-RC
196-255 Fondu en sortie du strobo de lent
en rapide
CH5 (CH7>60) 0-255 En mode auto, vitesse lente vers
rapide
CH6 (Couleurs statiques)
0-255
Couleurs statiques
CH6 (Changement de
couleur)
0-255 Strobo de lent vers rapide
CH7
0-59
Mode Dimmer
60-119 Couleurs statiques
120-179
Mode saut de couleur
180-239 Mode changement progressif de
couleur
240-255 Activation par le son
CONNEXIONS DMX512
Le DMX512 est le protocole de gestion intelligente d’appareils de lumière le
plus utilise qui permet un maximum de 12 canaux.
Une résistance de fin de ligne réduit les erreurs, problèmes
de transmission et interférences. Il est toujours conseillé de
brancher une terminaison DMX sur la sortie du dernier
appareil de la chaîne. C’est une fiche XLR qui contient une
résistance de 120 Ohms 1/4W entre la broche 2 (DMX-) et 3 (DMX+).
1. Reliez les appareils les uns aux autres par un cordon XLR qui se branche sur la
sortie du premier appareil et l’entrée du suivant et ainsi de suite. Le cordon ne
peut pas être divisé en “Y”. Des câbles inappropriés ou endommagés, des joints
soudés ou des connecteurs rouillés provoquent une distorsion du signal et
plantent le système.
2. Les fiches d’entrées et de sortie DMX font traverser le signal pour maintenir le
circuit DMX en place lorsqu’un des appareils n’est pas sous tension.
3. Le dernier appareil doit être muni d’une terminaison afin de réduire des
erreurs du signal. Soudez une résistance de 120 Ohms 1/4W entre la broche 2 et
3 de la fiche XLR et branchez cette fiche sur la sortie du dernier appareil.

©Lotronic – 2012 LP64LED-FLAT-RC
4. Chaque appareil doit avoir sa propre adresse DMX
enregistrée pour pouvoir recevoir les données envoyées par la commande.
L’adresse se situe entre 0-511 (généralement 0 & 1 sont égal à 1).
5. les fiches XLR à 3 broches sont plus courantes que les XLR à 5 broches.
XLR 3 broches: Pin 1: Masse, Pin 2: Signal négatif (-), Pin 3: Signal positif (+)
XLR 5 broches: Pin 1: Masse, Pin 2: Signal négatif (-), Pin 3: Signal positif (+),
Pin4/5: non utilisés
Configuration des broches
Pin 1 = Masse
Pin 2 = Data compliment (négatif)
Pin 3 = Data true (positif)
NOTE IMPORTANTE : Les produits électriques ne doivent pas être mis au rebut
avec les ordures ménagères. Veuillez les faire recycler là où il existe des centres
pour cela. Consultez les autorités locales ou votre revendeur sur la façon de les
recycler.
L
LE
ED
D
S
ST
TR
RA
AH
HL
LE
ER
R
P
PA
AR
R6
64
4
LP-64LED-FLAT-RC
BEDIENUNGSANLEITUNG
Vor der ersten Inbetriebnahme sorgfältig die Anleitung durchlesen. Sie enthält
wichtige Sicherheits- und Wartungshinweise.
Sicherheitshinweise
- Bewahren Sie die Anleitung für spätere Einsichtnahme auf.
- Bewahren Sie die Originalverpackung auf, um das Gerät jederzeit sicher
transportieren zu können.
- Verwenden Sie das Gerät nicht im Freien und nicht in feuchten Räumen.
- Wenn der Stecker und/oder das Kabel und/oder der Kabeleinlass des Geräts
beschädigt ist, muss es von einem Fachmann repariert werden.
- Ziehen Sie bei Gewitter, oder wenn das Gerät eine Zeit lang nicht benutzt
wird, stets den Stecker aus der Steckdose.
- Immer am Stecker anfassen, niemals am Kabel ziehen

©Lotronic – 2012 LP64LED-FLAT-RC
- Vor Hitze und/oder direktem Sonnenlicht schützen.
- Es dürfen keine kleinen Gegenstände oder Flüssigkeiten ins Gerät dringen.
- Reinigen Sie das Gerät nur mit einem leicht feuchten Tuch. Verwenden Sie
keine Haushaltsreiniger.
- Außer den in der Anleitung genannten Teilen enthält das Gerät keine
Komponenten, die vom Benutzer repariert oder ersetzt werden können.
- Falls das Gerät defekt ist, muss es von einer anerkannten Reparaturwerkstatt
repariert werden.
- Bewahren Sie das Gerät außerhalb der Reichweite von Kindern auf.
Installation
Prüfen Sie, ob Ihre Netzspannung der Versorgungsspannung des Strahlers
entspricht. Das Gerät benötigt 100-230Vac∼und 50/60Hz.
Technische Daten
Betriebsarten: Fernbedienung, DMX512, Automatik, Klangaktiviert, Master-
Slave
Leuchtmittel: 181 x 10mm superhelle LEDs (49 Rote,72 Grüne,60 Blaue)
LED Farben: RGB
DMX Kanäle: 3, 5 & 7 Kanäle
Verbrauch: 20W
Stromversorgung: 100-230Vac ∼50-60Hz
Abmessungen: L275 x B275 x H100mm
Gewicht: 1,95 Kg
Features
Extra schlanker PAR64 LED Strahler
Auswahl unter 3, 5, 7 Kanälen
4-stelliges LED Display mit Drucktasten
0—100% Stroboskop
Dimmer 0 - 100%: Unabhängige Steuerung der roten, grünen und blauen
LEDs
Statische Farben und RGB Farbmischung
Farbiger Stroboskopeffekt
Allmählicher Farbwechsel, Farbensprung, einstellbare Geschwindigkeit
Eingebaute Programme über Musikaktivierung
Sehr geringer Stromverbrauch, hohe Leuchtkraft
Anschlüsse über 3-pol. XLR Kabel
Inkl. Montagebügel

©Lotronic – 2012 LP64LED-FLAT-RC
Beschreibung
1. Befestigungsbügel 6. Erdkontakt
2. LCD Display
7. MENU Taste
3. DMX Eingang 8. UP Taste
4. DMX Ausgang 9. DOWN Taste
5. Netzbuchse
10. ENTER Taste
Menu Bedienfeld
MENU: Wahl der Programmfunktion
UP: Weiter in der gewählten Funktion
DOWN: Rückwärts in der gewählten Funktion
ENTER: Bestätigung der Wahl
So oft auf MENU drücken, bis die gewünschte Funktion erreicht ist. Mit den UP
und DOWN Tasten durch die Optionen laufen. Mit ENTER die angezeigte
Funktion bestätigen oder eine Menüoption aktivieren. Um in die vorige Option
oder ins Menü zurückzugehen, ohne einen Wert zu verändern, auf MENU
drücken.
Addr Enter a001 Up/Down a512 →Einstellen der DMX Adresse des Geräts
und Wahl der DMX Betriebsart
Chnd Enter 3CH UP/Down 5CH Up/Down 7CH →Wahl des 3-, 5- oder 7-
Kanalbetriebs
SLAU EnterYES Up/Down NO →Gerät auf Slavebetrieb einstellen
SOUn Enter Sd-1 Up/Down Sd-1 Enter →Gerät auf Musikbetrieb einstellen
SP-1 Up/Down SP-8 →Einstellen der Klangempfindlichkeit
Jump Enter JU01 Up/Down JU20 Enter →Wahl des Farbensprungbetriebs &
Einstellung der Sprunggeschwindigkeit

©Lotronic – 2012 LP64LED-FLAT-RC
FJ00 Up/Down FJ04 Enter →Wahl der Blitzgeschwindigkeit im
Farbsprungbetrieb
Fade Enter Fs01 Up/Down Fd15 Enter →Wahl des Farbeinblendbetriebs &
Einstellung der Farbeinblendgeschwindigkeit
AUT0 Wahl des Automatikbetriebs
COLO Enter C000 UP/Down C255 Enter →Wahl der statischen Farbbetriebsart
& Wahl unter 255 Farben
FL01 Enter FL15 Enter →Einstellen der Stroboskopgeschwindigkeit im
statischen Farbbetrieb
ManU Enterr000 Up/Down r255 Enter →Dimmereinstellung der ROTEN LED
G000 Up/Down G255 Enter →Dimmereinstellung der GRÜNEN LED
b000 Up/Down b255 Enter →Dimmereinstellung der BLAUEN LED
bLnd Enter YES Up/Down NO →Black out
diSP Enter YES up/Down NO →Display auf normal oder umgekehrt einstellen
EINSTELLEN ÜBER DIE FERNBEDIENUNG
1. Für Automatikbetrieb auf “Auto” drücken.
2. Für Musiksteuerung auf “Sound” drücken. 2-mal
drücken, um die Empfindlichkeit einzustellen. Hinweis:
Zusammen mit den + & - Tasten kann unter 3 Arten von
Klangaktivierung gewählt bzw. die Empfindlichkeit
eingestellt werden.
3. Für DMX-Betrieb auf “DMX” drücken. 2-mal für DMX
Kanalbetrieb drücken. Hinweis: Zusammen mit den + &
- Tasten kann eine DMX Adresse oder der DMX Kanal
gewechselt werden. Die DMX Adresse kann auch mit
den Nummerntasten 1-9 eingestellt werden. Beispiel:
Zur Einstellung der Adresse 16, die Tasten 0, 1 und 6
drücken.
4. Zum Ein- und Ausschalten der Lampen auf “BLACK OUT” drücken.
5. Die Tasten “Red”, “Green”, “Blue” & “White” (nur für Geräte mit 4-farbigen
LEDs) wird die Intensität der jeweiligen Farbe eingestellt. Hinweis: Zusammen
mit den + & - Tasten wird der Dimmer eingestellt.
6. Für Farbensprungbetrieb auf “Jump” drücken. Hinweis: Zusammen mit den +
& - Tasten wird die Geschwindigkeit gewechselt.
7. Für Farbenüberblendbetrieb auf “Fade” drücken. Hinweis: Zusammen mit den
+ & - Tasten wird die Überblendgeschwindigkeit eingestellt.

©Lotronic – 2012 LP64LED-FLAT-RC
8. Für statischen Farbbetrieb auf “Colour” drücken. Hinweis:
Zusammen mit den + & - Tasten können Sie unter 255 Farben wählen. Sie
können auch die Nummerntasten 0-9 drücken, um eine Farbe direkt zu wählen.
9. Für Stroboskopbetrieb auf “Flash” drücken. Hinweis: Zusammen mit den + & -
Tasten wird die Blitzgeschwindigkeit verändert. Die Blitzgeschwindigkeit kann
auch im Farbensprungbetrieb eingestellt werden.
10. Hinweis: Wenn die Fernbedienung benutzt wird, erscheint der Wert auch
auf dem LED Display.
DMX Werte und Funktionen:
3-KANALBETRIEB:
Kanal Wert Funktion
CH1
0-255
ROTER Dimmer
CH2 0-255 GRÜNER Dimmer
CH3
0-255
BLAUER Dimmer
5-KANALBETRIEB:
Kanal
Wert
Funktion
CH1 0-255 ROTER Dimmer
CH2
0-255
GRÜNER Dimmer
CH3 0-255 BLAUER Dimmer
CH4
0-255
Master Dimmer
CH5
0-6 Dimmer Betrieb
7-65 Stroboskop langsam auf schnell
66-69
Nicht belegt
70-128 Impulsstroboskop von langsam auf schnell
129-132 Nicht belegt
133-191
Stroboskopüberblenden von langsam auf schnell
192-195 Nicht belegt
196-255
Stroboskopausblenden von langsam auf schnell
7- KANALBETRIEB
Kanal
Wert
Funktion
CH1
0-255
ROTER Dimmer
CH2
0-255
GRÜNER Dimmer
CH3 0-255 BLAUER Dimmer
CH4
0-255
Master Dimmer
CH5 0-6 Dimmer Betrieb

©Lotronic – 2012 LP64LED-FLAT-RC
(CH7<60)
7-65
Stroboskop langsam auf schnell
66-69 Nicht belegt
70-128
Impulsstroboskop von langsam auf
schnell
129-132
Nicht belegt
133-191 Stroboskopüberblenden von
langsam auf schnell
192-195
Nicht belegt
196-255 Stroboskopausblenden von langsam
auf schnell
CH5 (CH7>60) 0-255 Im Automatikbetrieb,
Laufgeschwindigkeit von langsam
auf schnell
CH6 (static colour mode) 0-255 Statische Farbwahl
CH6 (Colour change mode)
0-255
Stroboskop langsam auf schnell
CH7 0-59 Dimmer Betrieb
60-119
Statischer Farbbetrieb
120-179 Farbensprungbetrieb
180-239 Allmählicher Farbwechsel
240-255
Musikaktivierter Betrieb
DMX512 ANSCHLÜSSE
Das DMX512 Protokoll mit einer Höchstanzahl von 512 Kanälen wird weltweit
als intelligentes Lichtsteuersystem eingesetzt.
Ein Endwiderstand reduziert Fehler, Übertragungsprobleme
und Störungen. Es ist ratsam, einen DMX Endwiderstand
an den Ausgang des letzten Geräts der Kette anzuschließen.
Es handelt sich dabei um einen XLR Stecker mit einem 120 Ohm
1/4W Widerstand zwischen Stift 2 (DMX-) und 3 (DMX+).
1. Schließen Sie die Geräte in einer Kette hintereinander, indem Sie ein DMX
Kabel vom Ausgang des Geräts an den DMX Eingang des folgenden Geräts
anschließen. Das Kabel darf nicht verzweigt werden. Ungeeignete oder

©Lotronic – 2012 LP64LED-FLAT-RC
beschädigte Kabel, Lötstellen oder verrostete Verbinder verformen das Signal
und das System stürzt ab.
2. Die DMX Ein- und Ausgangsverbinder leiten das Signal auch dann, wenn ein
Gerät in der Kette ausgeschaltet ist.
3. In den DMX Ausgang des letzten Geräts muss ein Endwiderstand gesteckt
werden, um Signalfehler zu vermeiden. Löten Sie einen 120 Ohm 1/4W
Widerstand zwischen Stift 2 und 3 des XLR Verbinders und stecken Sie ihn in den
DMX Ausgang des letzten Geräts.
4. Jedes Gerät muss eine eigene Adresse haben, um die vom Controller
gesendeten Daten empfangen zu können. Die Adresse ist eine Zahl zwischen 0
und 511 (im allgemeinen sind 0 & 1 = 1).
5. 3-pol XLR Verbinder sind häufiger als 5-pol. XLR Armaturen.
3-pol. XLR: Stift 1: Masse, Stift 2: Negatives Signal (-), Stift 3: Positives Signal (+)
5-pol. XLR: Stift 1: Masse, Stift 2: Negatives Signal (-), Stift 3: Positives Signal (+),
Pin4/5: nicht belegt
Stiftbelegung
Pin 1 = Masse
Pin 2 = Data compliment (negativ)
Pin 3 = Data true (positiv)
WICHTIGER HINWEIS: Elektrogeräte gehören nicht in den Hausmüll. Sie müssen
in speziellen Betrieben recycelt werden. Bringen Sie sie zu einer speziellen
Entsorgungsstelle für Elektrokleingeräte (Wertstoffhof)!

©Lotronic – 2012 LP64LED-FLAT-RC
L
LE
ED
D
P
PA
AR
R6
64
4
C
CA
AN
N
LP64LED-FLAT-RC
MANUAL DE INSTRUÇÕES
Obrigado por adquirir o LED PAR-64. Cada LED PAR-64 foi testado e enviado em perfeito
estado de funcionamento.
Recomendações de Segurança
•Não tente fazer reparações! Se o fizer, irá anular a garantia. No caso de a sua unidade
precisar de reparações entre em contacto connosco.
•Para prevenir ou reduzir o risco de choque eléctrico ou fogo, não exponha este
aparelho à chuva ou humidade.
•Leia atentamente este manual para se familiarizar com as operações básicas da
unidade.
• Antes de ligar certifique-se de que a tomada de energia eléctrica local coincide com a
voltagem necessária da unidade
• Não retire a tampa sob quaisquer circunstâncias caso não seja qualificado para o fazer.
•Nunca ligue a alimentação quando a tampa é removida.
•Nunca use o aparelho se estiver danificado.
•Nunca ligue o aparelho a qualquer tipo de dimmer e/ou power-pack.
• Se o aparelho não for usado por um longo período de tempo, desligue-o da fonte de
alimentação.
•Instale sempre a unidade num local seguro e estável e verifique se a área terá uma
ventilação adequada.
•Tome cuidado para que esta unidade não seja montada em áreas próximas a fontes de
calor, tais como amplificadores, aquecedores, fogões e aquecedores.
Instruções Gerais
Todas as unidades LED PAR-PRO podem ser alimentadas por 100-230Vac e 50/60Hz.
Especificações
Modos de operação: DMX512 remoto, Auto, Activação Sonora, Master-slave
Lâmpada: 181 x LEDs 10mm hi bright (49 Vermelho, 72 Verde, 60 Azul)
Cores LED RGB
Canais DMX: 3, 5 & 7 Canais
Consumo: 20W
Fonte de alimentação: 100-230Vac ∼50-60Hz
Dimensões: L275 X W275 X H100mm
Peso: 1.95 Kg
Table of contents
Languages:
Other Ibiza Floodlight manuals

Ibiza
Ibiza LZR360RGB-FX User manual

Ibiza
Ibiza LEDBAR252 User manual

Ibiza
Ibiza LEDSCAN20 15-1420 User manual

Ibiza
Ibiza LED PAR56 CAN User manual

Ibiza
Ibiza LP64LED-PRO User manual

Ibiza
Ibiza LED6-QUAD User manual

Ibiza
Ibiza DJLIGHT65 User manual

Ibiza
Ibiza FLASH-COLOR-STROBE User manual

Ibiza
Ibiza LMH400LED-MKII User manual

Ibiza
Ibiza LEDFLOOD-10WH-MD User manual