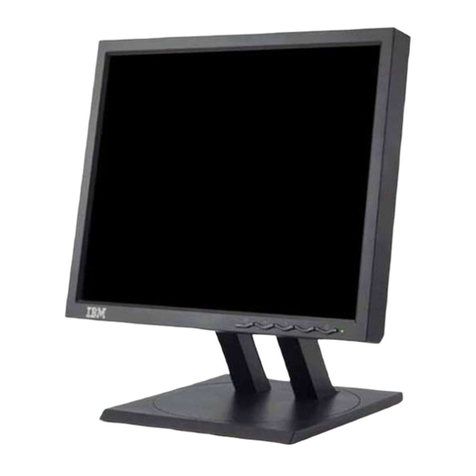
IBM 9514-BXX User manual

.......
.
......
.
TFT LCD Color Monitor
9514 - BXX Multimode
User's Setup Guide

1
These user’s setup instructions cover typical user environments. The on-screen
messages may differ depending on the level of your hardware and software. In some
cases you may need to vary the setup procedures.
For more information, refer to your computer or operating system manuals or consult
your system administrator or dealer.
Ces instructions de configuration d’exploitation s’appliquent aux environnements
d’utilisation types. Les messages affichés à l’écran peuvent varier en fonction du niveau
de votre matériel et de vos logiciels informatiques. Dans certains cas, vous pouvez être
amenés à changer de procédures de configuration.
Pour de plus amples informations à ce sujet, veuillez vous reporter aux manuels de votre
ordinateur et de votre système d’exploitation, ou consultez l’administrateur de votre
système ou votre revendeur.
Diese Anweisungen für die Einstellung durch den Benutzer gelten für typische
Betriebsumgebungen. Die Bildschirmmeldungen können je nach Art der verwendeten
Hardware und Software auch anders lauten. In einigen Fällen müssen die
Einstellungsschritte unter Umständen abgeändert werden.
Weitere Informationen finden Sie im Computer- oder Betriebssystemhandbuch, oder
wenden Sie sich an Ihren Systemadministrator oder Fachhändler.
En estas instrucciones de configuración se describen entornos de usuarios típicos. Los
mensajes en pantalla, pueden diferir según sea el nivel del hardware y del software. En
algunos casos, necesitará seguir otros procedimientos para la configuración.
Para obtener más información, puede consultar los manuales del ordenador o del sistema
operativo o ponerse en contacto con el administrador del sistema o con el distribuidor.
Queste istruzioni di configurazione per l’utente coprono gli ambienti operativi comuni. I
messaggi che appaiono sul video possono differire a seconda dell’hardware e del
software utilizzati. In alcuni casi potrebbe essere necessario variare le procedure di
configurazione.
Per ulteriori informazioni, fare riferimento ai manuali del computer o del sistema
operativo, o consultare il proprio amministratore di sistema o il concessionario.

i
DANGER
To avoid electric shock hazard:
• The product is supplied with a grounded plug and power cord which should be used to
connect to the AC supply.
• The power cord should only be used with a properly wired and grounded power outlet.
• Any equipment to which this product is attached must also be connected to a properly
wired and grounded outlet.
• Do not remove the covers.
• The product does not incorporate an AC power switch. To isolate the monitor from the
electrical supply, you must remove the plug from the power outlet. The power outlet
should be easily accessible
• Do not connect or disconnect this product during an electrical storm.
• Always use the AC adapter supplied with the monitor.
Handing:
• Handle this product with care when moving it.
• The panel should not be operated in a horizontal position.
• The fluorescent lamp used in the Liquid Crystal Display assembly contains a small
quantity of mercury (less than 50 milligrams). For environmental reasons this product
should not be disposed of into landfill. It must be disposed of as required by local
ordinances or regulations.
• The Liquid Crystal Display assembly is made of glass and can break as a result of
rough handling or dropping. This may lead under some circumstances to a small
quantity of the liquid crystal material being exposed. Avoid contact with this material as
it is an irritant. Should this material come into contact with eyes, hands, etc., the area
should be washed with water for at least 15 minutes; medical care should be obtained if
any symptoms are present after washing.
9514.book Page i Wednesday, March 25, 1998 10:12 PM

1
Contents
Contents . . . . . . . . . . . . . . . . . . . . . . . . . . . . . . . . . . . . . . . . . . . . . . . . . . . . . . . . . . 1
Setup . . . . . . . . . . . . . . . . . . . . . . . . . . . . . . . . . . . . . . . . . . . . . . . . . . . . . . . . . . . . . 2
Hardware Requirements . . . . . . . . . . . . . . . . . . . . . . . . . . . . . . . . . . . . . . . . . . 2
Workplace Preparation . . . . . . . . . . . . . . . . . . . . . . . . . . . . . . . . . . . . . . . . . . . 2
Lifting the Monitor . . . . . . . . . . . . . . . . . . . . . . . . . . . . . . . . . . . . . . . . . . . . . . . 2
Working Practices . . . . . . . . . . . . . . . . . . . . . . . . . . . . . . . . . . . . . . . . . . . . . . . 3
Connecting your Monitor . . . . . . . . . . . . . . . . . . . . . . . . . . . . . . . . . . . . . . . . . . 4
Switching on the Monitor . . . . . . . . . . . . . . . . . . . . . . . . . . . . . . . . . . . . . . . . . . 6
Adjusting the Monitor Position . . . . . . . . . . . . . . . . . . . . . . . . . . . . . . . . . . . . . . 6
Caring for your Monitor . . . . . . . . . . . . . . . . . . . . . . . . . . . . . . . . . . . . . . . . . . . 6
Configuring your Monitor . . . . . . . . . . . . . . . . . . . . . . . . . . . . . . . . . . . . . . . . . . . . 7
Automatic Setup . . . . . . . . . . . . . . . . . . . . . . . . . . . . . . . . . . . . . . . . . . . . . . . . 7
Auto Setup for the PC . . . . . . . . . . . . . . . . . . . . . . . . . . . . . . . . . . . . . . . . . . . . . . . 8
Auto Setup for DOS . . . . . . . . . . . . . . . . . . . . . . . . . . . . . . . . . . . . . . . . . . . . . 9
Auto Setup for Windows 3.1, Windows 95, or Windows NT . . . . . . . . . . . . . . 10
Auto Setup OS/2 . . . . . . . . . . . . . . . . . . . . . . . . . . . . . . . . . . . . . . . . . . . . . . . 11
Quick Setup . . . . . . . . . . . . . . . . . . . . . . . . . . . . . . . . . . . . . . . . . . . . . . . . . . . 12
User controls . . . . . . . . . . . . . . . . . . . . . . . . . . . . . . . . . . . . . . . . . . . . . . . . . . . . . 13
Front of screen controls . . . . . . . . . . . . . . . . . . . . . . . . . . . . . . . . . . . . . . . . . 13
On-screen display (OSD) controls . . . . . . . . . . . . . . . . . . . . . . . . . . . . . . . . . 14
Troubleshooting . . . . . . . . . . . . . . . . . . . . . . . . . . . . . . . . . . . . . . . . . . . . . . . . . . 17
Setting Non Interlaced Mode . . . . . . . . . . . . . . . . . . . . . . . . . . . . . . . . . . . . . . 18
Further Help . . . . . . . . . . . . . . . . . . . . . . . . . . . . . . . . . . . . . . . . . . . . . . . . . . 19
Specifications . . . . . . . . . . . . . . . . . . . . . . . . . . . . . . . . . . . . . . . . . . . . . . . . . . . . 20
Supported screen addressability . . . . . . . . . . . . . . . . . . . . . . . . . . . . . . . . . . . 21
Default Preset Timing . . . . . . . . . . . . . . . . . . . . . . . . . . . . . . . . . . . . . . . . . . . 22
Compliances . . . . . . . . . . . . . . . . . . . . . . . . . . . . . . . . . . . . . . . . . . . . . . . . . . . . . 24
Warranty . . . . . . . . . . . . . . . . . . . . . . . . . . . . . . . . . . . . . . . . . . . . . . . . . . . . . . . . . 27
9514.book Page 1 Wednesday, March 25, 1998 10:12 PM
2
Setup
Hardware Requirements
This Monitor requires a computer with a suitable on-board sub-system or Video Adapter card that can
support SXGA 1024 x 768 at 75 Hz.
Make sure the PC's video mode is set in the range of the supported screen addressability shown in the
table on page 21.
Workplace Preparation
Positioning the Monitor
This section gives advice
on what you should
consider before you set up your
monitor.
Choose a suitable place to position the monitor where it is not near
fluorescent desk lighting. Ensure that the furniture or equipment can support
the weight of the monitor. Allow at least 2 inches (50mm) ventilation space
around the monitor.
Height
The monitor should be positioned so that the top of the screen is slightly
below your eye level when you sit at your workstation.
Orientation
Choose a position that gives the least reflection from lights and windows,
usually at a right angle to any windows. The monitor should be positioned
directly in front of you so that you do not have to twist your body to use it. Tilt
the monitor to a comfortable viewing angle.
Lifting the Monitor
Do notsupport the monitor
withinthescreenarea.The
Liquid Crystal Display is glass
and can be damaged by rough
handling or excessive pressure.
Hold the bottom of the screen with both hands in the positions shown.
9514.book Page 2 Wednesday, March 25, 1998 10:12 PM

3
Working Practices
Rest
Take regular breaks. Vary your posture, stand up and stretch occasionally as
prolonged use of computer workstations can be tiring.
This section gives advice
on how you can work
comfortably and reduce fatigue.
Back
You should sit back in your chair and use the backrest.
Hands
Use a light touch on the keyboard, keeping your hands and fingers relaxed.
Allow a space in front of the keyboard to rest your wrists when not typing.
Consider using a wristpad.
Eyesight
Working with monitors, in common with any prolonged close work, can be
visually demanding. Look away from the screen periodically and have your
eyesight checked regularly.
Screen settings
Set the screen brightness and contrast to a comfortable level. You may have
to adjust this as the lighting changes during the day. Many application
programs let you select color combinations which can help you to view in
comfort
9514.book Page 3 Wednesday, March 25, 1998 10:12 PM

4
Connecting your Monitor
Be sure to read the
‘Safety Information’ at
the front of this User Guide
before carrying out this
procedure.
1. Turn off your PC and all attached devices.
2. With the monitor standing vertically, remove
the cable covers at the back:
• remove cable cover 1 by hooking your
finger at A and sliding the cover off
smoothly.
• remove cable cover 2 by pressing both
sides of the cover and pulling out.
3. Place the screen towards the edge of a flat
surface with the stand hanging slightly off the
edge. Connect the monitor cable and tighten the screws.
4.Next connect the AC adapter.
5. Thread the cables through the metal fitting - the AC adapter cable
through A and the monitor cable through B as shown below.
6. You can release the cables from each of the three notches by removing
the chips as shown above.
9514.book Page 4 Wednesday, March 25, 1998 10:12 PM

5
7. Turn the monitor upright and refit the covers.
Slide on cover 2, fit cover 1 either side of the
hinges and slide on.
8. Connect the monitor cable to the PC and
tighten the screws.
9. Connect the power cord to the AC adapter,
placing the AC adapter in a safe place.
10. Connect the other end of the power cord to
a correctly grounded AC power source.
Connecting the keyboard and mouse to the monitor
You do not need to
connect the optional
keyboard / mouse cable if you
use the DPMS function for
standby mode.
To use the standby mode or extend the cable between the keyboard and
mouse. Connect optional keyboard / mouse (P/N: 82H8627) to the connector
at the rear of the monitor as shown, then connect the other end of the
keyboard and mouse connectors to the PC.
9514.book Page 5 Wednesday, March 25, 1998 10:12 PM

6
Switching on the Monitor
Switch on the power source and PC. To turn on the monitor, push and
release the power switch. To switch it off, push and release the power switch
again.
Adjusting the Monitor Position
Viewing Angle
You can tilt the screen backward or rotate the monitor to the left or right, as
shown below.
Caring for your Monitor
Be sure to turn off the power before you perform any maintenance on the
monitor. Clean your monitor as follows:
• Gently wipe the device covers and the screen with a soft cloth.
• Do not use chemicals such as thinner or benzene. They may damage the
surface coating.
9514.book Page 6 Wednesday, March 25, 1998 10:12 PM

7
Configuring your Monitor
Automatic Setup
The Setup Utility included
on the setup option
diskettes are for displaying
color-bar patterns. They do not
replace or modify the display
driver.
When you first use your monitor you must perform Automatic (auto) Setup.
This procedure sets up your monitor to process the video signals from your
computer without image discoloration or flicker. After you perform auto setup,
the settings are stored and used each time you turn on the monitor.
The automatic setup
instructions require the
monitor to be warmed up for 15
minutes. This is not required for
normal operation.
9514.book Page 7 Wednesday, March 25, 1998 10:12 PM

8
Auto Setup for the PC
Check the operating system installed on your PC and follow the instructions
from the table below.
Before carrying out this
section it is very important
that The Monitor Information
Diskette for Windows 95 and
Windows 98 has been run. (See
page 10).
If your PC does not run
with the setup option
diskettes shipped with the
monitor, refer to Quick Setup
on page 12.
Before you begin the auto setup for your PC :
1. Make a backup copy of the setup option diskettes supplied with the
monitor.
2. Make sure the PC's video mode is set in the range in the table of
Supported screen addressability
on page 21.
3. Perform the auto setup for each screen mode you use.
Operating System First follow auto
setup on .... Then follow auto
set-up on ....
DOS page 9
Windows 3.1 page 9 page 10
Windows 95 page 9 page 10
Windows NT page 9 page 10
Operating System/2 (OS/2) page 9 page 11
9514.book Page 8 Wednesday, March 25, 1998 10:12 PM

9
Auto Setup for DOS
1. Turn on the monitor first; then the PC.
If the message UNSUPPORTED VIDEO is displayed, or if nothing is displayed
check:
• that the video interface cable is connected properly.
• the correct video adapter card is installed.
• the correct supported display mode is selected for your PC.
2. Wait approximately 15 minutes, until the monitor warms up.
3. Insert the diskette labelled ‘ Setup Option Diskette (for DOS / Windows /
Windows NT)’ into the diskette drive.
4. Display the command prompt screen of the DOS full-screen display:
• If Windows is installed, open the DOS prompt from the Program
Manager to display the DOS full-screen.
• If OS/2 is installed, open the DOS full-screen display from the
command prompt of OS/2.
• If only DOS is installed, the command prompt is displayed when the
system is started.
5. At the command prompt, type ‘A:’ and press ENTER.
6. Type ‘TESTPATD’ and press ENTER. The color-bar pattern appears.
7. Push the setup switch at the bottom of the monitor. The setup menu
appears.
8. Push one of the brightness control buttons to select AUTO SETUP.
9. Push one of the contrast control buttons (+ moves the highlighter
up; - moves the highlighter down). The AUTO SETUP line changes to
start, and auto setup starts.
10. Wait until the PRESS [ENTER] KEY message is displayed.
11. Press ENTER to continue the auto setup procedure.
12. The AUTO SETUP line changes to COMPLETED when auto setup is
complete.
13. Push the setup switch at the bottom of the monitor. The setup menu
disappears.
14. Type ‘Exit’ at the command prompt to return to Windows.
Now continue the setup for your operating system:
If the monitor is in standby
mode (STANDBY ON), it
may automatically turn off while
you are waiting for it to warm up.
IfyouareusingPC-DOS/V,
change to U.S. mode by
typing ‘CHEV US’ and pressing
ENTER at the command
prompt.
If the screen flickers,
repeat the setup several
times until the flicker is
minimised,
9514.book Page 9 Wednesday, March 25, 1998 10:12 PM

10
Auto Setup for Windows 3.1, Windows 95, or Windows NT
Continued from
Auto Setup for DOS
on page 9
15 Drag the icon bar and tool bar, if they are displayed, to the bottom of the
screen
16. Insert the diskette labelled ‘ Setup Option Diskette (for DOS / Windows /
Windows NT)’ into the diskette drive.
17. Check the operating system installed on your PC and follow the
instructions from the table below
.
18. The color-bar pattern appears and auto setup starts.
19. Position the mouse pointer at the bottom center of the screen. This
allows auto setup to run properly.
20. The AUTO SETUP line changes to COMPLETED when auto setup is
completed.
If “AUTO SETUP COMPLETED” is not displayed, or the “AUTO SETUP FAILED”
message appears, repeat the auto setup procedure several times.
21. Press ALT+F4 to exit auto setup.
You have completed the monitor setup.
Operating
system Step 1 Step 2 Step 3 Step 4
Windows 3.1 open
Program
Manager click on File click on run
Type
‘A:\TESTPAT’
Windows NT
3.5
open
Program
Manager click on File click on run
Windows 95 click on Start click on Run
Windows NT
4.0 click on Start click on Run
If the monitor is in standby
mode (STANDBY ON), it
may automatically turn off while
you are waiting for it to warm up.
The size and diversity of
the color pattern varies
with the screen resolution.
If the screen flickers,
repeat the setup several
times until the flicker is
minimised,
9514.book Page 10 Wednesday, March 25, 1998 10:12 PM

11
Auto Setup OS/2
Continued from
Auto Setup for DOS
on page 9
11 If the WarpCenter Toolbar is permanently on, click the right mouse
button on the WarpCenter Toolbar, click on ‘Properties’, ‘Display Tab’
and ‘Show only when mouse in center position’.
12. Insert the diskette labelled ‘ Setup Option Diskette (for OS/2)’ into the
diskette drive.
13. Open the OS/2 full-screen window or an OS/2 window.
14. At the command prompt type A: and press ENTER.
15. Type TESTPATS and press ENTER.
16. After approximately 1 minute, the color-bar pattern appears.
17. Move the mouse pointer (and the icon bar and tool bar if they are
displayed) to the bottom center of the screen to allow setup to run
properly.
18. The AUTO SETUP line changes to COMPLETED when auto setup is
completed after 10 to 20 seconds.
If “AUTO SETUP COMPLETED” is not displayed, or the “AUTO SETUP FAILED”
message appears, repeat the auto setup procedure several times.
19. Press ALT+F4 to exit auto setup.
You have completed the monitor setup.
If the monitor is in standby
mode (STANDBY ON), it
may automatically turn off while
you are waiting for it to warm up.
The size and diversity of
the color pattern varies
with the screen resolution.
If the screen flickers,
repeat the setup several
times until the flicker is
minimised.
9514.book Page 11 Wednesday, March 25, 1998 10:12 PM
12
Quick Setup
You can perform a quick setup without running the Auto-Setup application
1. Turn on the monitor and the System Unit and wait for about 15 minutes
until the machine warms up.
2. Start the operating system on the System Unit and display a full-screen
image.
3. Push the setup switch on the front of the monitor. The setup main menu
appears.
4. Press one of the brightness control buttons to select AUTO SETUP.
5. Press one of the contrast control buttons. After about 10 seconds,
the message “Save parameters?” is displayed.
6. To save the settings for the monitor, push a contrast control button.
To discard the settings (because some problem such as a screen flicker
occurs), push a brightness control button.
7. Press the setup switch on the back of the monitor to turn off the setup
main menu.
Check that the screen
resolution and the
frequencies are within the
Supported screen
addressability on page 21. If
not, change the settings on the
computer to set them within the
range.
You need a full screen
image to perform proper
auto setup. You also need a
clear contrast between the
brightest part of the screen and
the darkest for correct
adjustment. Otherwise, the
screen may flicker.
If the “Save Parameters?”
message is not displayed
ortheautosetupvalue“START”
does not change, push the
contrast control button to exit
auto setup and go back to step
4. Display another full-screen
image and redo auto setup.
If you are using a
workstation, the screen
appears greenish because the
black level is shifted due to the
difference of the voltage level of
the video signals. If this
happens, adjust OFFSET G in
the Specialist Controls on
page 16.
9514.book Page 12 Wednesday, March 25, 1998 10:12 PM
13
User controls
Front of screen controls
The front of screen user controls allow the user to turn the monitor on and off,
adjust the brightness and contrast of the monitor to meet the users
preferences, and also to gain access to intermediate and advanced On-
Screen Display Controls.
Icon Control Description
Power Switch Switches the monitor on and off
Power Indicator Green Light when monitor is
powered on.
Standby indicator Green Light when monitor is in
standby mode.
Brightness Control Adjusts background brightness.
Contrast Control Adjust contrast between
foreground and background.
Setup Switch Displays the setup menu.
9514.book Page 13 Wednesday, March 25, 1998 10:12 PM
14
On-screen display (OSD) controls
To display the OSD, press the setup switch on the front of the monitor.
There are eight menus within the OSD. These menus contain the following functions which can be divided
into four levels of adjustment : basic, intermediate, advanced and specialised. The final menu
“Information” gives the user information regarding their monitor.
Basic Controls
Menu +-
Brightness
Contrast
Function Location Effect of
control Description
AUTO
SETUP Menu 1 of 6 OFF / ON ‘AUTO SETUP - OFF’ is displayed. Start auto
setup. ‘START’-’COMPLETED’ are displayed in
sequence until auto setup is complete.
STANDBY Menu 1 of 6 OFF, 5 to 60
MINS, DPMS Set the number of minutes the monitor is out of use
before automatically entering the power-saving
mode. Specify OFF if you do not use this function.
9514.book Page 14 Wednesday, March 25, 1998 10:12 PM

15
Intermediate Controls
Advanced Controls
Function Location Effect of
control Description
CLOCK Menu 2 of 6 +........MHz......- Adjust this parameter to suppress the display of
vertical stripes.
PHASE Menu 2 of 6 0..................23 When there are visual noises on the edges of
characters and graphics, adjust this parameter to
suppress the noise.
H-POSI Menu 4 of 6 Moves image left or right.
V-POSI Menu 4 of 6 Moves image up or down.
SYSTEM
RESET Menu 5 of 6 YES / NO Use this parameter to restore all the values to the
orginal settings when the monitor was shipped.
Function Location Effect of
control Description
H-SIZE Menu 4 of 6 Adjusts image width.
V-SIZE Menu 4 of 6 Adjusts image height.
EXPAND-
SION
Menu 1 of 6 ON / OFF /
USER
To display a screen with resolution less than
1024×768 (the optimum resolution of the monitor),
select the optimum size you want by specifying one
of the following :
ON: Displays a full screen. This is the normal
selection.
OFF: Displays the screen specified by your PC.
USER: Enables you to set the screen size by
specifying H-size and V-size. This setting can be
set and saved for each screen resolution.
9514.book Page 15 Wednesday, March 25, 1998 10:12 PM

16
Specialist Controls
Information
Function Location Effect of
control Description
RED Menu 3 of 6 0................255 Adjusts the red hue level of the screen.
GREEN Menu 3 of 6 0................255 Adjusts the green hue level of the screen.
BLUE Menu 3 of 6 0................255 Adjusts the blue hue level of the screen.
Function Location Description
H-FREQUENCY Menu 6 of 6 The frequency of the video signal (horizontal sync
signal) from your PC (KHz).
V-FREQUENCY Menu 6 of 6 The frequency of the video signal (vertical sync signal,
or refresh rate) from your PC (Hz).
SYNC POLARITY Menu 6 of 6 The polarity of the video signal from your PC.
H stands for the horizontal sync signal, and V stands for
the vertical sync signal.
RESOLUTION Menu 6 of 6 The resolution of the video signal from your PC.
SOFTWARE VERSION Menu 6 of 6 The version number of the control program installed in
the monitor.
9514.book Page 16 Wednesday, March 25, 1998 10:12 PM

17
Troubleshooting
If you suspect something is not working correctly, you should :
1. Turn on the computer and monitor.
2. Set the brightness control to the proper position.
3. Ensure that all cables are securely connected.
4. Disable standby mode if it is enabled. Push the setup switch on the
back of the monitor to determine whether standby mode is enabled.
5. Disable the computer's screen saver program if it is enabled.
6. Run the auto setup procedure described in
Configuring your Monitor
on page 7
7. Adjust the CLOCK parameter in the
Intermediate Controls
on page 15
to suppress the display of vertical stripes.
8. To restore all the auto setup settings to the original values in effect when
the monitor was shipped, press each minus button of the brightness and
the contrast control simultaneously and turn on the monitor. Both LED
indicators turn on and off, and all settings are restored.
9. Set the screen mode to the
Supported screen addressability
in the
table on page 21.
10. Perform AUTO SETUP for each display mode (each screen resolution).
11. Disable Interlaced Mode. (The monitor does not support interlaced
mode).
The LCD contains over
2,300,000 thin-film
transistors (TFTs). A small
number of missing, discolored,
or lighted dots may be present
on the screen, which is an
intrinsiccharacteristicoftheTFT
LCD technology and is not an
LCD defect.
9514.book Page 17 Wednesday, March 25, 1998 10:12 PM
This manual suits for next models
1
Table of contents
Other IBM Monitor manuals

IBM
IBM 9513AG1 - T 55A - 15" LCD Monitor User manual

IBM
IBM Aptiva 2124 Owner's manual

IBM
IBM 9494HB0 - T 860 - 18.1" LCD Monitor User manual

IBM
IBM E74 User manual

IBM
IBM 6517-6LN E74M User manual

IBM
IBM 3276 Manual

IBM
IBM T541A User manual

IBM
IBM T84H User manual

IBM
IBM T T 541 User manual

IBM
IBM E74 User manual