manuals.online logo
Brands
  1. Home
  2. •
  3. Brands
  4. •
  5. IBM
  6. •
  7. Switch
  8. •
  9. IBM SAN40B-4 - System Storage Switch User manual

IBM SAN40B-4 - System Storage Switch User manual

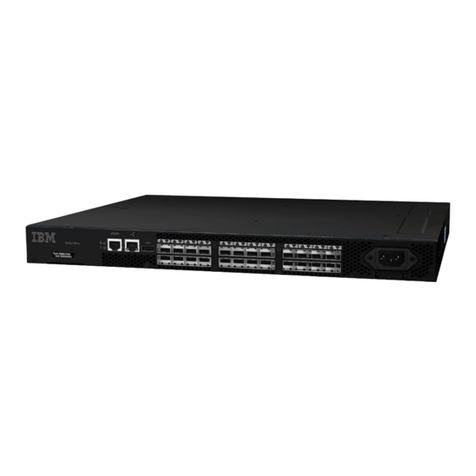
Complete the steps in this guide to install and setup your SAN40B-4 switch in a single-switch configuration using
EZSwitchSetup. See the IBM System Storage SAN40B-4 Installation, Service, and User’s Guide and the Fabric OS
Administrator’s Guide (located on the IBM Publications CD) if you want to choose a different setup.
Attention: Refer to the Safety and environmental notices section of the IBM System Storage SAN40B-4 Installation,
Service, and User’s Guide before starting any installation of this product.
Getting ready
Ensure that you have the items listed below. You can either set the IP address of your switch manually or you can use a
DHCP server. If you are going to use a static IP address, write the network values in the spaces provided.
Installing and starting EZSwitchSetup
1. Insert the EZSwitchSetup CD into the CD-ROM drive of your setup computer. The installer will autostart in about 1
minute.
2. Install EZSwitchSetup following the onscreen directions. Installation will take a few minutes after you click OK.
3. Wait for EZSwitchSetup to start, which should happen automatically after it is installed.
For Windows and Linux instructions, refer to the EZSwitchSetup Administrator’s Guide.
Powering up and connecting cables to the switch
1. Connect the power cord to the switch and then to the
powersource.ThepowerandstatusLEDsdisplay
amber then green. This can take from one to 3 minutes.
2. Install an Ethernet hub.
3. Connect an Ethernet cable from the switch to the LAN
through the Ethernet hub.
4. Attach a serial cable from the switch to the setup
computer.
5. Connect an Ethernet cable from the Ethernet hub to
the setup computer.
6. Attach an Ethernet cable from the Ethernet hub to the
LAN/WAN.
7. Set the connections in the wizard. Choose one of the
following options: Ethernet connection to the LAN (on
the same subnet as the switch) or connect directly to the
switch with a serial cable. Click Next.
In the Discover Switch screen: EZSwitchSetup attempts to connect to the switch across the serial cable. If the
connection is successful, the Set Switch IP Address screen is displayed.
Setting the switch IP address
You can use either a serial or Ethernet connection to set the IP address of the switch. If you are using a DHCP server to
set the IP address: the switch must have DHCP enabled and firmware 6.0 installed. The DHCP server must also be on
the same subnet as the switch.
1. Enter the required information in the SetSwitch IP Address screen.
2. If prompted to install Active X or a version of the Java runtime environment, do so. This might require you to reboot
the setup computer.
3. Click Continue. The configuration wizard will load, which can take a few minutes. If a warning screen for the applet is
displayed, click Ye s or Run to continue.
Values to record:
Fixed IP address (IPv4 or IPv6) for the switch (no DHCP server) _________________________________________
Subnet mask value _____________________________________________________________________________
Default Gateway value:__________________________________________________________________________
Switch World Wide Name (WWN): located on the switch ID pullout:_____________________________________
Items required:
-Ethernet connection (hub or switch) -Ethernet and Fibre Channel Cables
-Host computer with an installed HBA (this computer
should be on the same subnet as the Brocade
switch. Do not run the host computer in the SAN.
-Disk array with Fibre Channel ports
-Standard screw driver -Optical transceivers(SFPs)
-Browser that allows pop_up windows
1
2
3
2
7
5
3
1
6
4
4
IBM®System Storage™SAN40B-4 Quick Start Guide
Set the switch password
Your switch ships with the default password: password. Change the password of your switch and keep the new password
in a secure location for reference. Write your password here if needed: _______________________________________
1. Enter your password in the Set Parameters screen and follow the onscreen prompts.
2. Enter a new name for the switch at this time, if desired. Accept the displayed date and time and click Next.
Configuring the zones and performing device selection
1. Select Typical Zoning on the Zone Configuration screen and click Next.
Typical Zoning is the default zone configuration. See the EZSwitchSetup Administrator’s Guide for more information
on zone configuration.
2. Enter the number and types of devices that you are connecting to the switch on the Device Selection screen.
EZSwitchSetup uses these values to automatically configure the ports on your switch for the devices that you are
connecting.
Connecting devices
The Connect Devices screen displays a graphical representation of the switch with the device connections based on the
information that you entered when you configured zones and performed device selection. The Connect Devices screen
will show all physical connections as missing until you connect the devices that you specified.
1. Install the SFP transceivers in the Fibre Channel ports on the switch to match the ports shown onscreen.
a. Remove any protector plugs from the SFP transceivers you are going to use, and position and insert
each SFP transceivers as required (right side up in the top row of ports and upside down in the bottom
row of ports). Push the SFP until it is firmly seated.
b. Close the latching bale. Repeat for the other ports.
2. Connect Fibre Channel cables from the switch (shown below) to your host and storage devices (not shown).
Make the physical connections to match the connections on the Device Connection screen.
3. The Finish screen will display this message: “Congratulations—you’ve successfully completed the setup!”
4. Click Finish to exit setup.
You are now ready to configure the storage component of the SAN using the documentation that came
with the storage server(s).
5
6
7
4- 01
!
1a
!
a. Remove plastic protector caps from the Fibre Channel
cable ends (if there are any), and position the cable
connector so that it is oriented correctly.
b. Insert the cable connector into the SFP until it is firmly
seated and the latching mechanism clicks.
c. The Device Connection screenshows missing, valid, and
invalid connections as you cable the switch. Note that it
can take up to 15 seconds for the connection to display as
a valid connection. Verify that the connections are all
green and click Ne
Next.
GA32-0586-01 45W8149
© Copyright International Business Machines Corporation 2008, 2010. All rights reserved. US Government Users Restricted Rights –
Use, duplication or disclosure restricted by GSA ADP Schedule Contract with IBM Corp.
© 2008-2010 Brocade Communications Systems, Inc. All Rights Reserved. Printed in USA
IBM, the IBM logo, and ibm.com are trademarks or registered trademarks of International Business Machines Corporation in the
United States, other countries, or both. A complete and current list of other IBM trademarks is available on the Web at
www.ibm.com/legal/

Other manuals for SAN40B-4 - System Storage Switch

1

Other IBM Switch manuals

IBM T860 User manual

IBM

IBM T860 User manual

IBM 4002-Y2A User manual

IBM

IBM 4002-Y2A User manual

IBM RackSwitch G8264CS User manual

IBM

IBM RackSwitch G8264CS User manual

IBM TotalStorage 2109 M12 Installation and maintenance instructions

IBM

IBM TotalStorage 2109 M12 Installation and maintenance instructions

IBM 8237 User manual

IBM

IBM 8237 User manual

IBM SAN16B-2 - TotalStorage Express Model Switch Troubleshooting guide
IBM

IBM SAN16B-2 - TotalStorage Express Model Switch Troubleshooting guide

IBM 8239 Token-Ring Stackable Hub Safety guide

IBM

IBM 8239 Token-Ring Stackable Hub Safety guide

IBM 8265 Nways ATM Switch Technical specifications

IBM

IBM 8265 Nways ATM Switch Technical specifications

IBM 86495BX User guide

IBM

IBM 86495BX User guide

IBM ThinkPad 600 Operating and safety instructions

IBM

IBM ThinkPad 600 Operating and safety instructions

IBM BROCADE 4 GB FC HBAS User manual

IBM

IBM BROCADE 4 GB FC HBAS User manual

IBM pSeries Quick start guide

IBM

IBM pSeries Quick start guide

IBM TotalStorage 3534-F08 User manual

IBM

IBM TotalStorage 3534-F08 User manual

IBM Flex System EN2092 User manual

IBM

IBM Flex System EN2092 User manual

IBM 8960-F64 Manual

IBM

IBM 8960-F64 Manual

IBM SAN32M-2 Manual

IBM

IBM SAN32M-2 Manual

IBM RedBooks SAN24B-5 User manual

IBM

IBM RedBooks SAN24B-5 User manual

IBM RackSwitch G8000 User manual

IBM

IBM RackSwitch G8000 User manual

IBM TotalStorage L10 Instruction Manual

IBM

IBM TotalStorage L10 Instruction Manual

IBM Flex System EN2092 User manual

IBM

IBM Flex System EN2092 User manual

IBM RackSwitch G8264T User manual

IBM

IBM RackSwitch G8264T User manual

IBM 4002AC2 User manual

IBM

IBM 4002AC2 User manual

IBM SAN24B-6 User manual

IBM

IBM SAN24B-6 User manual

IBM E12 User manual

IBM

IBM E12 User manual

Popular Switch manuals by other brands

LDG ALK-2 Operation manual

LDG

LDG ALK-2 Operation manual

Citel EXTender 1100 Quick installation guide

Citel

Citel EXTender 1100 Quick installation guide

Blue Sea Systems 3000 manual

Blue Sea Systems

Blue Sea Systems 3000 manual

Kathrein EXD 154 manual

Kathrein

Kathrein EXD 154 manual

3Com 3C16863A datasheet

3Com

3Com 3C16863A datasheet

HP FlexFabric 7900 Series Command reference

HP

HP FlexFabric 7900 Series Command reference

FCI FLT93 Series Installation, Operation, Maintenance and Troubleshooting

FCI

FCI FLT93 Series Installation, Operation, Maintenance and Troubleshooting

HomeMatic HmIP-BS2 Installation instructions and operating manual

HomeMatic

HomeMatic HmIP-BS2 Installation instructions and operating manual

Cisco Cisco MDS 8/12c user guide

Cisco

Cisco Cisco MDS 8/12c user guide

Topshine USB 4by4 Console owner's manual

Topshine

Topshine USB 4by4 Console owner's manual

Allied Telesis AT-FS708 datasheet

Allied Telesis

Allied Telesis AT-FS708 datasheet

Monoprice Blackbird 33417 user manual

Monoprice

Monoprice Blackbird 33417 user manual

S&T kontron KSwitch D3 user guide

S&T

S&T kontron KSwitch D3 user guide

Equip USB Cable KVM Switch 2 Port + Audio user manual

Equip

Equip USB Cable KVM Switch 2 Port + Audio user manual

Farallon Fast Starlet user guide

Farallon

Farallon Fast Starlet user guide

HPE FlexFabric 5950 Series Configuration guide

HPE

HPE FlexFabric 5950 Series Configuration guide

Arista 7500N Series quick start guide

Arista

Arista 7500N Series quick start guide

H3C S6850 Series manual

H3C

H3C S6850 Series manual

manuals.online logo
manuals.online logoBrands
  • About & Mission
  • Contact us
  • Privacy Policy
  • Terms and Conditions

Copyright 2025 Manuals.Online. All Rights Reserved.