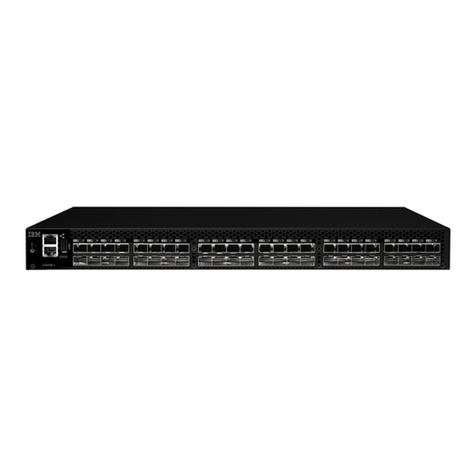
IBM Storage Networking SAN128B-6 Manual

IBM Storage Networking SAN128B-6
MTM Service information: 8960-F96, 8960-N96
Installation, Service, and User Guide
SC27-9251-00
IBM

Read Before Using
This product contains software that is licensed under written license agreements. Your use of such software is subject to the
license agreements under which they are provided.
Before you use the information in this publication, be sure to read the general information under “Notices” on page 89.
Copyright
Portions Copyright © 2018 Broadcom Limited and/or its subsidiaries. All Rights Reserved.
© Copyright IBM Corporation 2018.
US Government Users Restricted Rights – Use, duplication or disclosure restricted by GSA ADP Schedule Contract
with IBM Corp.

Contents
Figures ............... v
Tables ............... vii
Read this first ............ ix
Getting help .............. ix
Accessibility features for the SAN128B-6 ..... ix
How to send your comments ......... x
Safety and environmental notices ... xi
Safety notices and labels .......... xi
Cautions ............... xi
Danger Notices ............. xii
Safety labels .............. xiv
Attention notices ............ xv
ESD precautions ............ xvi
Rack safety .............. xvi
Rack installation ........... xvi
Rack relocation (19" rack) ........ xviii
Product recycling and disposal ....... xviii
Preface .............. xix
Product documents ........... xix
Brocade documents ........... xix
IBM and Brocade product matrix ....... xix
Device Overview ........... 1
License options ............. 2
Port-side view .............. 2
Nonport-side view ............ 3
Device management options ......... 4
Preparing for the Installation...... 5
Safety precautions ............ 5
General precautions ........... 5
ESD precautions ............ 6
Power precautions ........... 7
Lifting and weight-related precautions..... 8
Laser precautions ............ 9
Facility requirements ........... 9
Quick installation checklist ......... 10
Shipping carton contents .......... 12
Mounting the switch ......... 13
Precautions specific to mounting ....... 13
Standalone installation........... 14
Installing the Universal Four-Post Rack Kit .... 14
Time and items required ......... 15
Parts list .............. 15
Flush-front mounting .......... 17
Attaching the front brackets ....... 17
Attaching the bracket extensions to the device 18
Installing the device in the rack...... 18
Attaching the rear brackets to the extensions 19
Attaching the rear brackets to the rack posts 20
Flush-rear (recessed) mounting ....... 21
Attaching the front brackets to the rear of the
device .............. 21
Attaching the bracket extensions to the front
of the device ............ 22
Installing the device in the rack...... 23
Attaching the rear brackets to the extensions
at the front of the device ........ 24
Attaching the rear brackets to the front rack
posts .............. 26
Installing the Universal Two-Post Rack Kit .... 26
Time and items required ......... 27
Parts list .............. 27
Flush-front mounting .......... 28
Attaching the front brackets to the device .. 28
Attaching the front brackets to the rack ... 29
Attaching the rear brackets to the rack ... 30
Attaching the rear brackets to the device .. 31
Mid-mounting ............ 32
Attaching the front brackets to the device .. 32
Attaching the front brackets to the rack ... 33
Attaching the rear brackets to the rack ... 34
Attaching the rear brackets to the device .. 35
Initial Setup and Verification ..... 37
Items required ............. 37
Providing power to the device ........ 37
Establishing a first-time serial connection .... 37
Configuring the IP address ......... 38
Using DHCP to set the IP address ...... 39
Setting a static IP address......... 39
Setting the date and time .......... 39
Setting the time zone .......... 40
Synchronizing local time with an external source 40
Customizing the chassis name and switch name .. 41
Establishing an Ethernet connection ...... 41
Setting the domain ID ........... 41
Verifying correct operation ......... 42
Backing up the configuration ........ 43
Powering down the device ......... 43
Installing Transceivers and Cables... 45
Time and items required .......... 45
Precautions specific to transceivers and cables ... 45
Cleaning the fiber-optic connectors ...... 46
Managing cables............. 46
Installing an SFP+ transceiver ........ 46
Replacing an SFP+ transceiver ........ 47
Installing a QSFP transceiver ........ 48
Replacing a QSFP transceiver ........ 49
Verifying the operation of new transceivers.... 50
Monitoring the device ........ 51
Port-side LED locations .......... 51
© Copyright IBM Corp. 2018 iii
System power LED ........... 52
System status LED ........... 52
FC port status LED ........... 53
QSFP port status LED .......... 53
Nonport-side LED locations ......... 54
Power supply OK and FAIL status LEDs ... 55
Fan assembly status LED ......... 55
Interpreting the POST results ........ 55
Interpreting the BOOT results ........ 56
Running diagnostic tests .......... 56
Power Supply Assemblies ...... 57
Precautions specific to the power supply assemblies 58
Identifying the airflow direction ....... 58
Power supply OK and FAIL status LEDs .... 59
Power supply assembly unit fault indicators ... 59
Power supply assembly task guide ...... 59
Time and items required .......... 60
Recording power supply assembly critical
information .............. 60
Removing a power supply and fan assembly ... 61
Inserting a new power supply assembly ..... 62
Verifying the operation of the power supply and fan
assemblies ............... 63
Fan Assemblies ........... 65
Precautions specific to the fan assemblies .... 66
Identifying the airflow direction ....... 66
Fan assembly status LED .......... 67
Fan assembly unit fault indicators ....... 67
Fan assembly task guide .......... 67
Time and items required .......... 68
Recording power supply and fan assembly critical
information .............. 68
Removing a fan assembly ......... 68
Inserting a new fan assembly ........ 69
Verifying the operation of the power supply and fan
assemblies ............... 70
Chassis replacement ........ 71
Customer replacement responsibilities ..... 71
Determining the need to replace the chassis .. 71
Chassis replacement overview ....... 71
Preparing for replacement ....... 72
Recording critical device and SAN information 72
Powering down the switch ....... 75
Reconnecting system to the network and fabric 75
Downloading the configuration....... 76
Verifying correct operation of system ..... 77
Verifying correct configuration of the fabric... 78
IBM service replacement responsibilities ..... 79
Disconnecting the cables ......... 79
Remove the old switch chassis and install the
new switch chassis ........... 79
Appendix A. Product specifications .. 81
Appendix B. Cable routing table .... 87
Notices .............. 89
Trademarks .............. 90
Homologation statement .......... 90
Electronic emission notices ......... 90
BSMI statement (Taiwan) ......... 90
Canadian requirements ......... 90
CE statement ............. 91
China CCC statement .......... 91
China ROHS ............. 92
FCC warning (US only) ......... 92
Germany statement........... 92
KCC statement (Republic of Korea) ..... 92
VCCI statement ............ 92
Index ............... 93
iv SAN128B-6 Installation, Service, and User Guide

Figures
1. Port-side view ............ 2
2. Nonport-side view with AC power supply and
fan assembly units .......... 3
3. Rack kit parts ............ 16
4. Attaching the front brackets ....... 17
5. Attaching the bracket extensions to the device 18
6. Positioning the device in the rack ..... 19
7. Attaching the rear brackets to the extensions 20
8. Attaching the rear brackets to the rack posts 21
9. Attaching the front brackets to the rear of the
device .............. 22
10. Attaching the bracket extensions to the device 23
11. Positioning the device in the rack ..... 24
12. Attaching the rear brackets to the extensions at
the front of the device ......... 25
13. Attaching the short or long rear brackets to the
extensions ............. 25
14. Attaching the rear brackets to the front rack
posts ............... 26
15. Rack kit parts ............ 27
16. Attaching the front brackets ....... 29
17. Attaching front brackets to a rack ..... 30
18. Attaching the rear brackets to a rack .... 31
19. Attaching the rear brackets to the device 32
20. Attaching the front brackets ....... 33
21. Attaching front brackets to a rack ..... 34
22. Attaching the rear brackets to a rack .... 35
23. Attaching the rear brackets to the device 36
24. Optical transceiver extraction tool ..... 45
25. Installing a 32-Gbps SFP+ transceiver into an
upper port ............. 47
26. Replacing a 32-Gbps SFP+ optical transceiver
in an upper port ........... 48
27. Installing a 32-Gbps QSFP transceiver in an
upper port ............. 49
28. Replacing a QSFP optical transceiver .... 50
29. SAN128B-6 port-side LEDs ....... 51
30. Nonport-side LEDs with AC power supplies 54
31. AC power supply assembly ....... 57
32. Removing an AC power supply and fan
assembly ............. 61
33. Inserting an AC power supply and fan
assembly ............. 62
34. Fan assembly ............ 65
35. Removing a fan assembly ........ 69
36. Inserting a fan assembly ........ 70
© Copyright IBM Corp. 2018 v

vi SAN128B-6 Installation, Service, and User Guide

Tables
1. Brocade and IBM product and model number
matrix .............. xx
2. SFP+ ports numbering ......... 3
3. QSFP ports numbering ......... 3
4. Management options for the device ..... 4
5. Facility requirements .......... 9
6. Installation prerequisites ........ 10
7. Installation and basic system configuration 11
8. Space requirements .......... 14
9. tsTimeZone command parameter selection for
the US time zones .......... 40
10. System power LED patterns during normal
operation ............. 52
11. System status LED patterns during normal
operation ............. 52
12. SFP+ FC port status LED patterns during
normal operation........... 53
13. QSFP port status LED patterns during normal
operation ............. 53
14. Power supply status LEDs during normal
operation ............. 55
15. Fan assembly status LED patterns during
normal operation........... 55
16. Power supply status LEDs during normal
operation ............. 59
17. Fan assembly status LED patterns during
normal operation........... 67
18. Critical information checklist....... 73
19. Cable routing table for SAN128B-6 ..... 87
© Copyright IBM Corp. 2018 vii

viii SAN128B-6 Installation, Service, and User Guide

Read this first
Summary of changes
This is the first edition of the IBM®System Networking SAN128B-6 Installation, Service, and User Guide.
Getting help
For the latest version of your product documentation, visit the IBM Publications Center at
www.ibm.com/shop/publications/order. Search by form number or title.
For more information about IBM Storage Networking products, go to www.ibm.com/systems/
networking.
IBM Redbooks®often provide in depth information about product best practices, configurations, and
more technical information. For redbooks associated with this product, enter search terms on the
following Web site: www.redbook.ibm.com.
For support information for this and other IBM products, see the IBM Support Portal
www.ibm.com/supportportal. Search for the product Machine type or product name.
For Fabric OS Release Notes and access to Fabric OS firmware downloads, go to the IBM Support Portal
www.ibm.com/supportportal. Search for the product Machine type or product name, and then follow
links for Downloads. More detailed instructions are available through the Accessing firmware updates
and OS documentation updates link on the product documentation CD that is shipped with this
product.
You can also contact IBM within the United States at 1-800-IBMSERV (1-800-426-7378). For support
outside the United States, you can find the service number through the IBM contacts directory website at
www.ibm.com/planetwide/.
Visit the IBM contact website www.ibm.com/contact for contact information for your country or region.
For information about storage and networking industry standards, see the Storage Networking Industry
Association (SNIA) website at www.snia.org/.
Accessibility features for the SAN128B-6
Accessibility features help users who have a disability, such as restricted mobility or limited vision, to use
information technology products successfully.
Accessibility features
The following list includes the major accessibility features in this product:
vLight emitting diodes (LEDs) that flash at different rates, to represent the same information as the
colors of the LEDs
vIndustry-standard devices for ports and connectors
vManagement of the product through management applications is available through Web and Graphical
User Interface (GUI) options
© Copyright IBM Corp. 2018 ix

Keyboard navigation
This product does not have an attached or integrated keyboard. Any keyboard navigation is provided
through the management software and GUI.
Vendor software
This product includes certain vendor software that is not covered under the IBM license agreement. IBM
makes no representation about the accessibility features of these products. Contact the vendor for the
accessibility information about its products.
Related accessibility information
You can view the publications for this product in Adobe Portable Document Format (PDF) using the
Adobe Acrobat Reader. The PDFs are provided on a product documentation CD-ROM that is packaged
with the product. The CD-ROM also includes an accessible HTML version of this document.
IBM and accessibility
See the IBM Human Ability and Accessibility Center website at www.ibm.com/able/ for more
information about the commitment that IBM has to accessibility.
How to send your comments
Your feedback is important in helping us provide the most accurate and high-quality information. If you
have comments or suggestions for improving this document, send us your comments by email to
vExact publication title
vForm number (for example, GC27-2270-00)
vPage numbers to which you are referring
You can also mail your comments to:
International Business Machines Corporation
Information Development
Department GZW
9000 South Rita Road
Tucson, Arizona 85744-0001 U.S.A.
When you send information to IBM, you grant IBM a nonexclusive right to use or distribute the
information in any way it believes appropriate without incurring any obligation to you.
xSAN128B-6 Installation, Service, and User Guide

Safety and environmental notices
This section contains information about:
v“Safety notices and labels”
v“Rack safety” on page xvi
v“Product recycling and disposal” on page xviii
Safety notices and labels
When using this product, observe the danger, caution, and attention notices contained in this guide. The
notices are accompanied by symbols that represent the severity of the safety condition. The danger and
caution notices are listed in numerical order based on their IDs, which are displayed in parentheses, for
example (D004), at the end of each notice. Use this ID to locate the translation of these danger and
caution notices in the Safety Notices publication that is shipped with this product.
The following notices and statements are used in IBM documents. They are listed below in order of
increasing severity of potential hazards. Follow the links for more detailed descriptions and examples of
the danger, caution, and attention notices in the sections that follow.
vNote: These notices provide important tips, guidance, or advice.
v“Attention notices” on page xv: These notices indicate potential damage to programs, devices, or data.
v“Cautions”: These statements indicate situations that can be potentially hazardous to you.
v“Danger Notices” on page xii: These statements indicate situations that can be potentially lethal or
extremely hazardous to you. Safety labels are also attached directly to products to warn of these
situations.
vIn addition to these notices, “Safety labels” on page xiv may be attached to the product to warn of
potential hazards.
Cautions
A Caution statement alerts you to situations that can be potentially hazardous to you or cause damage to
hardware, firmware, software, or data.
General cautions
CAUTION:
Changes or modifications made to this device that are not expressly approved by the
party responsible for compliance could void the user's authority to operate the equipment.
CAUTION:
Do not install the device in an environment where the operating ambient temperature
might exceed 40°C (104°F).
CAUTION:
Make sure the airflow around the front, and back of the device is not restricted.
© Copyright IBM Corp. 2018 xi

Electrical cautions
CAUTION:
Before plugging a cable into any port, be sure to discharge the voltage stored on the cable
by touching the electrical contacts to ground surface.
CAUTION:
Static electricity can damage the chassis and other electronic devices. To avoid damage,
keep static-sensitive devices in their static-protective packages until you are ready to
install them.
CAUTION:
If you do not install a module or a power supply in a slot, you must keep the slot filler
panel in place. If you run the chassis with an uncovered slot, the system will overheat.
CAUTION:
Carefully follow the mechanical guides on each side of the power supply slot and make
sure the power supply is properly inserted in the guides. Never insert the power supply
upside down.
CAUTION:
The power supply switch must be in the off position when you insert the power supply
into the chassis. Damage to the switch can result if a live power supply is installed.
CAUTION:
All devices with DC power supplies are intended for installation in restricted access areas
only. A restricted access area is a location where access can be gained only by trained
service personnel through the use of a special tool, lock and key, or other means of
security, and is controlled by the authority responsible for the location.
CAUTION:
For the DC input circuit to the system, make sure there is a 10 Amp circuit breaker,
maximum 60 VDC, double pole, on the input terminal block to the power supply. The
input wiring for connection to the product should be copper wire, 16 AWG, marked
VW-1, and rated minimum 90°C.
CAUTION:
For a DC system, use grounding wire of at least 16 American Wire Gauge (AWG). The
grounding wire should be attached to the DC input connector; the other end connects to
the building ground.
CAUTION:
DC return shall be isolated from the chassis ground (DC-I) when connections to the
power supply are made.
Danger Notices
A Danger statement indicates conditions or situations that can be potentially lethal or extremely
hazardous to you. Safety labels are also attached directly to products to warn of these conditions or
situations.
xii SAN128B-6 Installation, Service, and User Guide

General dangers
DANGER
The procedures in this manual are for qualified service personnel.
DANGER
Be careful not to accidently insert your fingers into the fan tray while removing it
from the chassis. The fan may still be spinning at a high speed.
Electrical dangers
DANGER
For safety reasons, the ESD wrist strap should contain a series 1 megaohm resistor.
DANGER
Make sure that the power source circuits are properly grounded, then use the power
cord supplied with the device to connect it to the power source.
DANGER
Remove both power cords before servicing.
DANGER
Disconnect the power cord from all power sources to completely remove power from
the device.
DANGER
To avoid high voltage shock, do not open the device while the power is on.
Safety and environmental notices xiii

DANGER
Batteries used for RTC/NVRAM backup are not located in operator-access areas. There
is a risk of explosion if a battery is replaced by an incorrect type. Dispose of used
components with batteries according to local ordinance and regulations.
Dangers related to equipment weight
18-32 kg (39.7-70.5 lbs)
svc00167
DANGER
Make sure the rack housing the device is adequately secured to prevent it from
becoming unstable or falling over.
Laser dangers
DANGER
All fiber-optic interfaces use Class 1 lasers.
Safety labels
As an added precaution, safety labels are often installed directly on products or product components to
warn of potential hazards. These can be either danger or caution notices, depending upon the level of the
hazard.
The actual product safety labels may differ from these sample safety labels:
DANGER
Hazardous voltage, current, or energy levels are present inside any component that
has this label attached. Do not open any cover or barrier that contains this label.
(L001)
DANGER
Rack-mounted devices are not to be used as a shelf or work space. (L002)
DANGER
Multiple power cords. The product might be equipped with multiple power cords. To
remove all hazardous voltages, disconnect all power cords. (L003)
xiv SAN128B-6 Installation, Service, and User Guide

DANGER
Hazardous voltage present. Voltages present constitute a shock hazard, which can
cause severe injury or death. (L004)
CAUTION:
Hazardous moving parts nearby. (L008)
Attention notices
An attention notice indicates the possibility of damage to a program, device, or system, or to data. An
exclamation point symbol may accompany an attention notice, but is not required. A sample attention
notice follows:
Attention: Do not bend a fibre cable to a radius less than 5 cm (2 in.); you can damage the cable. Tie
wraps are not recommended for optical cables because they can be easily overtightened, causing damage
to the cable.
Safety and environmental notices xv

ESD precautions
Attention: Many of the field replaceable units (FRUs) are sensitive to electrostatic discharge (ESD), and
can potentially be damaged by improper handling. When working with any FRU, use correct ESD
precautions:
vAttach ground to the indicated area on the chassis
vWear a wrist grounding strap connected to chassis ground (if the switch is plugged in) or a bench
ground.
Note: For safety reasons, the ESD wrist strap should contain a series 1 megaohm resistor.
vStore ESD-sensitive components in antistatic packaging
Rack safety
Rack installation
DANGER
Observe the following precautions when working on or around your IT rack system:
vHeavy equipment—personal injury or equipment damage might result if mishandled.
vAlways lower the leveling pads on the rack cabinet.
vAlways install stabilizer brackets on the rack cabinet.
vTo avoid hazardous conditions due to uneven mechanical loading, always install the heaviest devices in the
bottom of the rack cabinet. Always install servers and optional devices starting from the bottom of the rack
cabinet.
vRack-mounted devices are not to be used as shelves or work spaces. Do not place objects on top of
rack-mounted devices.
vEach rack cabinet might have more than one power cord. Be sure to disconnect all power cords in the rack
cabinet when directed to disconnect power during servicing.
vConnect all devices installed in a rack cabinet to power devices installed in the same rack cabinet. Do not
plug a power cord from a device installed in one rack cabinet into a power device installed in a different
rack cabinet.
vAn electrical outlet that is not correctly wired could place hazardous voltage on the metal parts of the system
or the devices that attach to the system. It is the responsibility of the customer to ensure that the outlet is
correctly wired and grounded to prevent an electrical shock.
(R001 part 1 of 2)
xvi SAN128B-6 Installation, Service, and User Guide

CAUTION:
vDo not install a unit in a rack where the internal rack ambient temperatures will exceed the manufacturer’s
recommended ambient temperature for all your rack-mounted devices.
vDo not install a unit in a rack where the air flow is compromised. Ensure that air flow is not blocked or
reduced on any side, front, or back of a unit used for air flow through the unit.
vConsideration should be given to the connection of the equipment to the supply circuit so that overloading of
the circuits does not compromise the supply wiring or overcurrent protection. To provide the correct power
connection to a rack, refer to the rating labels located on the equipment in the rack to determine the total
power requirement of the supply circuit.
v(For sliding drawers) Do not pull out or install any drawer or feature if the rack stabilizer brackets are not
attached to the rack. Do not pull out more than one drawer at a time. The rack might become unstable if you
pull out more than one drawer at a time.
v(For fixed drawers) This drawer is a fixed drawer and must not be moved for servicing unless specified by the
manufacturer. Attempting to move the drawer partially or completely out of the rack might cause the rack to
become unstable or cause the drawer to fall out of the rack.
(R001 part 2 of 2)
Safety and environmental notices xvii

Rack relocation (19" rack)
CAUTION:
Removing components from the upper positions in the rack cabinet improves rack stability during
relocation. Follow these general guidelines whenever you relocate a populated rack cabinet within a
room or building:
vReduce the weight of the rack cabinet by removing equipment starting at the top of the rack
cabinet. When possible, restore the rack cabinet to the configuration of the rack cabinet as you
received it. If this configuration is not known, you must complete these steps:
– Remove all devices in the 32U position and above.
– Ensure that the heaviest devices are installed in the bottom of the rack cabinet.
– Ensure that there are no empty U-levels between devices installed in the rack cabinet below the
32U level.
– If the rack cabinet you are relocating is part of a suite of rack cabinets, detach the rack cabinet
from the suite.
– Inspect the route that you plan to take when moving the rack to eliminate potential hazards.
– Verify that the route that you choose can support the weight of the loaded rack cabinet. Refer to
the documentation that came with your rack cabinet for the weight of a loaded rack cabinet.
– Verify that all door openings are at least 760 x 2030 mm (30 x 80 in.).
– Ensure that all devices, shelves, drawers, doors, and cables are secure.
– Ensure that the four leveling pads are raised to their highest position.
– Ensure that there is no stabilizer bracket installed on the rack cabinet during movement.
– Do not use a ramp inclined at more than 10 degrees.
– Once the rack cabinet is in the new location, do the following:
- Lower the four leveling pads.
- Install stabilizer brackets on the rack cabinet.
- If you removed any devices from the rack cabinet, repopulate the rack cabinet from the lowest
position to the highest position.
– If a long distance relocation is required, restore the rack cabinet to the configuration of the rack
cabinet as you received it. Pack the rack cabinet in the original packaging material, or equivalent.
Also, lower the leveling pads to raise the casters off of the pallet and bolt the rack cabinet to the
pallet.
(R002)
Product recycling and disposal
Refer to the IBM Systems Environmental Notices and User Guide (Z125-5823) for translated environmental
statements and information regarding product recycling and disposal. This document may be provided
either in printed version or on the product documentation CD. A more current version may be available
through this link ftp://public.dhe.ibm.com/systems/support/warranty/envnotices/
environmental_notices_and_user_guide.pdf
xviii SAN128B-6 Installation, Service, and User Guide

Preface
This document is intended for use by systems administrators and technicians experienced with
networking, Fibre Channel, and storage area network (SAN) technologies. It describes how to install,
service, and use the IBM Storage Networking SAN128B-6 (machine type-models 8960-F96 and 8960-N96
Switch). Throughout this document, the product is referred to as the SAN128B-6, or simply the switch.
This document has been created to include information specific to SAN128B-6 switches running on Fabric
OS version 7.1.1 or later. This document does not support all Fabric OS versions. It is specific to Fabric
OS v7.1.1 or later. Refer to the Fabric OS Release Notes for more information.
Product documents
The following documents contain information related to this product. The documentation may be printed
material or may be on the documentation CD that is shipped with the product.
vIBM Storage Networking SAN128B-6 Installation, Service, and User Guide, TBD (this document)
vIBM Storeage Networking SAN128B-6 Quick Start Guide, TBD
vSafety Notices
vIBM Systems Environmental Notices and User Guide, Z125-5823
vWarranty Information, 45W6626
Newer versions of product documentation may be available through the IBM Publications Center website
www.ibm.com/shop/publications/order. Search by publication title or publication number.
Newer versions may also be available through the IBM Support Portal www.ibm.com/supportportal.
Enter your product machine type (8960) or product name in the search field, and then select
Documentation from the displayed page.
Brocade documents
IBM b-type switches use software licensed from Brocade Communications Systems, Inc. You can find
information related to the software that supports the switch in the following documents on the CD-ROM
supplied with this product:
Brocade Fabric OS
vEZSwitchSetup Administrator's Guide
vFabric OS Administrator's Guide
vFabric OS Command Reference Manual
vFabric OS MIB Reference Manual
vFabric OS Message Reference Manual
vFabric OS Troubleshooting and Diagnostics Guide
Brocade Fabric OS optional features
vFabric Watch Administrator's Guide
vWeb Tools Administrator's Guide
IBM and Brocade product matrix
The product matrix provides a cross-reference between the comparable IBM and Brocade product models.
© Copyright IBM Corp. 2018 xix

When you use any of the Brocade documents, such as Fabric Operating System (FOS) publications, you
will notice that the model numbers reflect the corresponding Brocade products. Table 1 provides a
product matrix to correlate the Brocade products and models to the IBM product names and machine
types and model numbers. Products withdrawn from marketing are not listed.
Table 1. Brocade and IBM product and model number matrix
Brocade product name IBM product name
IBM machine type and model
number
Brocade G630 SAN128B-6 8960 Models F96 and N96
Brocade G620 SAN64B-6 8960 Models F64 and N64
Brocade G610 SAN24B-6 8960 Models F24
Brocade X6-4 Director SAN256B-6 8961 Model F04
Brocade X6-8 Director SAN512B-6 8961 Model F08
Brocade 6520 SAN96B-5 2498 Models F96 and N96
Brocade 6505 SAN24B-5 2498 Model F24, 249824G
Brocade 6510 SAN48B-5 2498 Model F48
Brocade DCX 8510-4 SAN384B-2 2499 Model 416
Brocade DCX 8510-8 SAN768B-2 2499 Model 816
Brocade 7800 SAN06B-R 2498 Model R06
Brocade 7840 SAN42B-R 2498 Model R42
Brocade 300 SAN24B-4 2498 Models B24 and 24E
xx SAN128B-6 Installation, Service, and User Guide
This manual suits for next models
2
Table of contents
Other IBM Switch manuals

IBM
IBM Flex System EN2092 User manual

IBM
IBM RedBooks SAN24B-5 User manual

IBM
IBM 3454-CAC User manual

IBM
IBM 2498B24 - System Storage SAN24B-4 Switch Manual

IBM
IBM FC5022 User manual

IBM
IBM RackSwitch G8332 User manual

IBM
IBM FC5022 User manual

IBM
IBM 8265 Operating instructions

IBM
IBM SAN32M-2 User manual

IBM
IBM 6 MPLS User manual

IBM
IBM 8271 F12 User manual

IBM
IBM 3110X - Cisco Catalyst Switch Manual

IBM
IBM 8265 Nways ATM Switch User manual

IBM
IBM TotalStorage 3534-F08 User manual

IBM
IBM SAN24B-6 User manual

IBM
IBM RackSwitch G8264T User manual

IBM
IBM pSeries Quick start guide

IBM
IBM BNT User manual

IBM
IBM G8124E User manual

IBM
IBM 3454-A3C User manual