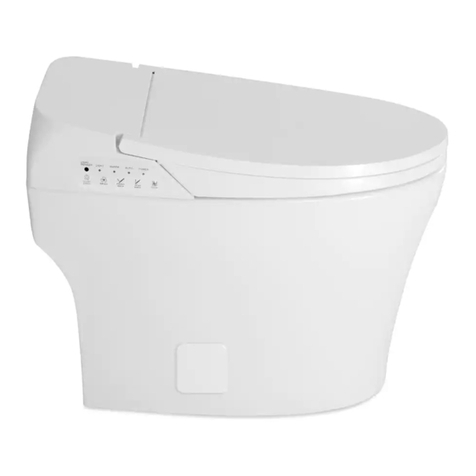
Icera RIOSE CT3140R06 User manual

HOME & BATH
© 2011 ICERA USA
INSTALLATION &CARE GUIDE
TWO‐PIECE
BACKOUTLET
TOILET
June2012

.
© 2011 ICERA USA
2
BEFOREYOUBEGIN
Pleasereadtheseinstructionscarefullytofamiliarizeyourselfwiththerequired
tools,materials,andinstallationsequences.Thiswillhelpyouavoidcostlymistakes.
Inaddition,readalloperatingandsafetyinstructions.
Allinformationinthisguideisbaseduponthelatestproductinformationavailableat
thetimeofpublication.Icerareservestherighttomakechangesinproduct
characteristics,packaging,oravailabilityatanytimewithoutnotice.
FIRSTSTEPS
Carefullyinspectthenewfixtureforanysignofdamage.
Ensurethatthetoiletflangehasthecorrectrough‐indimension.Thistoilethas
a4”rough‐indimension(distancefromthefloortowallflangecenterline).
Toiletflangeshouldbeflush(even)withthewall,within1/16”(16mm).
Seatpostholesareon5½”(140mm)centers.
Shutoffthewatersupply.NOTE:Ifreplacingthesupplyvalve,firstshutoffthe
mainwatersupply.
Fornewconstruction,refertodimensionsforlocatingtheshut‐offvalve.
FixturedimensionsarenominalandconformtotolerancesestablishedbyASME
Standards(A112.19.2‐2003).Observealllocalplumbingandbuildingcodes.
WARNING:Riskofinjuryorproductdamage.Handleceramicproductscarefully.
Productcanbreakandchipifyouover‐tightenboltsandnuts.
WARNING:Riskofexternalleakage.Thefillvalvenuthasbeenfactory‐tightened
todesignspecifications.Ifre‐tighteningisrequired,wrenchtightenoneturnpast
fingertight.
WARNING: Riskofinjury.Ifthenewtoiletisnotinstalledimmediately,temporarily
placearagintheclosetflange.Hazardousgasesmayleakfromtheflangeopeningif
itisnotblocked.

.
© 2011 ICERA USA
3
CAUTION:Ensurethatthewatersupplypressureisaminimumof35psi(2.5
kg/cm).Thetoiletwillnotfunctionproperlywithoutminimumpressure.
TOOLSANDMATERIALSREQUIRED(notsupplied)
Adjustablewrench
Metalfile(filecut)
Tapemeasure
Tubingcutter
Level
Hacksaw
Puttyknife
Screwdriver
Toiletinstallationflangeset
Toiletgasket/seal(neopreneorfeltrecommended)
Watersupplyline
PARTSPROVIDED
Toiletseat
Tanklever
Installationboltsandcaps
NOTICE:Iftheexistingtoiletdoesnothaveasupplyshut‐offvalvebelowthe
tank,installonebeforeinstallingthenewtoilet.

.
© 2011 ICERA USA
4
InstallationGuide
1)Installtheclosetboltsontheflange.Slidethemintoplace,paralleltothefloor
and6”(152mm)apart.(Useputtytoholdtheminplaceifneeded.)Then,drillthe2
mountingpilotholesonthefloorasshown.
2)Installtheoutletsealontheflange.Applysealantaroundtheedgeofthe
toilet’sbaseplatefacingthewall.

.
© 2011 ICERA USA
5
3)Installtoiletonthewallflangesothattheflangeboltsprojectthroughthe
mountingholes.Looselyinstalltheretainerwashersandnutsonthewallbolts.
Positionthetoiletagainstthewall,andcarefullypushthebowlagainstthesealand
flange.Alternatelytightenthenutsuntilthetoiletisfirmlymountedtothewall.
Donotovertightenthenuts,ortheceramicbasemaybedamaged!
4)Afterthewallboltsareaffixed,proceedtothefloorboltinstallation.First,put
thewashersinplaceontheceramicbase.Then,insertthefloorboltsthroughthe
mountingholes,andtightenintothepre‐drilledfloorholes.
5)Installthe4boltcaps.Ifnecessary,cuttheboltstolengthforthecaps’
installation.Smooth/cleananyexcesssealantaroundthebase.

.
© 2011 ICERA USA
6
6)Tankinstallation.Installthegasketatthebottomofthewatertank.Installthe
boltsintothebracket,andtightenevenly.Donotovertighten!
7)Mountingbolttabsmustcontact
bowlforpropergasketcompression.
8)Connectwatersupplyline,andturn
onthewater.Flushseveraltimes,and
checkforleaks.Donotovertighten!
Bolt
Bolt tab

.
© 2011 ICERA USA
7
10)Installthetanklidandseat,perthe
seatinstructionsprovided.Usethe
suppliedseatboltsandwashers.Check
forleaksoverthenextseveraldays.
9)Checkthatthetankleverchain is
taut,withoutanyexcessiveslack.
Ifnecessary,adjustthewaterlevelinthe
toilettank.Beginbya)pushingoutthe
redtab,toreleasethefloat;then,b)
twisttherodby90°,soitcanbepulled
awayfromitscatchonthefloat.
Pulltherodawayfromthefloat,as
shown.Then,c)adjustthefloat
upwardsordownwards,forthedesired
waterlevel.Whencomplete,d)return
therodintothecatch,andtwistback
90°;ande)pushtheredtabbackin,to
setthefloatposition.
PRODUCTCLEANING&CARE
•Donotusein‐tankcleanersinyourtoilet.
Productscontainingchlorinecanseriously
damagefittingsinthetank.Thiscancause
leakageanddamage.
•Donotusecementwhileinstallingtoilet.
•Wipesurfacescleanandrinsecompletely
withwaterimmediatelyafterapplying
cleaner.Rinseanddryanyoverspraythat
landsonnearbysurfaces.Donotallow
cleanerstosoakonsurfaces.
•Usesoft,dampenedspongeorcloth.
Neveruseanabrasivematerialsuchasa
brushorscouringpadtocleansurfaces.
•Ifyouliveinahardwaterarea,make
certainthattheholesinthetoiletrimare
keptcleantoensureproperbowlflushing.
Float
Rod

.
© 2011 ICERA USA
8
TROUBLESHOOTINGGUIDE
ProblemRecommendedAction
PoorFlush•Tightentankleverchaintoremoveexcessiveslack.
•Adjustthetankwaterleveltomatchthewaterline.
•Fullyopenthewatersupplyshut‐offvalve.
•Clearobstructionsfromthetrapway,jetorrimholes.
NoFlush
•Reconnectthechaintothetripleverorflushvalve.
•Tightentankleverchaintoremoveexcessiveslack.
Fillvalveturnsonor
offbyitself,without
toiletbeingflushed;or
itruns,allowingwater
toenterthetank
•Adjustflapperchainforproperslack,soflappercloses.
•Cleanorreplacetheflapperifitisdirtyormisaligned.
•Cleanareaaroundtheopeningtoallowflappertoseal.
•Adjustthetankwaterlevelifitistoohigh.
•Replacethefillvalveifthevalvefloatsinks.
Tanktakesexcessive
timetofill
•Fullyopenthewatersupplyshut‐offvalve.
•Checksupplylineforakink.Removekink.
•Cleanvalveinlet,valvehead,orsupplyline.Flushlines.
Thereisexcessive
noisewhenthetankis
filling
•Partiallyclosethewatersupplyshut‐offvalveifthe
waterpressuretothetoiletistoohigh.Checkthetoilet
performancefollowinganysuchadjustment.
•Removedirtorobstructionsfromthevalvehead.Flush
thelines.
FORANYINSTALLATIONORSERVICEISSUES,PLEASECONTACT:
IceraUSA
531MainStreet,Unit860
ElSegundo,California90245
TollFree:(855)444‐2372
This manual suits for next models
2
Table of contents
Other Icera Toilet manuals