manuals.online logo
Brands
  1. Home
  2. •
  3. Brands
  4. •
  5. Icom
  6. •
  7. Marine Radio
  8. •
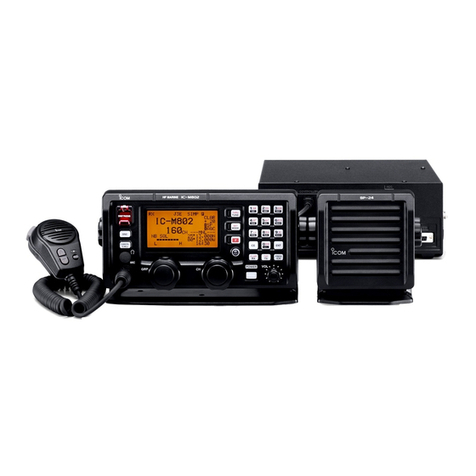
  9. Icom IC-M802 Installation manual

Icom IC-M802 Installation manual

Programming the Icom-M802, & the Open Ham/Dial Mode
The Icom M802 has two modes of operation - "Marine" which is the default and
"Open".
The radio is much easier to program in "Open" mode and thus it is
recommended that the radio be put into "open" mode before programming is
comenced.
"Open" mode is also advantageous as it also enables the radio to operate on
lower side band (SSB), on other HF frequencies such as ham radio and also
makes for easier manual tuning - ie like your AM / FM radio that you probably
have in your car.
The CLAR/RX key toggles the radio back-and-forth between the Marine Mode
and the Open Mode.
To determine if the Open Mode on your M802 is enabled press the CLAR/RX key
on the keypad. If enabled, the LCD display will change, displaying frequency
information with a cursor beneath the rightmost digit. If the display does not
change or there's no cursor beneath the displayed frequency, the Open Mode is
not enabled.
Here's how to put the radio into the Open Mode and set frequencies:
Step Instructions Dial Display Change
1.
Put the
radio into
the OPEN
mode.
With the radio turned off hold
down the 2, mode, and TX keys
at the same time, and turn the
radio on.
Normal dial display. The
M802 doesn't indicate if its
in the open/Dial mode or
closed mode.
2
Select
tuning
capabilities
Press the CLAR/RX button. If the
radio is in the Open/Dial Mode an
arrow pointing right will appear
next to the RX on the top line of
the LCD display. The channel label
will be replaced with the stored
frequency and mode, and a cursor
(underline) will be under one of
the numbers. If the sideways
arrow to the right of RX does not
appear the radio is in the "closed"
mode. Repeat step 1 above.
8152.0
3
Dialing-in
the
Frequency
Turn the left knob until the cursor
is under the number in the column
you want to change (ie we have
moved the cursor from the far
right column to the far left column
in our example)
8152.0
4
Dialing-in
the
Frequency
Turn the right knob left or right
until the desired number in the
selected column is displayed (ie -
we have changed the 8 now to a
14 in our example)
14152.0
5
Dialing-in
the
Frequency
Turn the left knob clockwise to
move the cursor to the next
column you want to change (in
this example the 100KHz column).
14152.0
WWW.RADIOS.NET.AU
ICOM M802 PROGRAMMING INSTRUCTIONS
www.radios.net.au t. 07-41257700 f 03-8640-0419 e. [email protected]
6
Dialing-in
the
Frequency
Turn the right knob left or right
until the desired number in the
selected column displayed in the
100 KHz column (in this example
3).
14352.0
7
Dialing-in
the
Frequency
Turn the left knob clockwise to
move the cursor to the next
column you want to change (in
this example the 10KHz column).
14352.0
8
Dialing-in
the
Frequency
Turn the right knob left or right
until the desired number in the
selected column displayed in the
10 KHz column (in this example
1).
14312.0
9
Dialing-in
the
Frequency
Turn the left knob clockwise to
move the cursor to the next
column you want to change (in
this example the 1KHz column).
14312.0
10
Dialing-in
the
Frequency
Turn the right knob left or right
until the desired number in the
selected column is displayed in the
1 KHz column (in this example 3).
14313.0
11
Store the
new
Transmit &
receive
frequency
Press and hold the ENT key. When
the little right pointing arrow
disappears, the LCD display
reverts back to showing the
channel label, and SIMP is
displayed on the top line, the new
frequency and mode has been set.
In this example the radio will
transmit and receive on 14.313
MHz.
The "SIMP" displayed on
the first line of the LCD
indicates the transmit and
receive frequencies are the
same.
12 Toggle
Press the FREQ/CH key to toggle
between the channel and
frequency mode.
15
Note: It is not necessary to set each column individually. Put the cursor
under any of the columns and rotate the right-hand knob, tuning the
radio as you would a regular AM / FM radio. Remember, the farther to the
right a column is located, the finer the tuning increment.
Programming Simplex Frequencies into the User Channel Group
Step Instructions What's Happening
1
Press the Freq/CH button to put
the M-802 into the Channel Mode
if necessary.
With each press of the CH/
Freq button the LCD
display will toggle back and
forth, displaying the
selected radio channel, and
with the next press
displaying the frequency
stored in that radio
channel.
WWW.RADIOS.NET.AU
ICOM M802 PROGRAMMING INSTRUCTIONS
www.radios.net.au t. 07-41257700 f 03-8640-0419 e. [email protected]
2
Select the channel you wish to
program by turning the large
right-hand knob (channel selector
knob)
The channel selector knob
selects channels within a
Channel Group.
3 Press the CLAR/RX button
The small right pointing will
appear next to the RX on
the top line of the LCD
display. The channel label
will be replaced with the
stored frequency and
mode, and a cursor
(underline) will be under
one of the numbers
4
Enter the desired frequency using
the keypad, or dial it in using the
two large front panel knobs.
You are entering a new
receive & transmit
frequency.
5
Press and hold the ENT key. When
the small right pointing arrow
disappears, the LCD display
reverts back to showing the
channel label, and SIMP is
displayed on the top line, the new
frequency and mode has been set.
Stores the new RX & TX
frequency and mode for
this radio channel into the
M-802's permanent
memory.
Programming Duplex Frequencies into the User Channel Group
Step Instructions What's Happening
1
Store the receive frequency
following the instructions for
programming a simplex frequency
described above.
Writes the receive
frequency into memory.
2 Press the TX key
LCD displays changes to
the frequency mode and TX
flashes.
5Enter the new transmit frequency
using the keypad, or knobs.
6 Press and hold the ENT key.
Writes the new transmit
frequency into memory.
The LCD display reverts
back to showing the
channel label and DUP
replaces SMIP.
Adding Names/Labels to Your Channels
Step Instructions What's Happening
1
Press the Freq/CH button to put
the M-802 into the Channel Mode
if necessary.
Put the M-802 into the
Channel Mode.
2 Press the "F" (Function button) Enable the function mode.
3 Press the Freq/CH
The LCD dial display will
show a line of character
positions.
WWW.RADIOS.NET.AU
ICOM M802 PROGRAMMING INSTRUCTIONS
www.radios.net.au t. 07-41257700 f 03-8640-0419 e. [email protected]
4
Rotate the right-hand Channel
Selector knob to select the first
character position.
Rotating the channel
selector knob selects the
character position where
you want to enter a letter
or number.
5Using the keypad, enter the
desired character.
6
Rotate the right-hand Channel
Selector knob to select the next
character position.
Use the "1" key for Q, Z, q,
z, and space, the "0" key
for 0, and symbols + - = /
( ) * < > and @
7Using the keypad, enter the next
character.
8
Continue with steps 6 - 7 until you
have either completed the channel
label, or all eight positions are
filled.
The maximum channel
label size is eight
characters.
9 Press ENT when finished.
Stores the newly entered
channel label into the
radio's permanent
memory.
WWW.RADIOS.NET.AU
ICOM M802 PROGRAMMING INSTRUCTIONS
www.radios.net.au t. 07-41257700 f 03-8640-0419 e. [email protected]

Other manuals for IC-M802

9

Other Icom Marine Radio manuals

Icom IC-M501 Quick start guide

Icom

Icom IC-M501 Quick start guide

Icom MA-510TR User manual

Icom

Icom MA-510TR User manual

Icom IC-M25 User manual

Icom

Icom IC-M25 User manual

Icom IC-M802 Quick start guide

Icom

Icom IC-M802 Quick start guide

Icom IC-M802 Instruction Manual

Icom

Icom IC-M802 Instruction Manual

Icom IC-M80 User manual

Icom

Icom IC-M80 User manual

Icom MarineComander MXS-5000 User manual

Icom

Icom MarineComander MXS-5000 User manual

Icom MA-500TR User manual

Icom

Icom MA-500TR User manual

Icom MA-500TR User manual

Icom

Icom MA-500TR User manual

Icom IC-M80 User manual

Icom

Icom IC-M80 User manual

Popular Marine Radio manuals by other brands

AMEC CAMINO-701 Installation and operation manual

AMEC

AMEC CAMINO-701 Installation and operation manual

Uniden SOLARA DSC Manual Del Usuario

Uniden

Uniden SOLARA DSC Manual Del Usuario

Audiovox JPORT manual

Audiovox

Audiovox JPORT manual

Tres 900s Operation manual

Tres

Tres 900s Operation manual

AMEC CAMINO-701 manual

AMEC

AMEC CAMINO-701 manual

Siemens SIMATIC RTLS4060T operating instructions

Siemens

Siemens SIMATIC RTLS4060T operating instructions

ACR Electronics AISLink CB2 user manual

ACR Electronics

ACR Electronics AISLink CB2 user manual

Westhold G3MX user manual

Westhold

Westhold G3MX user manual

Simons Voss Technologies 3064 manual

Simons Voss Technologies

Simons Voss Technologies 3064 manual

Comar Systems 001-1019 user manual

Comar Systems

Comar Systems 001-1019 user manual

Cobra MRHH150FLT USA Series user manual

Cobra

Cobra MRHH150FLT USA Series user manual

GEM GX700 instruction manual

GEM

GEM GX700 instruction manual

Westhold G3KART TXLi3 user manual

Westhold

Westhold G3KART TXLi3 user manual

Furuno FA-70 Operator's manual

Furuno

Furuno FA-70 Operator's manual

OTS DRS-100 Mod B user manual

OTS

OTS DRS-100 Mod B user manual

Feig Electronic Obid ID AWE3000.A-A Installation

Feig Electronic

Feig Electronic Obid ID AWE3000.A-A Installation

Uniden MHS130 owner's manual

Uniden

Uniden MHS130 owner's manual

Blue Mark 122fpv Series manual

Blue Mark

Blue Mark 122fpv Series manual

manuals.online logo
manuals.online logoBrands
  • About & Mission
  • Contact us
  • Privacy Policy
  • Terms and Conditions

Copyright 2025 Manuals.Online. All Rights Reserved.