manuals.online logo
Brands
  1. Home
  2. •
  3. Brands
  4. •
  5. Icom
  6. •
  7. Repeater
  8. •
  9. Icom D-STAR ID-31A; D-STAR ID-31E User manual

Icom D-STAR ID-31A; D-STAR ID-31E User manual

You can store up to 6 “MY” call signs, [MY1]–[MY6].
If necessary, enter a note of up to 4 characters, such as the
model of the transceiver, name, area indication, and so on, after
your call sign.
Example: Program “JA3YUA/ID31” into the call sign memory
channel [MY1].
• A to Z, 0 to 9, / and (Space) can be se-
lected.
• If you make a mistake, push [CLR]
to delete the selected character, num-
ber or symbol.
• Push D-pad(") to enter a space or rotate [DIAL] to insert a
space to a desired .
ID-31A/ID-31E
D-STAR Quick Guide [DR mode]
The DR (D-STAR® Repeater) mode is one mode you can use for D-STAR®repeater operation. In this mode, you can select
the preprogrammed repeater or frequency in “FROM” (the access repeater or simplex), and UR call sign in “TO” (destina-
tion), as shown on page 3. The DR mode uses the programmed Repeater List as it’s data source.
1 2
This quick guide assumes that your own call sign has already been registered at a gateway re-
peater, and uses the preset repeater list for the descriptions.
*If needed, ask the gateway repeater administrator for call sign registration instructions.
D-STAR Terms
D-STAR:
Digital Smart Tech-
nologies for Ama-
teur Radio, an open
protocol.
Area:
Communication
range that covers a
D-STAR repeater.
Gateway repeater:
A D-STAR repeater,
connected to the In-
ternet.
Local CQ:
To call a station
through your local
area (access) re-
peater.
Gateway CQ:
To call through your
local area (access)
repeater, repeater
gateway, and the
Internet to your des-
tination repeater.
JA3YUA calling
through JP3YHH
Port A*...
Osaka
Hirano
Osaka
Hirano
Tokyo
Hamacho
Tokyo
Hamacho
D-STAR radio
■ D-STAR repeater operating example (Example: from Osaka Hirano to Tokyo Hamacho)
Your access
repeater
Destination
repeater
Internet
JA3YUA calling
through JP3YHH
Port A*...
ID-31A/E
Selecting
“FROM”
To reply a received call from your access repeater
Select your access repeater
Push D-pad(w) to select “FROM,” and then push D-pad(Ent).
Push D-pad(e) to select “Repeater List,” and then push D-
pad(Ent).
• The REPEATER GROUP screen is displayed.
Push D-pad(r) to select the repeater group where your destination
repeater is listed, and then push D-pad(Ent). (Example: 11: Japan)
Push D-pad(t) to select “Hamacho430,” and then push D-
pad(Ent).
• “Hamacho430” is displayed on “FROM.”
Hold down qfor 1 second.
• The DR mode is selected.
2. Program your own call sign (programming mode)
1.
Select “My Call Sign” channel, then enter to programming mode
Register and set your own Call sign
Push D-pad(w) to select the root item (“My
Station”), and then push D-pad(Ent).
Pusht, and then push D-pad() to se-
lect “Edit.”
Push D-pad(Ent) to enter the call sign programming mode.y
• A cursor appears and blinks.
Push [MENU]qto enter the menu mode.
Push D-pad(e) to select “My Call Sign,”
and then push D-pad(Ent).
Push D-pad(r) to select the call sign mem-
ory channel “1” ([MY1]).
Rotate [DIAL] to select the rst digit. (Example: J)u
!2 Push D-pad(Ent) to set the programmed
call sign and note.
!3 Push D-pad(Ent) again to return to the MY
CALL SIGN screen.
• Two beeps sound.
!4 Push [MENU] to exit to the MENU screen.
!1 Repeat steps uand ito program the de-
sired 4 character note.
(Example: ID31)
!0 Push D-pad(") several times to move the cursor to the right of
“/”.
o Repeat steps uand i to enter your own
call sign of up to 8 characters, including
spaces.
(Example: First, J, then A, then 3, then Y,
then U, then A)
Push D-pad(i") to move the cursor to the second digit.
Antenna connector
Control dial
Volume control
Function display
Internal microphone
External Speaker/micro-
phone Jack
VFO/MHz • Clear • Output-
power key
Enter key
RXÚCS (Rx call sign set)/
Up key
D-pad
CS (Call sign)/
Right key
CD (Rx call
record)/
Left key DR/
Down key
Memory/Call •Select memory write key
Data Jack
External DC IN Jack
Quick menu key
TX/RX Indicator
PTT Switch
Squelch key
Menu • Lock key
FM/DV • Scan key
Power key
microSD card slot
Speaker
Front, top and side panels■
Reply to a received call (One-touch Reply)
Release [PTT] to receive.
• After selecting, release , and then
the selected station call sign is announced.
(RX>CS Speech function*)
•
When a call sign has not been received correct-
ly, error beeps sound, and no call sign is set.
• After selecting a call sign, the arrow icon
blinks on “TO.”
While holding down , rotate [DIAL] to se-
lect a call sign to send a reply.
If you want to reply to the last calling station,
hold down for 1 second. (It is not neces-
sary to rotate [DIAL].)
Push [CLR] , [FM/DV] , [M/CALL] , or
to return to the previous screen.
• The arrow icon on “TO” disappears.
The calling station’s call sign can be captured to quickly and
easily reply.
Means you received a
call from “JM1ZLK.”
Blinks after selecting
a call sign.
Means you have re-
plied to “JM1ZLK.”
D-pad
(�)
(Ent)
To program a note (up to 4 characters, for operating radio type,
area, and so on.), go to step !0, otherwise go to step !2.
MY1
MY2
DR mode screen
<Example> Select “Hamacho430” to “FROM”
*By selecting a repeater name, repeater call sign, frequency, duplex
and offset settings are automatically set.
* The repeater list that is used in the description, may differ with your
transceiver's preset contents.
* Set the repeater node to ‘B’ for the 430 MHz band, outside Japan.
See page 3-1 in Advanced Instructions, for details.
1. Set the received station’s call sign
2. Push [PTT] to transmit
3. Releasing the one touch reply mode
Simplex operation in the DR mode
When setting a Simplex frequency in the
Simplex group to “From,” simplex contacts
can be made in the DR mode.
Operation
q Select the “Repeater List” screen, as
described in steps qto e above.
w Select “20: Simplex” described in step
r above.
e Push D-pad(E) to select a desired
frequency, and then push D-pad(Ent)
r Hold down [PTT] to transmit.
43 A-6986H-3EX Printed in Japan © 2011 Icom Inc.
About “UR?” and “RPT?” indicationsYou can save the temporary settings to memory channel
After you finish the setting:
Hold down [S.MW] qfor 1 second to en-
ter the memory select write mode.
Rotate [DIAL] to select the Memory channel w
001.
Hold down [S.MW] efor 1 second to
store the setting, and the transceiver returns
to the DR mode.
• The memory contents are displayed for a
moment.
• If the selected channel is blank, the name
from the “FROM”/“TO” setting is automati-
cally saved into the Memory channel.
“UR?” appears
The call was successfully sent, but no station’s signal was
immediately received.
The listening station may missed your call, so after waiting
for a while, try calling again.
“RPT?” or “RX” appears
The destination repeater was not found, there is a pro-
gramming error, or the destination repeater was busy.
When “RPT?” is displayed, wait for a while, then try calling
again, because in the gateway call, a signal is sent even if
the destination repeater is busy.
NOTE: “RPT?” is displayed when;
• the repeater call sign programming is error.
• your own call sign is not registered on a gateway re-
peater, or the registration contents is not matched.
• the destination call sign is not registered on a gateway
repeater, or the registration contents is not matched.
• the destination repeater cannot be accessed.
“RX” is displayed when a blank MY call sign memory
has been selected.
2. “TO” (Destination) setting1. Set your access repeater(FROM)
Operation Operation
Following screen appears after making the call
3 Hold down [PTT] to transmit
•Local area call
•Local area call
•Gateway call •Gateway call
•“Your Call Sign” setting •“Your Call Sign” setting
• To maximize the readability of your signal, hold the microphone 5
to 10 cm (2 to 4 inches) from your mouth, then speak at a normal
voice level.
• In the DR mode, the previously used setting remain programmed.
Therefore, we select “CQCQCQ” in “TO” after you nish last call, to
prevent an accidental transmission to an undesired destination.
• Hold down for 1 second to exit the DR mode and return to
the main screen..
• When you select just the repeater name, the repeater call sign, its
frequency, duplex setting and frequency offset are automatically set.
• The repeater list, described in this manual, may differ from your
transceiver’s preset contents.
• You have four other ways to set your access repeater, other than
selecting it from repeater list.
You can select by rotating [DIAL], Search for the nearest repeat-
er, Setting from the TX History or Search for a repeater using the
DR mode scan. See the Advanced Instruction for more details.
The following destination station/repeater setting methods are also
possible. See the ‘ “TO” (Destination) setting’ described in Advanced
Instructions, section 3, for details.
• Using [DIAL]
• Setting from the RX History
• Setting from the TX History
• Direct Input (UR)
• Direct Input (RPT)
• When you call an individual station call sign through a gateway,
the signal is automatically sent to the last repeater that the station
accessed.
So, even if you don't know where the station is, you can make a
call using call sign routing.
• See ‘Your (destination) call sign programming’ described in
Advanced Instructions, section 4, for details.
Push D-pad(w$) to select “FROM,”
and then push D-pad(Ent).
Push D-pad(w) to select “Local CQ,” and then push D-pad(Ent).
Push D-pad(w) to select the item, and then push D-pad(Ent).
“Gateway CQ”  “11:Japan”  “Hamacho430”
Push D-pad(w) to select the item, and then push D-pad(Ent).
“Your Call Sign”  “TOM”
Push D-pad(e) to select “Repeater List,”
and then push D-pad(Ent).
• The REPEATER GROUP is displayed.
Push D-pad(r) to select the repeater
group where your destination repeater is
listed, and then push D-pad(Ent).
(Example: 11: Japan)
Push D-pad(t) to select “Hirano430,” and
then push D-pad(Ent).
• “Hirano430” is displayed on “FROM.”
Hold down q for 1 second to enter the DR mode.
FROM: Hirano430 repeater
(JP3YHH A*)
FROM: Hirano430 repeater
(JP3YHH A*)
FROM: Hirano430 repeater
(JP3YHH A*)
TO: Local CQ
(CQCQCQ)
TO: Hamacho430
(JP1YIU A*)
TO: TOM
(JM1ZLK)
MY
MY
MY
Area
Area
Area
JA3YUA
JA3YUA
JA3YUA
Internet
CQ
CQ
Internet
(GW)
(GW)
Push D-pad(q) to select “TO,” and then push D-pad(Ent).
The local area call is
successfully sent, but no
station’s signal is immediately
received.
The destination repeater is
busy, when making a gateway
communication from Hirano430 to
Hamacho430.
JA3YUA
calling through
JP3YHH...
NOTE:
If the selected channel in step whas
memory contents already programmed,
the Repeater Name will not be
programmed.
20: Simplex group
TX display in the DR
mode
Example: Set the "Hirano430" repeater name in “FROM”
“Hirano430” setting is
completed.
Settings are
complete
Settings are complete
Hamacho430 call sign
with “/” automatically
added, scrolls.
TOM’s call sign scrolls.
CQCQCQ scrolls.
Select “11: Japan”
where “Hamacho430”
repeater is listed.
The call sign of the
selected station is
displayed.
“TOM” setting is
completed.
Blinks
Blinks
When Memory chan-
nel 001 is selected.
* Set the repeater node to ‘B’ for the 430 MHz band, outside Japan.
See page 3-1 in Advanced Instructions, for details.

Other manuals for D-STAR ID-31A; D-STAR ID-31E

3

This manual suits for next models

1

Other Icom Repeater manuals

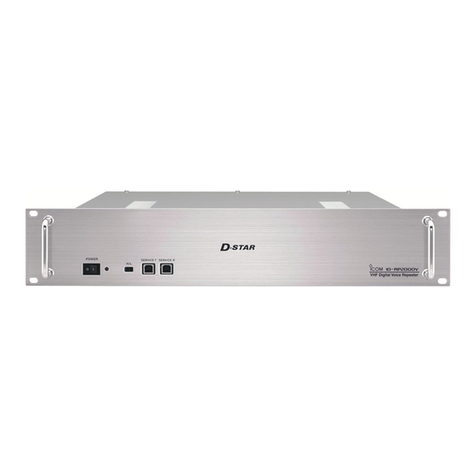
Icom IC-RP1620 User manual

Icom

Icom IC-RP1620 User manual

Icom IC-RP2210 Service manual

Icom

Icom IC-RP2210 Service manual

Icom iC-FR5000 User manual

Icom

Icom iC-FR5000 User manual

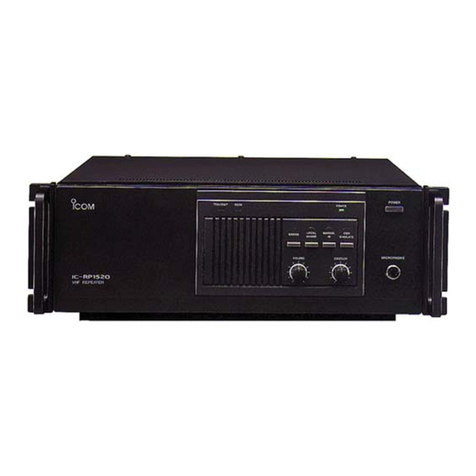
Icom IC-RP1520 User manual

Icom

Icom IC-RP1520 User manual

Icom IC-FR5300 User manual

Icom

Icom IC-FR5300 User manual

Icom IC-FR3100 User manual

Icom

Icom IC-FR3100 User manual

Icom IC-FR3000 Series User manual

Icom

Icom IC-FR3000 Series User manual

Icom IC-FR5100 User manual

Icom

Icom IC-FR5100 User manual

Icom ID-RP2000V User manual

Icom

Icom ID-RP2000V User manual

Icom ID-RP4000V User manual

Icom

Icom ID-RP4000V User manual

Icom iC-FR5000 Installation and operating instructions

Icom

Icom iC-FR5000 Installation and operating instructions

Icom IC-FR6100 User manual

Icom

Icom IC-FR6100 User manual

Icom CY-5300 User manual

Icom

Icom CY-5300 User manual

Icom C RP1520 User manual

Icom

Icom C RP1520 User manual

Icom id- rp2000v User manual

Icom

Icom id- rp2000v User manual

Icom ID-RP2C User manual

Icom

Icom ID-RP2C User manual

Icom IC-FR3000 Series User manual

Icom

Icom IC-FR3000 Series User manual

Icom iFR5000 User manual

Icom

Icom iFR5000 User manual

Icom UHF IC-FR6000 Installation and operating instructions

Icom

Icom UHF IC-FR6000 Installation and operating instructions

Icom FR9020 11 User manual

Icom

Icom FR9020 11 User manual

Icom UHF FM Repeater iFR6100 User manual

Icom

Icom UHF FM Repeater iFR6100 User manual

Icom IC-FR5100 Series User manual

Icom

Icom IC-FR5100 Series User manual

Icom IC-FR9020 User manual

Icom

Icom IC-FR9020 User manual

Icom ID-RP2010V User manual

Icom

Icom ID-RP2010V User manual

Popular Repeater manuals by other brands

Kenwood TKR-740 Service manual

Kenwood

Kenwood TKR-740 Service manual

Dekolink Deko2119 product manual

Dekolink

Dekolink Deko2119 product manual

Digital Monitoring Products 1100R installation guide

Digital Monitoring Products

Digital Monitoring Products 1100R installation guide

teko Astra-Z-8845 Operation manual

teko

teko Astra-Z-8845 Operation manual

QMotion Qrelay quick guide

QMotion

QMotion Qrelay quick guide

Kenwood TKR-740 Brochure & specs

Kenwood

Kenwood TKR-740 Brochure & specs

MST ImPact owner's manual

MST

MST ImPact owner's manual

Rollts DOMINO S1 user guide

Rollts

Rollts DOMINO S1 user guide

Allied Telesis CentreCOM AT-MR415T installation guide

Allied Telesis

Allied Telesis CentreCOM AT-MR415T installation guide

Digital Antenna DA4000SBR Installation and operation manual

Digital Antenna

Digital Antenna DA4000SBR Installation and operation manual

Yaesu FTR-710A instruction manual

Yaesu

Yaesu FTR-710A instruction manual

pathway 901 Series manual

pathway

pathway 901 Series manual

COMBA RX-8139 user manual

COMBA

COMBA RX-8139 user manual

SureCall CM-Triflex-V user manual

SureCall

SureCall CM-Triflex-V user manual

Newnex FireNEX-uLINK-DS user manual

Newnex

Newnex FireNEX-uLINK-DS user manual

Dali Wireless DW-010-7373-08 Installation and operation manual

Dali Wireless

Dali Wireless DW-010-7373-08 Installation and operation manual

Cypress CM-388M Operation manual

Cypress

Cypress CM-388M Operation manual

Hama N300 operating instructions

Hama

Hama N300 operating instructions

manuals.online logo
manuals.online logoBrands
  • About & Mission
  • Contact us
  • Privacy Policy
  • Terms and Conditions

Copyright 2025 Manuals.Online. All Rights Reserved.