ICON IP2032 User manual

16
ICON Voice Networks
8001 Jetstar Drive
Irving, TX 75063
www.iconvn.com
Printed in USA Part Number: 702406
REV 1.0
IP2032
Quick Reference Guide
ICON Voice Networks

2
Introduction
The IP2032 includes a three-line LCD display, dial pad, three
dynamic soft keys, handset, I/O ports, and a desktop pedestal
with a wall-mount option. The IP2032 supports
Power-over-Ethernet (PoE), but also ships with a 5VDC/2A
power adapter when PoE is not available.
Use the illustrations and tables on the next few pages to
familiarize yourself with the IP2032.
Depending on the TOS 3000 software version and how your phone is
programmed feature availability and operation may differ from the instructions
in this guide. For more information contact your authorized ICON Voice
Networks Dealer.
15
Phone Information
Extension Number:
Passcode / Voice Mail Access Code:
IP Address:
MAC Address:
Serial Number:

14
press the Edit soft key. Use the dial pad to enter a new
number and press OK.
4. To edit an existing number, find the number (0-9) you
want to edit and press the Edit soft key. Use the
Backsp soft key to clear the old number and use the
dial pad to enter a new number. When finished press
OK.
3
No Part Name Description
1Handset Cradle (Top) For the placement of handset
(receiver end).
2Hook switch On-hook / off-hook switch.
3Handset Hook Secures the handset when
wall-mounted.
4Speaker Provides sound for ringing and
hands-free conversation.
5Handset Jack RJ-9 handset jack for connecting the
handset cord.
6Headset Jack RJ-9 headset jack for connecting a
headset.
7 Handset Cradle (Bottom) For the placement of handset
(transmitter end).
8
Indicates an incoming call, new
voice message, or registration
notification.
9Telephone Display
The three-line LCD displays features
such as the time, date, telephone
number, caller ID, line/call status,
number of messages, and soft key
menus.
10
MENU / EXIT Key
In the idle state, the MENU / EXIT
key accesses the telephone menu.
While in a menu, pressing
MENU/EXIT returns you to the
previous menu level.
REDIAL / << Key
In the idle state, the REDIAL / << key
accesses the call log. While in the
telephone menu, use the key scroll
left.
11
1
OK / MESSAGE Key
Message Key: In idle state, press
the Message key to access your
voice mailbox.
OK Key: Use the OK key to confirm
a menu setting or a dialed telephone
number.

4
No Part Name Description
PHONEBOOK / >>
The PHONEBOOK/>> key. In idle
state, press to open the phonebook
menu. In any other menu press to
advance to the next submenu.
Each of the soft keys above activates a soft key menu option. Soft
key feature options are displayed along the bottom of the
telephone display. Soft key feature availability is dependent upon
the state of the telephone.
12
Line Keys 1 & 2
Line keys 1 and 2 can be used for
line selection or programmable
features.
Line Key In-Use = Red LED.
Line Key Not In-Use = No LED.
Headset Key
Toggles the Headset on or off.
Headset On = Red LED.
Headset Off = No LED.
To make a call using the headset,
press the Headset key then press
the Speaker key.
Mute Key
Toggles Mute on or off.
Mute On = Red LED.
Mute Off = No LED.
13
Speaker Key
Toggles the speaker (headset if
active) on or off.
Speaker On = Red LED.
Speaker Off = No LED.
14
Volume Control /
Navigation Keys
Volume Control: Use to adjust/turn
off the ringer, handset, headset, or
speakerphone volume level.
Navigation: The +/- keys allow you
to scroll through text and select
features on the telephone display.
13
Delete a Phonebook Entry
1. Press the Menu key and use the navigation keys to
select Phonebook. Press OK
2. Select Delete and either use the navigation keys to
scroll through the list or use the dial pad to enter a
phonebook bin number (1-200).
3. Press the Del soft key.
4. Press the Del soft key a second time to confirm.
Ring Type
The IP2032 allows you to select one of eleven distinctive ring
types for your phone. (Default = 0).
1. Press the Menu key and use the navigation keys to
select Ring Type and press the OK.
2. Use the Backsp soft key to clear the current entry. Use
the dial pad to enter a new Ring Type (0-10) and press
OK.
Speed Dialing
The Speed Dialing feature lets you store a list of 10 phone
numbers that you can access easily using a speed dial number
from 0 to 9.
Speed Dialing a Number
1. Press the Menu key and use the navigation keys to
select Speed Dialing, then press OK.
2. Use the Navigation Keys to scroll through the speed
dial list.
3. Press the Dial soft key to dial a number.
Editing your Speed Dial Directory
1. Press the LCD Menu key and use the navigation keys
to select Speed Dialing, then press OK.
2. Use the navigation keys to scroll through the speed
dial list.
3. To add a new number, find an empty position (0-9) and

12
forwarded to the no answer forwarding destination.
(Default value is 15 seconds.)
Call Log:
1. Press the Menu key.
2. Select the Call Log option and press OK to enter the
call log menu.
3. Scroll to select Dialed Calls, Missed Calls, or Received
Calls and press OK.
4. Use the +/- navigation keys to scroll through your calls.
5. You may choose to Dial, Delete/Delete All Number(s)
or press Cancel to exit the menu.
Phonebook:
The Phonebook feature allows you to store a list of phone
numbers for fast dialing. The IP2032 can store up to 200
entries.
Browse the Phonebook
1. Press the Menu key and Use the navigation keys to
select Phonebook. Press OK.
2. Select Dial and either use the Navigation keys to scroll
through the list or use the dial pad to enter a
phonebook bin number (1-200).
3. Once you have selected a phonebook contact you can
press the Dial soft key to call.
Edit or Add a Phonebook Entry
1. Press the Menu key and Use the navigation keys to
select Phonebook. Press OK.
2. Select Edit and either use the Navigation keys to scroll
through the list or use the dial pad to enter a
phonebook bin number (1-200).
3. Press Edit.
4. Press the Edit soft key to edit the name and telephone
number using the dial pad. When finished press OK.
5
No Part Name Description
15 Microphone Microphone input under the IP2032
lower front edge.
16
Dial Pad
Telephone dial pad.
(1-9, 0, *, and #).
Conference Key
Press the Conference key to initiate
a conference call after two calls are
connected.
Transfer Key
Transfer a call to another station.
17
Hold Key
Press the Hold key to place a call on
hold or retrieve a held call.

6
LED Overview
LED Color Status Description
Off Idle or no new message.
Slow Blink New voice message
indication.
Rapid Blink There is an incoming call.
Message
LED
Red
Rapid Blink
(Constant)
IP2032 cannot register
to TOS3000 system.
Off The hands-free speaker is
not in use.
Speaker key
Red Steady In on-hook dialing mode or
hands-free talking mode.
Off
The microphone is on for
handset, headset, or
hands-free mode.
Mute key
Red
Steady
The microphone is off
(muted) for handset,
headset, or hands-free
mode.
Off Headset mode is disabled.
Headset key
Red Steady Headset mode is enabled.
Off The line is idle.
Steady
The line is active (dialing or
on a call).
Slow Blink A call is on hold.
Line keys 1
& 2
Red
Rapid Blink Incoming call.
11
Advanced Call Features
Call Blocking Based on Caller ID:
1. Press the Menu key and use the navigation keys to
select Call Blocking. Then press OK.
2. To enable choose Status and use the navigation keys
to toggle to ON. Press OK to save.
3. To edit one of the ten entries, select Blocking List, then
a number (0-9). Press OK, then Edit to enter a number.
When finished press OK to save. Calls from this
number will no longer ring your extension and instead
receive a busy signal.
Call Forward:
1. Press the Menu key and use the navigation keys to
select Call Forward. Then press OK.
2. Scroll to select the call forwarding type you want to
activate and press OK.
3. Select Always Forward to forward all calls, Busy
Forward to forward only busy calls, No Answer
Forward to forward only unanswered calls, or DND
Forward to forward calls when the phone is in DND
mode.
4. Select Status and press OK.
5. Use the +/- navigation keys to enable call forwarding
(on) or disable (off) call forwarding and press OK.
6. Select Forward Number to enter the phone number
where you want calls forwarded and press OK.
7. Select Forward Call Type. ICM enables call forwarding
only for calls from an internal extension. Outside
enables call forwarding for calls from an outside line or
networked TOS 3000 system. Both forwards all calls.
8. When enabling No Answer Forwarding, you must set
the No Answer Timer. If the telephone is not answered
after the no answer timer expires, the call is then

10
hands-free) you can mute the microphone by pressing
the Mute key. The Mute key will light red when mute is
active.
Transfer (Blind Transfer):
1. While on an active call press the Transfer key.
2. The system will prompt you to enter the number where
you would like to transfer the call.
3. Use the dial pad to dial an extension or outside
telephone number and press OK.
4. Hang up to complete the transfer.
Transfer (Supervised Transfer):
1. While on an active call place the first call on hold by
pressing the Hold key.
2. The IP2032 will automatically switch to the second
channel. Use the dial pad to dial an extension or
outside telephone number and press OK.
3. When the called party answers you can speak to the
called party before transferring.
4. Press the Transfer key to complete the transfer.
Voice Mail:
1. Press the OK/Message key or dial the voice mail
access code ______ to access your voice mailbox.
2. When prompted, enter your voice mailbox pass code.
Volume Adjustment While on a Call:
1. During a conversation (handset, headset, or
hands-free), you can adjust the receive audio through
the handset, headset or speaker using the volume
control key.
2. Press the volume control + key to raise the volume or
volume control – key to lower the volume. The audio
level will display on the LCD. Please note that the
lowest level turns the receive audio OFF.
7
IP2032 I/O Ports
The side view and the connectors of the IP2032 are as follows:
No Part Name Description
1 CON
Not used.
2
RJ-45
Ethernet Port
RJ-45 Jack 10/100 Mbps Ethernet port for
connecting to PC. It could be used as a switch for
a PC to access the IP network.
3
RJ-45
Ethernet Port
10/100 Mbps Ethernet port for connecting the
IP2032 to an IP network. This port also supports
Power-over-Ethernet (PoE) (IEEE802.3af
standard).
4
Power Input
The IP2032 can be powered by the 5V/2A power
adapter (included with the IP2032). This device
supports a power auto-switch function and can
switch from AC power to PoE (if available).

8
Basic Call Features
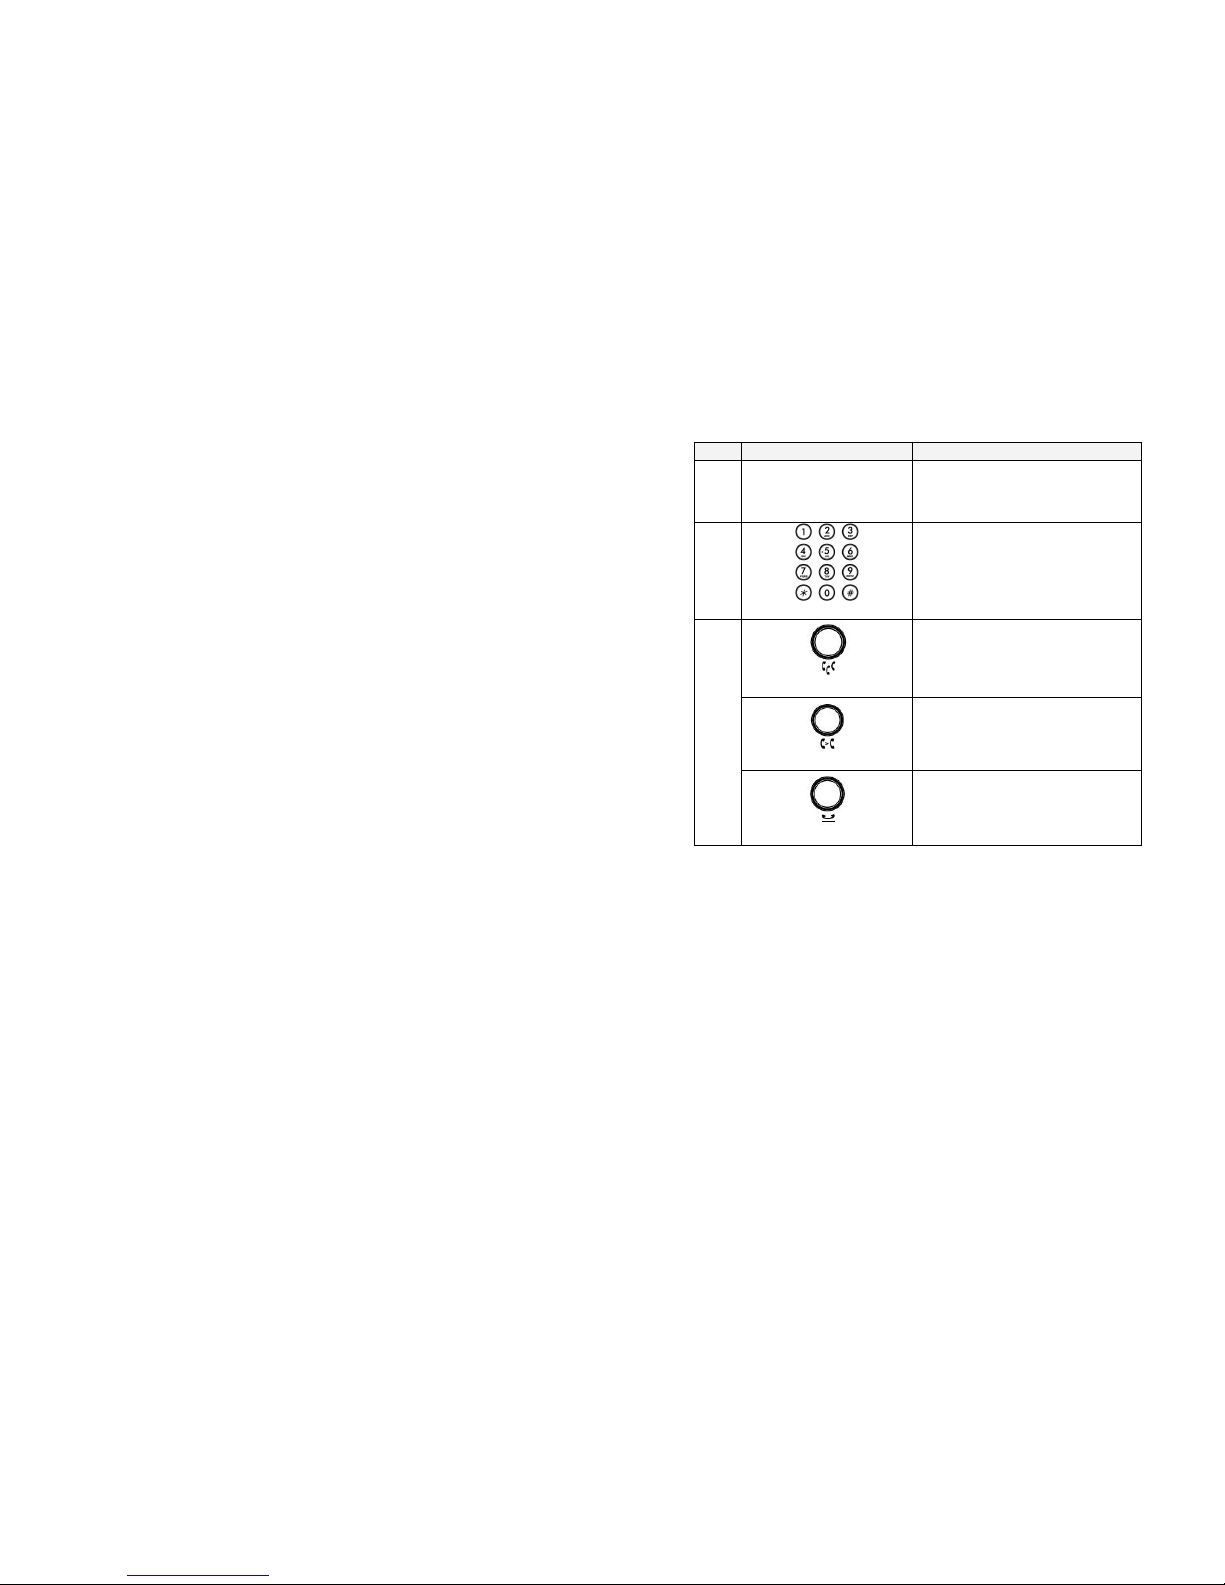
Three Ways to Use the Phone:
1. Handset – Lift the handset from the cradle to answer.
2. Hands-Free / Speakerphone – You can enter hands-free
mode by pressing the Speaker key. To end a call, press the
Speaker key to hang-up.
3. Headset – The Headset key is used to enable/disable
headset mode, when enabled, it will switch the phone from
hands-free to headset mode when the Speaker key is
pressed. When in headset mode use the Speaker key to
answer and end a call.
Making a Call:
1. Lift the handset or press the Speaker key. Note. If
using a headset make sure the Headset key is active.
2. Use the dial pad to dial an extension number or
outside phone number. You may also choose to dial a
phone number by entering the IP address of the
telephone. E.g., To dial 192.168.1.11, enter the
following: 192*168*1*11.
3. Press OK or the Dial soft key to dial the number, or
wait for the dial timeout (default 5 seconds). The
IP2032 will select the first available line to dial the
number.
4. When your party answers, begin speaking.
5. Hang up or press Speaker to end the call.
Receiving a Call:
1. Lift the handset or press the Speaker key. Note. If
using a headset make sure the Headset key is active.
2. Begin speaking.
3. Hang up or press Speaker to end the call.
Conference:
1. While on an active call, you can invite another party to
9
join using the 3-party conference call feature.
2. Place the first call on hold by pressing the Hold key.
3. The IP2032 will automatically switch to the second
channel. Use the dial pad to dial an extension or
outside telephone number and press OK.
4. When the outside party answers press the Conference
key to start the three-way conference. The LCD will
display CONF to show that the two calls are joined in
the conference.
5. Please note the conference call will end for all parties
when the TOS 3000 extension hangs up.
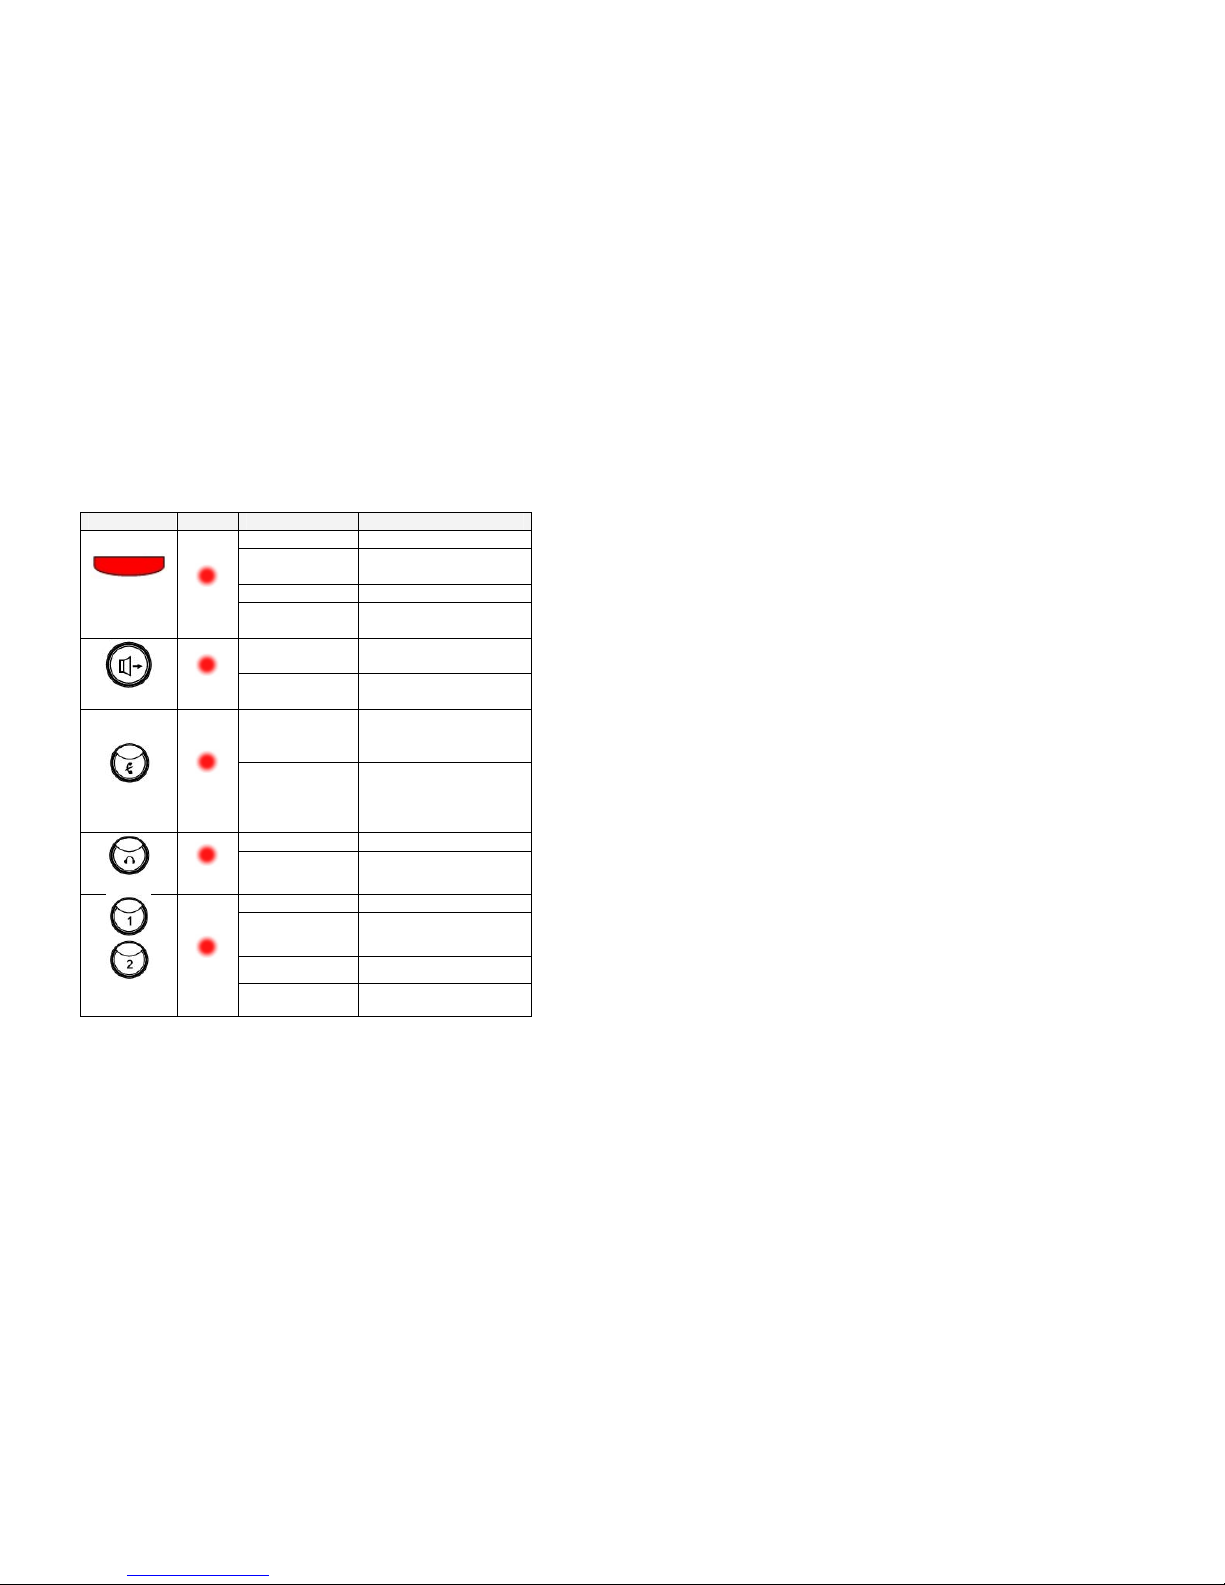
Do Not Disturb (DND):
1. Use this feature to prevent calls from ringing at your
extension. When enabled, calls will follow the DND
forward setting (default voice mail).
2. Press the Menu key and use the navigation keys to
select DND and press OK.
3. Use the up/down navigation keys to enable (On) or
disable (Off) DND and press OK.
Hold:
1. While on an active call press the Hold key.
2. To pick-up the held call, press the Hold key or if the call
is held on a Line key, you can also press the Line key
to pick-up the call.
Last Number Redial:
1. Press the <</Redial key.
2. The IP2032 phone will display the last 10 dialed
numbers.
3. Use the Navigation keys to select a number and press
the Dial soft key to redial.
Mute:
1. During a conversation (handset, headset, or
Table of contents
Other ICON IP Phone manuals