Iconasys LumiPad 360 User manual

1
© Iconasys 2013-2021
Iconasys Large LumiPad 360 Lighting System
Set up & User Guide
Included with purchase:
A. 1X Backlight Panel: 34 x 34 x 4” (86 x 86 x 10cm) –includes 24V 6A power
adaptor
B. 1X Backlight Panel Base Stand 34 x 8” (+ 6 mounting screws)
C. 2X Spectro 600 Pro LED Panel Lights –includes 2X 15 1.5A power adaptors
D. 2X Light Stands: Adjustable Height
E. 3X 36 x 36” White Panels: Use panels to convert into a Light box (2 side panels &
1 top panel)
F. Velcro Circles: Use to connect white panels to side walls of the backlight

2
© Iconasys 2013-2021
Hardware Set-up:
Important Links:
1. Large LumiPad 360 Lighting Kit: Set up Video
2. Large LumiPad 360 Lighting Kit: Unboxing Video
3. Spectro 600 PRO Panel Lights: User Guide
4. Spectro 600 PRO Wireless Remote: User Guide / Tutorial Video
5. Using the LumiPad 360 Lighting Kit as a Lightbox: Video
Connect the Backlight Base Stand:
Included in the package is a base stand for the 34 x 34” Backlight Panel. This is a 34
x 8” piece of white acrylic that will help to support the backlight panel when
standing vertically. This will connect via 6 screws to the bottom of the Backlight
Panel.
Connect the Spectro 600 LED Panel Lights to the Light Stand:

3
© Iconasys 2013-2021
1. Open the light stands so the footprint expands. This can be done by
loosening the hand screw on the side of the light stand then opening the
base part.
2. Connect the LED Panel Light to the top of the Light Stand. If it cannot fit over
top of the light stand, use the ‘Bracket Knob’ on the bottom of the Light
bracket (U Shaped Rod) to loosen the screw so it will fit on the Light Stand.
3. Expand Light Stand to desired height. Light stands can expand from 28” to
72” by loosening the hand screw on vertical pole and pulling it up. After
desired height has been achieved, tighten hand screw to secure the height.
Powering Lights:
A. Backlight Panel: Connect to the 24V 6A AC Adaptor. Note, this is rated for
110-240V. For international customers, a plug adaptor may be required.
B. Spectro 600 LED Panel Lights: Connect to the 15V Power Adaptor. Note, this
is rated for 110-240V. For international customers, a plug adaptor may be
required.
Spectro 600 LED Light Panel

4
© Iconasys 2013-2021
Dimming & Color Adjustment
Included with the package is 2 Spectro 600 LED Light Panels. These lights will be
used up front to illuminate the subject being shot. Each panel is:
A. Dimmable: These panels have a dimming option ranging from 10-99%. This is
depicted by the two numbers on the left side of the LED Display Screen. At
full power, each light emits 4,320LM. Typically users will utilize the lights at
around 50 –75% however this will depend on:
a. The distance from the subject to the light
b. The size of the subject
c. The amount of light preferred on a subject

5
© Iconasys 2013-2021
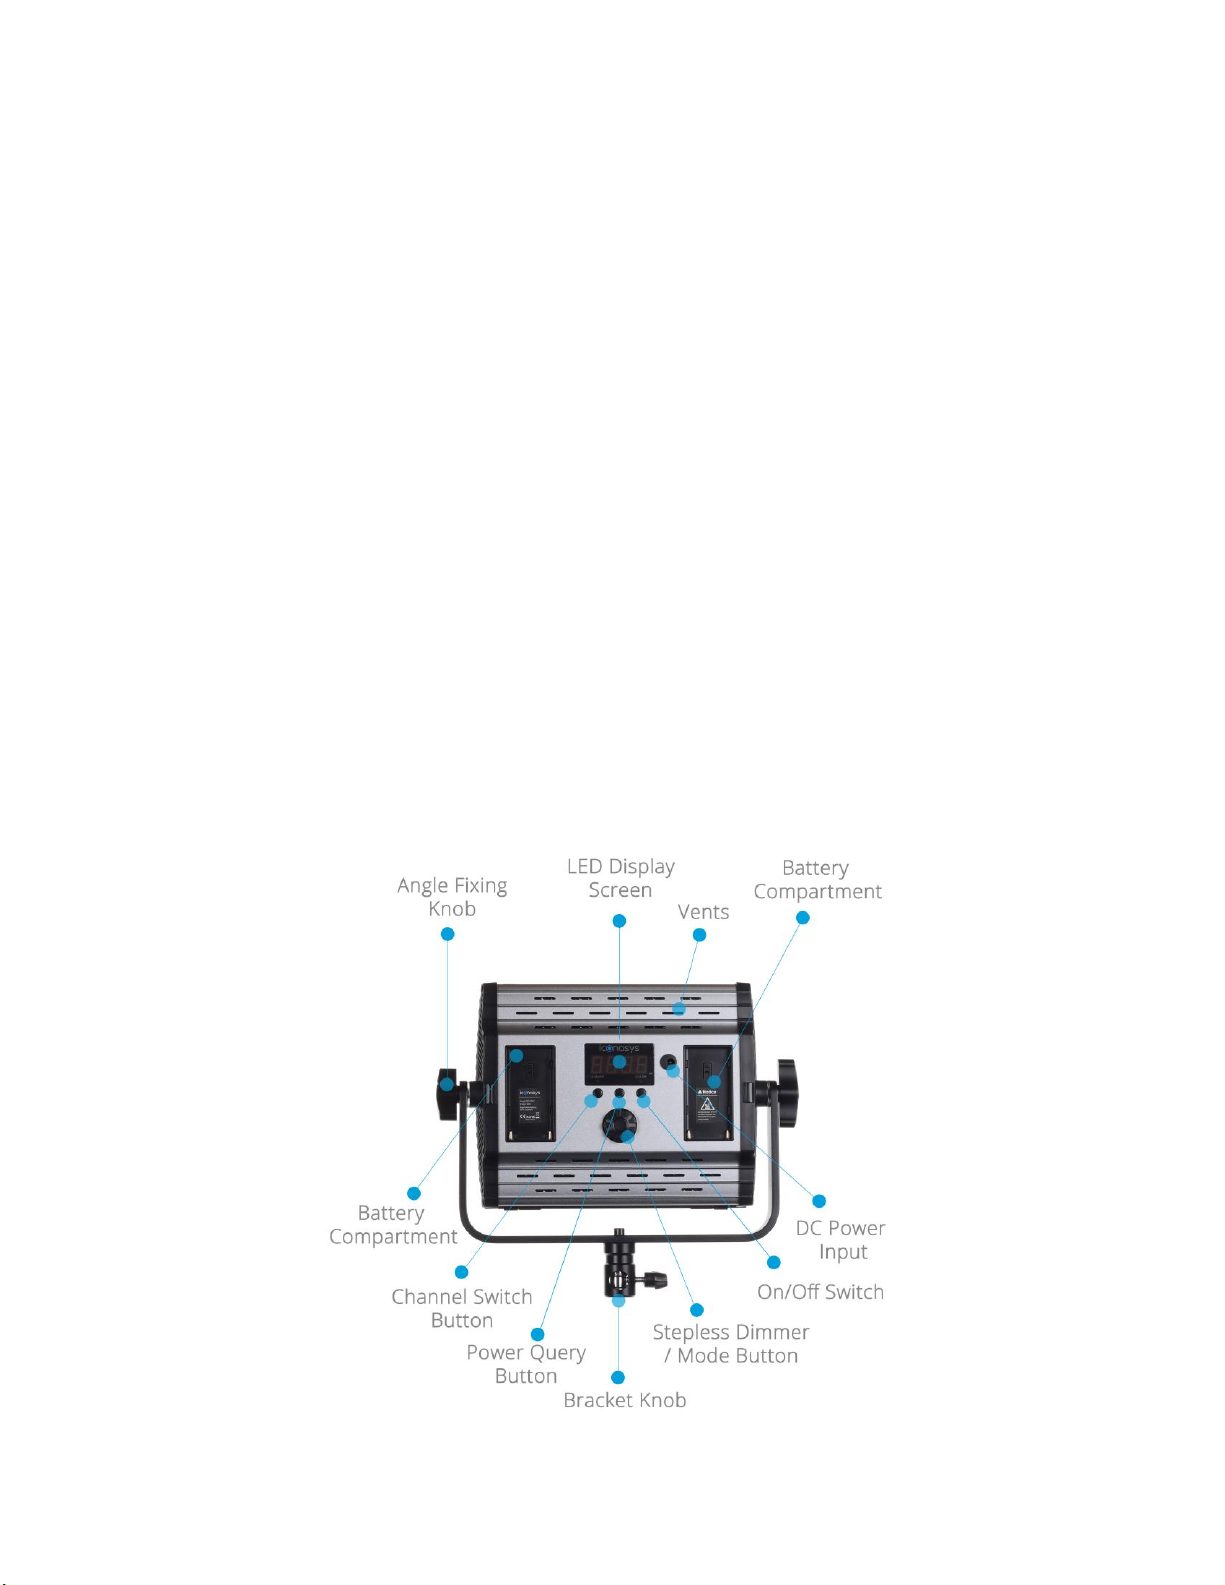
To adjust dimming, ensure the blue LED under the word ‘DIMMER’ on the left hand
side of the LED Display Screen is lit up. If it is not, press once on the ‘Stepless
dimmer / Mode switch” to toggle from Color Adjustment to Dimmer mode. Then
twist the knob left/right to adjust brightness.
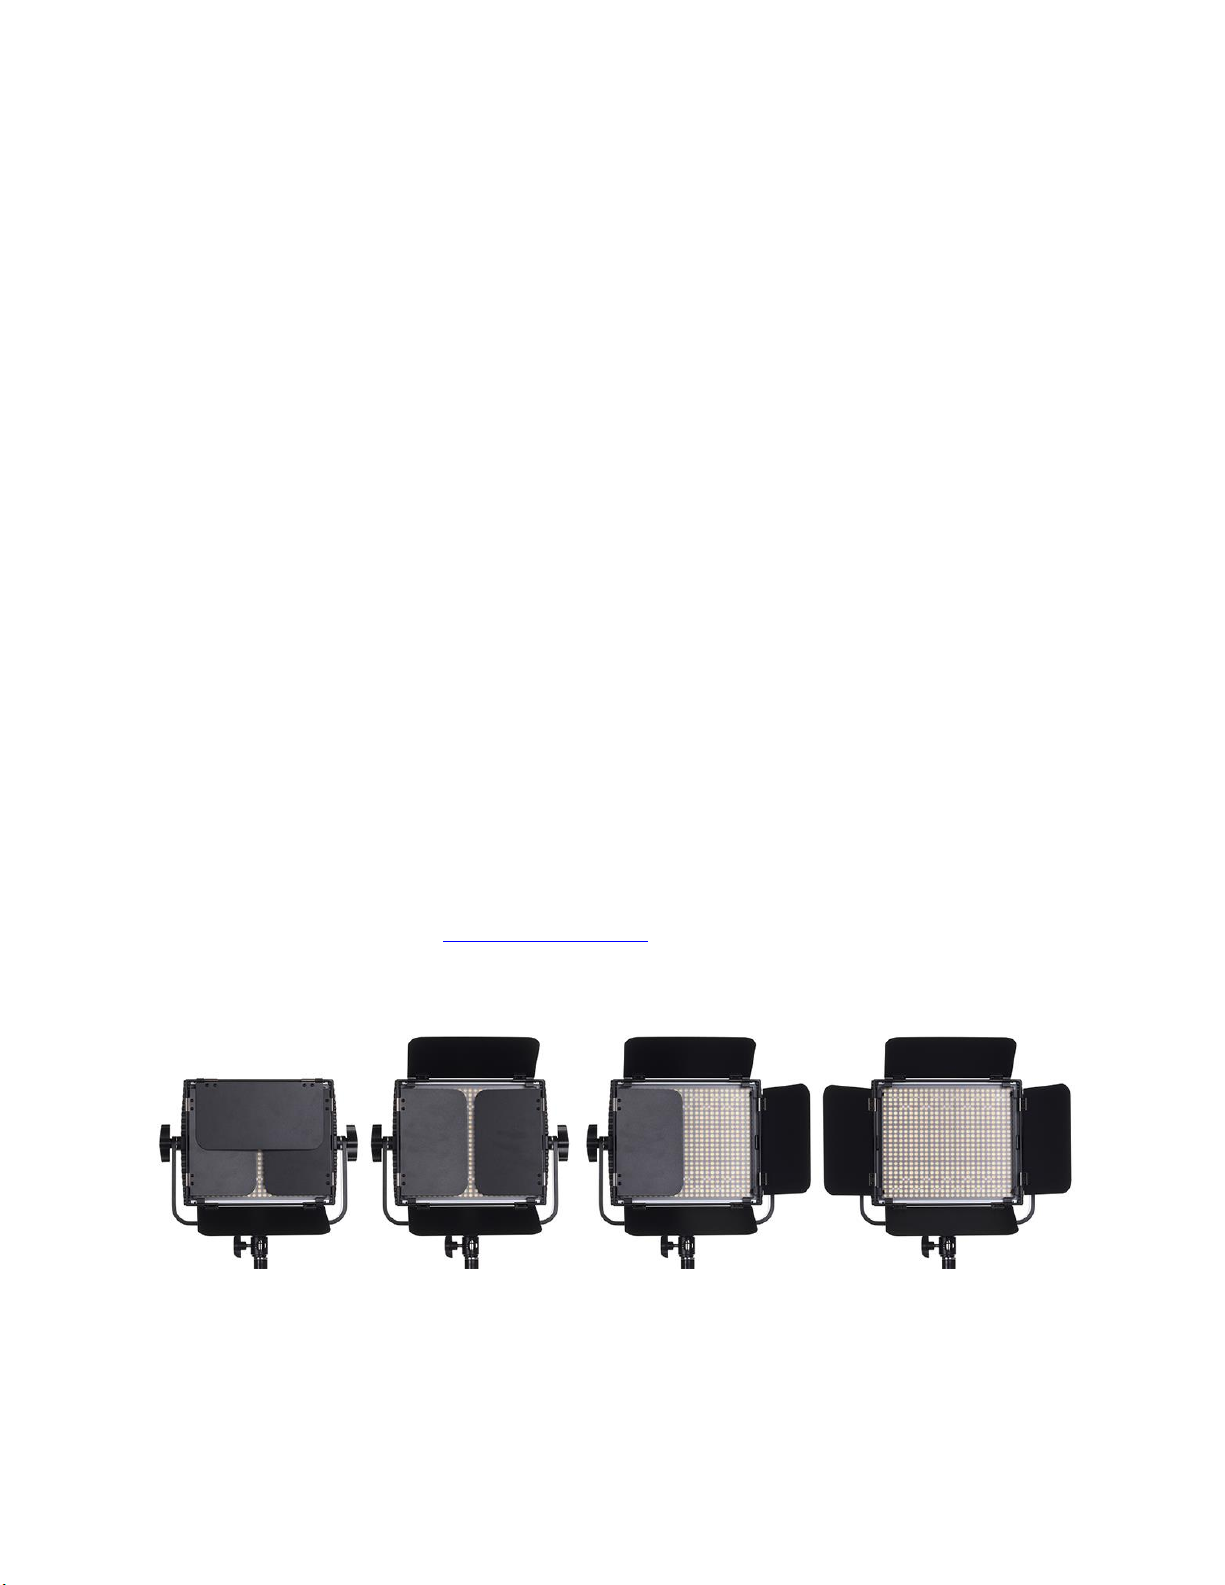
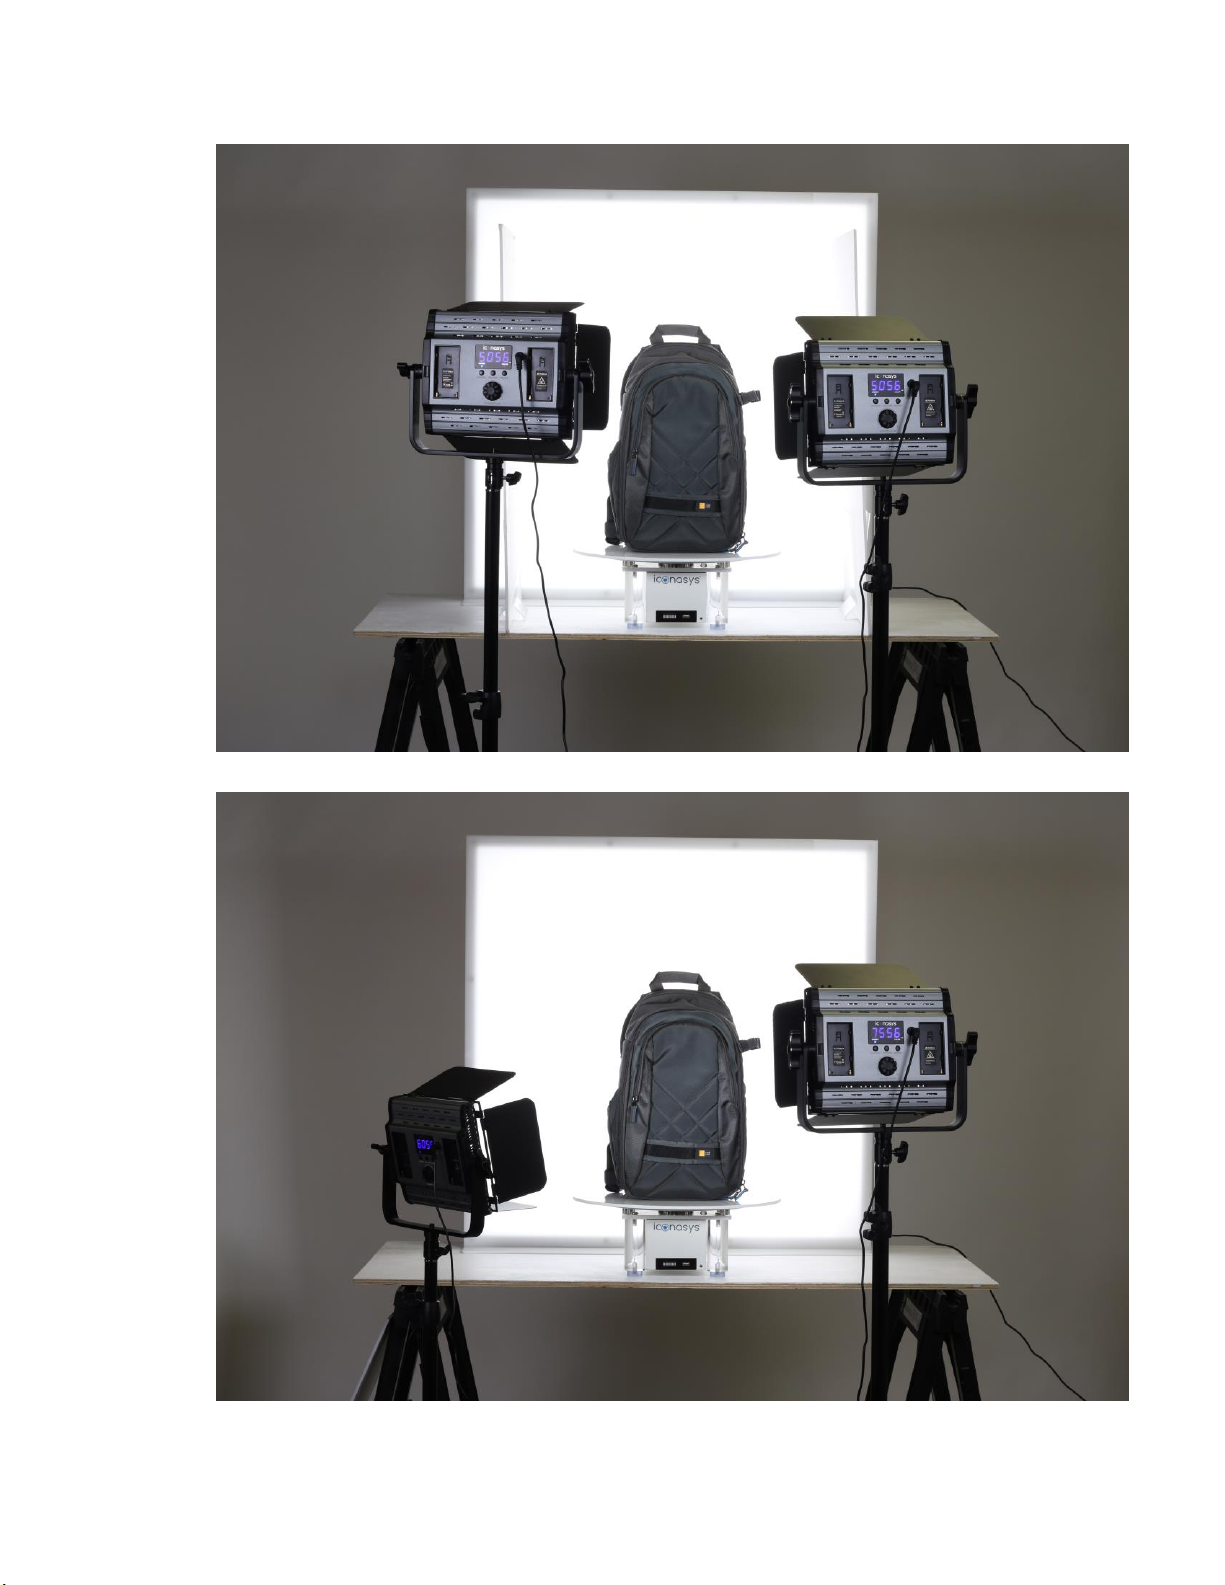
B. Color Adjusted: These light panels range from 3,200K (denoted by 32) to
5,600K (denoted by 56). Typically users will work with the lights between
5,000 and 5,600K (daylight balanced) to achieve color accurate results.
However, in some cases, users may find benefit from lowering the color
temperature to help achieve consistent colors (for ex. shooting gold or yellow
items). We suggest to use both Panels at the same color temperature.
To adjust LED Panel color temperature, ensure the blue LED under the word
‘COLOR’ on the right hand side of the LED Display Screen is lit up. If it is not, press
once on the ‘Stepless dimmer / Mode switch” to toggle from Dimmer to Color
Adjustment mode. Then twist the knob left/right to adjust brightness.
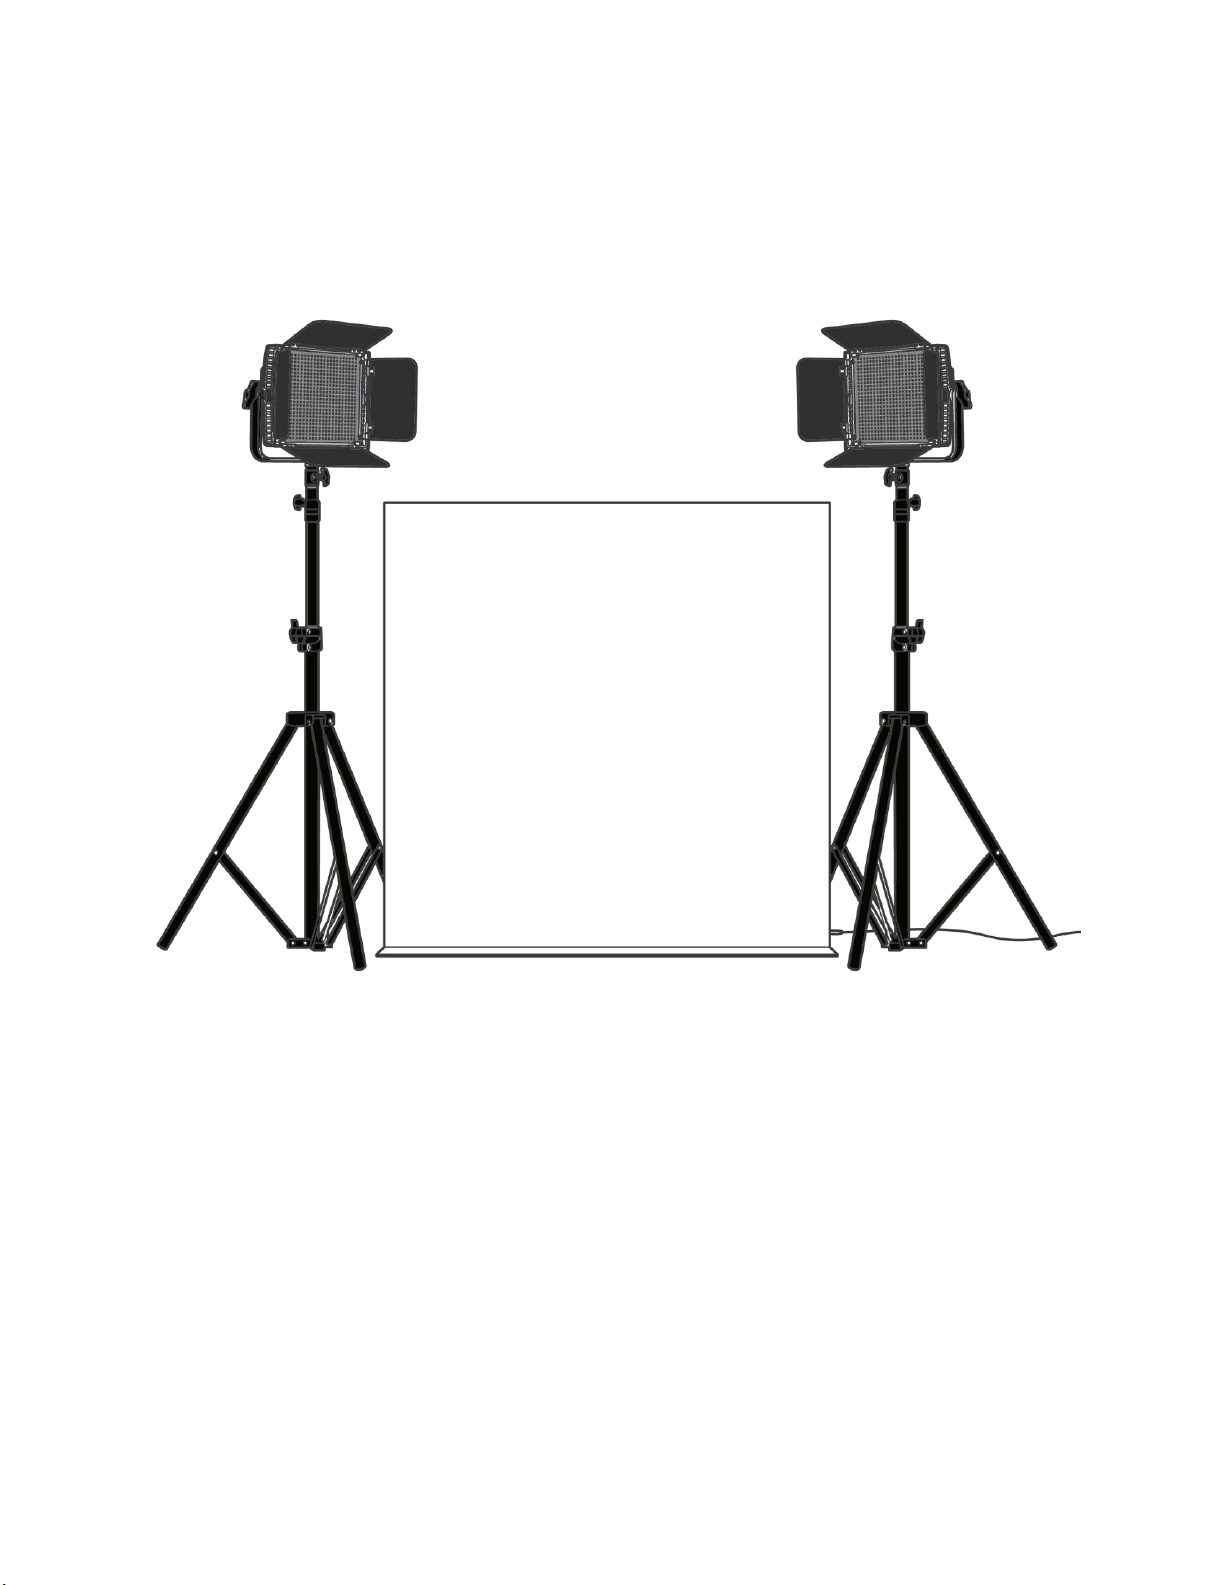
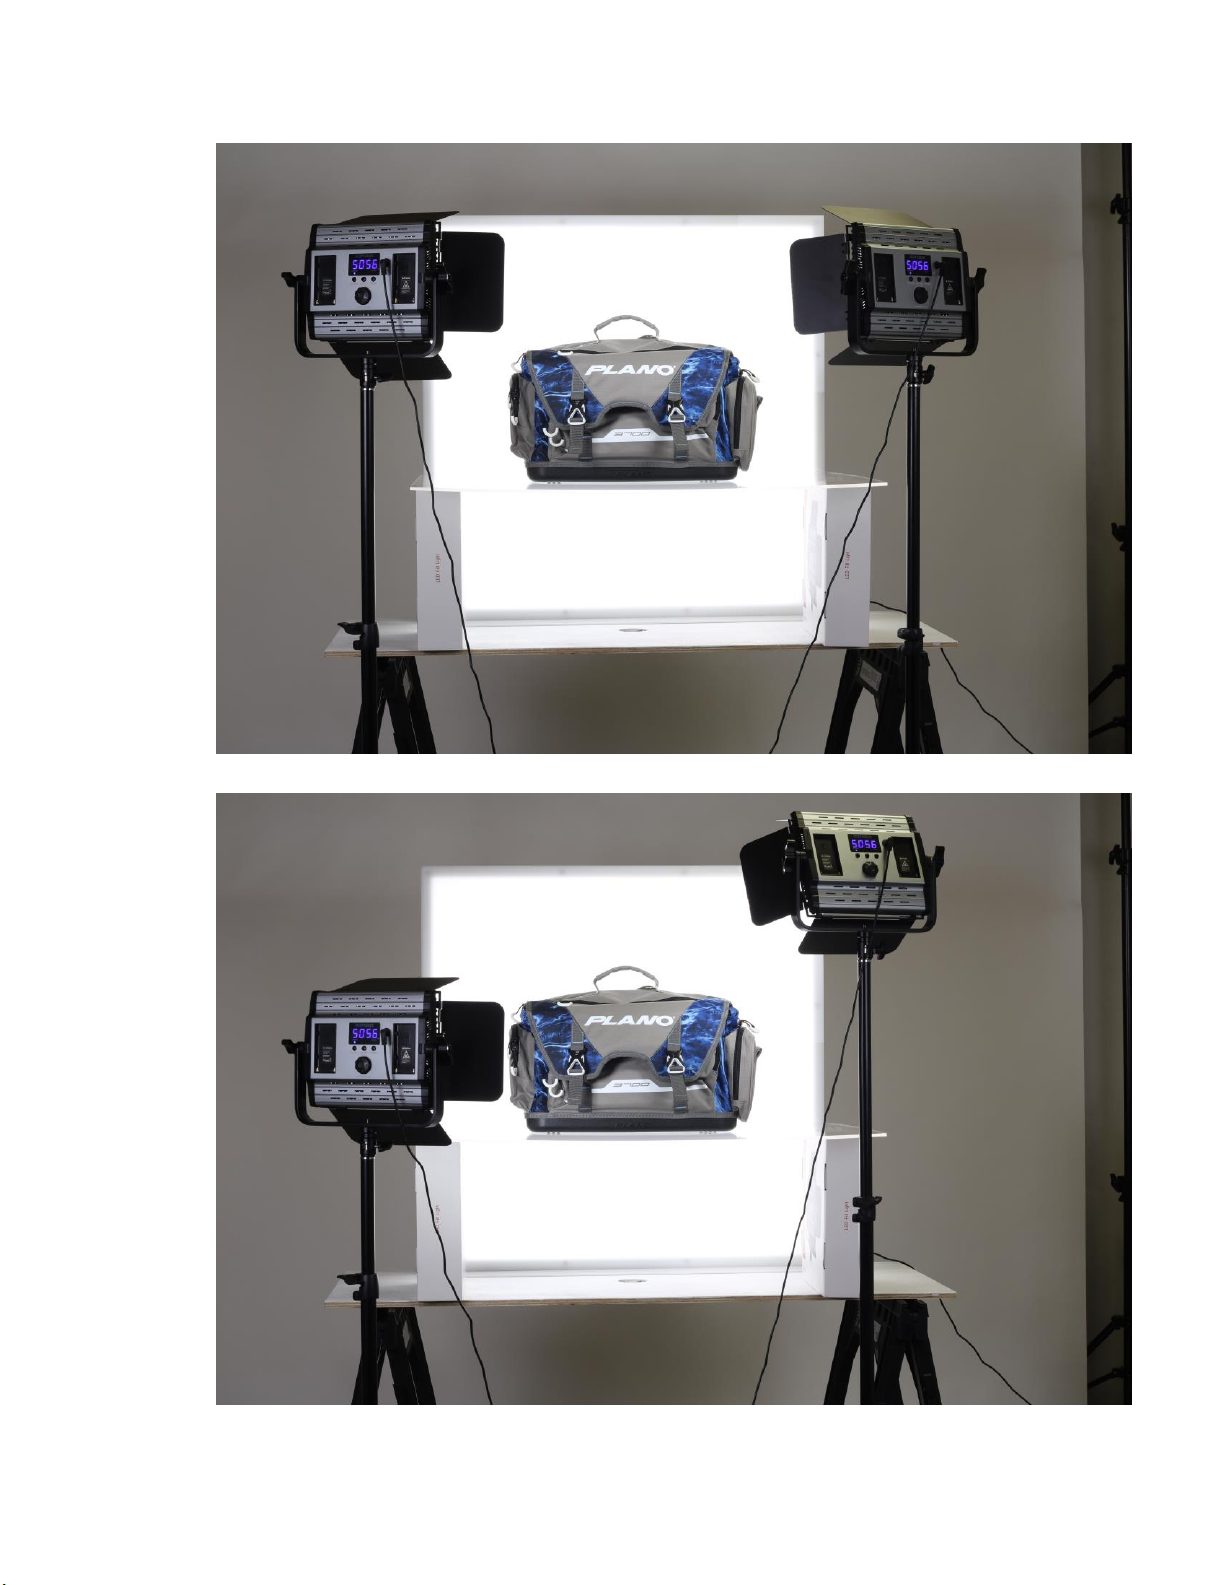
Spectro 600 LED Panel Barn Doors
Each LED Panel includes Barn Doors –these are the metal flaps connected to the
light. These can open up and are responsible for helping users shape and
concentrate light dispersion. Lights can also be angled (use ‘Angle Tilt Knob’ to
adjust and set Tilt. See the set up guide video for additional information.

6
© Iconasys 2013-2021
Spectro 600 LED Tilt/Angle Adjustment
Users can adjust the tile/angle of the light by loosening the ‘Angle Fixing Knob’ then
adjusting angle up and down. After achieving desired angle, simply tighten the
‘Angle Fixing Knob’.
34 x 34” Backlight Panel
Included with the package is a 34 x 34” Backlight Panel. This will sit behind the
subject to allow for product images with white backgrounds. This panel is
dimmable using the side dimmer knob. Users will typically use this at about 50-75%
however can depend on:
a. The distance from the subject to the backlight
b. The amount of light bleed on to the subject
c. The ability to shoot product onto pure white background
If required, users can raise the height backlight panel (suggested if working with a
turntable & acrylic riser) by placing a secure, flat base under the panel (ex. cinder
blocks).

7
© Iconasys 2013-2021
Light Positioning
The below is a general guideline for light positioning. We do suggest a minimum of
5” between the backlight panel and the product being shot. The front light position
depend on side of the product and can be used in multiple configurations for
achieving the best quality product images.
LumiPad 360 Lighting Orientations
Users will have full control over the lighting orientation to optimize product
image quality. Below are some common lighting orientations:

8
© Iconasys 2013-2021
Figure A. Even height panels (shooting with clear acrylic sheet)
Figure B. Left light straight on / Right light high & angled down

9
© Iconasys 2013-2021
Figure C. Shooting with 2 side wall panels
Figure D. Left panel low / Right Panel high & angled down

10
© Iconasys 2013-2021
36 x 36” White Panel Walls (see video)
Users can convert their LumiPad 360 Lighting Kit into an enclosed lighting studio. Each
package contains 3 - 36 x 36” White Panel Walls (foamcore material). Panels can connect to
each side and top wall using the included Velcro strips. When used, the Panel Walls help to
eliminate external light sources and help control reflections on highly reflective items.
Figure E. Enclosed lighting using included panels
Questions? Please reach out to our Technical Support Department
(Support contact options here)
Table of contents
Other Iconasys Lighting Equipment manuals
Popular Lighting Equipment manuals by other brands

Algam Lighting
Algam Lighting S-20 User manuals

AlienPro
AlienPro ALPHA-ILDA user manual

TouchTunes
TouchTunes Ovation II Installation notes

LightProcessor
LightProcessor DMuX Installation and operating manual

Berchtold
Berchtold CHROMOPHARE D 650plus Service manual

Conrad
Conrad 57 65 81 operating instructions