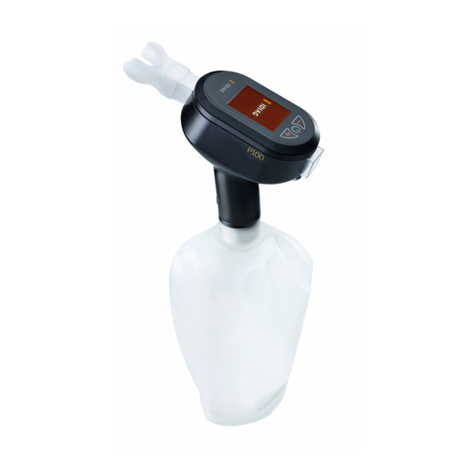
idiag P100 User manual

Guide to getting started
with Idiag P100 training

2
Background
At rest, a human being takes some 20,000 breaths a day. As the only vital skeletal muscle, the
respiratory muscles work day and night. During sporting or other generally strenuous activity,
however, these muscles can become fatigued and impair athletic performance and even quali-
ty of life. Various diseases may also increase this fatigue.
To train these muscles effectively, ordinary endurance training is not sufficient. The Idiag
P100 can be used to train the respiratory muscles in a targeted manner, thus improving athle-
tic performance and also reducing respiratory system complaints caused by disease.
As with any skeletal muscle, the respiratory muscles can be stimulated either through endur-
ance training or through strength training. Comprehensive training encompasses both com-
ponents, which is why we also recommend that healthy people perform both endurance and
strength training. Both modalities are possible with the Idiag P100.
A differentiation can be made between three different breathing movements: The abdominal
breathing movement, the thoracic breathing movement and the breathing movement in the
neck/throat/shoulder area.
The abdominal breathing movement is mainly performed by the diaphragm. The diaphragm is
considered the main inhalation muscle, which lowers itself in the abdominal cavity when it
contracts during inhalation. This causes the abdominal cavity to expand, thereby allowing a
large volume of air to be inhaled.
During inhalation, the diaphragm is supported by muscles which cause the rib cage to expand
by raising the ribs. This is known as the thoracic breathing movement.
The breathing movement in the neck/throat/shoulder area comes into play if the respiratory
muscles need to develop great strength, are overstrained or exhausted. The constant action
of the shoulder and neck muscles during endurance training can lead to overloading of the
neck area and to it suffering cramps as a result. In endurance training, this is therefore con-
sidered a compensatory mechanism and should consequently be prevented. Strength training,
on the other hand, requires action from the neck and shoulder areas in order to generate the
corresponding forces and pressures.
The optimal breathing technique consists of a combination of abdominal and chest breathing
movements. The optimal breath is initiated by the diaphragm and shortly thereafter the rib
cage begins to participate. This allows for maximum expansion and therefore ventilation of
the lungs. During endurance training with the Idiag P100 the breathing pattern is exactly the
same, whereby breathing is forced. The focus here is on the diaphragm, which is trained corre-
spondingly. The neck/throat/shoulder area remains loose and relaxed..
IDIAG
P100®
PERFORMANCE

3
If one wishes to develop maximum pressures, as is the case with strength training, it is pri-
marily the accessory respiratory muscles that are active. During inhalation, these are mainly
the outer intercostal muscles. The diaphragm cannot exert large forces. During exhalation it
is mainly the inner intercostal muscles and the large abdominal muscles that force air out of
the lungs.
Depending on the posture adopted, respiratory muscle training is either made more difficult
or easier. When sitting, breathing is made easier because body tension is reduced. By suppor-
ting the body on the elbows too, breathing can be made easier again.
When standing, breathing resistance increases because the upper body postural musculature
is tense. This resistance is reduced by leaning the shoulder girdle against a wall, thereby ma-
king breathing easier.
First steps with the Idiag P100
Before using the Idiag P100 for the first time, please read the Quick Reference Guide and visit
the instruction website at https://www.idiag.ch/en/idiag-p100-training/ for helpful informa-
tion in video form.
To harness the full potential of the Idiag P100, download
the Idiag P100sport smartphone app, register your device
and connect it to the app at least once. This activates
endurance and strength training on the device in addition
to free mode. You can run these additional modes either
with or without the app.
Starting respiratory muscle training
To start training with the Idiag P100 and get to know the device, we recommend that you
first train in „free mode“. In this mode, you can train without any specifications regarding bre-
athing frequency or breathing depth. Free mode is therefore perfectly suited to acquiring a
solid breathing technique and gaining a feeling for how the device works.
Start a training session (without the app) in free mode and place the mouthpiece into your
mouth. First, begin to breathe in and out through your mouth through the device in a relaxed
manner. After approx. 30 seconds, take the device out of your mouth and look at the display.
It shows your breathing frequency and depth over the last 3 breathing cycles. At rest, one
achieves about 15-20 breathing cycles per minute. Next, start breathing a little faster and
deeper than before, so that your breathing frequency reaches approx. 25. Each time, inhale
and exhale deeply enough to fill your lungs and then exhale completely again.

4
Now continuously increase the training duration over a period of 1-2 weeks, with the aim of
being able to train for approx. 10-15 minutes without a break.
Depending on your fitness level and individual progress, we recommend that you build up to
this level gradually in smaller steps.
Example:
5 x 3 minutes (with a break of approx. 30 seconds between intervals).
If this goes well, gradually build up your training until you can breathe for 10-15 minutes at a
time.
1. Goal To lay the foundation for solid respiratory muscle endurance
2. Goal To adopt a good breathing technique
Frequency 3-5 training sessions a week
Exercises for consolidating your breathing technique for free mode and endurance training
Conscious abdominal breathing
Brace your hands under your ribs on the sides of your flanks.
Inhale without the Idiag P100 so that your hands are pushed
outwards as far as possible (standing or sitting). Ensure that
your shoulders remain loose. You can simplify the exercise by
leaning your shoulder girdle against a wall. Now apply this
breathing technique using the Idiag P100.
Conscious chest breathing
Place an elastic band (e.g. Theraband) or even a cord around your chest and hold both ends
with one hand in the middle of your sternum. Hold the Idiag P100 in your other hand. Now try
to inhale such that your chest expands as much as possible in all directions and the elastic
band or cord tightens as much as possible. Ensure that your shoulders remain loose.
Combine these two breathing movements to create an optimal breathing technique. The opti-
mal inhalation breath is initiated by the diaphragm and shortly thereafter the rib cage begins
to participate.

5
Endurance training
The endurance mode corresponds to free mode in terms of training, but in endurance mode
you receive a target and feedback in terms of your desired breathing frequency and depth.
Endurance training can therefore be considered either as a form of follow-up training to free
mode or as an alternative to it.
Assessment and adjustment of the parameters
When you start a workout in endurance mode for the first time, you will be prompted to take
an assessment. Based on the result of this test, the breathing depth is determined for you to
continue training. If you know your approximate value from training in free mode, you can also
skip the test and then enter your breathing depth manually in the settings menu.
Breathing depth test:
You will be prompted to inhale fully once and then exhale through the device at maximum volume. Your ma-
ximum breathing depth is measured during exhalation. For endurance training, the device sets the breathing
depth to 60% of your maximum.
You will only be prompted to do the assessment during your first training session. If you
would like to repeat the test, you can select it from the settings menu.
The value for breathing depth that is set on the basis of the test, and also the breathing fre-
quency and the duration of training can be adjusted in the settings menu before the training
session. The pre-set breathing frequency is 25 breaths per minute and the pre-set duration
for an endurance training session is 15 minutes.
Controlling the intensity
The aim should be to train for 15-20 minutes per endurance training session.
Such a training session should always be intense and should fatigue you in order to set a trai-
ning stimulus. This is the only way to make progress.
We recommend to complete 3-5 training sessions per week.
We recommend increasing the intensity for more strenuous endurance training as follows:
1. Increase the training duration
2. Increase breathing frequency
3. Increase breathing depth
1. Goal To understand and implement feedback from the device.
2. Goal To continuously adjust the training parameters so that training always remains
intense.
Frequency 3-5 training sessions, each of 15-20 minutes, a week.

6
Tips on training
Always pay attention to breathing frequency first. As soon as you can maintain this at a good
level, focus on breathing depth.
If you want to change the breathing frequency during training, you can do so by pressing the
+ and - buttons on the device. Pressing the respective button once changes the frequency by
one breath per minute.
If the breathing depth feedback is always orange, try breathing deeper. If the colour still does
not change, you should reduce the breathing depth in the settings menu. If the breathing
depth feedback is always blue, increase the breathing depth in the settings menu (you are
breathing deeper than prescribed).
Training can be continued with both permanent orange and permanent blue feedback. The
evaluation after the training session will then show what you have achieved in reality.
The feedback from the device always refers to the measured values over the last 3 breathing
cycles. This means that adjustments in your breathing always appear on the device with some
delay.
Vary your posture during the training sessions. Prop yourself on your elbows, stand up, walk
around – this way you will directly feel the different stresses caused by the change in post-
ure.
Strength training
You can start strength training at the same time as endurance training. We recommend that
you perform strength training before endurance training if you want to do both types of trai-
ning during the same training session.
You do not need the breathing bag for strength training, because regulation of your breathing
air is not necessary in this mode. However, you can leave the bag attached to the device du-
ring strength training. This prevents moisture from dripping out of the air guide.
In strength mode you have the option of training inspiration, expiration or both. Initially, we
recommend that you train inspiration and expiration separately and always train both, i.e. in-
spiration and expiration consecutively, during one training session.
Assessment and adjustment of the parameters
Before the first strength training session, an assessment must be carried out to determine
your basic individual training settings.
During the assessment for inspiration and expiration strength training, the maximum pressu-
res you can achieve in the device by inhaling and exhaling are measured. The maximum pres-
sure that can be achieved by expiration is often higher than the pressure that can be achie-
ved by inspiration. This is also why two tests must be performed.

7
On the basis of these results, resistance thresholds are set for strength training, which you
must then overcome in order to successfully complete a repetition during strength training.
This threshold is set to a default value of 50% of the maximum pressure determined during
the assessment.
You will only be prompted to do the assessment during your first training session. If you
would like to repeat the test, you can select it from the settings menu.
Both the threshold values set on the basis of this test and the number of breaths for training
can be adjusted in the settings menu before commencing training. The pre-set number of bre-
aths is 10.
Controlling the intensity
Strength training should be intensive and should fatigue you. For this reason it is important
to set and continuously adjust the training parameters accordingly.
Initially, we recommend that you perform strength training with 10 breaths against the resis-
tance of 50% of the maximum pressure determined during the assessment.
You will probably find this rather easy and not very strenuous. So you can soon increase the
intensity.
We recommend increasing the intensity for more strenuous strength training as follows:
1. Increase the number of breaths up to approx. 30
2. Train 2 x daily
3. Increase the threshold
1. Goal To understand and implement feedback from the device.
2. Goal To continuously adjust the training parameters so that training always remains intense.
Frequency 3-5 training sessions a week
Tips on training
If you want to change the threshold value during training, you can do this by pressing the „+“ and „-“ but-
tons on the device. Pressing the respective button once changes the threshold value by 5%.

8
Intervall Training
High intensity interval training (HIIT) is a form of training where several short and intense
training sessions are performed right after each other, with short breaks in between the sin-
gle intervals. Example with running: 4 x 3 minutes of fast running with 1 minute and 30 se-
conds of walking or easy jogging in between.
With such a training, fatigue can be evoked very rapidly, thus setting a training stimulus.
Studies show that HIIT sets a similar training stimulus as long endurance sessions with the
big difference that HIIT takes much less time. Therefore, HIIT is not only effective but also
very efficient.
This theory is also applicable on the respiratory muscles and the training thereof.
The interval mode of the Idiag P100 offers the unique possibility to conduct HIIT. In this
mode the respiratory muscle endurance training is complemented with resistances (similar to
strength training), to ensure high intensity and faster fatigue of the respiratory muscles.
Assessments and adjustment of the parameters
The interval training requires the same assessments as the endurance and strength training
to individualize the training appropriately.
Therefore, the assessments of the maximum breathing depth, maximum expiratory strength
and maximum inspiratory strength need to be conducted. If those values already exist, the
assessments don’t need to be repeated.
In the settings in the app the individual parameters for the interval training can be set prior
to the training.
First, the procedure of the interval training is defined by choosing the duration of the inter-
vals, the duration of the pauses between the intervals and the number of intervals.
The intensity of the intervals is set via the breathing frequency, the resistance levels for in-
spiration and expiration and the desired breathing depth during the intervals.
The resistances can be set to low, middle, or high, whereas the resistances for inspiration and
expiration can be chosen differently.
Attention! The settings for the interval training can only be adjusted via the smartphone app but not on the
Idiag P100 itself.
The interval training can also be conducted without the app. In this case the parameters which were last set
via the app, or the default parameters are used.
Per default, four 4-minute intervals with 1-minute pauses at a frequency of 25 breaths per minute and a
breathing depth of 60% of the maximum at middle resistance levels are set.

9
In the pauses between the intervals, either one can continue breathing through the device
(without resistance and without any instructions on breathing frequency or breathing depth)
or the device can be taken out of the mouth.
Controlling the intensity
To achieve the best results, the interval training needs to be exhausting and therefore the
parameters require continuous adjustment according to the improved performance, so the
training remains strenuous.
In interval mode, the intensity can be adjusted in different ways:
1. Longer intervals / shorter pauses
2. Higher resistances
3. Higher breathing frequency
4. Bigger breathing depth
The standard recommendation for increasing the intensity is as follows:
1. Increase interval duration stepwise (until 4 x 4 minutes at low resistance is feasible)
Example:
8 x 1 min with 30 sec pauses in between
6 x 2 min, with 1 min pauses in between
5 x 3 min, with 1 min pauses in between
4 x 4 min, with 1 min pauses in between
2. If the desired interval duration is feasible, increase the resistances (low →middle →high)
3. Increase breathing frequency (stepwise until approx. 34)
4. Reduce the breathing frequency again and in turn increase breathing depth stepwise
(approx. +10%), then again increase breathing frequency
The interval mode allows for sport-specific training. In most cases the intensity is adjusted
with regards to the specific type of load or to a certain weakness, which differs from this
standard recommendation.
Recovery
Interval training stresses the respiratory muscles to a high extent. Therefore, the muscles re-
quire more recovery time after such trainings. Generally, we recommend the «standard» user
to not conduct intensive respiratory muscle interval trainings on consecutive days.
It is important to emphasize that the recovery process is very individual and dependent on general fitness
and performance levels and eventually each user must listen to the needs of their body.
In rare instances training using the Idiag P100 may cause dizziness, shortness of breath, headaches, nausea or vestibular disorders. If negative symptoms occur, training with the Idiag P100 must be
stopped immediately. The user assumes full responsibility for his training. Idiag accepts no liability whatsoever for any consequences arising from training using the Idiag P100.

SWITZERLAND
Idiag AG
Mülistrasse 18
CH-8320 Fehraltorf
P+41 44 908 58 58
idiag.ch
GERMANY
Idiag GmbH
Wotanstraße 109
DE-80639 Munich
P+49 89 2000 297 20
idiag.de
Other manuals for P100
3
Table of contents
Other idiag Fitness Equipment manuals
