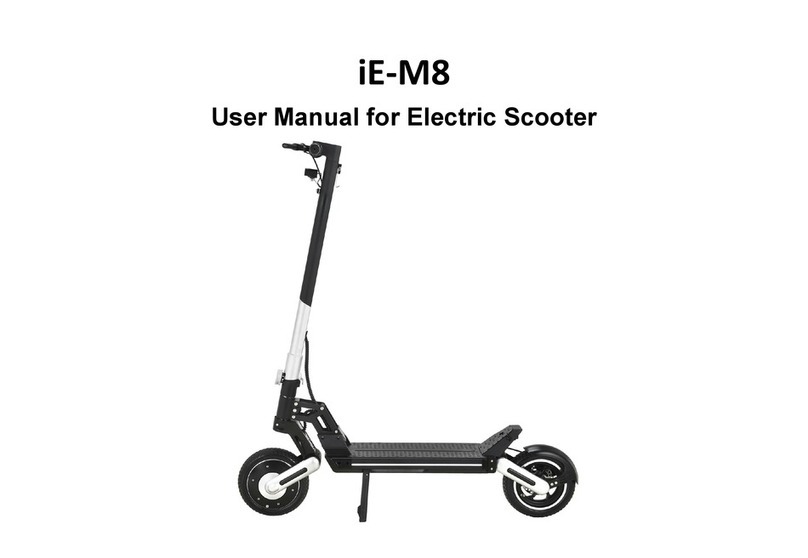
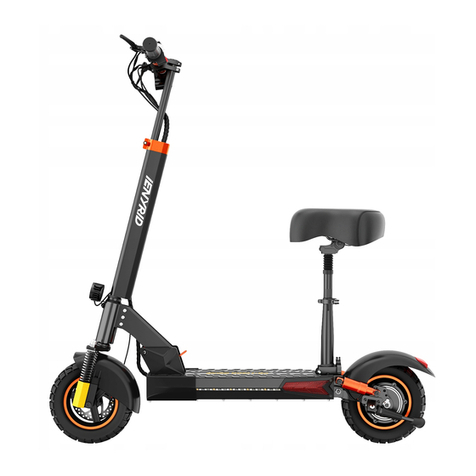
iENYRID ES30 User manual

Shenzhen Tianshengle Robot Co.,Ltd.
USER MANUAL
PLEASE READ T HE INS T RUCT ION S CAREFUL LY BEF O RE R IDING
DUAL MOTOR
TEMPERATURE CONTROL
DISC BRAKE SYSTEM
NFC

GENERAL INFORMATION
MUKUTA RANGE-CONTROL LAYOUT,FUNCTIONS AND SPECIFICATIONS
INTELLIGENT TEMPERATURE CONTROL MANAGEMENT SYSTEM
MUKUTA DISPLAY OPERATION AND PROGRAMMING
FOLDING HANDLE BARS
BATTERY AND CHARGING
PRE RIDE CHECKS
WARNING
LIMITED WARRANTY
ERROR CODES
INCLUDED IN THE BOX
AFTER-SALES SERVICE
1
2~3
4~5
6~15
16~17
18~19
20
21
22~23
24~25
26
27~28
· · · · · · · · · · · · · · · · · · · · · · · · · · · · · · · · · · · · · · · · · · · · · · · · · · · · · · · · ·
· · · · · · · · · · · · · ·
· · · · · · · · · · · · · · · · · ·
· · · · · · · · · · · · · · · · · · · · · · · · · · · · · · · · ·
· · · · · · · · · · · · · · · · · · · · · · · · · · · · · · · · · · · · · · · · · · · · · · · · · · · · · · · · · ·
· · · · · · · · · · · · · · · · · · · · · · · · · · · · · · · · · · · · · · · · · · · · · · · · · · · · · · · ·
· · · · · · · · · · · · · · · · · · · · · · · · · · · · · · · · · · · · · · · · · · · · · · · · · · · · · · · · · · · · · · ·
· · · · · · · · · · · · · · · · · · · · · · · · · · · · · · · · · · · · · · · · · · · · · · · · · · · · · · · · · · · · · · · · · · · · · · · ·
· · · · · · · · · · · · · · · · · · · · · · · · · · · · · · · · · · · · · · · · · · · · · · · · · · · · · · · · · · · · ·
· · · · · · · · · · · · · · · · · · · · · · · · · · · · · · · · · · · · · · · · · · · · · · · · · · · · · · · · · · · · · · · · · ·
· · · · · · · · · · · · · · · · · · · · · · · · · · · · · · · · · · · · · · · · · · · · · · · · · · · · · · · · · ·
· · · · · · · · · · · · · · · · · · · · · · · · · · · · · · · · · · · · · · · · · · · · · · · · · · · · · · · · · ·
CONTENT

IMPORTANT INFORMATION
WHY IS IT NECESSARY TO READ THIS MANUAL BEFORE OPERATING?
This manual was written to help you undertsand the proper use and maintenance of the iENYRID line of Electric Scooter.
It is important to understand the functions and features of the new iENYRID before operating it as it will allow you to enjoy the most of it from the
first and every ride.
It is also important for you to note that the first trial of the iENYRID should be in a remote area where obstacle are minimal to none.
The iENYRID unit will require some adjustments and break-in period for all moving parts to adjust themselves into the correct position.
BEFORE RIDING: Please ensure that the folding mechanism is firmly locked in place and that the safety lock is engaged.
DISCLAIMER & W
The product and its brand iENYRID is not liable for any accidental damages related to the usage of this product.
WARNING!
The responsibility for iENYRID maintenance is yours! Proper and frequent maintenance will reduce risks of injuries.
- ALWAYS WEAR A HELMET WHEN RIDING
- ALWAYS FOLLOW LOCAL LAWS AND REGULATIONS
- NEVER RIDE SCOOTER IN POOR VISIBILITY
- DO NOT DO STUNTS, WHEELIES or JUMPS IF YOU DO NOT HAVE THE PROPER SAFETY GEARS.
ARNING
READ THIS MANUAL BEFORE USING
1Warning & General

2
PNEUMATIC TYRE 10×3INCH
DISC BRAKE SYSTEM
1200W REAR MOTOR
REAR SUSPENSION
CONTROLLER: 52 V /25A*2
MAX RANGE: 50-70KM
BATTERY: 52V/20AH
MAX SPEED: 25-60KM/
ELECTRONIC BRAKE +
MECH DISC BRAKE SYSTEM
TURN SIGNAL
H
DISC BRAKE SYSTEM
FRONT SUSPENSION
FOLDING SWITCH
NFC KEY LOCK
ELECTRONIC HORN
4.5 INCH LARGE SCREEN LCD

Model
T
Battery
ire
Brakes
Max Range(Single Motor)
Max Speed
Weight
52V/20
Suspension
Motor Power
Controller
Max Load
iE-ES30
AH
10×3 inch
Electric Brake+Front and rear disc brake system
25-60KM/
50-70KM
H
Net weight: 30KG
FRONT-REAR SUSPENSION
52V 1200W×2 BRUSHLESS MOTORS
52V/25A*2
130KG
3TECHNICAL FEATURES iENYRID
Maximum load and speed may vary depending on the rider's weight, riding style and terrain.
Gross weight: 35.5KG
Packing Size 135*28*60cm

INTELLIGENT TEMPERATURE CONTROL MANAGEMENT SYSTEM
Intelligent overheat protection
4 Intelligent temperature control management system
Intelligent temperature control management system
The intelligent temperature control system will reduce the output current to protect the controller when it detects that the
temperature of the controller is too high. At this time, you should stop driving vigorously. If you continue to ride at high power
consumption, the intelligent temperature control system will cut off the power supply to the motor. Conditions that reduce current
and cut power to the motor will recover automatically after detecting the temperature drop.

5Intelligent temperature control management system
Intelligent temperature control management system
iENYRID series electric scooter intelligent temperature control system
Model
Temperature protection
(Current-limiting)
(According to the local topography±5℃)
Temperature protection
(Cut power to the motor)
(According to local climatic conditions±5s)
iENYRID ES30
90 ℃
110 ℃
Remove thermal protection 85 ℃
Remove thermal protection
(Motor recovery, limiting current until 85℃)105 ℃

Basic operation:
6iENYRID display operation and porgramming
1、
iENYRID display operation and porgramming
Function
1. Displayed content
Speedometer / Voltage leve Odometer / Trip meter / Battery level / Cruise-control active light / Gear ondocator / Fault warning light
2. All content on display(power on within 1 second)
NFC card area
Battery Indicator
Speed (KM/H)
Speed Level

7iENYRID display operation and porgramming
3.1 Speed display area
Unit:MPH/KMH
The speed signal is taken from the Hall signal inside the motor.Sent to controller by controller(Time of single Hall period,unit:1MS).The display
calculate the true speed based on wheel diameter and signal data calculate the true speed(The motor Holzer also needs to set the number of magnetic
steel)
3.2 Vehicle power gear adjustment,0-3 digital display;
3.3 vehicle status display area
Brake power off reminder
Constant speed cruise hint;
The headlight turns on the prompt;
Communication fault prompt;
iENYRID display operation and porgramming

8iENYRID display operation and porgramming
P01:Backlight brightness:The 1 level is the darkest,Level 3 brightest;Default: 3
P02:Mileage: unit,0:KM;1:MILE;Default: MILE
P03: Voltage level: 24V, 36V, 48V, 52V, 60V, 72V, Default:52V
P04: Dormancy time:0 means no dormancy;Other numbers are dormant time.The range is 1-60 minute.Default:5
P05: Reserve
P06: Wheel diameter: The unit is inch. The accuracy is 0.1; Default:10.0
P07: Speed measuring magnetic steel number.The range is 0-255. Default:28
P08: Rate-limiting: The range is 0-100km/h.Default: 100
P09: Zero start、no zero start setting;0 means zero start.1means no Zero start.Default: 0
P10:Reserve
P11: EABS switch choose.The range is 1-5.0 means closing.1 means weakest. 5 means strongest.
P12: Soft and hard start strength.The range is 1-5. The softest is 1.The hardest is 5.Default: 5
P13: Reserve
P14: Reserve
P15: Controller under-voltage
P16: ODO Zero setting: keep pressing “+” for 5 seconds,ODO will zero clearing.
P17: When it shows 0,it can not use cruise.When it shows 1,it can use cruise.Default:0
P18: Bind and unbind NFC CARDS.Long press "+" to build the binding, long press "-" to build the unbinding
P19: Reserve
P20: Communication protocol is defaults 4.It can not change.
To accsee this menu,long-press and .Use button to scroll through P-codes, a
iENYRID display operation and porgramming
nd to change parameterd
Display P-Codes(programming codes)

9iENYRID display operation and porgramming
2、Introduction of buttons and interfaces
1. When it is shutdown, long-press hold button continuously for 2s to turn on the power. When it is power on ,It can change interface
between the ODO、TRIP、VOL, by pressing for short time.
2. When it is power on, long-press hold button continuously for 2s to turn off,press to change gear.
3. Long-press and to enter P-code menu - refer to functions on page 8.
Enter the menu setting interface, press or to increase or decrease the value , after the modification is finished;Press to
switch to the next parameter and save the value of the previous parameter;After parameter modification, long press + again to
exit the setting interface, or wait for 8 seconds for automatic exit and save parameters.
iENYRID display operation and porgramming

10 iENYRID display operation and porgramming
3、Card binding instructions
1.The instrument is not bound to ID card:
2.How to bind ID card:
After starting up, the LCD displays the normal contents, At this time, the meter can directly enter the working state.
The diagram below:
CARDS are bound by factory default
Late setting: When using mobile phone or NFC functional card binding, refer to the following methods
Long press for 5 seconds to display B 0. At this time, the ID card is close to the card swiping area and B 1 is displayed, indicating that the
card is tied successfully.
Press for 5 seconds to display C 0. At this time, all ID CARDS have been unbound.
iENYRID display operation and porgramming

11iENYRID display operation and porgramming
Note:Due to the upgrade of the company's products, some of the displayed contents of the products you get may be different from the instruc-
tions, but it will not affect your normal use.
If the NFC cards are lost accidentally
3. The NFC display has been bound with NFC card: after starting up,the LCD screen is displayed as CARD. At this time, the motor does not
work.The diagram below:
, you can try to contact the local agents. (each E-Scooter is equipped with 3 keys).
iENYRID display operation and porgramming

12 iENYRID display operation and porgramming
1. Horn
2. NFC card area
3. Downshift button/Upshift button
4. Turn on the light
5. Power Switch
6. Handle Folding Mechanism
7. Brake
8. Turn signal
9. Throttle
10.Single motor dual motor switching
iENYRID display operation and porgramming
1
3
2
4
5
6
8
67
7
9
10

13iENYRID display operation and porgramming
While power is on, Long-press(press and hold for 2s) [4] button to turn on or off headlight.
Power On/Off
Speed Control
Headlight
Mileage & Other data
Long-press the power button [5] for 2 seconds to turn on/off the scooter,then use NFC card to active it.The scooter
turns off automatically if not used for 90 seconds
Press the [3] button to cycle through the three different speed levels 1 to 3.Use the throttle to control the speed within
each speed level.
While stationary, and with the power on, Long-press(press and hold for 2s) and release th [5] button to cycle through
the following data: ODO (lifetime mileage),TRIP mileage, VOLTAGE level, ERROR CODE.
iENYRID display operation and porgramming

14 iENYRID display operation and porgramming
TURNING IT ON
Press the for 3 seconds and wait to be prompted for the Token (Card).
Tap the Token (Card) to the IR reader NFC
PSETTING
Press and hold both and simultaneously for 3 seconds to access the P Setting interface.
CHANGING OF SPEED
Press the once to toggle between increasing between 1 to 3.
Function is to limit max limit, 3 being themax speed able to achieve.
iENYRID display operation and porgramming

15iENYRID display operation and porgramming
Press the
Press the
Downshift button/Upshift button
HORN
BUTTON FOR TURN
SIGNAL LIGHTS (BLINKERS)
Press the
DDM
Mode button to cycle through the three different speed
levels 1 to 3.
left turn button, and the left turn light will flash.When
you're done turning, press the button again to turn off
the light. Please do not press the two turn buttons at
the same time, otherwise the two turn signals will
flash at the same time.
horn button once to activate the horn. Button are able
to be holdon or to press once.
iENYRID display operation and porgramming
Press the Press the once to activate the Dual Drive Motor function.
Pressing it again will allow Single Drive Motor Function.

Loosen the folding buckle
Turn the handle screw anti - clockwise
to loose the mechanism
1
Simultaneously fold the handle bar down
34
Once loosen, pull the screw catch away
from each other
2
16 Folding handle bar
Folding handle bar

Take out the hook
5
Fold down the main pole
6
Snap the handlebar's safety hook into the rear shim
7
17Folding handle bar
Folding handle bar

BATTERY
- Do not operate the scooter while charging
- Do not store the scooter over a long period of time with an almost empty battery.
- From time to time, discharge the battery by riding. Have the battery recharge
again and make sure to not leave battery fully empty
DO NOT DO ANY CHARGING IF THE BOARD:
.
- is broken
- emits an usual odour or colorless liquid.
- the bottom of the deck or it as a whole gets into excessive heating
- leakage is present.
Avoid contacting with substance or medling with a bloated battery. Keep the battery away
from children, pets or direct heat.Exposure to the battery voltage may cause death or serious
injury.
The use, storage or charging of the iENYRID battery outside specified limits may result in
the annulment of the warranty, battery damage and an effective battery charging,
18 Battery and charging
Battery and charging
Table of contents
Other iENYRID Scooter manuals

