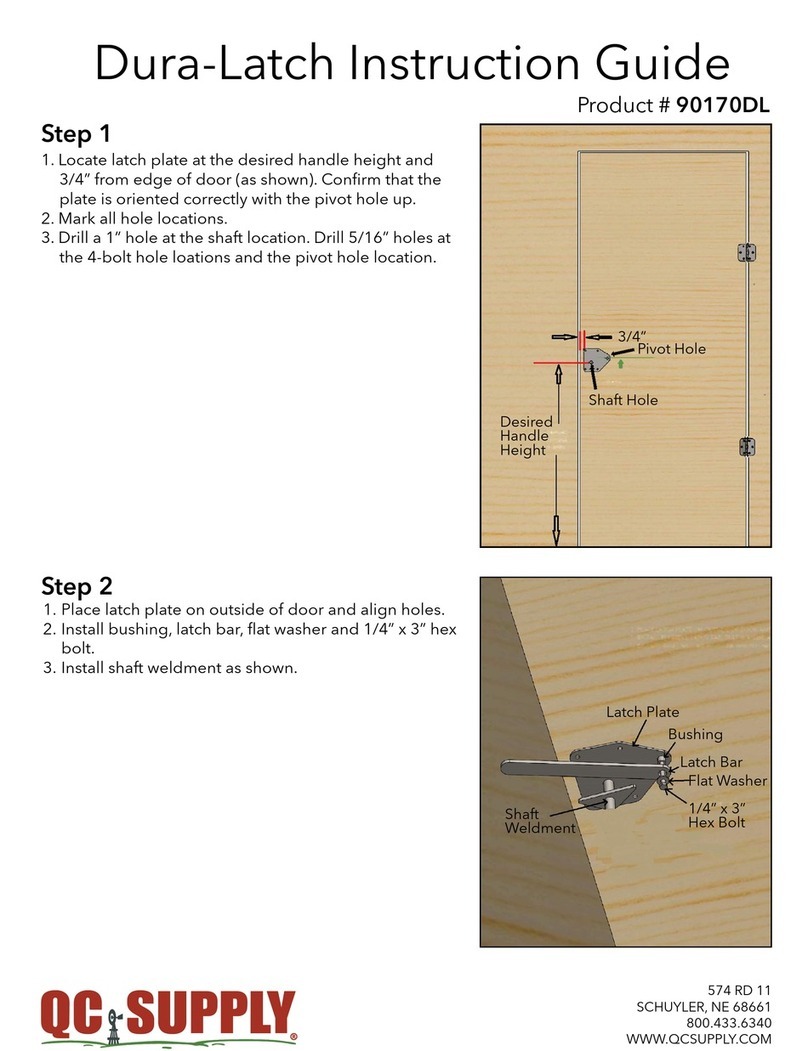
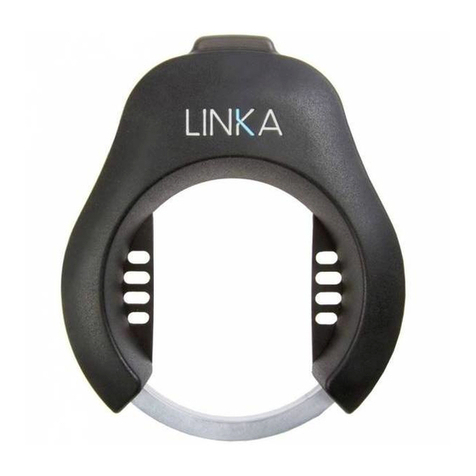
iglooworks Padlock 2E User manual

1
Version 0.1 01/23
User guide
Padlock 2E.

Tip: As we continuously improve our products and services, the latest version of this user
guide can be found in the support & help portal!
Hi there!
Hi there!
We’re so glad you’ve decided to join us on this journey to create a world
without keys. In this guide, you’ll find everything you need to get started with
your lock.
If you do not find what you’re looking for, reach out to us at
support@iglooworks.co. We’re here to help.
Let’s stay connected:
support@iglooworks.co
Singapore: +65 3129 2464
USA: +1 929 224 0688
Support & Help Portal:
go.iglooworks.co/support

Table of Contents
What’s Included 4
Specifications 5
Lock Anatomy 6
Lock Features 7
Managing Batteries 9
Charging the Batteries 13
Getting Started 14
Pairing the Lock 15
Mode of Access 16
Manage Lock Features 17
Manage Lock Settings 19
Audio and LED Indications 20
Hard Reset 21
Admin Features 22
igloodeveloper 23
Troubleshoot 24

4
What’s Included
Padlock 2E USBC-USBC CableTorx Screwdriver
Lithium Rechargeable Battery QR Code Stickers x3

5
Specifications
SKU SP2E
Body Zinc Alloy, Stainless Steel, Rubber
Shackle Boron Steel
Gross (with packaging) 0.5kg / 1.1 lbs
Net 0.5kg / 1.1 lbs
Modes of access (Entry) Pin Code, Bluetooth
Power type Rechargeable Lithium battery
Battery life Up to 12 months*
Emergency power type USB-C jumpstart
Battery operating temperature -20 to 50°C / -4°F to 122°F
Operating temperature -30°C to 55°C / -22°F to 131°F
Certifications IPX8, CE, RoHs2, FCC, CEN-3, IK-09, ISED, GITEKI, UKCA
Protocols Bluetooth 5.0, algoPIN™ technology
Usage Suitable for both indoor and outdoor usage
Front Side
For damage resulting from incorrect use of lock, use of lock in potentially explosive
environments, or use of lock outside of stipulated specifications, the customer bears
sole responsibility. igloohome accepts no liability whatsoever.
* Battery life may vary at extreme temperatures.
38mm55mm
82mm
24.3mm
33.7mm
8.7mm

6
Lock Anatomy
Boron Steel
Shackle
Clear Unlock
RubberBumper
Battery
Cover
Rubber Cover
USB-C Port

7
Lock Features
Master Bluetooth Key
The Padlock 2E unlocks with Bluetooth
via the app.
Master PIN Code
The Padlock 2E unlocks with a
permanent Master PIN Code.
User PIN Code
The Padlock 2E supports multiple
types of User PIN codes, e.g. One-
Time, Permanent, Recurring &
Duration which can be generated
and shared via the app.
PIN Code/Bluetooth Key
Low Battery Alert
Intuitive audio and visual alerts will
prompt you to change the batteries
when it runs low.
Battery
Emergency Jumpstart
Easily jumpstart the lock with a
USB-C cable connected to a power
bank if batteries are drained.
User Bluetooth Key
The Padlock 2E supports User
Bluetooth keys which can be
generated and shared via the app.

8
Lock Features
Manual Relock
Volume Control
Keypad LED Toggle
Manually lock the device by holding
the ‘Unlock’ icon if Auto Lock does
not work.
Adjust the volume according to
your preference. Select from levels
0 (mute) to 5 (loudest).
Turn the backlight from the keypad
buttons on or o.
Security Lockout
Keypad is disabled after several
incorrect access attempts.
Others
Decoy PIN Code
Heighten security and throw o
onlookers by entering random digits
before your actual PIN code.
Auto Lock
Automatically locks once the
padlock is shut to give you greater
peace of mind.
Learn how to access, activate, and deactivate these features from pages 17 - 18.
Relock Reminder Alert
Obstruction Alarm
Encryption
Lock will sound an alert to remind
users to fasten the shackle.
The lock will sound an alarm if the
shackle cannot lock or unlock to
alert the user of any obstructions.
AES 128-bit

9
Managing the Battery
Changing the battery
a
2. Pull the rubber cover from the
bottom of the Padlock out, and
release the Torx screw.
1. Padlock must be unlocked. Pull the
shackle to ‘open’ position.
*NOTE: Batteries sold separately. If you just want to charge the lock, see section on page 13.

10
4. Release the 3 screws that secures
the battery cover and pull the tab to
remove the battery.
3. Release the Torx screw located
below the shackle on the inside of the
Padlock and remove the back cover.
Turn the screw anticlockwise
5 times till it pops up. The screw
will be retained in the lock.
Turn the screws anticlockwise 5
times till it pops up. The screw will
be retained in the battery cover.
Battery Cover
Pull
Tab

11
Note: Extra batteries are sold separately.
6. Insert the back cover and tighten
the Torx screw located below the
shackle on the inside of the Padlock.
5. Replace the Rechargeable Lithium
Battery, close the battery cover and
secure it with the 3 screws.
Rechargeable Lithium
Battery

12
8. Push the shackle to ‘close’ position
for the Padlock to automatically lock.
7. Tighten the Torx screw at the
bottom of the Padlock and plug the
rubber cover into place.

13
It is recommended that you fully charge the Padlock 2E before usage.
Charging requirements: Prescribed charger is 5V 1A (5W). Charging time to
50% and 100% is 30 minutes and 1 hour respectively.
Charging the battery
b
2
Charging via the USB-C port
on the Padlock 2E
1. Connect the USB cable into the USB-C
port on the Padlock 2E
2. Insert the other end of the cable into a
USB-C Power Adapter (not provided)
and plug it into a power outlet.
LED indications for charging status
1. Fully charged - Breathing green LED
2. Charging - Breathing red LED

14
Getting Started
All access begins with the Dashboard. Speak with your owner or admin to get your
accounts set up before you proceed.
Once you receive an invite, you can register for an iglooworks account to start
operating the lock on the ground.
The iglooworks mobile app allows for on-the-ground management of your locks.
Authorized members can perform operational tasks without fuss.
Getting your iglooworks app account
Your app account is tied to your Dashboard account. If you’re an existing member,
you can access the iglooworks app with the same credentials. Otherwise, speak to
your account owner to invite you as a member.
1. Download the iglooworks app on your smartphone via the App Store or
Google Play Store.
2. Log in with your iglooworks account and organization ID.
3. Tap [Enter].

15
Pairing the Lock
To wake the lock up, you can either
1. Press the Lock button for 5 seconds
2. Plug in the USB C cable
The lock will go back to sleep in 1 minute in the unpaired state.
Note:
Ensure that the lock is fully charged before using it. If the battery is completely flat, you may need
to plug in the USB C cable and charge it.
Test the lock with the Factory PIN code before you begin the pairing process.
1. Wake the lock by pressing any button on the front body.
2. Tap , then enter 1234567890, followed by .
3. The LED indicator on the lock will flash green when it is successfully unlocked. You will
also hear four ascending tones.
Once you have tested it, you can now begin to pair the lock to your iglooworks account.
1. Select [Locks] from the menu.
2. Tap [Pair New Lock].
3. Select the property.
4. Tap [Next].
5. Select the lock model and follow the steps shown on the screen.
Note:
Ensure your Bluetooth and Location services are turned on. You may have to perform a
Bluetooth sync after successfully pairing the lock to obtain the initial battery status of the device.

16
Modes of Access
To unlock via PIN code:
1. Wake the lock by pressing any button on the front body.
2. Enter a valid PIN code, with or without decoy digits, followed by .
3. The LED indicator on the lock will flash green when it is successfully unlocked.
You will also hear four ascending tones.
To unlock via Bluetooth:
If you are an owner or admin, you will be able unlock the lock via Bluetooth. This is also possible
for an authorized manager or lock users once permissions are granted via the Dashboard.
1. Select the lock you want to unlock.
2. Tap [Sync & Unlock].
Note: Ensure your Bluetooth service is turned on and that you are within range of the lock.
a
b

17
Manage Lock Features
Auto Lock
You can configure the duration before Auto Lock is triggered:
*Please ensure you are within Bluetooth range of the lock and your Bluetooth
function is turned on.
1. On your app, tap [Lock Settings].
2.Select [Auto Lock Timer]
3. Select from the list of preset durations or choose to never automatically lock.
4.Tap [Apply Changes].
If you choose to never automatically lock, you may wish to perform a manual relock:
Hold the on the keypad for 2 seconds. The LED indicator will flash green and you’ll
hear a long beep for successful relocking.
Security Lockout
You can configure the number of attempts before the Security Lockout mode is
enabled:
*Please ensure you are within Bluetooth range of the lock and your Bluetooth
function is turned on.
1. On your app, tap [Lock Settings].
2. Select [Security Lockout].
3. Select the number of attempts from 1 to 10, or choose to deactivate this
function completely.
4. Tap [Apply Changes].
Once this is set, the lockout will be triggered after you exceed the number of
attempts set.
Your lock will reject any further unlocking attempts via the same mode you used. You
can disable it by trying another valid access mode.
Triggered Security Alarm Security Lockout
1st Time 30 Sec 1 Min
2nd Time 60 Sec 5 Min
3rd and
Consecutive Time 90 Sec 10 Min
Relock Reminder
Alert
You can enable, disable and configure the duration before the alert sounds o:
*Please ensure you are within Bluetooth range of the lock and your Bluetooth
function is turned on.
1. On your app, tap [Lock Settings].
2. Select [Relock Reminder Alert].
3. Configure the duration between 5 seconds to 10 minutes, or disable the alert.
4. Tap [Apply Changes].

18
Emergency
Jumpstart
1. Connect the USB-A to USB-C cable to a power bank.
2. Plug the USB-C port into the jumpstart port on the lock.
3. Once the lock powers up, enter a valid PIN code within 20 seconds,
followed by to unlock.
Decoy PIN Code 1. Key in up to 8 random digits before your actual PIN code, followed by
to unlock.
Volume Control
To configure the volume of your lock:
*Please ensure you are within Bluetooth range of the lock and your Bluetooth func-
tion is turned on.
1. On your app, tap [Lock Settings].
2. Select [Volume].
3. Select the volume level from 0 to 5 (softest to loudest).
4. Tap [Apply Changes].
Keypad LED
Toggle
To configure the LED settings:
*Please ensure you are within Bluetooth range of the lock and your Bluetooth
function is turned on.
1. On your app, tap [Lock Settings].
2. Select [Keypad LED Toggle].
3. Turn it on or o.
4. Tap [Apply Changes].
This feature is switched on by default.

19
Manage Lock Settings
Lock Information
(View only)
You can view the lock information of the lock by:
1. Select the lock.
2. Tap [Lock Information].
Firmware
Version
(View only)
You have to be entitled to have the DFU rights in order to see this option:
1. Select the lock.
2. Tap [Firmware Version].
Delete Lock
You have to be an owner to delete a lock.
1. Select the lock.
2. Tap [Delete Lock].
3. Tap [Confirm].
Replicating
a lock
You have to be an owner to replicate a lock.
1. Select the lock.
2. Tap [Replicate Lock].
3. Tap [Select New Lock].
4. Choose the new lock model from the list.
5. Place palm over new lock keypad to activate device and tap [Next].
6. Select the new lock product ID.
7. Tap [Continue] to start the replicating process.
8. Tap either of the options to continue:
- Delete Previous Lock (Start the unpairing process for previous lock)
- Proceed to Lock (Proceed to new lock screen)

20
Audio and LED Indications
Bluetooth
Connection
Successfully
Unlocked
Successfully
Locked
Incorrect
PIN Code
Deleted PIN Code
Obstruction Alarm
Security Lockout
Alarm
Security Lockout
Deactivated
Charging in
Progress
Charging Completed
LED Indicator flashes Blue
Ascending 4 fast tones after unlocked and flash
Green LED 2 times
1 long beep after Padlock is locked
and Green LED for 2 seconds
4 short beeps and flash Red 2 times
3 sets of 4 short beeps and flash Red 2 times
6 sets of 4 short beeps and flash Red 2 times
Low - High siren for 30 / 60 / 90 seconds
and flash Red 2 times
2 long beeps
Breathing red LED flash when
USB-C is connected
Actions Indications
Low Battery
Alert
Hard Reset /
Unpair
Power Start Up
Descending 3 fast tones when keypad is
woken up and breathing Red LED
Descending 4 slow tones
1 long beep then 2 quick beeps
Breathing green LED flash when
USB-C is connected
Table of contents
Other iglooworks Lock manuals