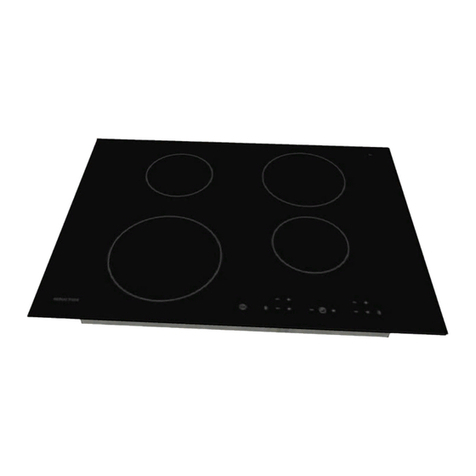
IKEA TREVLIG User manual


TREVLIG
SMAKLIG
3
476 mm
553 mm
4 mm
50 mm
590 mm
510 mm
1x
1x
NYTTIG
2x
ENGLISH
12
Environmental concerns
WARNING! Ensure that the appliance
is switched o and disconnected from
the power supply before performing any
maintenance operation; never use steam
cleaning equipment - risk of electric shock.
Do not use abrasive or corrosive
products, chlorine-based cleaners or pan
scourers.
DISPOSAL OF PACKAGING MATERIALS
The packaging material is 100% recyclable and is marked with
the recycle symbol
with the wiring rules and the appliance must
be earthed in conformity with national electrical
safety standards.
Do not use extension leads, multiple sockets
or adapters. The electrical components must not
be accessible to the user after installation. Do not
use the appliance when you are wet or barefoot.
Do not operate this appliance if it has a damaged
power cable or plug, if it is not working properly,
or if it has been damaged or dropped.
If the supply cord is damaged, it must
be replaced with an identical one by the
manufacturer, its service agent or similarly
qualified persons in order to avoid a hazard -
risk of electric shock.
WARNING: Do not locate multiple portable
socket-outlets or portable power supplies at the
rear of the appliance.
CLEANING AND MAINTENANCE
WARNING: Ensure that the appliance is
switched off and disconnected from the power
supply before performing any maintenance
operation; never use steam cleaning equipment -
risk of electric shock.
Do not use abrasive or harsh cleaners such
as window sprays, scouring cleansers, flammable
fluids, cleaning waxes, concentrated detergents,
bleaches or cleansers containing petroleum
products on plastic parts, interior and door liners
or gaskets. Do not use paper towels, scouring
pads, or other harsh cleaning tools.
DISPOSAL OF PACKAGING MATERIALS
The packaging material is 100% recyclable and is marked with the
recycle symbol . The various parts of the packaging must therefore
be disposed of responsibly and in full compliance with local authority
regulations governing waste disposal.
DISPOSAL OF HOUSEHOLD APPLIANCES
This appliance is manufactured with recyclable or reusable materials.
Dispose of it in accordance with local waste disposal regulations.
For further information on the treatment, recovery and recycling
of household electrical appliances, contact your local authority, the
collection service for household waste or the store where you purchased
the appliance. This appliance is marked in compliance with European
Directive 2012/19/EU, Waste Electrical and Electronic Equipment (WEEE).
By ensuring this product is disposed of correctly, you will help prevent
negative consequences for the environment and human health. The
symbol on the product or on the accompanying documentation
indicates that it should not be treated as domestic waste but must be
taken to an appropriate collection centre for the recycling of electrical
and electronic equipment.
ENERGY SAVING TIPS
To guarantee adequate ventilation follow installation instructions.
Insufficient ventilation at the back of the product increases energy
consumption and decreases cooling efficiency.
Frequent door opening might cause an increase in Energy consumption.
The internal temperature of the appliance and the Energy Consumption
may be affected also by the ambient temperature, as well as location of
the appliance. Temperature setting should take into consideration these
factors. Reduce door opening to minimum.
When thawing frozen food, place it in the refrigerator. The low
temperature of the frozen products cools the food in the refrigerator.
Allow warm food and drinks to cool down before placing in the
appliance.
Positioning of the shelves in the refrigerator has no impact on the
efficient usage of energy. Food should be placed on the shelves in such
way to ensure proper air circulation (food should not touch each other
and distance between food and rear wall should be kept).
You can increase storage capacity of frozen food by removing baskets
and, if present, Stop Frost shelf.
Do not worry about noises coming from the compressor which are
normal operation noises.
. The various parts of the packaging must
therefore be disposed of responsibility and in full compliance
with local authority regulations governing waste disposal.
DISPOSAL OF HOUSEHOLD APPLIANCES
This appliance is manufactured with recyclable or reusable
materials. Dispose of it in accordance with local waste disposal
regulations. For further information on the treatment, recovery
and recycling of household electrical appliances, contact your
local authority, the collection service for household waste or
the store where you purchased the appliance. This appliance
is marked in compliance with European Directive 2012/19/EU,
Waste Electrical and Electronic Equipment (WEEE). By ensuring
this product is disposed of correctly, you will help prevent
negative consequences for the environment and human health.
The symbol on the product or on the accompanying
documentation indicates that it should not be treated as
domestic waste but must be taken to an appropriate collection
center for the recycling of electrical and electronic equipment.
ENERGY SAVING TIPSs
Make the most of your hot plate’s residual heat by switching it
o a few minutes before you nish cooking.
The base of your pot or pan should cover the hot plate
completely; a container that is smaller than the hot plate will
cause energy to be wasted.
Cover your pots and pans with tight-tting lids while cooking
and use as little water as possible. Cooking with the lid o will
greatly increase energy consumption.
Use only at-bottomed pots and pans.
DECLARATION OF CONFORMITY
This appliance meets the Eco Design requirements of European
Regulations n. 66/2014 in conformity to the European standard
EN 60350-2.
n
Electrical connection
Electrical connection must be made before connecting the
appliance to the electricity supply.
Installation must be carried out by qualied personnel who
know the current safety and installation regulations. Specically,
installation must be carried out in compliance with the
regulations of the local electricity supply company.
Make sure the voltage specied on the data plate located on the
bottom of the appliance is the same as that of the home.
Regulations require that the appliance be earthed: use
conductors (including the earth conductor) of the appropriate
size only. Power cord is approved accoding to Standard IEC/EN
60335-2-6.
Manufacturer
Ikea of Sweden AB - SE - 343 81 Älmhult, Sweden
SERVICE
PLER8
00
220-240 V ~ 50-60 Hz
7,2 kW
HB I84F
1806
F101090
HB I84F
869991010900
901806030988
I.C.SN
802080988
769991010902
The technical information are situated in the rating plate on the
bottom side of the appliance.
230V 2L 2N ~
IE
T
L1
N+T N+T
N+T
L3
220-240V 3 ~
BE
230V 2L 2N ~
IE
T
L1
N+T
N+T
N+T
L3
220-240V 3 ~
BE
230V 2L 2N ~
IE
T
L1
N+T N+T
N+T
L3
220-240V 3 ~
BE
230V 2L 2N ~
IE
T
L1
N+T N+T
N+T
L3
220-240V 3 ~
BE
L1 = R : black
L2 = S : brown
N = N : blue
N = T : blue (grey)
= E : yellow / green
L1 = R : black
L2 = S : brown
N = N : blue
N = T : blue (grey)
= E : yellow / green
L1 = R : black
L1 = S : brown
N = N : blue
N = T : blue (grey)
= E : yellow / green
L1 = R : black
L2 = S : brown
N = N : blue
N = T : blue (grey)
= E : yellow / green
1x
TREVLIG
SMAKLIG
F0E7
°C
MANUAL
www.ikea.com
TREVLIG
SMAKLIG
TREVLIG

3
476 mm
553 mm
4 mm
50 mm
590 mm
510 mm
1x
1x
NYTTIG
2x
0
0
TREVLIG
SMAKLIG
MANUAL
www.ikea.com
3
476 mm
553 mm
4 mm
50 mm
590 mm
510 mm
1x
1x
NYTTIG
2x
°C
MANUAL
www.ikea.com
TREVLIG
SMAKLIG
Min. 100 mm
Max 145 mm
Min. 150 mm
Max 210 mm
Min. 120 mm
Max 180 mm
Min. 120 mm
Max 340x200 mm
1x
x
Min 150
Max 210
Min 120
Max 200
Min 200
Max 375
Min 100
Max 150
0
0
TREVLIG
SMAKLIG
MANUAL
www.ikea.com
Min 120
Max 180
Min 120
Max 180
°C
MANUAL
www.ikea.com
TREVLIG
SMAKLIG
TREVLIG

6
1Cooking level selected
2
3Cooking power control
4Booster
5
6Timer control
7Cooking time indicator
8OK/Key lock button
9Pause
10 Zone active Led
11 Timer Led
12 Timer symbol
Control panel
AControl panel
BCooking zones: 1, 2, 3, 4
Product description
Pot incorrectly positioned or missing
This symbol appears if the pot is not suitable for induction
cooking, is not positioned correctly or is not of an appropriate
size for the cooking zone selected. If no pot is detected within 30
HResidual heat
If the display shows “H“, the cooking zone is still hot. When the
B
A
3
4
2
1
Functions
CONTROL PANEL LOCK
To lock the settings and prevent it being switched on
accidentally, press and hold the OK/Key lock button for 3
seconds. A beep and a warning light above the symbol indicate
that this function has been activated. The control panel is
button. To unlock the
controls, repeat the activation procedure.
TIMER
There is one timer witch controls each cooking zones button.
To activate the timer:
Select the cooking zone, press the “+“ or “-“ button to set the
desired time. An indicator light will be activated in line with the
. Once the set time has elapsed, a beep will
The time can be changed at any point, and several timers can be
activated simultaneously.
and the relative cooking time selected is displayed on the
central display.
To deactivate the timer:
Press the “+“ and “-“ buttons together until the timer is
deactivated.
Timer not available with autofunctions.
TIMER INDICATOR
The LED of “timer active indicator” indicates that the timer has
been set for the cooking zone.
ENGLISH
2 4 5 7 8 12 1131
0
0
0
0
0
0
0
0
6 9
0
0
0
0
10
0
0
0
0
0
0
0
0
0
0
0
0
To download the full version visit www.ikea.com

7
1Ausgewählte Garstufe
2Kochzone abschalten
3Garleistungsregelung
4Booster-Funktion
5Ein/Aus
6Timer-Einstellung
7Timer-Anzeige
8Taste OK/Tastensperre
9Pause
10 LED aktive Kochzone
11 Timer-LED
12 Timersymbol
Bedienfeld
ABedienfeld
BKochzonen: 1, 2, 3, 4
Produktbeschreibung
Falsches Kochgeschirr oder kein Kochgeschirr
Dieses Symbol erscheint, wenn das Topfgeschirr nicht für
Induktionsherde geeignet ist, wenn es nicht richtig aufgestellt
ist oder wenn es nicht die richtige Größe hat. Wird innerhalb von
30 Sekunden nach Auswahl kein Topf erkannt, so schaltet sich
die Kochzone wieder aus.
HRestwärme
Wird auf dem Display H angezeigt, so ist die Kochzone noch
heiß. Erst nach Abkühlen der Kochzone erlischt die Anzeige.
Funktionen
SPERRE DES BEDIENFELDS
Zum Sperren der Einstellungen, und um ein versehentliches
Einschalten zu vermeiden, drücken und halten Sie die Taste
OK/Tastensperre 3 Sekunden lang gedrückt. Ein Piepton und
ein Warnlicht über dem Symbol zeigen an, dass diese Funktion
eingeschaltet wurde. Das Bedienfeld ist mit Ausnahme
der Ein-/Abschaltfunktion gesperrt. Zum Ausschalten
der Bedienfeldsperre wiederholen Sie die beschriebene
Vorgehensweise.
TIMER
Ein Timer ist verfügbar, der über die Tasten der einzelnen
Kochzonen eingestellt wird.
Einschalten des Timers:
Wählen Sie die Kochzone aus, drücken Sie die Taste „+“ oder „-“,
um die gewünschte Zeit einzustellen. Ein Anzeigelicht erscheint
neben dem speziellen Symbol . Nach Ablauf der eingestellten
Zeit ertönt ein Piepton und die Kochzone schaltet automatisch
ab.
Die Zeit kann jederzeit geändert werden und es können
mehrere Timer gleichzeitig aktiviert werden.
Bei aktiviertem Timer blinkt die „Anzeige Kochfeldauswahl“ und
die jeweils eingestellte Kochzeit erscheint auf dem mittleren
Display.
Timer deaktivieren:
Drücken Sie die Tasten „+“ und „-“ zusammen, bis der Timer
deaktiviert ist.
Der Timer ist nicht mit den Automatikfunktionen verfügbar.
TIMERANZEIGE
Die LED „Anzeige Timer aktiviert“ zeigt an, dass der Timer für die
Kochzone eingestellt wurde.
Um die Vollversion herunterzuladen, besuchen Sie www.ikea.com
DEUTSCH
B
A
3
4
2
1
2 4 5 7 8 12 1131
0
0
0
0
0
0
0
0
6 9
0
0
0
0
10
0
0
0
0
0
0
0
0
0
0
0
0

8
1Niveau de cuisson choisie
2Arrêt zone de cuisson
3Réglage de la puissance de cuisson
4Surpuissance (Booster)
5Marche/Arrêt
6Commande minuterie
7Indicateur de temps de cuisson
8Touche OK/ Key Lock (Blocage touches)
9Pause
10 Led Zone active
11 Led minuterie
12 Symbole minuterie
Panneau de commande
APanneau de commande
BFoyers : 1, 2, 3, 4
Description de produit
Casserole mal positionnée ou absente
Ce symbole apparaît si la casserole n’est pas adaptée à la
cuisson par induction, n’est pas positionnée correctement ou
n’est pas de la taille appropriée pour le foyer sélectionné. Si
table de cuisson s’éteint.
HChaleur résiduelle
Si la lettre H est visible sur l’écran, la zone est encore chaude.
Functions
BLOCAGE CLAVIER
Pour verrouiller les réglages et empêcher que la table de
cuisson ne soit allumée accidentellement, appuyer et maintenir
le bouton OK/verrouillage pendant 3 secondes. un bip et un
voyant au-dessus du symbole indiquent que la fonction est
activée. Le panneau de commande est verrouillé, à l’exception
. Pour déverrouiller les commandes, répétez
ces opérations.
MINUTERIE
Il existe une minuterie qui commande chaque bouton de zone
de cuisson.
Pour activer la minuterie:
Sélectionnez la zone de cuisson, appuyez sur le bouton «
+ » ou « - » pour régler le temps souhaité. Un témoin sera
activé face au symbole . Lorsque la durée déterminée est
écoulée, un signal sonore retentit et la zone de cuisson s’éteint
automatiquement.
Le temps peut être changé à tout moment, et plusieurs
minuteries peuvent être activées simultanément.
Si la minuterie est activée, le témoin «Indicateur de sélection de
zone» clignote et le temps de cuisson correspondant sélectionné
Pour désactiver le minuteur :
Appuyez sur les boutons « + » et « - » ensemble jusqu’à ce que
minuteur soit désactivé.
La minuterie n’est pas disponible avec des fonctions
automatiques.
INDICATEUR DE MINUTERIE
Le voyant « indicateur de minuterie active » indique que la
minuterie a été réglée pour la zone de cuisson.
Pour télécharger la version complète, visitez www.ikea.com
FRANÇAIS
B
A
3
4
2
1
2 4 5 7 8 12 1131
0
0
0
0
0
0
0
0
6 9
0
0
0
0
10
0
0
0
0
0
0
0
0
0
0
0
0

9
1Geselecteerd bereidingsniveau
2Kookzone uit
3Kookvermogensregeling
4Booster
5Aan/Uit
6Bediening kookwekker
7Indicatie bereidingsduur
8OK/vergrendeltoets
9Pauze
10 Ledlampje zone actief
11 Ledlampje kookwekker
12 Symbool kookwekker
Bedieningspaneel
ABedieningspaneel
BKookzones: 1, 2, 3, 4
Productbeschrijving
De pan is verkeerd geplaatst of er is geen pan
Dit symbool verschijnt als de pan niet geschikt is voor een
inductiekookplaat, als hij niet correct is geplaatst of geen
geschikte afmetingen heeft voor de geselecteerde kookzone.
geregistreerd, dan wordt de kookzone uitgeschakeld.
HRestwarmte
Als ‘H’ wordt weergegeven op het display is de kookzone nog
heet. Wanneer de kookzone afkoelt, gaat het display uit.
Functies
TOETSENBLOKKERING
Om de instellingen te vergrendelen en te voorkomen dat de
kookplaat onbedoeld wordt ingeschakeld, druk 3 seconden
op de toets OK/toetsenblokkering. Een geluidssignaal en
een waarschuwingslampje boven het symbool geven aan
dat de functie is ingeschakeld. Het bedieningspaneel is
vergrendeld, met uitzondering van de toets Aan/Uit . Om de
blokkering van de bedieningen te deactiveren, herhaalt u de
activeringsprocedure.
KOOKWEKKER
Er is één kookwekker die alle kookzones regelt.
De wekker inschakelen:
Selecteer de kookzone, druk op de toets “+” of “-” om de
gewenste tijd in te stellen. Er wordt een indicatielampje
ingeschakeld naast het bijbehorende symbool . Wanneer
de ingestelde tijd is verstreken, klinkt er een geluidssignaal en
wordt de kookzone automatisch uitgeschakeld.
De tijd kan op elk willekeurig ogenblik gewijzigd worden, en
verschillende kookwekkers kunnen gelijktijdig ingeschakeld
worden.
Als de kookwekker is ingeschakeld, knippert het lampje
voor “Zoneselectie” en wordt de bijbehorende bereidingstijd
weergegeven op het middendisplay.
De kookwekker uitschakelen:
Druk tegelijkertijd op de toetsen “+” en “-” totdat de timer is
uitgeschakeld.
De kookwekker is niet beschikbaar bij gebruik van automatische
functies.
INDICATOR VAN DE KOOKWEKKER
Het ledlampje ‘kookwekker ingeschakeld’ geeft aan dat de
kookwekker is ingesteld voor de kookzone.
Ga naar www.ikea.com om de volledige versie te downloaden
NEDERLANDS
B
A
3
4
2
1
2 4 5 7 8 12 1131
0
0
0
0
0
0
0
0
6 9
0
0
0
0
10
0
0
0
0
0
0
0
0
0
0
0
0

10
1Valgt tilberedningsniveau
2Slukket kogezone
3
4Booster
5Tænding/slukning
6Timerstyring
7Tilberedningsvarighedens indikator
8Knappen OK/Tastaturlås
9Pause
10 Kontrollampen Aktiv zone
11 Timerkontrollampe
12 Timersymbol
Betjeningspanel
ABetjeningspanel
BKogezoner: 1, 2, 3, 4
Produktbeskrivelse
Ukorrekt anbragt eller manglende gryde
Dette symbol vises hvis gryden ikke er velegnet til
induktionstilberedning, hvis den ikke er anbragt korrekt eller
hvis den ikke har den rette størrelse til den valgte kogezone.
Hvis der ikke registreres en gryde inden for 30 sekunder efter
markeringen, slukker kogezonen.
HRestvarme
Hvis displayet viser “H”, er kogezonen stadig varm. Når
kogezonen køler ned, slukker displayet.
Funktioner
LÅSNING AF TASTATURET
Tryk og hold knappen OK/Tastaturlås trykket i 3 sekunder, for
at låse indstillingerne og forebygge tænding ved et uheld. Et
bip og en advarselslampe over symbolet angiver at funktionen
er aktiveret. Betjeningspanelet er låst med undtagelse af
. For at deaktivere børnesikringen gentages
aktiveringsproceduren.
TIMER
Der er ét minutur, som overvåger hver kogezoneknap.
Aktivering af minuturet:
Vælg kogezonen, tryk på knappen “+“ eller “-“ for at indstille det
ønskede tidsrum. Der aktiveres en kontrollampe på linje med
. Når tiden er gået, lyder der et bip, og
kogezonen slukker automatisk.
Tidsindstillingen kan ændres når som helst og man kan aktivere
Hvis minuturet er aktiveret, blinker “Zonemarkeringens
indikator“ og den markerede tilberedningstid visualiseres på det
centrale display.
Inaktivering af minuturet:
Tryk på knapperne “+“ og “+“ indtil minuturet er inaktiveret.
Minutur ikke disponibel med autofunktioner.
TIMER INDIKATOR
Kontrollampen til indikatoren “aktiv timer” angiver, at minuturet
er blevet indstillet for kogezonen.
Besøg www.ikea.com for at downloade den fulde version
DANSK
B
A
3
4
2
1
2 4 5 7 8 12 1131
0
0
0
0
0
0
0
0
6 9
0
0
0
0
10
0
0
0
0
0
0
0
0
0
0
0
0

11
1Valgt kokenivå
2Kokesonen er slått av
3
4Booster
5På/Av
6Timer kontroll
7Indikator for tilberedningstid
8OK/Tastesperre
9Pause
10 Led for aktiv sone
11 Timer Led
12 Timer symbol
Betjeningspanel
ABetjeningspanel
BKokesoner: 1, 2, 3, 4
Produktbeskrivelse
Kjelen er ikke riktig plassert eller mangler
Dette symbolet kommer til syne dersom kjelen ikke er egnet for
induksjonstilberedning, dersom den ikke er plassert riktig eller
dersom størrelsen på kjelen ikke er egnet for størrelsen for valgt
kokesone. Dersom ingen kjele registreres i løpet av 30 sekunder
fra valget ble tatt, slår kokesonen seg av.
HGjenværende varme
Dersom display viser “H“, er kokesonen fortsatt varm. Når
kokesonen avkjøles, slår displayet seg av.
Funksjoner
KONTROLLPANELETS SPERRE
For å sperre innstillingene og hindre at de utilsiktet slås på,
trykk og hold nede OK-/tastsperreknappen i 3 sekund. En pipe-
lyd og en varsellampe indikerer at denne funksjonen er aktivert.
Alle funksjonene på betjeningspanelet er blokkerte, bortsett fra
På/Av knappen. For å frigjøre bryterne, gjenta prosedyren for
aktivering.
TIMER
For å aktivere timer:
Velg kokesonen, trykk på knappene“+“ eller “-“ for å stille inn
ønsket tid. En indikatorlampe vil tennes på linje med det gitte
symbolet . Når den innstilte tiden er utgått, vil du høre et
pipe-signal og kokesonen vil automatisk slå seg av.
samtidig.
Dersom timeren er aktivert vil “Indikatoren for valg av sone“
blinke og den tilhørende valgte koketiden vises på det midtre
displayet.
For å deaktivere timer:
Trykk på “+“ og “-“ knappene sammen helt til timeren er
deaktivert.
Timer er ikke tilgjengelig med automatiske funksjoner.
TIDSINDIKATOR
LED til “indikator for aktiv timer” indikerer at timeren er stilt inn
for kokesonen.
Besøk www.ikea.com for å laste ned hele versjonen
NORSK
B
A
3
4
2
1
2 4 5 7 8 12 1131
0
0
0
0
0
0
0
0
6 9
0
0
0
0
10
0
0
0
0
0
0
0
0
0
0
0
0

12
1Keittotaso valittu
2Keittoalue pois päältä
3Kypsennystehon säätö
4Pikakuumennus
5Päällä/Pois
6Ajastimen säätö
7Kypsennysajan osoitin
8OK/Painikelukitus-painike
9Tauko
10 Aktiivisen alueen led
11 Ajastimen led
12 Ajastimen symboli
Käyttöpaneeli
AKäyttöpaneeli
BKeittoalueet: 1, 2, 3, 4
Tuotteen kuvaus
Väärin sijoitettu tai puuttuva keittoastia
Tämä symboli tulee näkyviin, jos keittoastia ei sovellu
induktioliedelle, sitä ei ole sijoitettu oikein tai jos se ei ole
kooltaan sopiva valitulle keittoalueelle. Jos keittoastiaa ei
tunnisteta 30 sekunnin kuluessa valinnan suorittamisesta,
keittoalue kytkeytyy pois toiminnasta.
HJälkilämpö
Jos näytössä näkyy “H“, keittoalue on vielä kuuma.
Kun keittoalue jäähtyy, näyttö kytkeytyy pois.
Toiminnot
OHJAUSPANEELIN LUKITUS
Asetusten lukitsemista ja vahingossa tapahtuvan
käynnistämisen estämistä varten paina OK/Painikelukitus-
painiketta ja pidä sitä painettuna 3 sekunnin ajan. Äänimerkki
ja symbolin yläpuolelle syttyvä varoitusvalo ilmoittavat, että
-painiketta lukuun ottamatta. Lukitus poistetaan käytöstä
toistamalla sen aktivointimenettely.
HÄLYTINAJASTIN
Ajastin ohjaa kunkin keittoalueen painiketta.
Ajastimen käynnistäminen:
Valitse keittoalue ja aseta haluttu aika painamalla “+“ tai “-“
-painiketta. Merkkivalo käynnistyy linjaan kyseisen symbolin
kanssa. Kun asetettu aika on kulunut, laitteesta kuuluu
merkkiääni ja keittoalue kytkeytyy automaattisesti pois päältä.
Aikaa voidaan muuttaa milloin tahansa ja useampi ajastin
voidaan käynnistää samanaikaisesti.
Jos ajastin on aktivoitu, aluevalinnan ilmaisin vilkkuu ja kyseinen
valittu keittoaika näkyy keskinäytöllä.
Ajastimen kytkeminen pois toiminnasta:
Paina “+“ ja “-“ painikkeita yhdessä kunnes ajastin kytkeytyy pois
toiminnasta.
Ajastinta ei voida käyttää automaattisten toimintojen kanssa.
AJASTIMEN OSOITIN
Aktiivisen ajastimen osoittimen led näyttää, että keittoalueelle
on asetettu ajastin.
Lataa täysi versio osoitteesta www.ikea.com
SUOMI
B
A
3
4
2
1
2 4 5 7 8 12 1131
0
0
0
0
0
0
0
0
6 9
0
0
0
0
10
0
0
0
0
0
0
0
0
0
0
0
0

13
1Vald tillagningsnivå
2Kokzon avstängd
3
4Snabbvärme
5På/Av
6Timer
7Indikering för tillagningstid
8OK/Knapplåsningsknapp
9Paus
10 Lysdiod för aktiv zon
11 Lysdiod för timer
12 Timersymbol
Kontrollpanel
AKontrollpanel
BKokzoner: 1, 2, 3, 4
Beskrivning av produkten
Kokkärl är felplacerat eller saknas
Denna symbol visas om kastrullen inte passar för
induktionshällar, har placerats felaktigt eller inte har rätt storlek
för den valda kokzonen. Om ingen kastrull detekteras inom 30
sekunder efter att valet har gjorts stängs spishällen av.
HRestvärme
Om displayen visar “H“ är kokzonen fortfarande varm. När
kokzonen har svalnat släcks displayen.
Funktioner
LÅSA KONTROLLPANELEN
För att låsa inställningarna och förhindra att spishällen
oavsiktligen slås på, ska man hålla intryckt knappen OK/
Knapplås i 3 sekunder. En ljudsignal och ett varningsljus ovanför
symbolen anger att funktionen har aktiverats. Kontrollpanelen
är låst, med undantag för knappen På/Av . För att låsa upp
knapparna, gör på samma sätt som för att aktivera knapplåset.
TIMER
Så aktiverar du timern:
Välj kokzon och tryck på knappen “+“ eller “-“ för att ställa in
symbolen . När den inställda tiden har löpt ut avges en
ljudsignal och kokzonen stängs av automatiskt.
samtidigt.
Om timern är aktiverad kommer lampan ”Vald kokzon” att blinka
och respektive vald koktid visas på den mittre displayen.
För att avaktivera timern:
Tryck på knapparna “+“ och “-“ tillsammans tills timern
avaktiveras.
Timer inte tillgänglig med de automatiska funktionerna.
TIMERLAMPA
Lysdioden på indikeringen ”Timer aktiv” anger att timern har
ställts in för kokzonen.
Besök www.ikea.com för att ladda ner hela versionen
SVENSKA
B
A
3
4
2
1
2 4 5 7 8 12 1131
0
0
0
0
0
0
0
0
6 9
0
0
0
0
10
0
0
0
0
0
0
0
0
0
0
0
0

14
1
2Varná zóna vyp
3
4
5Zap/vyp
6
7Indikátor doby tepelné úpravy
8
9Pauza
10
11 Kontrolka minutky
12 Symbol minutky
Ovládací panel
A
BVarné zóny: 1, 2, 3, 4
Popis spotřebiče
Nesprávně umístěný nebo chybějící hrnec
HZbytkové teplo
Funkce
UZAMKNUTÍ OVLÁDACÍHO PANELU
MINUTKA
Aktivace časovače:
automaticky vypne.
Deaktivace časovače:
nedeaktivuje.
INDIKÁTOR ČASOVAČE
Chcete-li stáhnout plnou verzi, navštivte www.ikea.com
ČESKY
B
A
3
4
2
1
2 4 5 7 8 12 1131
0
0
0
0
0
0
0
0
6 9
0
0
0
0
10
0
0
0
0
0
0
0
0
0
0
0
0

15
1Nivel de cocción seleccionado
2Zona de cocción apagada
3Control de potencia de cocción
4Impulsor
5Encendido/Apagado
6Control del temporizador
7Indicador de tiempo de cocción
8Botón de OK/Bloqueo de teclas
9Pausa
10 Led de zona activa
11 Led del temporizador
12
Panel de control
APanel de control
BZonas de cocción: 1, 2, 3, 4
Descripción del producto
La olla no está correctamente colocada o no se
encuentra
inducción, si no está colocada correctamente o si no es del
tamaño apropiado para la zona de cocción seleccionada. Si no
la zona de cocción se apagará.
HCalor residual
Funciones
BLOQUEO DEL PANEL DE CONTROL
accidentalmente, mantenga pulsado el botón OK/Bloqueo de
teclas durante 3 segundos. Una señal acústica y una luz de
activado. El panel de control está bloqueado, excepto el botón
de Encendido/Apagado . Para desbloquear los mandos, repita
la secuencia de activación.
TEMPORIZADOR
Hay un temporizador que controla cada botón de las zonas de
cocción.
Para activar el temporizador:
Seleccione la zona de cocción, pulse el botón «+» o «-» para
ajustar el tiempo deseado. Se activará un indicador luminoso a
. Cuando haya transcurrido
el tiempo establecido, sonará una señal acústica y la zona de
control se apagará automáticamente.
El tiempo se puede cambiar en cualquier momento, y puede
activar varios temporizadores de forma simultánea.
En caso de que se active el temporizador, el «indicador
de selección de zona» parpadeará y el tiempo de cocción
seleccionado correspondiente se mostrará en la pantalla central.
Para desactivar el temporizador:
Pulse los botones «+» y «-» a la vez hasta que el temporizador se
desactive.
Temporizador no disponible con funciones automáticas.
INDICADOR DE TIEMPO
El LED del «indicador de temporizador activo» indica que el
temporizador se ha ajustado para la zona de cocción.
Para descargar la versión completa, visite www.ikea.com
ESPAÑOL
B
A
3
4
2
1
2 4 5 7 8 12 1131
0
0
0
0
0
0
0
0
6 9
0
0
0
0
10
0
0
0
0
0
0
0
0
0
0
0
0

16
1Livello di cottura selezionato
2Zona di cottura spenta
3Controllo della potenza di cottura
4Booster
5Accensione/Spegnimento
6Comando timer
7Indicatore tempo di cottura
8Tasto OK/Blocco tasti
9Pausa
10 LED zona attiva
11 LED timer
12 Simbolo del timer
Pannello comandi
APannello comandi
BZone di cottura: 1, 2, 3, 4
Descrizione prodotto
Pentola assente o in posizione errata
Il simbolo appare se la pentola non è adatta per la cottura
a induzione, non è posizionata correttamente o non è delle
dimensioni adeguate per la zona di cottura prescelta. Entro 30
secondi dalla selezione, se non viene rilevata nessuna pentola,
la zona di cottura interessata si spegne.
HCalore residuo
spegne.
Funzioni
BLOCCO DEL PANNELLO COMANDI
Per bloccare le impostazioni ed evitare attivazioni accidentali,
premere per 3 secondi il tasto OK/Blocco tasti. Un segnale
acustico e una spia luminosa sopra al simbolo segnalano
l’avvenuta attivazione. Il pannello dei comandi è bloccato
ad eccezione del tasto di accensione/spegnimento . Per
disattivare il blocco comandi ripetere la procedura di attivazione.
TIMER
È disponibile un solo timer per il comando di tutte le zone di
cottura.
Per attivare il contaminuti:
Selezionare la zona di cottura, quindi premere il tasto “+” o
“-” per impostare il tempo desiderato. Si accenderà una spia
luminosa in corrispondenza del simbolo . Allo scadere del
tempo impostato, viene emesso un segnale acustico e la zona di
cottura si spegne automaticamente.
più timer contemporaneamente.
Se il timer è attivato, l’indicatore di “selezione della zona”
lampeggia e sul display centrale viene visualizzato il tempo di
cottura corrispondente.
Per disattivare il contaminuti:
viene disattivato.
Il timer non è disponibile con le funzioni automatiche.
INDICATORE TIMER
Il LED di “timer attivo” indica che è stato impostato il timer per la
zona di cottura.
Per scaricare la versione completa visitare www.ikea.com
ITALIANO
B
A
3
4
2
1
2 4 5 7 8 12 1131
0
0
0
0
0
0
0
0
6 9
0
0
0
0
10
0
0
0
0
0
0
0
0
0
0
0
0

17
1
2
3
4Gyorsforralás
5Be- és kikapcsolás
6
7
8OK/Gombzár gomb
9Szünet
10
11
12
Vezérlőpanel
A
B
Termék leírása
Rosszul elhelyezett vagy hiányzó edény
HMaradékhő
Funkciók
KEZELŐPANEL ZÁROLÁSA
megakadályozásához nyomja meg és tartsa lenyomva 3
másodpercig az „OK/Gombzár” gombot. Ekkor hangjelzés
kikapcsoló gomb
bekapcsolási lépéseket.
IDŐZÍTŐ
Az időzítő aktiválásához:
kikapcsol.
aktiválni.
Az időzítő deaktiválásához:
Nyomja meg egyszerre és tartsa lenyomva a „+“ és „-“ gombot,
IDŐZÍTŐ KIJELZŐJE
A teljes verzió letöltéséhez keresse fel a www.ikea.com webhelyet
MAGYAR
B
A
3
4
2
1
2 4 5 7 8 12 1131
0
0
0
0
0
0
0
0
6 9
0
0
0
0
10
0
0
0
0
0
0
0
0
0
0
0
0

18
1Wybrany poziom gotowania
2
3Kontrola mocy pól grzewczych
4Funkcja wzmocnienia mocy
5
6Kontrolka timera
7Kontrolka czasu gotowania
8OK/Przycisk blokady przycisków
9Pauza
10 Dioda aktywnego pola
11 Dioda timera
12 Symbol timera
Panel sterowania
APanel sterowania
BPola grzejne: 1, 2, 3, 4
Opis produktu
Nieprawidłowe ustawienie lub brak naczynia
HCiepło resztkowe
Funkcje
BLOKADA PANELU STEROWANIA
TIMER
Wszystkimi przyciskami pól grzejnych steruje jeden timer.
Aktywowanie timera:
odpowiednim symbolem
automatycznie.
wybrany czas gotowania.
Aby dezaktywować timer:
dezaktywacji timera.
WSKAŹNIK TIMERA
Aby pobrać pełną wersję, odwiedź www.ikea.com
POLSKI
B
A
3
4
2
1
2 4 5 7 8 12 1131
0
0
0
0
0
0
0
0
6 9
0
0
0
0
10
0
0
0
0
0
0
0
0
0
0
0
0

19
1
2
3
4
5Iesl./izsl.
6
7
8
9
10
11 Taimera LED indikators
12 Taimera simbols
Vadības panelis
A
B
Izstrādājuma apraksts
Katls novietots nepareizi vai tā nav vispār
HAtlikušais siltums
Funkcijas
VADĪBAS PANEĻA BLOĶĒŠANA
TAIMERIS
Taimera aktivizēšana:
laiks.
Taimera deaktivizēšana
TAIMERA INDIKATORS
Lai lejupielādētu pilno versiju, apmeklējiet vietni www.ikea.com
LATVISKI
B
A
3
4
2
1
2 4 5 7 8 12 1131
0
0
0
0
0
0
0
0
6 9
0
0
0
0
10
0
0
0
0
0
0
0
0
0
0
0
0

20
1
2
3Kaitros galios valdymas
4Stiprintuvas
5
6
7
8Mygtukas OK (Gerai) / „Key lock“
9Pristabdymas
10 Aktyvios zonos LED
11
12
Valdymo skydelis
AValdymo skydelis
BGaminimo zonos: 1, 2, 3, 4
Gaminio aprašymas
Puodas netinkamai pastatytas arba neuždėtas
kaitlentei, jis netinkamai pastatytas arba yra kaitvietei
HLikutinė šiluma
Funkcijos
VALDYMO PULTO UŽRAKTAS
LAIKMATIS
Kad įjungtumėte laikmatį:
indikatorius“ ir pasirinktas atitinkamas gaminimo laikas
parodomas centriniame ekrane.
Kad laikmatį išjungtumėte:
Vienu metu paspauskite mygtukus „+“ ir „-“, kol laikmatis
LAIKMAČIO INDIKATORIUS
yra nustatytas laikmatis.
Lai lejupielādētu pilno versiju, apmeklējiet vietni www.ikea.com
LIETUVIŲ
B
A
3
4
2
1
2 4 5 7 8 12 1131
0
0
0
0
0
0
0
0
6 9
0
0
0
0
10
0
0
0
0
0
0
0
0
0
0
0
0
Other manuals for TREVLIG
8
Table of contents
Languages:
Other IKEA Hob manuals

IKEA
IKEA SKALAN 005.234.19 User manual

IKEA
IKEA HBN 430B User manual

IKEA
IKEA FRAMTID HGC2K User manual

IKEA
IKEA UTNAMND User manual

IKEA
IKEA HGC4K User manual

IKEA
IKEA MATMASSIG 504-672-51 User manual

IKEA
IKEA VASASTAN User manual

IKEA
IKEA ELDSLAGA User manual

IKEA
IKEA TILLREDA User manual

IKEA
IKEA MOJLIG 402.371.52 User manual