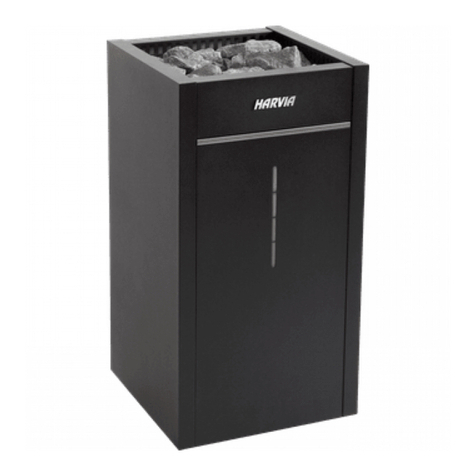
IKI-Kiuas IKI Pro 14 User manual

Instruction manual
IKI Pro 14
IKI Pro 21
IKI Pro 28
IKI Pro 35
4/2019

Instruction manual | IKI Pro electric heater Page 1
This instruction manual is intended for the owner or the person responsible for the upkeep of the
sauna as well as for the electrician in charge of installation. Once installation is completed, the
instruction manual must be handed over to the owner or manager. The purpose of the heater is to
heat a sauna room to a temperature appropriate for sauna-bathing; any other use is prohibited.
Please note the following before beginning installation:
•Beware of sharp edges in the heater frame. Wear a long-sleeved shirt and
protective gloves during installation and laying of the stones.
•Before installation read through the instructions for installation and use.
•The warranty does not cover malfunctions caused by faulty installation or use.
Technical support
IKI Kiuas Plc
Production site /
Pieksämäki
Niilontie 10
76150 Pieksämäki
tuotanto@ikikiuas.fi
CONTACT DETAILS
Vallila pick up storage

Instruction manual | IKI Pro electric heater Page 2
Contents
Instructions for installation and laying of the stones........................................................................................ 3
Connecting the heater to electricity.................................................................................................................. 5
Circuit diagram .................................................................................................................................................. 6
Physical installation instructions for Pro-B2 control unit.................................................................................. 7
Heater measurements....................................................................................................................................... 9
Heater safety distances ..................................................................................................................................... 9
Troubleshooting .............................................................................................................................................. 10
Quality requirements for water ...................................................................................................................... 10
Instructions for use.......................................................................................................................................... 10
Warranty.......................................................................................................................................................... 11
Quality guarantee / Freight guarantee............................................................................................................ 11
Ventilation ....................................................................................................................................................... 13
Illustration of ventilation................................................................................................................................. 13
Warnings.......................................................................................................................................................... 14

Instruction manual | IKI Pro electric heater Page 3
Instructions for installation and laying of the stones
1. Check that all the required items are included in the delivery. The heater has four parts: heater
base with the heating elements, a guide that fits around the heating elements, as well as an inner
and an outer frame.
2. Select the location for the heater to be installed in following the proper safety distances (page 7).
Make sure that water will not puddle under the heater, where it may vaporise and corrode the
connections and wiring inside the heater.
3. Take into consideration the location of the air vents, the thermostat (page 5) and control unit (Ref.
the separate installation instructions for the control unit).
4. Lift off the outer frame to reveal the inner frame (installation image 1).
5. Lift the inner frame that surrounds the heating elements off the heater base (installation image 2).
6. Open the base plate under the heater (installation image 3).
7. Perform the electrical connections according to the circuit diagram on page 6.
8. Connect the wiring to the central unit according to the instructions found in the central unit.
9. Test that the heating elements are functioning properly by switching the power on. If all the
heating elements are working, close the base plate. If one or more of the heating elements fail to
heat up, or there is another problem, such as a fuse blowing, contact the manufacturer.
10. LAYING THE STONES: We recommend using small Kerkes Tetra ceramic interspace sauna stones
around the heating elements. The specially designed Kerkes stones support and protect the heating
elements, and they do not disintegrate prematurely. As surface stones, we recommend using large
Kerkes Tetra or rough-cut olivine, olivine diabase or peridotite (e.g. Parhaat Löylyt) stones the size
of 5 to 10 cm in diameter. The warranty period is extended when using Kerkes stones (ref. p. 9 for
warranty specifications). NOTE! Soapstone, rounded stones or natural stones may only be used at
the surface level. See page 4 for specified stone-laying instructions.
11. IKI Kiuas recommends, for safety reasons, building a safety railing around the heater, when the
heater is used in a public sauna. Make sure to follow the appropriate safety distances for the
railing.
12. As the stones settle down, during use, the surface drops down a little. Add more stones, if needed.
The frequency with which the stones should be replaced depends on stone quality and frequency
of sauna use. Check the condition of the stones yearly, remove any broken ones and replace them
with new ones.
STONE ALTERNATIVES AND RECOMMENDATIONS FOR INSTITUTIONAL OR PROFESSIONAL USE:
Option 1.
-Professional use: public baths, health clubs, etc. where the heater is active 12-18 hours a day (Ref.
p. 9 for warranty specifications)
Maximum need:
IKI Pro 14 and 21
IKI Pro 28
IKI Pro 35
Kerkes, tetra small
120 kg
140 kg
180 kg
Kerkes, tetra large
120 kg
160 kg
180 kg
Option 2.
-Semi-professional use (e.g. shared & communal saunas in buildings and private functions) where
the heater is functional no more than 8-10 hours a day (Ref. p. 9 for warranty specifications)
Maximum need:
IKI Pro 14 and 21
IKI Pro 28
IKI Pro 35
Kerkes, tetra small (interspace)
40 kg
60 kg
80 kg
Regular sauna stone (smaller than
10 cm)
200 kg
240 kg
280 kg

Instruction manual | IKI Pro electric heater Page 4
Installation and stone-laying instructions
Image 1
Image 2
Image 3
1. Lift and remove the heating
element guide and place small
Kerkes tetra stones in between
the elements one by one.
2. Put the guide back when the
stones have filled the lower half
of the heater.
3. Place about 6 small Kerkes
tetra stones on the top and in
between the heating elements to
keep them separated.
4. Place the inner frame around
the heating elements. Make
sure it rests firmly on the base
plate.
5. Put the outer frame on.
6. Finally, lay large Kerkes tetra
stones between the inner and
outer frame. Place large and
small stones on top of the inner
frame.
NOTE!If you use rough-cut olivine, or other, stones instead of Kerkes stones, (alternative 2 – semi-
professional use.), the diameter of the stones should be between 5 and 10 cm. Follow the same
instructions as above to fill the space between the inner and outer frames.
This manual suits for next models
3
Table of contents
Other IKI-Kiuas Electric Heater manuals
