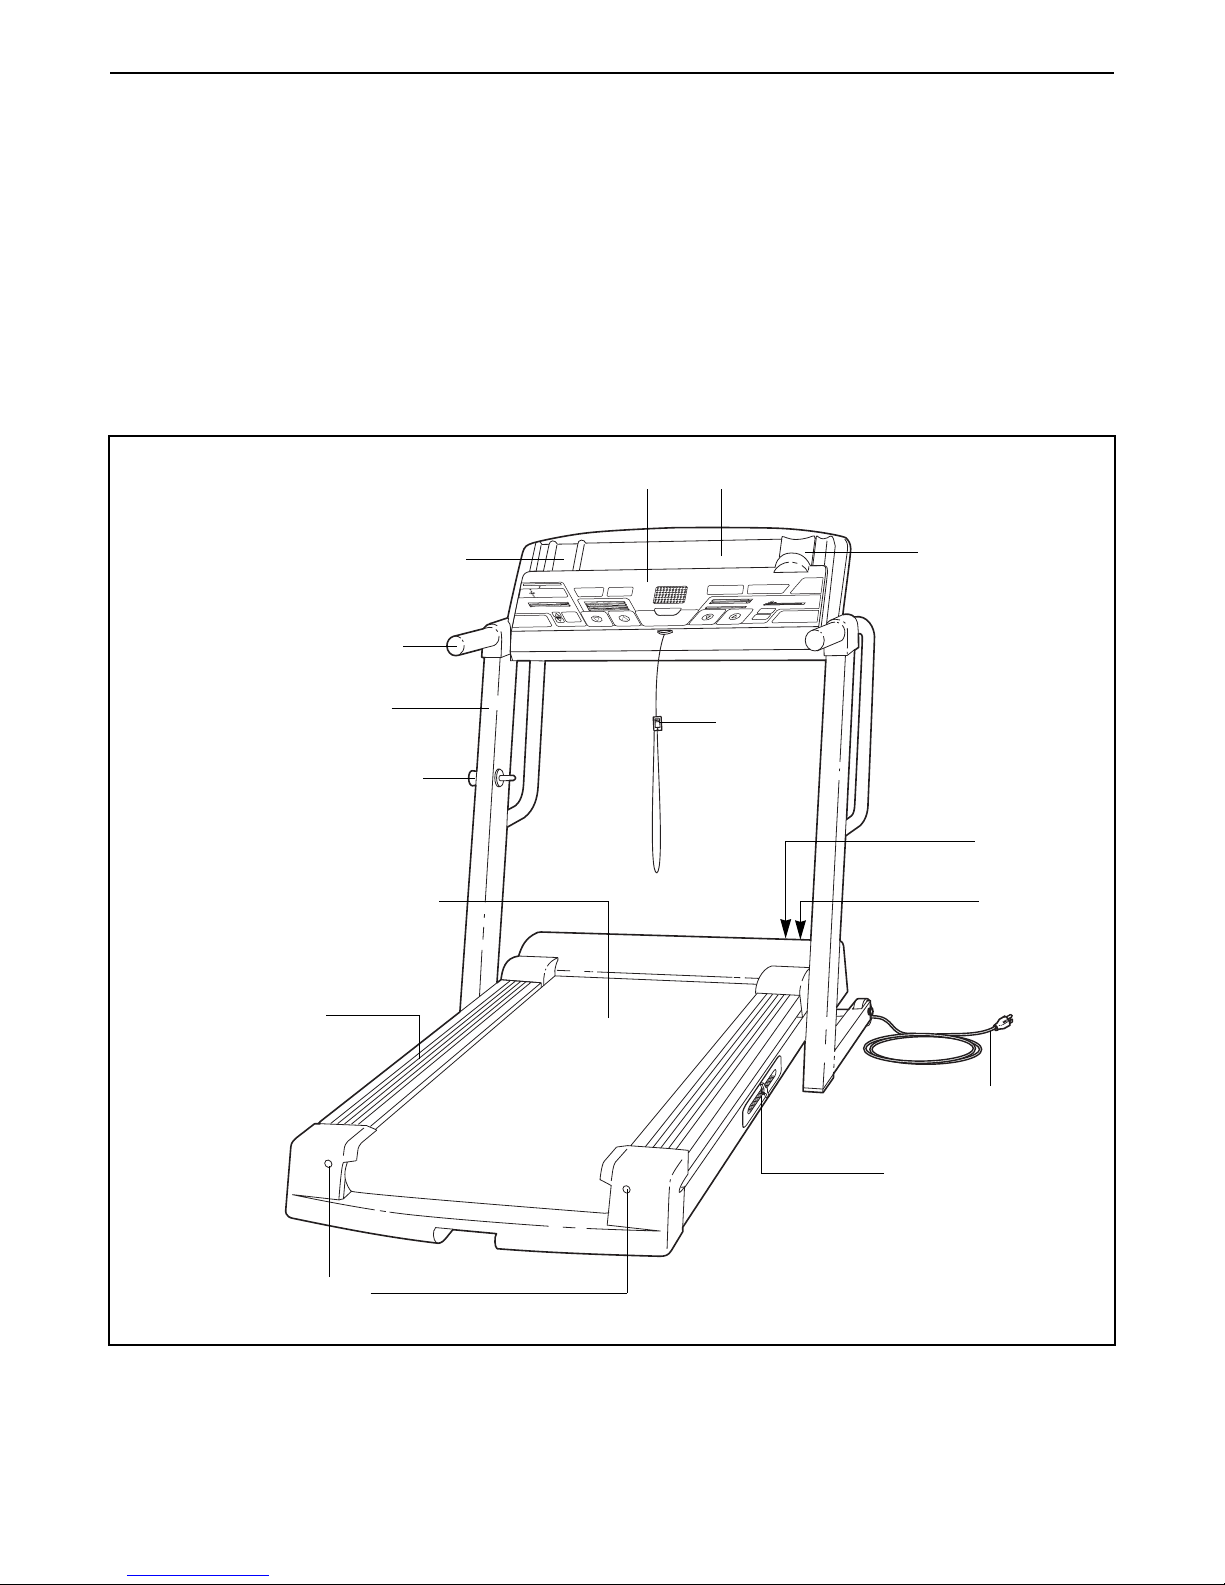
DIAGRAM OF THE CONSOLE
Refer to the drawing on the opposite page. Note: The
console can display exercise feedback in either
miles or kilometers. For simplicity, all instructions
in this section refer to miles.
A. Calories/Fat Calories displayÑThis display shows
the numbers of calories and fat calories you have
burned (see BURNING FAT on page 25). The
display will alternate between one number and the
other every seven seconds.
B. Distance/Incline/Laps displayÑThis display shows
the distance you have walked, the number of 1/4-
mile laps you have completed, and the incline level
of the treadmill. The display will change from one
number to the next every seven seconds. Note:
Each time the Incline buttons are pressed, the
display will show the incline setting.
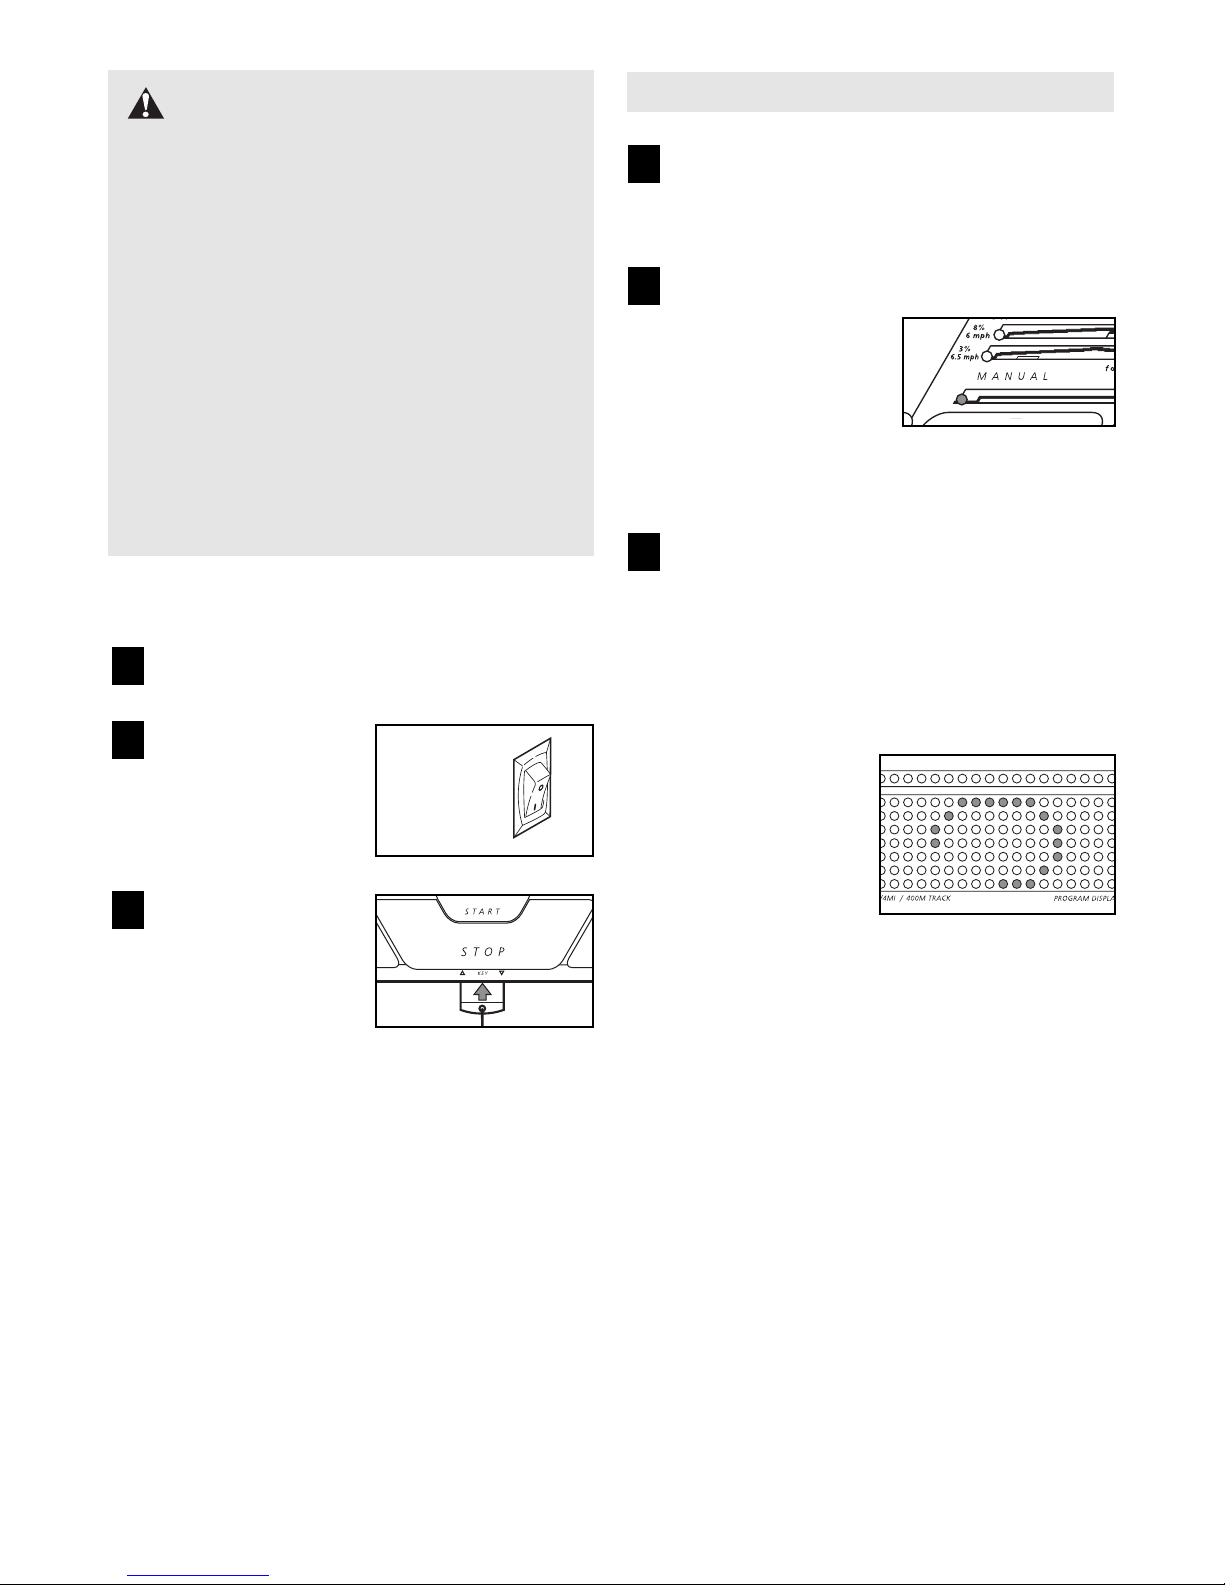
C. Program displayÑWhen the manual mode or an
iFIT.com program is selected, this display will show
your progress on an LED track. When a perfor-
mance program, a total-body workout program, or
a custom program is selected, the display will show
the programÕs speed settings.
D. Hand Weight displayÑDuring the two total-body
workout programs, this display will prompt you to
use the included hand weights for upper-body
exercise as you walk on the treadmill.
E. Speed/Minutes-Mile displayÑThis display shows
the speed of the walking belt and your current pace
(pace is measured in minutes per mile). The display
will alternate between one number and the other
every seven seconds. Note: Each time the Speed
buttons are pressed, the display will show the speed
setting.
F. Time/Segment Time displayÑWhen the manual
mode or an iFIT.com program is selected, this
display will show the elapsed time. When a perfor-
mance program, a total-body workout program, or
a custom program is selected, the display will show
both the time remaining in the program and the
time remaining in the current period of the pro-
gram. The display will alternate between one num-
ber and the other every seven seconds.
G. Program Select buttonÑThis button is used to
select the manual mode, performance programs,
total-body workout programs, custom programs,
and iFIT.com programs. Note: If the walking belt is
moving when the Select Program button is pressed,
the walking belt will slow to a stop and the displays
will be reset.
H. Performance program profilesÑThese profiles
show how the speed and incline of the treadmill will
change during performance programs.
I. Incline buttonsÑThese buttons control the incline of
the treadmill. The incline range is 0% to 10%.
J. Stop buttonÑThis button is used to stop the walking
belt.
K. Key with clipÑThe key turns the console on and off.
The clip is worn on the waistband of your clothes.
L. Start buttonÑThis button is used to start the walking
belt.
M. Mode indicatorsÑThese indicators show whether
the manual mode, a performance program, a total-
body workout program, a custom program, or an
iFIT.com program is selected.
N. Speed buttonsÑThese buttons control the speed
of the walking belt. The speed range is 0.5 mph to
12 mph. Note: When the Start button is pressed,
the walking belt will begin to move at 1 mph.
O. Total-body workout program profilesÑThese pro-
files show how the speed and incline of the tread-
mill will change during total-body workout programs.
P. Record buttonÑThis button is used to program
speed and incline settings for custom programs.
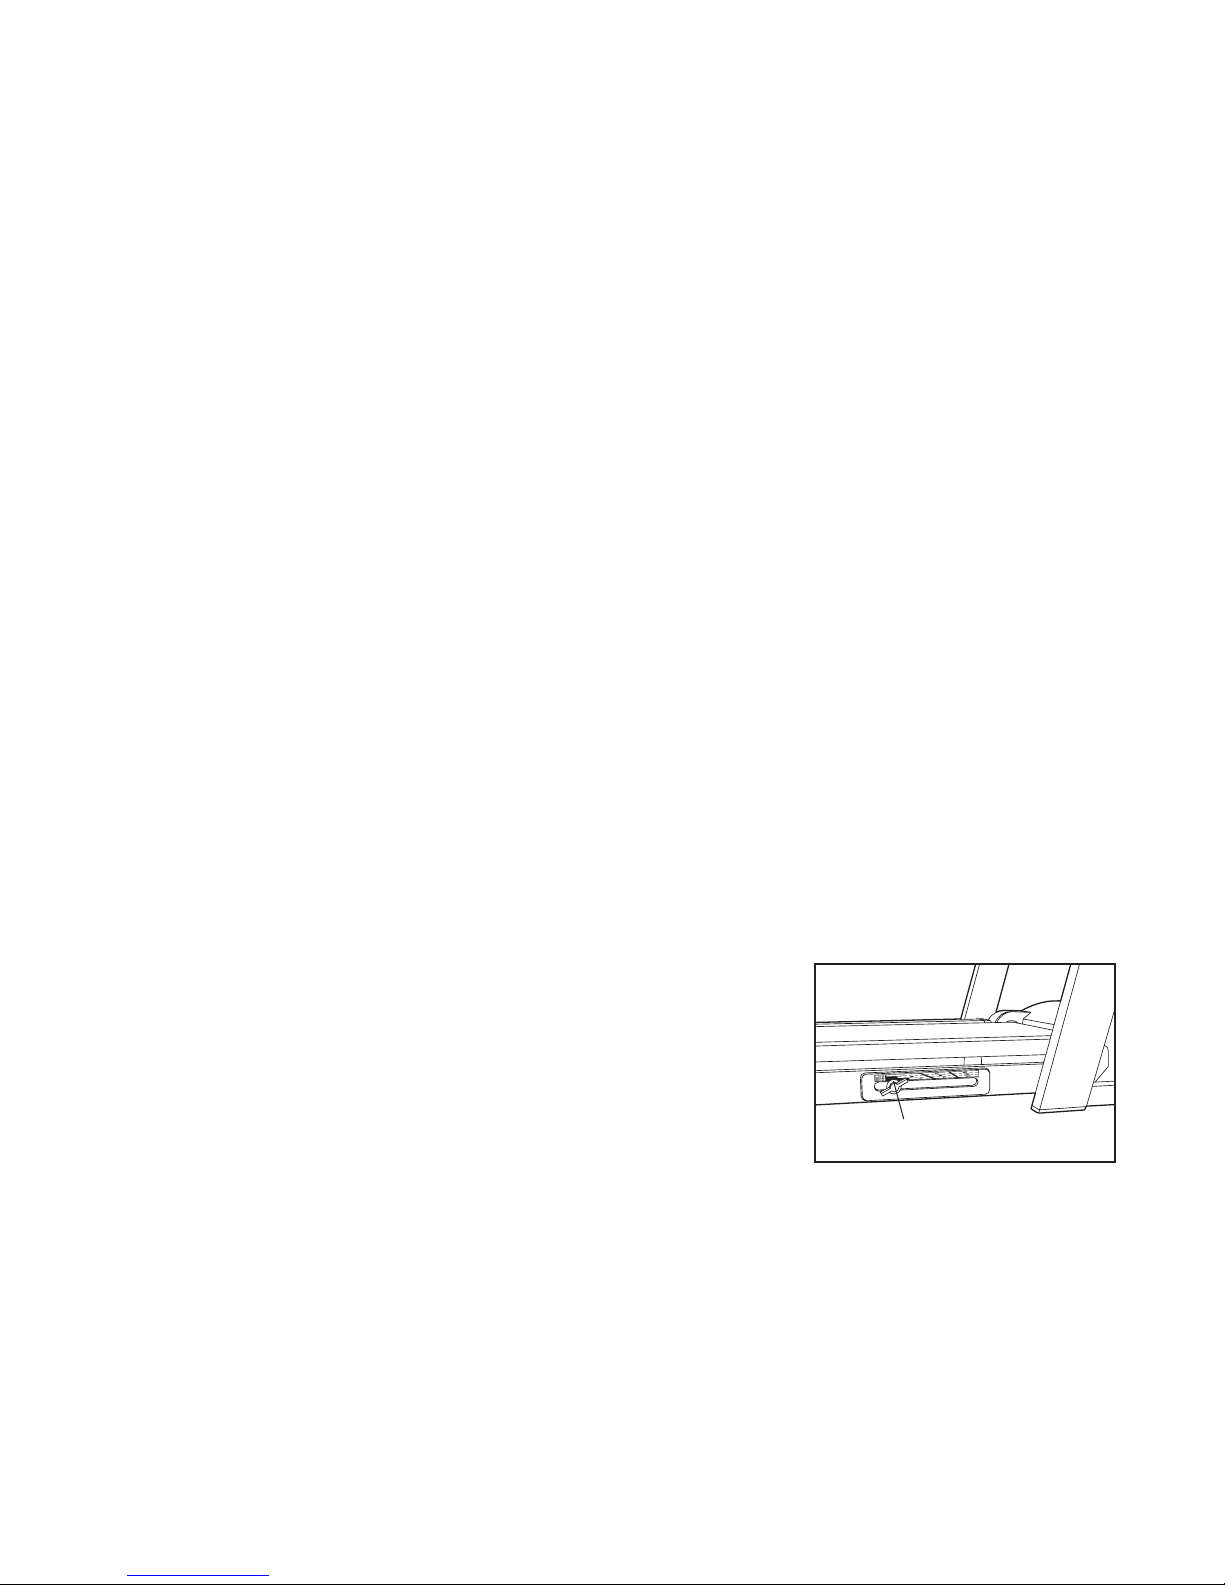
HOW TO ADJUST THE FIRMNESS OF THE
CUSHIONING SYSTEM
The treadmill
features a cush-
ioning system
that reduces the
impact as you
walk or run on
the treadmill.
The firmness of
the cushioning
system is con-
trolled with the knob on the right side of the treadmill.
To increase the firmness, turn the knob clockwise; to
decrease the firmness, turn the knob counterclock-
wise. Note: The faster you run on the treadmill, or
the heavier your weight, the firmer the cushioning
system should be. If the cushioning system is too
soft, you will hear the walking platform hitting the
platform bumpers as you run.
Adjustment Knob
9